Wednesday, October 24, 2007

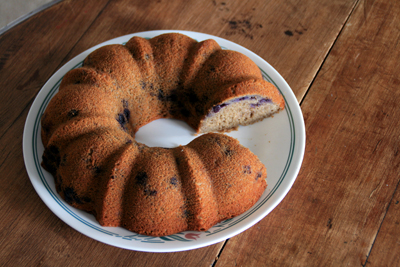
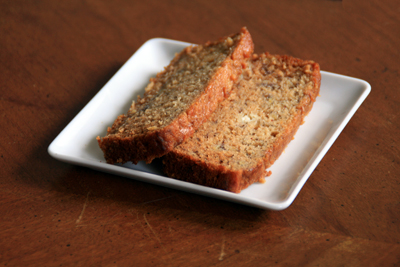
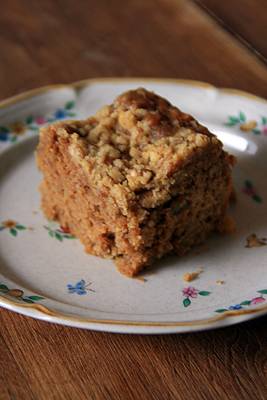
Apple Anadama Coffee Cake

Apple Anadama Coffee Cake

This the sort of cake I imagine Heidi Swanson or Molly would like.

It's very hearty and seasonally appropriate. Cornmeal, whole wheat flour, semolina flour, and grated apples give the cake a dense texture that's somewhat like a bran muffin. The crunchy cornmeal streusel on top is a nice addition too.

Sometimes it's nice to enjoy something that's not overly sweet.

Apple Anadama Coffee Cake
adapted from Leslie Mackie's Macrina Bakery and Cafe Cookbook

1 cup all purpose flour
1/2 cup semolina flour
1/2 cup fine whole wheat flour
1/4 cup cornmeal
2 tsp baking powder
1 tsp baking soda
1 tsp cinnamon
1/2 tsp ground cloves
1/4 tsp ground nutmeg
1 tsp kosher salt
8 tbsp (1 stick) unsalted butter, at room temp
1/2 cup light brown sugar
1/3 cup molasses
3 eggs
1 tsp pure vanilla extract
2 granny smith apples, peeled and grated
2/3 cup buttermilk

for the topping:
2 tbsp unsalted butter, chilled
3 tbsp cornmeal
3 tbsp light brown sugar
1 tbsp all purpose flour
1/3 cup pecans, coarsely chopped

Preheat the oven to 350. Oil a 9in square baking pan.

Combine flours, cornmeal, baking powder, baking soda, spices, and salt in a medium bowl. Mix with a wooden spoon and set aside.

Place butter and brown sugar in the bowl of a stand mixer and using the paddle attachment, mix on medium speed for 5-8 minutes. The creamed butter will become smooth and pale in color.

In a medium bowl, combine molasses, eggs, and vanilla extract and mix with a whisk. With the stand mixer on low speed, slowly pour the molasses mixture into the creamed butter and mix with the paddle attachment for about 2 minutes. At first the butter will look like it's separating, but don't worry. Add the grated apples and continue mixing on low speed for 30 seconds.

Remove the bowl from the stand mixer. Alternately add small amounts of the flour mixture and the buttermilk to the bowl, mixing with a wooden spoon just until the batter comes together. Pour batter into the prepared baking pan and spread evenly. Set aside.

for the topping:
Place all topping ingredients in the bowl of a stand mixer and mix with the paddle attachment on low speed for 1-2 minutes. The topping will become coarse and crumbly.

Spread topping evenly over the cake and bake for 40-45 mins. Test center with a skewer. It will come out clean when the cake is finished. Let cook for 20 minutes on a wire rack, then run a sharp knife around the sides of the cake to release it from the baking pan. Invert pan to remove the coffee cake, then place it, topping side up, on a serving plate. Leftovers can be wrapped in plastic and stored at room temp for 3 days.

Tuesday, October 23, 2007

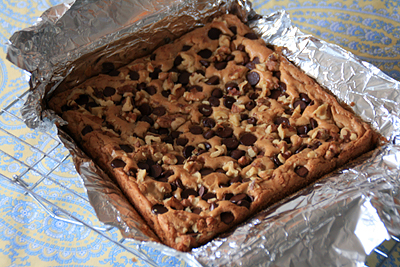
Blondies (not boring!)

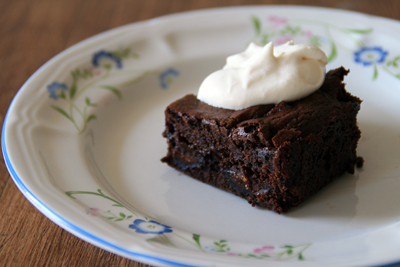
Blondies

Alice Medrich's Cookies and Brownies continues to surprise me.

I usually hate blondies. My usual reaction is too much flour, too little flavor. These were great for a few reasons: they're simple (melt the butter and mix in everything else,) they're chewy, and they're full of flavor.

Alice Medrich suggests adding a tablespoon of dark rum. Don't omit this step! You can, but I thought the rum added a fantastic and surprising depth of flavor.

Try to use good chocolate chips if you can; I used 62% Nestle Chocolatier chips. They're not the best, but they're much better than the normal tollhouse. Chopped bittersweet chocolate would work nicely too.

Please, please don't overbake these!

Blondies
adapted from Alice Medrich's Cookies and Brownies

1 cup all-purpose flour
3/4 tsp baking powder
1/8 tsp salt
8 tbsp butter
1 cup packed light brown sugar, lump free
1 large egg
1/2 tsp vanilla extract
1 tbsp dark rum or bourbon
2/3 cup walnut pieces
1/2 cup semi-sweet chocolate chips
8 inch square pan, lined with parchment paper or foil

Preheat the oven to 350. Position a rack in the lower third of the oven.

Combine the flour, baking powder, and salt in a small bowl and mix together thoroughly with a wisk or fork. Set aside.

Melt the butter in a small saucepan. Remove the pan from the heat and stir in the brown sugar. Use a wooden spoon to beat in the egg, vanilla, and rum, if using. Stir in the flour mixture followed by half of the walnuts. Spread the batter in the pan. Sprinkle the remaining walnuts and the chocolate chips evenly over the top.

Bake for 20-25 minutes, or until the nuts look toasted, the top is golden brown, and the edges have pulled away from the sides of the pan. Cool in the pan on a rack. Lift the ends of the parchment or foil and transfer to a cutting board. Use a long, sharp knife to cut into 16 squares. May be stored, airtight, for 3-4 days.

Monday, October 22, 2007

Sweet and Spicy Nuts.

I had a library student potluck last night. The blackout cake went over well; the outer frosting got way too hard in the fridge, but the inside was very moist. I'd happily eat a bowl of the pudding filling by itself.

I also made this recipe for Sweet and Spicy Nuts from The Macrina Bakery and Cafe Cookbook. I have no photo because everyone ate them! The cayenne pepper gives these spiced nuts a pleasant kick. They'd make a good holiday gift or holiday party contribution. Feel free to substitute other nuts; I used 2c walnuts, 1c almonds/pecans, and 1c hazelnuts.

Sweet and Spicy Nuts
1 cup whole almonds
1 cup whole peanuts
1 cup whole pecans
1 cup walnut halves
1 tsp cinnamon
1/2 tsp ground allspice
1/4 tsp ground cardamom
1/2 tsp ground ginger
1/4 tsp ground black pepper
1/2 tsp cayenne pepper
1/2 tsp kosher salt
1/2 cup honey
1/2 cup light corn syrup

Preheat the oven to 350. Line a rimmed baking sheet with parchment paper, then brush the top of the paper with canola oil.

Combine almonds, peanuts, pecans, and walnuts in a medium bowl.

Combine cinnamon, allspice, cardamom, ginger, pepper, cayenne and salt in a small bowl. Mix well, then pour the spice mixture over the nuts and toss together thoroughly.

Combine honey and corn syrup in a medium saucepan and place over low heat, stirring frequently, until the mixture is just warm. Pour the mixture over the nuts and toss together until the nuts are evenly coated.

Pour the nuts onto the prepared baking sheet and spread them in a single layer. Bake on a center rack of oven for 15-20 minutes, or until the nuts take on a rich mahogany color. Let the nuts cool completely. At this point they will have formed a single, crispy layer in the baking sheet. Break the nuts apart with your hands and store in an airtight container. Store in a cool place, as heat will melt the syrup on the nuts and make them sticky.

Sunday, October 21, 2007

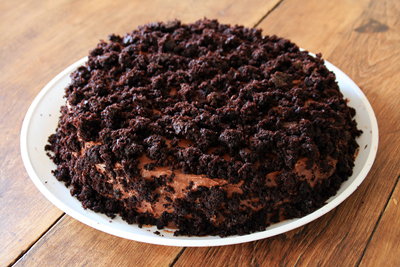
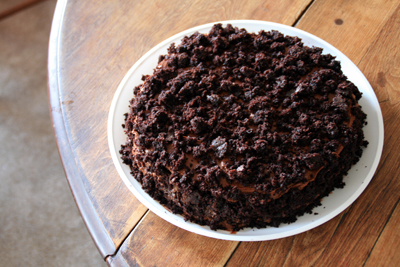
Brooklyn Blackout Cake

Brooklyn Blackout Cake

This is the Brooklyn Blackout Cake from Tish Boyle's The Cake Book.

Something is wrong. My baking has been off for a week and a half or so- about the entire time i've been ill. I decided to make this cake for a potluck, but nothing went quite right.

The cake layers were either undercooked, or over-ly moist. This could have been due to too much liquid, or the fact that valrhona cocoa powder has a higher fat content than other cocoa powders. Probably too much liquid, too little flour. My chocolate pudding filling wasn't as set as I would have liked. I think I should have used a higher percentage cocoa.

When I tried to frost the cake, the broken middle layer started sliding out with the pudding. I managed to precariously cover the mess in frosting and hide all damage with the cake crumbs.

I'm going to serve it anyway without comment and hope it tastes fine.

Brooklyn Blackout Cake

Saturday, October 20, 2007

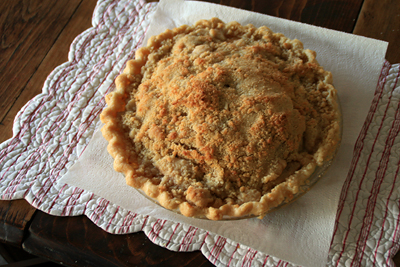
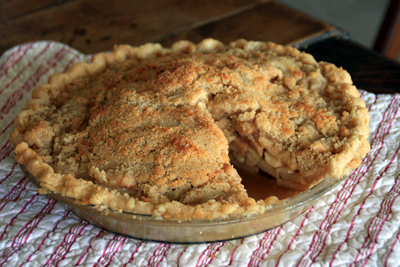
Flag-Raising Apple Pie

Apple Pie

Apple Pie

I'm practicing for the upcoming Slow Food Pittsburgh apple pie contest. It's difficult; apple pie has so many variables and i've never actually had one I really, truly liked. For me, key factors are:

1. crispy crust that has flavor (ie- plain shortening won't cut it.)
2. properly cooked apples
3. doesn't turn into a mess when you cut into it
4. doesn't have an inch of liquid in the bottom.


I've always loved my mother's apple pie. She uses gala apples and butter flavored shortening. The problem is a lot of people hate butter flavored shortening.

I don't think a fancy tart crust ala Maury Rubin or Pierre Herme suits apple pie. I like a rustic quality- something closer to a crostata.

I've had crusts made with oil or melted butter that tasted pretty good. Some suggest pre-cooking the crust and the filling. I'm starting to think this might be a good technique. There's also some interesting recipes for dutch apple pie that involve making a caramel/cooked apple mix that gets tossed with the sliced apples.

This first attempt is Flo Braker's "Flag Raising Apple Pie" from The Simple Art of Perfect Baking. The streusel recipe was so simple: butter, sugar, and flour. I thought it'd be boring, but it's fantastic.

The crust recipe was crunchy, but relatively flavorless. It contrasted well with the streusel though. Unforunately, the bottom crust was a disaster. I put too many apples in the pie and they released too much liquid. The bottom crust was beyond soggy, and the apples were undercooked.

I think cornstarch would be a better thickener this time. Flour just doesn't work as well.

Hopefully i'll find a good recipe in time. I'm going to experiment with some other crusts and apples and i'll keep you posted.

Monday, October 15, 2007

Recipe for Failure.

Failure.

Failure (serves one.)
1 cake recipe
2 garbage bags
1 sponge
1 glass of water
15 spatulas

1. Decide that, despite being really sick, you'd like to bake a cake.

2. Select a cake recipe and corresponding frosting. In this instance we've used Tish Boyle's Banana Cake with Espresso-Caramel Frosting.

3. Prepare the cake according to the directions. You should end up with the most perfect nine inch cakes you've ever produced.

4. Begin the frosting and decide halfway through that you're going to try a new technique for incorporating the sugar.

5. Undercook your sugar syrup, curdle your eggs, then increase the mixer speed to high whilst thinking this will rectify all problems.

6. Attempt to spread the curdled frosting on the cake. Attempt to pipe a lovely border.

7. Refrigerate the cake for ten minutes.

8. Remove cake from fridge and watch the top layer slide off the bottom.

9. Use the sponge to clean large gobs of weeping buttercream from your drawers, countertops, and mixer. Drop the cake into one garbage bag, and once you see the corners of the cake board poking through place it in a second bag. Throw cake into the garbage chute. Pray the bag doesn't burst within the chute.

10. Get a glass of water and go back to bed. Do more grad school homework like you should have done in the first place.


Water

Sunday, October 14, 2007

Date Cake with Toffee Sauce

Sticky Toffee Cake

Sticky Toffee Cake

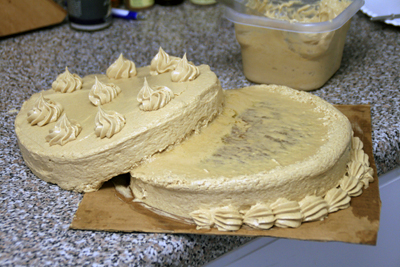
Yesterday I tried to make the Date Cake from Desserts from Chanterelle. I bought a bag of california dates, figuring they'd be fine; however, the recipe calls for 9oz of unpitted medjool dates and I wasn't comfortable estimating a substitution. I made the toffee sauce and decided to buy medjool dates the next day.

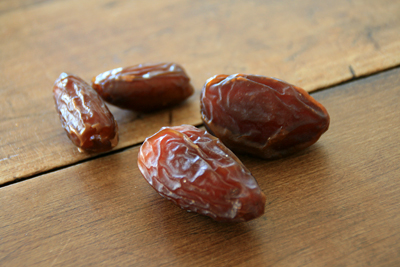
Dates

The medjool dates are on the right. They're moist and meaty while the california dates are slightly dry and much less flavorful. Sometimes it's worth it to spend slightly more for good ingredients.

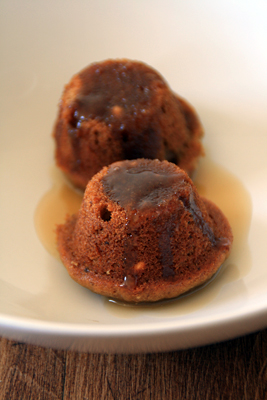
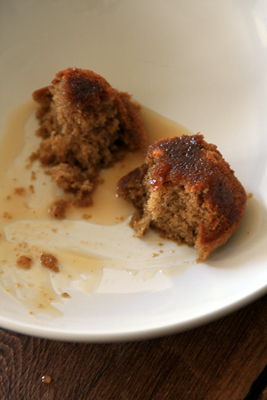
I didn't have a 9in square pan, so I set aside one cup of the batter and baked the rest in an 8in square. I used the extra to make some mini cakes for sampling and photos, as the whole cake is going to Bloomfield for a dinner.

This Date Cake is Kate Zuckerman's version of a sticky toffee pudding. It's a great cake for fall; it's spiced with cloves, cinnamon, nutmeg, espresso powder and rum. The warm toffee sauce is a rich, boozy concoction of butter, cream, rum, and brown sugar.

I highly recommend this. Please don't ask me to post the recipe; I have mentioned several from this book already and I do not think it's fair to put them all online.

Saturday, October 13, 2007

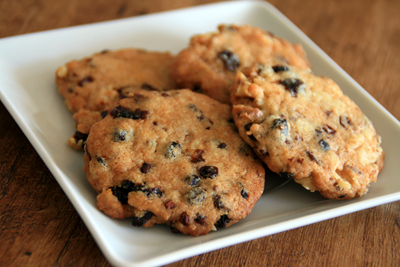
Nibby Nut and Raisin Cookies

NIbby Nut and Raisin Cookies

These are the Nibby Nut and Raisin Cookies from Alice Medrich's Bittersweet.

I used a little too much flour. The cookies didn't spread well, so I flattened the tablespoons of dough with a glass. I felt pretty shocked and dissapointed when the first batch didn't look anything like the picture in the book.

This recipe is nice because it's loaded with currants (in place of raisins,) cocoa nibs, and chopped walnuts. It also omits the creaming step and uses melted butter.

I'd be interested to talk to anyone who's had great success with this recipe. Given my results I think dark brown sugar would work much better than light brown, and I would have liked to throw in a few pinches of cinnamon. Baking the dough without parchment or silicone made the cookies much crispier on the bottom too.

Friday, October 12, 2007

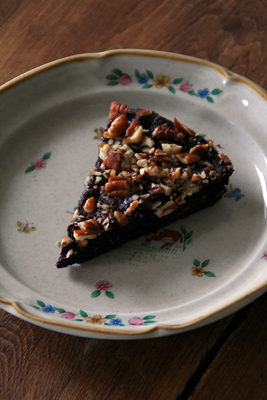
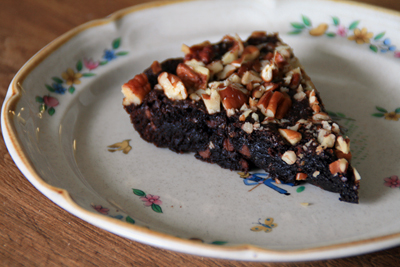
Chocolate-nut Wedges

Chocolate Nut Wedges

Chocolate Nut Wedges

I met a fellow Pittsburgh blogger for coffee at Enrico's Tazza D'oro yesterday. Antonio, a very friendly barista, made me the best double macchiato i've ever had in Pittsburgh (possibly ever.) His foam technique is really solid.

I really appreciate a good cup of coffee. I never know what to say when a barista asks me how much milk I want on my macchiato. I especially hate it when the beverage i'm handed is just a shot of espresso with some milk dumped in.

Anyway, one topic of conversation was boxed cake mix. I don't think box mix is -that- convenient, especially considering that many people doctor their box mix with other ingredients. I'm not saying you're not allowed to enjoy box cake; If you are simply intimidated by baking, there are many simple, delicious, and forgiving recipes you can try.

These chocolate-nut wedges from The Weekend Baker can be made in half an hour, possibly less. The prep time is especially fast if you use a food scale. All the dry ingredients get thrown together. The wet ingredients are piled on top and mixed in. The resulting treat is something in between cake and a brownie.

Because this recipe is so simple, your finished product will only be as your ingredients. I used some leftover valrhona cocoa powder and chinese cassia cinnamon from Penzey's Spices. I used mini chocolate chips so they'd be better distributed and I chose pecans because I love them combined with cinnamon.

The cake may seem underbaked when you pull it out of the oven, but it will harden up as it cools. Believe me- if you wait until the whole cake is solid and tests completely done, it will be way overcooked. These wedges taste much better when they've fully cooled. Right out of the oven the texture is a little off, and the flavor of cinnamon isn't as pronounced.

This might not be the best treat you ever eat, but for something that takes a half hour it's delicious. Some days I need a recipe that doesn't take three hours and make a mess of the kitchen.


Chocolate-nut Wedges
adapted from The Weekend Baker by Abigail Johnson Dodge
3/4 cup (99g) all purpose flour
3/4 cup (170g) granulated sugar
1/3 cup (57g) semi-sweet chocolate chips
1/2 cup (43g) unsweetened cocoa powder, sifted
1/4 tsp ground cinnamon
1/4 tsp baking powder
1/4 tsp table salt
1/3 cup (73ml) canola or corn oil
2 large eggs
1/2 cup (57g) chopped nuts (hazelnuts, walnuts, or pecans) no need to toast

1. Position an oven rack on the middle rung. Heat the oven to 350/180C degrees. Lightly grease the bottom and sides of a 9in(22.75cm) pie plate.

2. In a medium bowl, combine the flour, sugar, chocolate chips, cocoa powder, cinnamon, baking powder, and salt. Whisk until well blended. Mix together the oil and eggs with a fork until just blended. Pour the liquid over the flour mix and mix with a rubber spatula until well blended. Scrape into the prepared pie plate and spread evenly (the batter will be quite thick.) Scatter the chopped nuts over the top.

3. Bake until a toothpick inserted in the center comes out with only a few gooey pieces clinging to it, about 20 minutes. Transfer the baking dish to a rack and let cool. Cut the pie into 8 wedges.

Monday, October 8, 2007

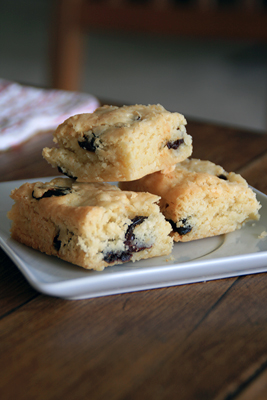
Chewy Almond and Cherry Bars.

Cherry Almond Bars

Some days, I feel like lazy baking: baking that requires no butter creaming, egg white whipping, gelatin blooming, double boiling or dough proofing.

I've also been a little uninspired lately when it comes to cooking, writing, and music making. I thought it might help to go back to basics. I've been working on etudes and keeping my blog entries rather short. Alice Medrich's Cookies and Brownies is an old classic and I decided to try a simple recipe i'd normally be tempted to skip over.

These Almond and Cherry Bars taste like something someone's mother would give you. They're very plain but satisfying with a chewy texture similar to blondies or peanut butter bars. The almond extract lends a delicate, aromatic touch.

I'm not sure how my writing is going to progress. My sixteen year old brother wrote a short autobiography that was incredibly fresh and hillarious. It made me wonder if my literary voice has been killed by years of trying to do well in english class.

Anyway, i'm going to keep trying simplicity for a while and see where things go.

Chewy Almond and Cherry Bars
3/4 cup whole almonds, with or without skins
1 cup all purpose flour
1/8 tsp salt
3/4 tsp baking powder
8 tbsp unsalted butter
3/4 cup + 2 tbsp sugar
1 large egg
1/4 tsp almond extract
1/2 cup dried tart cherries, or dried cranberries, or apricots
8 inch square pan lined with parchment or foil

Preheat the oven to 350. Position a rack in the lower third of the oven.

Process the almonds with the flour in a food processor fitted with a steel blade until the almonds are finely ground. Add the salt and baking powder and pulse to mix. Set aside.

Melt the butter in a medium saucepan. Remove from the heat and stir in the sugar. Using a wooden spoon, beat in the egg and almond extract. Stir in the flour mixture, followed by the dried fruit. Spread the batter evenly in the pan.

Bake for 20-25 minutes, or until the edges are golden brown and have pulled away from the sides of the pan and the top is golden brown. Cool in the pan on a rack. Run a knife along the unlined sides of the pan. Transfer to a cutting board and cut into 16 squares. May be stored airtight for at least 1 week.

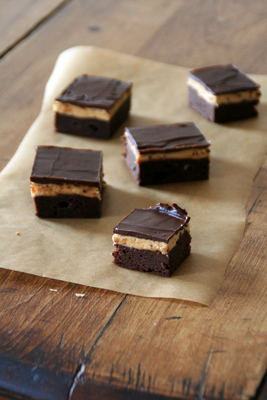
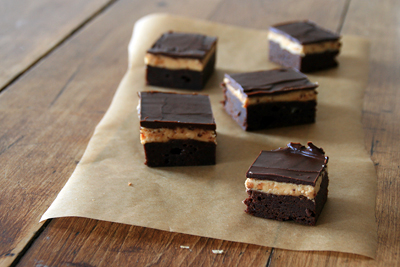
Peanut Butter Brownies

Peanut Butter Brownies

Peanut Butter Brownies

These pictures are rather similar, but I couldn't choose between them.

This is a decadent recipe from Dorie Greenspan. The key is to let the brownies reach room temperature before you eat them- otherwise the ganache will be hard to bite through and the peanut butter frosting will pull away from the brownie.

They are ridiculously decadent.

Peanut Butter Brownies
reposted from epicurious.com

Brownies
3/4 cup (1 1/2 sticks) unsalted butter
7 ounces bittersweet or semisweet chocolate, chopped
3 ounces unsweetened chocolate, chopped
1 1/2 cups sugar
1 1/2 teaspoons vanilla extract
1/4 teaspoon salt
4 large eggs
1 cup all purpose flour
1 cup roasted salted peanuts, coarsely chopped

Frosting and ganache
1 cup chunky peanut butter (do not use natural or old-fashioned)
1/2 cup (1 stick) unsalted butter, divided, room temperature
3/4 cup powdered sugar
1/8 teaspoon salt
1/8 teaspoon ground nutmeg
1 tablespoon whole milk
1 teaspoon vanilla extract

7 ounces bittersweet or semisweet chocolate, chopped

For brownies:
Position rack in center of oven and preheat to 325°F. Line 13x9x2-inch metal baking pan with foil, leaving long overhang; butter foil.

Place 3/4 cup butter in heavy large saucepan. Add both chocolates; stir over low heat until smooth. Remove from heat. Whisk in sugar, vanilla, and salt, then eggs, 1 at a time. Fold in flour, then nuts. Spread in prepared pan. Bake until tester inserted into center comes out with moist crumbs attached, about 30 minutes. Place pan on rack; cool.

For frosting and ganache:
Using electric mixer, beat peanut butter and 1/4 cup butter in medium bowl to blend. Beat in powdered sugar, salt, and nutmeg, then milk and vanilla. Spread frosting over brownies.

Stir chocolate and 1/4 cup butter in heavy small saucepan over low heat until smooth. Drop ganache all over frosting; spread to cover. Chill until set, about 1 1/2 hours. Do ahead Can be made 1 day ahead. Cover and keep chilled.

Using foil as aid, transfer brownie cake to work surface; cut into squares. Bring to room temperature; serve.

Sunday, October 7, 2007

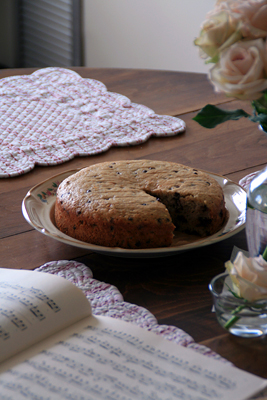
Banana Bread/Cake ala David Lebovitz.

Banana Chocolate Chip Cake

I made this recipe from David Lebovitz's blog. It's a little different than other banana bread recipes i've made: less butter, and some fromage blanc. It's a good snack cake.

I'm a little amused by the photo; it wasn't staged. I bought roses earlier in the day (only 5 bucks from the lady outside PNC) and the music was from cello practice. I don't have a music stand at the moment, so I invariably prop the music on tables, chairs, desks, random piles of junk.

I'm making almond/cherry bars and peanut butter brownies tonight so stay tuned. It's going to be a crazy week and I think i've been baking overtime to avoid thinking about it.

Tuesday, October 2, 2007

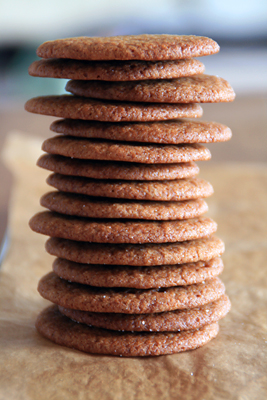
Gingersnaps.

Gingersnaps

I finally ordered a copy of The Sweet Life: Desserts from Chanterelle. These gingersnaps won me over; I could eat the whole pile in one go.

These aren't snappy, toothbreaking gingersnaps: They're crisp right around the edges, but soft in the middle. I baked one batch for 10 minutes and the other for 15. The second batch had much crispier edges, but still stayed chewy.

The flavors are really well balanced. I like my gingersnaps with more cloves than usual, so the 1.5 tsps in this recipe was perfect.

Gingersnaps
adapted from The Sweet Life: Desserts from Chanterelle

18 tbsp butter, at room temperature
1 1/4 cups packed light brown sugar
2 eggs, at room temperature
1/2 tsp salt
2 tsp baking soda
2 1/4 cups flour
2 tsp powdered ginger
1.5 tsp ground cloves
1.5 tsp ground cinnamon
1/4 cup molasses
1 cup raw sugar, or granulated sugar.

Place the butter in the bowl of a stand mixer fitted with the paddle attachment and beat on medium speed for 1 minute. Add the light brown sugar and beat on medium-high speed until the mixture becomes fluffy and lighter in color, 6 to 8 minutes, stopping the mixer occasionally to scrape down the sides of the bowl. Add the eggs, one at a time, and continue to beat until they are fully incorporated and the batter looks smooth and glossy, 1 to 2 minutes.

In a dry bowl, whisk together the dry ingredients. Add the dry mixture, all at once, to the butter mixture. Using a rubber spatula, fold together for a few turns. With the mixter on slow speed, mix the dough until thoroughly combined, 1 minute.

Add the molasses and mix until incorporated. Cover the dough with plastic wrap and refrigerate for at least 2 hours.

Preheat the oven to 350. Line baking sheets with parchment or silicone. Place the raw sugar in a small bowl. Pinch off 1.5 inch pieces of batter and roll into balls. Roll each ball in the sugar to coat. Arrange the cookies on the prepared sheet 2 inches apart and press your thumb in the center of each cookie to flatten it a bit. Bake until the cookies spread, crack a bit, and take on a dark golden brown color, 10-15 minutes.

Buckwheat Blueberry Cake.

Blueberry Buckwheat Cake

I tried this recipe from Orangette today; I felt like I needed a hearty, comforting breakfast cake.

I think it's delicious, and you'll like it if you enjoy the strong taste of buckwheat. I think the walnuts added in the original recipe would have been a nice touch too.

Wednesday, September 19, 2007

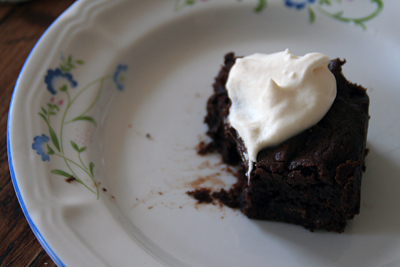
Fig Brownies with Brown Sugar Whipped Cream.

Fig Brownies w/ Brown Sugar Whipped Cream

Fig Brownies w/ Brown Sugar Whipped Cream

My love affair with Ficoco sent me on a google search for fig and chocolate recipes. My search yielded two noteworthy results.

1) God Hates Figs. (a spoof website ala godhatesshrimp.com)

2) A Double Chocolate Fig Slice Recipe.

Instead of soaking the figs in marsala, I soaked them overnight in dark rum (an -excellent- decision.) The resulting brownies were fudgy, adult, and richly studded with chunks of fig. I chopped the fruit pretty coarsely and used valrhona cocoa powder and 60% callebaut.

I used an 8" square pan, but I think a 9" might have been better as my brownies ended up too-underbaked in the very center. I'd love to eat them with some coffee ice cream next time!

More on Oh Yeah!

Here is a good, informative article on the new ice cream place:

http://www.popcitymedia.com/developmentnews/ohyeah0919.aspx

Also, Peter Berger posted this article and video regarding Oh Yeah! He seems to share my enjoyment of boozy ice cream.

More photos later in the week. I made another cheesecake, chocolate cherry cookies, and fig brownies.

Sunday, September 16, 2007

Wedding Cake (Part 3.)

Wedding Cake

Wedding Cake

Wedding Cake

Wedding Cake

Wedding Cake

Wedding Cake

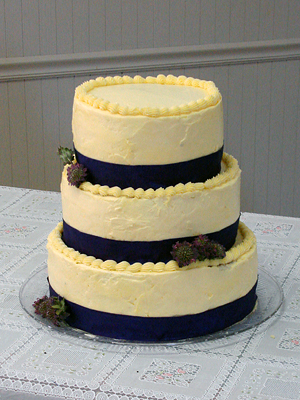
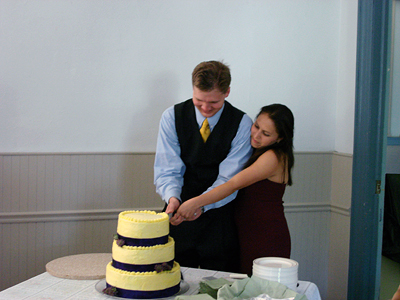
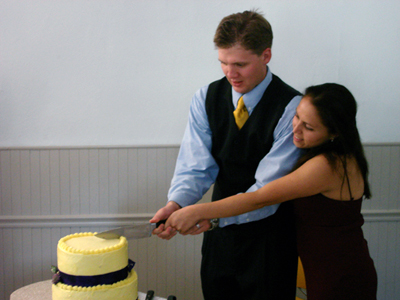
The reception was wonderful. The decorations were great, the food was simple and delicious, the alcohol was plentiful, the people were genial, and the cake was very well recieved.

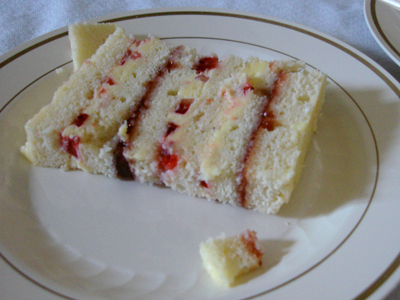
It was really delicious. The caterer took care of the cutting after Aaron and Claudia made the first slice. Many people told me they usually didn't eat cake, but they loved this and ate two or three slices. I recieved so many nice compliments. It felt really nice to see everyone eating and enjoying the cake.

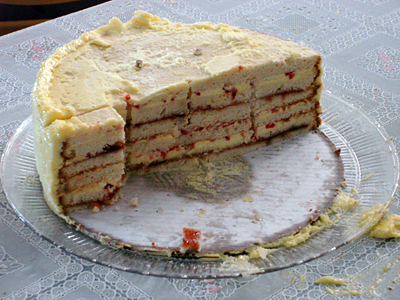
I found quarts of strawberries for a dollar each in the Strip District on Saturday. I bought five for the filling and they really added a lot to the finished product. The ribbon on the cake was actually a very bright royal purple, but I made the mistake of bringing the small camera rather than the nice one and it didn't register.

If I ever decide to make another wedding cake it won't be nearly as stressful. All the worrying about how everything would turn out was horrid, and now that i've gone through the entire process I think I can do a lot better!

I had an awesome time. And there's a good chunk of leftovers :)

Saturday, September 15, 2007

Wedding Cake (Part Two.)

wedcake

http://www.flickr.com/photos/37876536@N00/3738812509/sizes/o/in/photostream/
It was brought to my attention that my posts don't often reflect the amount of frustration I experience during difficult baking.

At the moment, I never ever want to make a wedding cake again.

We baked the cakes last night. Creaming 3 pounds of butter is very difficult when you're using a hand mixer instead of a giant Hobart.

There were injuries. Blood was shed (I cut my thumb pretty wickedly while slicing layers.) And it's still not done! Tomorrow there will be touch up and decorating with some ribbon and flowers. Then there's the issue of transporting it to the reception, and cutting/serving it.

I've been incredibly nervous about the whole thing. I'm plagued by questions like what is the volume isn't so good, what if there's not enough icing, what if I don't use enough dowels, what if the buttercream all melts, what if no one likes the cake...

If you ever want to attempt your first wedding cake, here is my advice to you:

1) Plan ahead. Way ahead. Make yourself a little cake baking calendar.

2) Make way more frosting than you need to. Make sure you're doing math for the amount of frosting between all the layers.

3) Find a wedding cake recipe. Don't just throw together random frosting, cake, and filling recipes.

4) Get some friends to help.

5)Remember to breathe, try not to have a nervous breakdown.


In the end, i'm sure it will be ok. Even nice, maybe.

Perfectionists, beware the wedding cake.

Wednesday, September 12, 2007

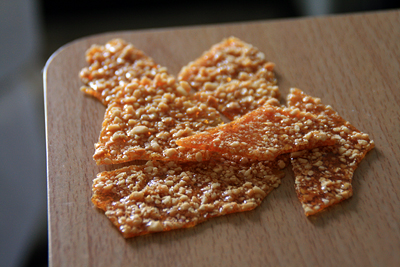
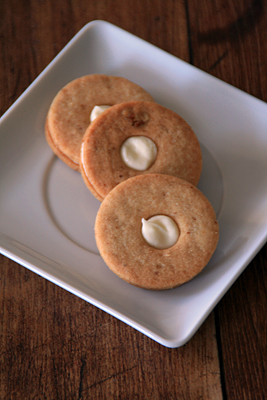
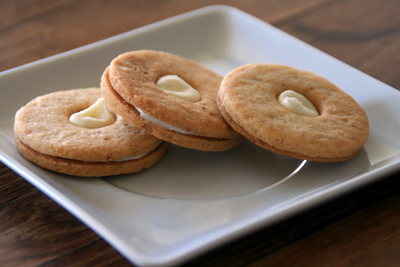
Peanut Brittle, Walnut Sandwich Cookies.

Peanut Brittle

Walnut Cream Cheese Sandwich Cookies

I'm still working my way through The Sweet Life: Desserts from Chanterelle.

I decided to roll and shape the Walnut Cream Cheese Sandwich Cookies, but next time I think i'll just cut them into rectangles to save some time. If it's humid and your cookies get a little soggy, you can refresh them in a 350 oven for 4-5 minutes. You can fill and freeze the cookies too. They don't freeze too hard and the cookies stay crunchy!

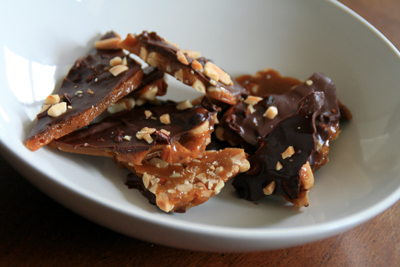
The book suggests using the Thin and Delicate Peanut Brittle as a garnish or candy. You make a caramel, grind it in a food processor and combine it with ground peanuts, then bake it until it re-melts. It's topped with some fleur de sel.

I'm not going to post these recipes for now; I've posted a few from the book already, and you should consider buying it or finding it at your local library if the recipes are to your liking.

I do recommend it. I browsed through it many times before checking it out, and for all my skepticism i've really enjoyed the recipes.

Walnut Cream Cheese Sandwich Cookies

Monday, September 10, 2007

Kabocha Squash Cheesecake

Kabocha Squash Cheesecake

Kabocha Squash Cheesecake

I need to have more faith in cookbooks. Lately i've been so wary even though the recipes have been great!

Fall is just around the corner. I'd been in the mood for comforting, spiced baked goods, so I picked up a 3 lb red kabocha squash from the Food Co-op and decided to try Pichet Ong's recipe for Kabocha Squash Cheesecake.

This isn't your average cheesecake. It's a little more like a pumpkin pie in that the filling has a very high ratio of squash flesh to cream cheese. Consequently, it's not nearly as dense and retains that silky but not mushy texture of good pumpkin pie.

The crust is amazing too. I worried the Mi-Del graham crackers would be too dense, but they worked perfectly. The crust is a little thicker than usual, and it stayed nice and crunchy. I loved the balance of spices too!

A nice dollop of whipped cream would suit if the cake isn't quite rich enough for you. The cookbook suggests a little condensed milk chantilly cream. I will probably make this for Thanksgiving.


Kabocha Squash Cheesecake with Walnut Crust
adapted from Pichet Ong's The Sweet Spot
Kabocha Squash Filling
one 3 lb kabocha squash
8 oz cream cheese, at room temp
1 cup sugar
1.5 tsp ground cinnamon
1 tsp ground ginger
1/3 tsp nutmeg
1/2 tsp salt
1.5 tsp brandy (I used rum.)
2 large eggs, room temp

Walnut Crust
1/4 cup unsalted butter, melted
1/2 cup walnuts
1/2 cup packed light brown sugar
11 graham crackers (174 g), crushed into fine crumbs, about 1.5 cups
(I used mi-del honey grahams.)
2 tsp grated lime zest
1/2 tsp cinnamon
1/8 tsp ginger
1/4 tsp salt

1. To make the filling: Prepare a steamer by filling a large round casserole with water to a depth of 3 inches; the casserole should be able to hold the squash comfortably and have a tight fitting lid. Put a steamer rack or enough crumpled heavy-duty foil to support the squash on the bottom; the rack or foil should be just above the waterline. Set over medium heat and bring to a steady simmer. Put the whole squash on the rack, cover the pot, and steam until a knife pierces the flesh easily (about 1hr.)

2. Remove from the heat, uncover the pot, and cool the squash in the steamer until cool enough to handle.

3. Meanwhile, make the crust: Preheat the oven to 325. Lightly butter a 9-inch springform pan, line with paper and butter the paper. Set aside.

4. Spread the walnuts on a rimmed baking sheet and toast, shaking the pan occasionally, until fragrant, about 15 minutes. Cool completely. Turn the oven down to 300.

5. Put the walnuts and 1/4 cup of the brown sugar in the bowl of a food processor and pulse until the walnuts are coarsley ground. Transfer the walnuts to a mixing bowl and add the graham cracker crumbs, zest, cinnamon, ginger, and salt, and the remaining 1/4 cup brown sugar. Mix well, then add the melted butter and mix with your hands until everything is moistened. Transfer the mixture to the prepared pan and press into an even layer on the bottom.

6. Bake the crust until golden brown, about 12 minutes. Cool completely. Leave the oven on.

7. When the squash is cool enough to handle, remove it from the steamer, cut it in half, and scoop out and discard the seeds and strings. Scoop out 2.5 cups of the squash flesh into a small bowl. Reserve any remaining squash for another use.

8. Put the cream cheese, sugar, cinnamon, ginger, nutmeg, and salt into the bowl of a food processor and process, scraping down the sides and bottom of the bowl occasionally, until the mixture is light and smooth. Add the squash and process again, scraping down the sides of the bowl of the bowl occasionally, until smooth. Add the brandy and eggs and process until just incorporated. Transfer to a bowl and finish mixing with a rubber spatula.

9. Transfer the filling to the cooled crust. Bake until the center is set but still slightly jiggly, about 1 hour. Cool completely and unmold.

NOTES: I think steaming your squash upside down would be good. The top of my squash was much thicker than the bottom, and didn't quite cook all the way through.

Keeping the walnuts pretty coarse adds a nice crunch.

Saturday, September 8, 2007

The Scoop on "Oh Yeah"

There is a new ice cream/coffee parlor on Highland Ave (across-ish from Casbah.) It's called "Oh Yeah!" and when I stopped by this evening the guy behind the counter said they'd been open less than 24 hours.

The decor is pretty cool. They have posters emphasizing eating locally. All of the countertops are made from recycled bowling alley lanes. The railings and signpost look like they were made by the folks at Iron Eden. Cuter still, the door handles are oversized ice cream scoops.

They do not make their own ice cream, but rather bring in a few flavors from Dave and Andy's and many from Woo City Creamery: a fantastic place in Ohio. I'm excited to see the product, as pints at Whole Foods are really expensive. They get their coffee from La Prima (yay!)

Oh Yeah! isn't any more expensive than your average ice cream place.They also have Woo City's vegan "woo foo," a sort of vegan ice/ice cream. I really like some of Woo City's flavors: the bailey's, chai, and coffee chip are awesome. They had a good looking peach one too.

There is something about this trend of bakeries/eateries with a huge emphasis on interior design and relentless marketing that makes me feel a little wary though. Conversation with employees/owners can seem slightly tinged with self-promotion. It seems it's not enough just to offer a good product anymore. You need modern furniture, or cute little buttons and packaging.

That said, i'm interested to see how Oh Yeah fares. The ice cream is good, and it's worth a trip.

Wedding Cake (Part One.)

I volunteered to make a friend's wedding cake. I've had one too many grocery store wedding cakes, and I thought it'd be lovely to make something simple, elegant, and delicious. This will be the only wedding cake i've ever made though, so i'm a little nervous!

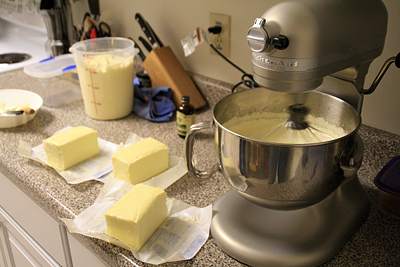
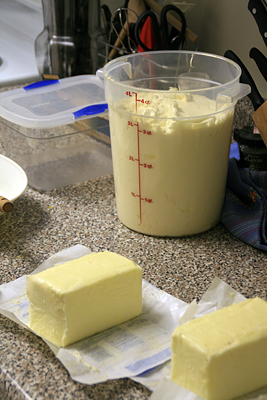
buttercream

buttercream1

We made all the frosting tonight. Frosting is a little scary when made in bulk. I six-tupled Flo Braker's recipe for classic buttercream. This took:
6 pounds of butter
6 cups of sugar
nearly a quart of liquid egg yolks.


I added some Nielsen-Massey bourbon vanilla extract too. Despite what you might think, the frosting doesn't just taste like butter. It's fluffy, light, and the vanilla flavor really shines. In the end, we made about a gallon and a half.

Flo Braker's The Simple Art of Perfect Baking is a must-have. It's been re-printed and updated several times. Her recipe for genoise is the only one i've ever had success with. The directions are extremely specific and i've had tons of success with them.

Instead of pouring the sugar syrup into the yolks while the mixer is running, this recipe suggests dumping it all into the middle of the bowl, whisk it a bit by hand, then re-attaching it to the mixer and continuing. This prevents sugar from splattering all over the sides of the mixing bowl. Another handy tip is holding ice cubes against the bowl to get the yolk/sugar mixture to cool to room temperature a little faster.

Wednesday, September 5, 2007

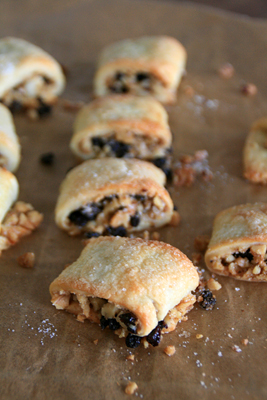
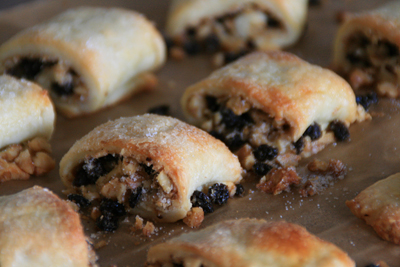
Cinnamon Currant Walnut Rugelach

Cinnamon Currant Walnut Rugelach

Cinnamon Currant Walnut Rugelach

Another recipe from the Desserts from Chanterelle book. The dough is really delicious- creaming the butter and cream cheese seems to be a good technique.

While the cookies turned out well, they were really difficult to shape. I think alice medrich's recipe shapes them individually. That might be much easier than managing a 16 inch log.

Monday, September 3, 2007

Labor Day Baking.

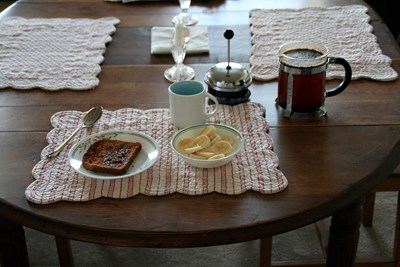
This morning I ate some breakfast.

Breakfast

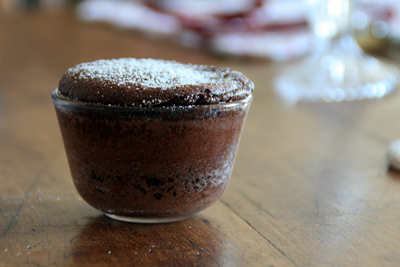
I made a souffle.

souffle

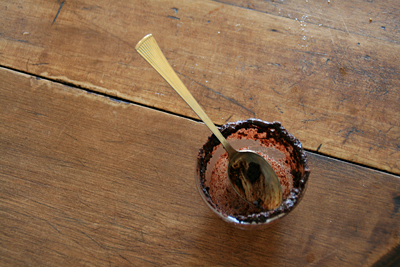
I ate a souffle.

Cocoa Souffle

Then I worked on nasty homework.

The souffle is from Alice Medrich's Bittersweet. The breakfast is yogurt and bananas, toast with ficoco, and coffee. And I didn't have souffle right after breakfast. It was more like 2pm. Happy Labor Day!

Saturday, September 1, 2007

Oatmeal, Milk Chocolate, Raisin Cookies.

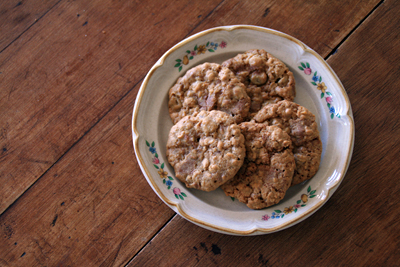
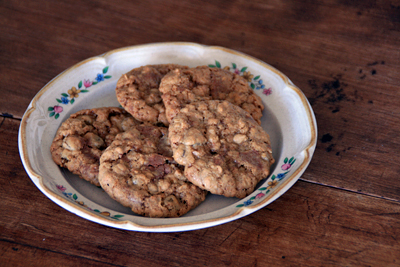
Milk Chocolate Oatmeal Raisin Cookies

Milk Chocolate Oatmeal Raisin Cookies

I wasn't expecting anything too special from the oatmeal cookie recipe in The Sweet Life: Desserts from Chanterelle. Lately I've been dissapointed by many cookie recipes.

This recipe was fantastic. I love a cookie that's pretty crispy on the edges, but not hard all the way through. These cookies have great texture: not too full of oatmeal, not too chewy from brown sugar.

The book also suggests using dark chocolate and dried cherries or pears rather than milk chocolate and raisins. I thought the original flavor combination was interesting, but the milk chocolate I used didn't have enough flavor. I think this recipe would be great with nuts, chocolate chips, or any sort of add-ins. I'd definitely make it again.

Oatmeal Cookies with Golden Raisins and Milk Chocolate Chips
adapted from The Sweet Life: Desserts from Chanterelle

1 1/4 cups flour
1 tsp baking soda
1/2 tsp salt
16 tbsp unsalted butter, at room temp
1 cup sugar
1 cup dark brown sugar
2 eggs plus 1 egg white, at room temp
3 cups raw oatmeal
8 oz milk chocolate, chopped into 1/4 inch pieces
1 cup golden raisins

Preheat the oven to 350. Line cookie sheets with parchment or silicone.

In a dry bowl, whisk together the flour, baking soda, salt, and oats.

Place the butter in the bowl of a stand mixer with the paddle attachment and beat on medium speed for 1 minute. Add the sugar, and beat on med-high speed until fluffy and light in color, approximately 5 minutes. Add the dark brown sugar and continue creaming for 3-4 minutes, stopping occasionally to scrape down the sides of the bowl. Turn the mixer down to slow speed. Add the eggs and white, one at a time, and continue to beat until they are fully incorporated and the batter looks smooth and glossy, 1-2 mins.

Add the dry mixture, all at once, to the butter mixture. Using a rubber spatula, fold together for a few turns. With the mixer on slow speed, mix the dough until combined. Add the chopped milk chocolate and raisins. Scrape down the sides of the bowl and mix for another 30 seconds. The dough can be made up to this point and refrigerated for 3 days.

Using 2 teaspoons, scoop the dough into mounds and place 2 inches apart on your cookie sheets. Flatten each mound with the back of a spoon or two fingertips (*I didn't flatten them and they still turned out well.) Bake until the cookies spread and rise, 12-15 minutes until a light golden brown. If you continue to bake the cookies they will color more and result in a crunchy, caramelized cookie.
Friday, August 31, 2007

Chocolate Chip Cookies

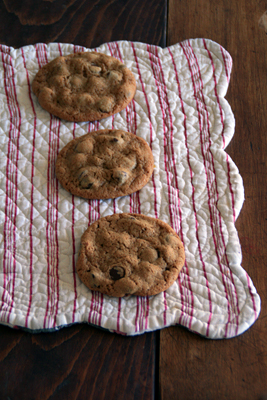
Chocolate Chip Cookies

Chocolate Chip Cookies

I tried this recipe from Emily Luchetti's Classic Stars Desserts. The flavor was good, but they were a little toothsome in an over brown sugared way. I like recipes with a combination of brown and granulated sugar better.

Unfortunately I have yet to find a chocolate chip cookie recipe that I can call my favorite. I'm going to keep trying.

Monday, August 27, 2007

Oat Crisps.

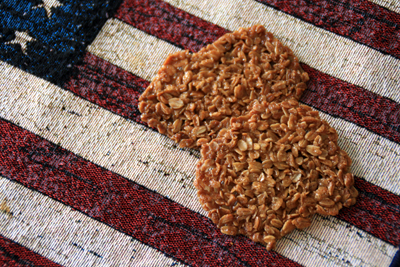
Oat Crisps

I'm not a huge fan of those placemats, but I suppose oatmeal cookies feel very all-american.

Anyway, Emily Luchetti has fantastic cookie recipes. The more I make them, the more I think we have the exact same taste in cookies. She really has a knack for texture. These oat crisps were wonderfully crispy and delicate. Emily Luchetti seems to appreciate crunch as much as I do.

This recipe came from Classic Stars Desserts. She serves them with creme fraiche and blueberries for desserts and with yogurt for breakfasts. They're simple, fast, and really delicious.

Oat Crisps
adapted from Classic Stars Desserts
2 1/2 tbsp unsalted butter, melted
1/4 cup firmly packed dark brown sugar
2 tbsp granulated sugar
2 tbsp dark corn syrup
1 cup old fashioned rolled oats

Preheat the oven to 350. Line 2 baking sheets with parchment paper.
In a bowl, combine the butter, brown sugar, granulated sugar, and corn syrup and stir until blended. Stir in the oats, mixing well.
To form the crisps, drop the oat mixture, one tbsp per cookie, onto the prepared baking sheets, spacing them about 2.5 inches apart. Bake, rotating the sheets at the midway point, until golden brown and bubbly, about 15 minutes. Let cool for 5 minutes on the baking sheets. Then, using a metal spatula, transfer the crisps to a large flat plate to cool.

Sunday, August 26, 2007

Pichet Ong's Banana Cake.

Pichet Ong's Banana Cake

This is the first recipe in Pichet Ong's The Sweet Spot and it's a great starting point. Many of the recipes are familiar with interesting twists: ginger pastry cream in a banana cream pie, perhaps a touch of matcha, yuzu, or condensed milk...

I really enjoyed this cake because it's different from your typical banana bread. I used a wildflower honey, but I think something a little darker would have been fantastic. Really try to avoid over mixing. Even if there are a few pockets of yogurt/sour cream, the cake will be incredibly tender.

Banana Cake
adapted from Pichet Ong's "The Sweet Spot"

1/3 cup unsalted butter, at room temperature, plus more for greasing the pan
1 cup all purpose flour
1 tsp baking powder
1 tsp baking soda
1/4 cup honey
1/2 cup light brown sugar
1/2 tsp ground cinnamon
1/2 tsp salt
1 cup (228g) roughly mashed baby bananas
1/2 tsp vanilla
1 large egg
1/2 cup plain whole milk yogurt or sour cream
1 cup semisweet chocolate chips (optional)

1. Preheat the oven to 350. Lightly butter an 8.5x4.5in loaf pan and set aside.
2. Sift together the flour, baking soda, and baking powder and set aside
3. Put the butter, honey, sugar, cinnamon, and salt in the bowl of an electric mixer fitted with the paddle attachment. Beat the mixture on medium high speed until light and fluffy- about 5 minutes. Scrape down the sides and bottom of the bowl and add the bananas and vanilla, beating on medium speed until the mixture looks "broken" or lumpy, about 1 minutes. The bananas should be smashed, with a few small chunks remaining.
4. Turn the speed to medium low and beat in the egg until incorporated. Turn the speed to low and gradually add the sifted flour mixture, mixing just until no traces of flour remain- about 10 seconds. Add the yogurt and mix until the batter has only a few remaining white streaks- about 5 seconds. Be sure to avoid over mixing. Gently fold in the chocolate, if desired.
5. Transfer the batter to the pan. Bake in the center of the oven until a tester comes out clean, about 45 minutes. Cool the cae in the pan on a rack for 5 minutes, then unmold and cool completely on the rack.

Buttercrunch Toffee.

Buttercrunch Toffee

I love toffee. Yesterday I used David Lebovitz's Recipe which turned out quite well.

I used a combination of toasted almonds and hazelnuts with a smattering of cocoa nibs and fleur de sel on top of 73% El Rey chocolate.

There's not much else I can say other than don't burn the sugar. Burnt toffee is a tragedy.

Friday, August 24, 2007

Ficoco.

Ficoco

Pittsburgh is great because you can find nearly any ingredient you need in a small radius.

For Example: Lotus in the Strip has banana leaves, frozen cassava and coconut meat, palm sugar, and mochi. Prestogeorge occasionally has Nielsen-Massey vanilla for a really gooprice. Penn Mac has salt cod, blanched hazelnuts, and marscarpone for about half the price of Giant Eagle. Penzey's has dried lavender, but you have to ask for it because it's behind the counter. Mon Aimee Chocolat has baking chocolate for 4 dollars a pound. Whole Foods and Giant Eagle also have some great specialty products as well as baking staples.

I love our local Whole Foods. They always have interesting products, they're the cheapest place for Fage yogurt and Ito-En tea, and their layout is really effective. I love that Pittsburgh grocery stores don't have alcohol. In a big California grocery store, you typically find 1-3 aisles or a big nook dedicated solely to booze.

Whole Foods is rather pricy for produce, protein, and cheese, so I usually buy really specific things. Every now and then i'll treat myself to something special: an amazing bar of crispy spanish Turron, a bottle of grass-fed milk, some creamed honey...

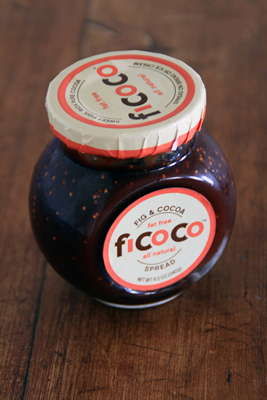
My latest find was Ficoco, a Fig and Cocoa spread that's made in Croatia (who finds these things??) If you're a fan of figs, raisins, or other dark tasting fruits you'll love this spread. I think the combination of figs and chocolate is kindof sexy. I ate it for breakfast today on some buckwheat crepes. I think it'd be great spread on some bread or mixed into some yogurt/ice cream too.

Vegetable Soup with Fennel, Herbs, and Parmesan Broth.

Vegetable Soup

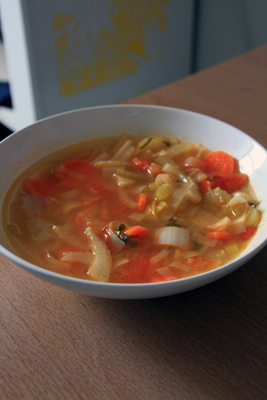
This recipe came from the latest issue of Food and Wine Magazine. It's by Viana La Place, who is one of my favorite Italian cookbook authors. Cucina Fresca and Cucina Rustica are great books and I love them for their simple, fresh tastes.

I think this soup really highlights her style: on the page the ingredients seem a little plain, but the finished product is really flavorful and well-composed. Best of all, you don't need to make any stock. The soup gets plenty of punch from the fresh herbs and parmesan cheese.

Vegetable Soup with Fennel, Herbs, and Parmesan Broth
by Viana La Place for Food and Wine Magazine

2 Tbsp extra virgin olive oil
4 garlic cloves, minced
3 carrots, halved lengthwise and thinly sliced crosswise
2 celery ribs, halved lengthwise and thinly sliced crosswise
2 leeks, white parts only, halved lengthwise and thinly sliced crosswise
1 fennel bulb, halved, cored, and thinly sliced
1 medium tomato, cut into 1/2 inch dice
2 bay leaves, preferably fresh
6 cups water
One 3-inch square Parmigiano-Reggiano Rind
1 Tbsp chopped flat-leaf parsley
1 Tbsp chopped fresh basil
1/4 cup grated parmigiano-reggiano cheese

1. Heat the olive oil in a large soup pot. Add the garlic and cook over moderate heat, stirring, until fragrant, about 2 minutes. Add the carrots, celery, leeks, and fennel and cook, stirring, until the vegetables begin to soften, about 5 minutes. Add the tomato and bay leaves and cook until the vegetables are tender, about 5 minutes. Add the water and the cheese rind and bring to a simmer. Cover partially and cook over moderately low heat until the vegetables are very tender, about 30 minutes.
2. Discard the cheese rind and bay leaves. Stir in the parsley and basil and season the soup with salt and pepper. Ladle into bowls, sprinkle with the grated cheese and serve.