Sunday, August 31, 2008

Photos from Weekend Baking

Slow Roasted Tomatoes

Potato and Parmesan Tart

Potato and Parmesan Tart

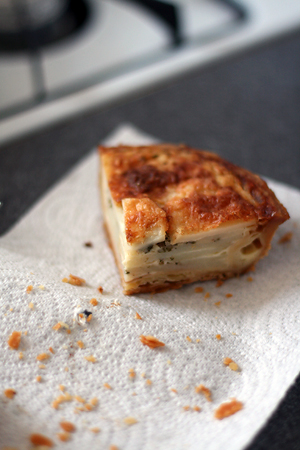
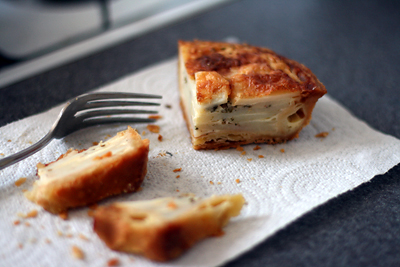
I was too tired to go out this morning, so I made some slow roasted tomatoes for another tart, and two kinds of cookie dough. Then I took some interior shots of the tart.

The tomatoes are brushed with a mixture of olive oil, garlic, oregano, salt, and pepper.

Saturday, August 30, 2008

Potato and Parmesan Tart with Chives

Potato and Parmesan Tart

Potato and Parmesan Tart

Cookbook photos can be dangerous.

I looked at the beautifully photographed potato tart in Tarts: Sweet and Savory and decided I had to make it immediately. I don't think i'm the only one who's aesthetically drawn to recipes. If the photo is pretty enough, I will empty my wallet for special pans or ingredients. I will make a potato tart even though I rarely eat potatoes. Or savory tarts. Or anything that's really heavy on dairy.

Baking on impulse can be successful or unsuccessful. For a while, I thought this tart would be wildly unsuccessful. Part of the problem was my friend Siobhan gave me a casserole dish that looked just like the one in the photo. While the recipe said any 1 quart capacity dish would work, my dish was too small. I had so much filling leftover that I layered it in a separate souffle dish.

The crust created another set of problems. I've blind-baked tarts lined with commercial grade plastic-wrap before; the plastic becomes brittle, but it doesn't lost its shape or affect the taste. Trying this trick with normal plastic wrap was a disaster. The plastic shrunk excessively, and I spent a while picking little bits of it out of the pan. It was frustrating. I had invited two people over for dinner, and I was convinced we'd be stuck with nothing but Caesar Salad.

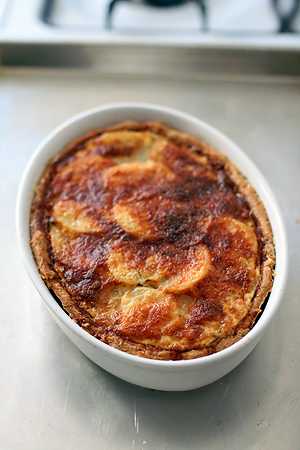
When I pulled the tart from the oven it looked perfect. Not quite picture-perfect, but certainly close. It warm, comforting, and well-seasoned. The crust was especially flaky and well browned, even on the bottom. I was especially proud because I haven't hand-made tart dough in a long time (usually I use the food processor.)

If you have any interest in trying this recipe, definitely use an 8-inch springform pan. And try not to be so hard on yourself if things start going wrong!

Potato and Parmesan Tart with Chives
adapted from Maxine Clark's Tarts: Sweet and Savory

1 recipe rich shortcrust pastry dough
2 lb new or white potatoes, thinly sliced
4 tbsp unsalted butter, cubed
1/4 cup freshly chopped chives
freshly grated nutmeg, to taste
4 oz freshly grated parmesan cheese (about 1 1/4 cups)
1 large egg, beaten
1 1/4 cups heavy cream
sea salt and freshly ground black pepper
a deep, 8 inch diameter springform tart pan

Bring the dough to room temperature. Preheat the oven to 400F.

Roll out the dough thinly on a lightly floured work surface. Use the dough to line the pan or dish (this can be a little tricky, so be patient and take your time) then prick the base. Chill or freeze for 15 minutes, then blind bake (lined with foil or parchment filled with pie weights or dried beans) for 10-12 minutes. Remove the weights and bake for another 5-7 minutes. If you are worried about the crust becoming soggy, you can brush it with beaten egg and bake again for another 5-10 minutes, until shiny and dried.

Turn down the oven to 325F. Reserve 1/4 cup of the Parmesan. Layer the sliced potatoes and butter in the baked pie crust, seasoning the layers with chives salt, pepper, nutmeg, and 1 cup of the parmesan.

Put the egg and cream into a bowl, beat well, then pour over the potatoes. Sprinkle the remaining parmesan over the top. Bake for 1 hour to 1 hour and 15 minutes, until the potatoes are tender and the top is a dark golden brown.

Let cool for 10 minutes, then remove from the pan or dish, or serve straight from the dish.

Rich Shortcrust Pastry Dough
2 cups all purpose flour, plus extra for dusting
1/2 tsp salt
9 tsbp unsalted butter, chilled and diced
2 large egg yolks
2 tbsp ice water

Sift the flour and salt together into a bowl, then rub in the butter

Mix the egg yolks with the ice water. Add to the flour, mixing lightly with a knife. If it is still too dry, add a little more water 1 tbsp at a time.

Invert the mixture onto a lightly floured work surface. Knead lightly with your hands until smooth.

Form the dough into a ball. Flatten slightly an chill for at least 30 minutes before rolling out.

Thursday, August 28, 2008

Creamy Coconut Cardamom Rice Pudding

Coconut Cardamom Rice Pudding

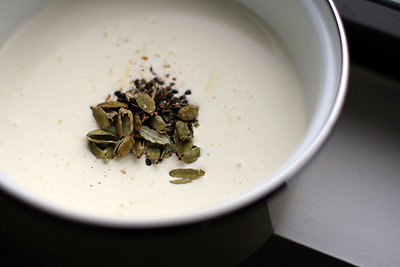
Infusing the custard.

This rice pudding recipe is very different from others i've tried. Cardamom-infused creme anglaise folded into coconut rice creates a thick, decadent pudding that's best served in small portions. I wasn't sure I liked it at first, but the cardamom flavor won me over.

I bruleed the puddings under the broiler, but brulee torch would have been more effective. The burnt topping adds a nice crunch and takes away the fridge-chill.

The recipe makes a rather large quantity, so i'll probably save it for a bigger occasion.

Creamy Coconut Cardamom Rice Pudding
adapted from Kate Zuckerman's The Sweet Life
makes about 6 cups, serves 8-12

Rice:
1/2 cup + 2 tbsp jasmine rice or basmati rice
1/4 cup sugar
1 (13.5 fluid oz) can coconut milk
1 cup whole milk
1/4 tsp salt

Custard:
16 cardamom pods
1/2 cup + 2 tbsp sugar
1 cup whole milk
2 cups heavy cream
5 egg yolks
1 egg
1 tsp vanilla extract

1. Cook the rice: Preheat the oven to 325F. Place the rice in a strainer and rinse with cold water. Place the rice in a heavy-bottomed medium-sized saucepan with 2 cups cold water. Bring the rice to a boil and immediately remove the pan from the heat. Strain the rice and discard the starchy water. Place the blanched rice back in the pan and add the sugar, coconut milk, milk, and salt. Bring to a boil, remove from the heat, and cover the pan with aluminum foil or the lid. Place the pan in the oven and bake until the rice expands and absorbs all liquids, 30 minutes. If the pan is not oven proof, transfer the rice to a metal or glass baking dish and cover with aluminum foil. If there is still runny milk in the pan, continue to bake, covered, for another 5 to 10 minutes. When the rice is done, remove it from the oven, leave it covered, and set it aside.

2. Make the custard: While the rice is baking, make the custard. Using the bottom of a small frying pan, crush the cardamom pods to split them open. (*I used a mortar and pestle.) In a heavy saucepan combine the cardamom pods and seeds, 1/2 cup of the sugar, milk, and cream and bring to a simmer over medium heat. Remove from the heat and allow the cardamom to steep for 10 minutes.

In a mixing bowl, combine the egg yolks, egg, and remaining 2 tbsp of sugar and briefly whisk for 1 minute. Using a ladle, slowly whisk some of the hot cream into the egg mixture to warm it. Gradually pour the warmed egg mixture into the hot cream, whisking the cream constantly as you pour.

Cook the custard over medium heat, stirring continuously and scraping the bottom with a rubber spatula or wooden spoon, until the custard thickens enough to coat the back of a spoon. Remove from the heat and strain the custard to remove the cardamom pods and seeds.

3. Combine the custard and the rice: Scoop the rice into a large mixing bowl. Pour the hot custard over the rice and, using a whisk, slowly whisk until all of the rice granules are dispersed evenly and the mixture is thoroughly combined. Add the vanilla extract. Allow the rice pudding to cool completely. This pudding will keep, refrigerated, for 3 days.

Sunday, August 24, 2008

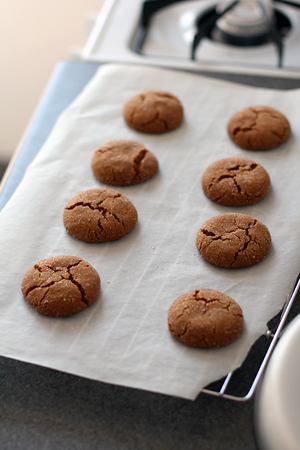
Molasses Spice Cookies

Molasses Spice Cookies

Molasses Spice Cookies

I strongly believe that gingersnaps and molasses cookies should be enjoyed year-round. While some people save cinnamon, ginger, allspice, and cloves for fall and Christmas recipes, I use them for any occasion. Especially breakfast.

I've tried many kinds of spiced cookies and I definitely have favorites. So, when I tried this Cook's Illustrated recipe, I wasn't expecting much. I just wanted to use up the molasses.

As soon as the cookies came out of the oven, I knew they'd be perfect. They were beautiful: big, sugary, crinkled, and perfectly round. I've tried similar recipes that weren't nearly as consistent- the cookies spread too much, or they looked nothing like they were supposed to. Conversely, these cookies turned out perfectly every time.

I highly recommend this recipe if you like chewy molasses cookies. Don't over bake them, or they will lose their wonderfully chewy texture!

Molasses Spice Cookies
from Cook's Illustrated

Measure the molasses in a liquid measuring cup. If you find that the dough sticks to your palms as you shape the balls, moisten your hands occasionally in a bowl filled with cold water and shake off the excess. Bake the cookies one sheet at a time. If baked two sheets at a time, the cookies started on the bottom rack won’t develop the attractive cracks. The cookies should look slightly raw and underbaked when removed from the oven.

1/3 cup granulated sugar (about 2 1/2 ounces), plus 1/2 cup for dipping
2 1/4 cups unbleached all-purpose flour (11 1/4 ounces)
1 teaspoon baking soda
1 1/2 teaspoons ground cinnamon
1 1/2 teaspoons ground ginger
1/2 teaspoon ground cloves
1/4 teaspoon ground allspice
1/4 teaspoon ground black pepper
1/4 teaspoon table salt
12 tablespoons unsalted butter (1 1/2 sticks), softened but still cool
1/3 cup dark brown sugar (about 2 1/2 ounces)
1 large egg yolk
1 teaspoon vanilla extract
1/2 cup molasses (about 6 ounces), light or dark

1. Adjust oven rack to middle position and heat oven to 375 degrees. Line 2 baking sheets with parchment paper. Place 1/2 cup sugar for dipping in 8- or 9-inch cake pan.

2. Whisk flour, baking soda, spices, and salt in medium bowl until thoroughly combined; set aside.

3. In standing mixer fitted with paddle attachment, beat butter with brown and granulated sugars at medium-high speed until light and fluffy, about 3 minutes. Reduce speed to medium-low and add yolk and vanilla; increase speed to medium and beat until incorporated, about 20 seconds. Reduce speed to medium-low and add molasses; beat until fully incorporated, about 20 seconds, scraping bottom and sides of bowl once with rubber spatula. Reduce speed to lowest setting; add flour mixture and beat until just incorporated, about 30 seconds, scraping bowl down once. Give dough final stir with rubber spatula to ensure that no pockets of flour remain at bottom. Dough will be soft.

4. Using tablespoon measure, scoop heaping tablespoon of dough and roll between palms into 11/2-inch ball; drop ball into cake pan with sugar and repeat to form about 4 balls. Toss balls in sugar to coat and set on prepared baking sheet, spacing them about 2 inches apart. Repeat with remaining dough. Bake 1 sheet at a time until cookies are browned, still puffy, and edges have begun to set but centers are still soft (cookies will look raw between cracks and seem underdone), about 11 minutes, rotating baking sheet halfway through baking. Do not overbake.

5. Cool cookies on baking sheet 5 minutes, then use wide metal spatula to transfer cookies to wire rack; cool cookies to room temperature.

Tuesday, August 19, 2008

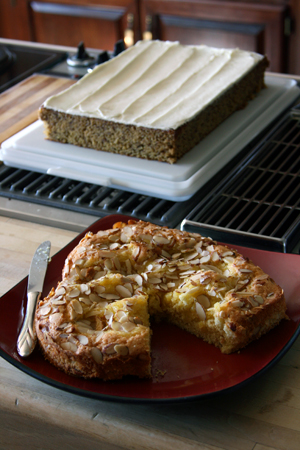
Banana Cake and Lemon Almond Torta

Lemon Almond Torta and Banana Cake

Banana Cake w/ Cream Cheese Frosting

One of the best parts of making this Banana Cake from last week's LA Times was eating the cake scraps. The recipe comes from Clementine, a bakery/cafe in Century City. Mom and I had lunch there today. I love their sandwiches and deli salads, but their baked goods can be hit or miss.

My family sets the bar pretty high for pastries. This week I made:
  • Strawberry tarts with vanilla pastry cream
  • White nectarines with toasted almonds and custard
  • Almond biscotti
  • Glazed buttermilk cookies
  • Almond and nectarine cakes
  • Banana bread (twice)
  • Banana cake with cream cheese frosting
  • Almond crescents with burnt butter icing
  • Crepes with peaches and blueberry sauce
  • Lemon almond torta

    I love spoiling my family. It's so much more fun to bake when you have a house full of people to feed.

    The Lemon Almond Torta is a recipe from The Traveler's Lunchbox. The lemon curd topping is quite good- next time i'd spread it more evenly though. My large dollops made the cake lumpy.
  • Saturday, August 16, 2008

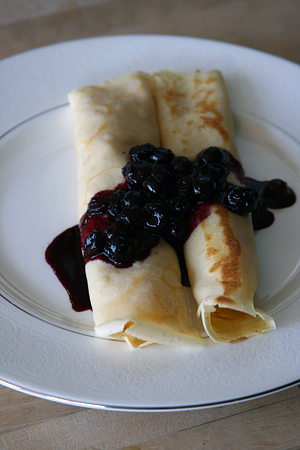
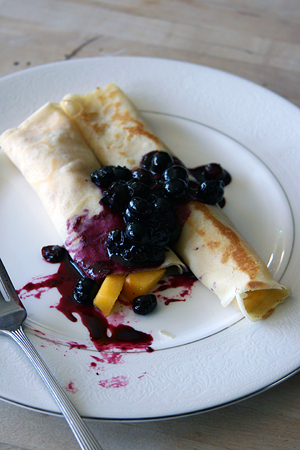
    Crepes with Peaches and Blueberry Sauce

    Crepes w/ Peaches and Blueberry Sauce

    Crepes w/ Peaches and Blueberry Sauce

    I like eating plain buckwheat crepes fresh from the pan. Sometimes I spread them with nutella or jam, or top them with a drizzle of maple syrup. I've tried several recipes for crepe batter, and while this one is my favorite, I prefer others for different occasions.

    These crepes are flexible and sturdy enough for fresh fruit or cheese fillings. They don't color much- probably because there's little butter in the batter and I don't add much to the pan. A second frying can add color and bring out the cinnamon flavor. If you omit the cinnamon, the crepes can be used with savory fillings.

    It took a few tries to figure out how I wanted to serve them. I tried spreading the crepes with cream cheese and greek yogurt. I tried sprinkling them with sugar and lemon juice before adding the peaches. I tried folding them into quarters and rolling them.

    I decided I liked rolled crepes with diced peaches and blueberry sauce best. The fruit (especially the peaches) didn't need any accompaniment. The peaches are some of the best i've ever had- they're large, juicy, and very smooth textured. They're extremely ripe and not at all mushy.

    It was a very successful breakfast!

    Crepes
    from Emily Luchetti's A Passion for Desserts

    2 large eggs
    1/4 cup water
    1 cup milk
    3/4 cup all purpose flour
    6 tbsp cornstarch
    1/4 tsp cinnamon
    1/4 tsp salt
    2 tbsp unsalted butter, melted
    1/2 tsp vanilla extract

    Whisk the eggs, water, and milk in a bowl until combined. Sift together and then whisk in the flour, cornstarch, cinnamon and salt. Whisk in the melted butter and vanilla. Chill in the refrigerator for 30 minutes.

    Heat a 6 inch crepe pan or nonstick skillet over medium heat (*I used an 8 inch). Lightly grease the bottom of the pan. Fill a 1/4 cup measure about 3/4 full with the crepe batter and pour it into the pan, rotating the pan so that a thin layer covers the entire bottom. Cook for about 1 1/2 minutes, until lightly browned. Using a knife, loosen a corner of the crepe from the pan. With your fingers, flip the crepe over and cook for another 15 seconds. Place the finished crepe on a plate.

    Continue cooking crepes, stacking them, slightly overlapping, on top of each other, until there are at least 12 crepes. It is not necessary to grease the pan after each crepe. Wrap the crepes in plastic wrap until ready to use. Store at room temperature for several hours, but refrigerate overnight. Crepes can be refrigerated for 2 days or frozen for 2 weeks. Defrost for 30 minutes before using.

    Blueberry Sauce
    1 1/2 pints fresh blueberries
    3 tbsp sugar
    1 1/2 tsp lemon juice

    Combine 1 pint of blueberries, sugar, and lemon juice in a medium saucepan. Cook over medium heat until the berries have mostly burst and cooked down, about 3 minutes. Stir in the remaining 1/2 pint blueberries, then serve.

    Thursday, August 14, 2008

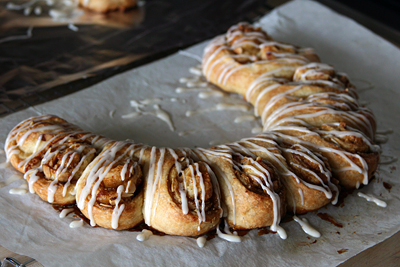
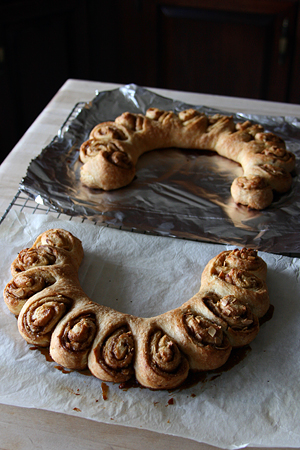
    Almond Crescents w/ Burnt Butter Icing

    Almond Crescents w/ Burnt Butter Icing

    Almond Crescents w/ Burnt Butter Icing

    Usually I hate excessive frostings and glazes. They're often overly-sweet and loaded with scary ingredients like shortening and corn syrup. Icing recipes can be bland; they never quite lose their water/milk/egg white/sugar taste, even with the addition of extracts or juices.

    This is probably the only time you'll hear me say this: I wish I put more icing on these. The browned-butter icing on these almond crescents looked and tasted fantastic. Mom and I repeatedly stuck our fingers in the container of unused icing for taste-tests. I'm looking forward to using it on other pastries.

    I was happy this recipe turned out so well- i've had less success with others from the same book. I had some difficulty rolling out the dough; I suggest chilling it thoroughly and liberally flouring the counter if it sticks.

    I seem to bake more every time I visit my family. I think I whipped out two different pastries within twenty-four hours of arriving. Now that I live alone with a tiny kitchen, counter space and enthusiastic tasters are a luxury. There will be plenty of baking before I head back to Pittsburgh.

    Almond Crescents with Burnt Butter Icing
    adapted from America's Best Lost Recipes
    makes 2 crescents, each serving 6

    Dough:
    2 1/4 cups all purpose flour
    1 package rapid-rise or instant yeast
    1 tsp salt
    8 tbsp (1 stick) unsalted butter, cut into 1/2 inch pieces and chilled
    1/4 cup warm evaporated milk (110 degrees)
    1/4 cup warm water (110 degrees)
    2 tbsp granulated sugar
    1 large egg

    Filling:
    1/2 cup packed light brown sugar
    1/2 cup sliced almonds, toasted
    3 tablespoons unsalted butter, melted

    Burnt Butter Icing:
    2 tablespoons unsalted butter
    1 cup confectioners' sugar
    2 tbsp milk

    1. For the dough: Pulse the flour, yeast, and salt in a food processor until blended. Add the butter and pulse until the flour is pale yellow and resembles coarse cornmeal. Turn the mixture into a large bowl.

    2. Beat the milk, water, sugar, and egg in a medium bowl. Using a rubber spatula, fold the milk mixture into the flour mixture, then press against the side of the bowl. (The dough will be sticky.) Divide the dough into two pieces, wrap tightly in plastic wrap, and refrigerate until well chilled, at least 2 hours and up to 24 hours.

    3. For the filling: Line two baking sheets with parchment paper. Stir the brown sugar and almonds together in a small bowl.

    4. Working with one piece of dough at a time on a lightly floured surface, roll the dough out to a 14x9 inch rectangle. Brush the dough with half the melted butter, then sprinkle with half the almond mixture, leaving a 1/4 inch border around the edges. Starting at the long end, roll the dough into an even cylinder and pinch the dough to seal. Form the cylinder into a crescent shape on a prepared baking sheet and, with a paring knife, make cuts around the outside of the ring, spacing them about 1 inch apart. Rotate each piece cut side up. Repeat with the remaining dough and filling. Cover with plastic wrap coated with cooking spray and let rise until the dough is almost doubled in size, about 1 hour.

    5. Adjust two oven racks to the upper-middle and lower-middle positions and heat the oven to 350 degrees. Bake until the crescents are golden brown, about 20 minutes, rotating and switching the sheets halfway through baking. Cool on a rack until just warm, at least 40 minutes.

    6. For the icing: While the crescents are cooling, heat the butter in a small saucepan over medium heat, swiring the pan constantly, until the butter is golden brown, 3 to 5 minutes. Transfer the butter to a bowl and whisk in the confectioners' sugar and milk. Drizzle the icing over the crescents. Serve.

    Monday, August 11, 2008

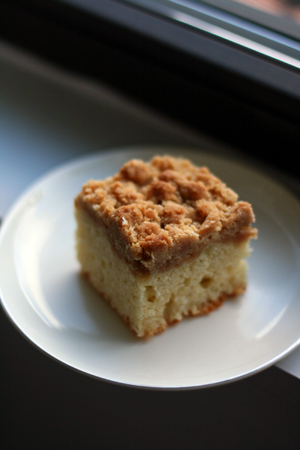
    Classic Crumb Cake

    Crumb Cake

    Moving has been a good occasion to turn back to one of my favorite cookbooks: The Weekend Baker. It has plenty of recipes for those of us with little space, time, or equipment. I'm definitely hurting in the equipment department: my apron has been doubling as a dish towel, oven mitt, and pot-holder. I'm missing other important things, like silverware.

    I decided to make this crumb cake to try out my tiny gas oven. It's easy to make, especially if you have a food scale. It was visually striking; the top browned well and the big crumbs held their shape. It looked like something you'd see at Starbucks.

    Considering how easy it was to make, this cake was pretty good. The recipe isn't my favorite, but it's good in a pinch- especially if you're feeding a crowd.

    Classic Crumb Cake
    adapted from Abigail Johnson Dodge's The Weekend Baker

    For the topping:
    16 tbsp (227g) unsalted butter, cut into 6 pieces
    1/2 cup (113g) granulated sugar
    3/4 cup (170g) firmly packed light brown sugar
    1 1/2 tsp ground cinnamon
    1/4 tsp ground nutmeg
    pinch table salt
    2 2/3 cups (340g) all purpose flour

    For the cake:
    3 cups (383g) all purpose flour
    1 1/4 cups (284g) granulated sugar
    1 1/2 tsp baking powder
    1/2 tsp table salt
    2 large eggs
    1 cup whole milk
    12 tbsp (170g) unsalted butter, melted and cooled slightly
    2 tsp pure vanilla extract

    1. To make the topping: in a large saucepan, melt the butter over medium heat. Slide the pan from the heat and add the granulated sugar, brown sugar, cinnamon, nutmeg, and salt. Stir with a rubber spatula, pressing when necessary, until there are no lumps of sugar. Add the flour and mix until well blended and pasty. Set aside.

    2. To make the cake: position an oven rack on the middle rung. Heat the oven to 350F/180C degrees. Lightly grease the bottom and sides of a 9x13in baking pan or dish.

    3. In a large bowl, combine the flour, granulated sugar, baking powder, and salt. Whisk until well blended. In a medium bowl, combine the eggs, milk, melted butter, and vanilla. Whisk until well blended.

    4. Pour the wet ingredients over the dry ingredients and gently stir with a rubber spatula just until blended. Scrape the batter into the prepared pan and spread evenly. Break up the topping mixture with your fingers into medium sized pieces and sprinkle evenly over the cake batter to form a generous layer.

    5. Bake until the cake springs back lightly when pressed in the center and a toothpick inserted in the center comes out clean, about 40 minutes. Transfer the pan to a rack to cool. Serve warm or at room temperature. Before serving, sift some confectioners' sugar over the top, if desired.

    Friday, August 8, 2008

    Moving and a Wedding.

    Wedding Brunch

    Wedding Brunch

    I'm playing cello for a friend's wedding this weekend. While the wedding festivities (and the final stages of moving/unpacking) leave little time for baking, they've created plenty of opportunities for eating good food.

    I didn't take any pictures of said food; I was too busy enjoying myself. We brunched on crab canapes, jerk chicken, ceviche, stone fruit salad, caprese salad, fried zucchini blossoms, chicken sandwiches, fantastic ravioli, and champagne at The Cafe at the Frick.

    I thought Abay, an Ethiopian restaurant, was a risky choice for the rehearsal dinner, but it was perfect. The staff was obviously excited to host us, and they did a fantastic job picking an assortment of dishes and dealing with guests constantly changing seats. No one seemed to mind the lack of utensils; everyone shared and interacted. The Tikil Gomen and Misir Wat were particularly good.

    Both restaurants provided some of the best service i've experienced in a while. They handled large parties, multiple dietary restrictions, and unanticipated delays with ease. Moreover, they were courteous, enthusiastic, and helpful.

    This week i'm headed home to Los Angeles again. I've already had several baking requests, so more recipes are forthcoming!