Monday, October 5, 2009

The End.

Blueberry Pie

I think this was the last pie I made in Pittsburgh. It was the second to last pie I made in Pennsylvania, before I moved to Alabama for a new job. The unexpected opportunity has caused drastic changes in my life. If you told me three months ago that I'd be leaving Pittsburgh, I would have said you were crazy.

So instead of spending my weekends in the Strip, I am spending them visiting places like this:

Continental Bakery

Continental Bakery

Continental Bakery

Pepper Place Farmers Market

Pepper Place Farmers Market

Given that this blog was meant to be Pittsburgh centric, I think it's time to conclude it. I don't think blogs should go on forever- much has changed since I started this one, and i'm ready for new projects. Should I start a new baking or food related project, I will let you know. Pittsburgh has been good to me, and I will miss it.

Sunday, August 16, 2009

CSA Box Equals Less Baking

White Peach

There were amazing peaches in my Penn's Corner Farm Alliance CSA box this week. I have included an extra-large photo to convey my extra-large love for them.

Friday, July 31, 2009

Banana Cream Pie

Banana Cream Pie

This pie was fantastic. I ate the first slice right after I assembled the pie. I ate the last slice on Friday at 8:30am after discovering it in the work fridge.

I'm picky about cream and custard pies. In my opinion, they have to taste good, look good, and slice well. Most recipes achieve sliceability with tapioca, cornstarch, or gelatin which, when abused, can ruin the pie's texture and taste.

The custard was so thick I worried that i'd inadvertently doubled the cornstarch. I thought it would taste bland and doughy, but this wasn't the case- brown sugar and cinnamon improved the flavor, and the texture was a nice contrast to the bananas and whipped cream/sour cream topping.

I'm definitely making it again. You can find the recipe here.

Monday, July 27, 2009

Strawberry Rhubarb Pie

Strawberry Rhubarb Pie

Another pie from Ken Haedrich's book. I thought the filling was a little runny, but that could be because I put too much fruit in. The cornmeal crumble topping, however, was fantastic. I'd put that on top of any pie.

I also made the sweet cherry pie with coconut almond crunch topping. I used a combination of bing cherries and ranier cherries. It was quite good, and I have plans to make it again soon.

I have few complaints about this book. It's been very reliable!

Sunday, July 26, 2009

Lemon Chess Pie with Sour Cherries

Lemon Chess Pie with Sour Cherries

Since I bake so often, I usually have treats to give away. I made seven pies last week, and while some of them were for specific people, others were up for grabs. Deciding who to give them to was an interesting process.

I have an unspoken bartering system with people who loan me ingredients. An egg will get them a slice. Two pounds of peaches might get them half the pie, possibly the whole pie if i'm feeling really friendly. It usually depends on how badly I need the ingredient.

I also consider things like, "when was the last time I took a pie to work?" or "when did I last give a pie to [some person]?" Given too frequently, treats cease to be special. If you take a pie to work every day, people will start grumbling on the days you don't bring a pie. I like having a rotation of multiple workplaces and people.

If i'm really undecided, i'll mention my indecision on Facebook or in the company of friends. Whoever expresses the most interest in the pie usually gets the pie. Sometimes my morning commute factors in; if taking two pies to work requires getting them on the 71A during the morning rush, i'll probably pass. Many a pie has gone to a friend who lives nearby, or a friend with a car.

I sent half of this lemon pie to work with a friend, where it was promptly devoured. People came looking for it long after it was gone. I love hearing what happens to baked goods after I give them away. Sometimes I enjoy the stories about the food more than the food itself.

This is a versatile recipe. The original recipe in The Foster's Market Cookbook includes variations for Eggnog Pie and Chocolate Chess Pie. You can also substitute other fresh or dried fruits. I would suggest adding more than 1/2 cup- in this photo, i've used about 3/4 cup of cherries, and I think more would have been better.

Lemon Chess Pie with Sour Cherries
adapted from Sara Foster's The Foster's Market Cookbook

1 1/2 cups sugar
1 tbsp yellow cornmeal
1 tbsp all purpose flour
3 large eggs, lightly beaten
Grated zest and juice of 2 lemons
4 tbsp unsalted butter, melted and cooled
1/2 cup heavy cream
1 tsp pure vanilla extract
1/2 cup fresh sour cherries, pitted
OR 1/2 cup dried cherries, soaked in hot water for 1 hour and drained
1 unbaked 9-inch pie crust

1. Preheat the oven to 350F.

2. Combine the sugar, cornmeal, and flour in a bowl and stir until blended.

3. Add the eggs to the sugar mixture and whisk until smooth and well blended.

4. Add the lemon zest, lemon juice, butter, cream, and vanilla, and mix until well blended.

5. Place the cherries in the bottom of the chilled, unbaked pie crust.

6. Pour the filling on tom of the cherries. Bake 50-55 minutes, or until the top is golden brown and a toothpick inserted in the center comes out clean.

7.Cool the pie completely on a baking rack before slicing.

Tuesday, July 21, 2009

Sour Cherry Pie

Sour Cherry Pie

The produce store on Murray Avenue had sour cherries for $5 per quart. I bought two and used most of them to make this sour cherry pie from Ken Haedrich's book.

It's the first time i've seen sour cherries in Pittsburgh. I hear you have to order them; I know April from Cookworm ordered a flat from Patty's in Aspinwall. If anyone knows other places to source them, let me know!

I thought making a lattice would be complicated, but it wasn't. The book's clear directions and illustrations made the process simple and fun. I've tried four recipes from this book this week and i've liked them all. Right now I have a strawberry rhubarb pie in the oven- i'll let you know how it turns out.

Lattice-Top Deep-Dish Sour Cherry Pie
adapted from Ken Haedrich's Pie

1 recipe Flaky Pie Pastry

Filling:
6 cups fresh sour cherries, stemmed and pitted
1 1/4 cups + 3 tbsp sugar
1/4 cup cornstarch
2 tsp fresh lemon juice
Grated zest of 1 lemon
2 tbsp cold unsalted butter, cut into small pieces

Glaze:
Milk or light cream
Sugar

1. Roll the disk of pastry into a 13.5 inch circle between two sheets of wax paper. Peel off the top sheet of paper. Invert the pastry over a 9.5 inch deep-dish pie pan, center, and peel off the paper. Gently tuck the pastry into the pan without stretching it. Sculpt the overhang into an upstanding ridge. Refrigerate for 15 minutes.

2. Place the cherries in a large bowl. Mix sugar and cornstarch together in a small bowl, then stir the mixture into the fruit. Add the lemon juice and zest. Set aside for 10 minutes. Preheat the oven to 400F.

3. On another sheet of wax paper, roll the remaining pastry into a 12x10 inch rectangle. Cut the pastry into 8 lengthwise strips, each 1.25 inches wide. You should have at least 8. Set aside.

4. Turn the filling into the chilled pie shell. Smooth the top of the filling and dot it with the butter. Lay 5 pastry strips vertically across the pie, evenly spaced. Fold back strips 2 and 4 and lay another strip directly across the center of the pie. Unfold the folded strips, then fold back strips 1, 3, and 5. Lay another perpendicular strip across the pie. Unfold the folded strips, then fold up strips 1, 3, and 5 on the other side of the pie. Place another perpendicular strip across the pie, then unfold strips 1, 3, and 5. Trim the strips, then pinch the ends of the strips into the edge of the pastry. Lightly brush the strips with milk and sprinkle the top of the pie with sugar.

5. Bake for 30 minutes. Reduce the oven temperature to 375F and rotate the pie 180 degrees. Just in case, slide a large baking sheet onto the rack below to catch any spills. Bake until the top is golden brown and any visible juices bubble thickly, 35-40 minutes.

6. Transfer the pie to a wire rack and let cool for at least 2 hours before serving.

Monday, July 20, 2009

Photo Update

I've repaired all of the dead photo links, with exception of a few from 07/2007. I've also uploaded a ton of archived photos to flickr. Enjoy, and thanks for your patience with the fix!

Sunday, July 19, 2009

Friday Pie-Day

Peach Cherry Pie

Peach Cherry Pie

Berry Pie

My friend Emily has this thing called "Friday Pie-Day." It involves making pies on Thursday night and delivering them to work the next morning. She wanted to improve her pie technique (which was excellent to begin with), so we met up in Squirrel Hill and made four pies: two Peach and Sour Cherry with Oatmeal Crumb Topping, and two Mixed Berry Crumb.

We baked for a good five hours, stopping to eat dinner and run to the store for extra flour and cornstarch. While the pies were baking, we watched the latest episode of So You Think You Can Dance. It was a nice change of pace; it's been a while since I baked with a friend, in someone else's kitchen.

Pies aren't an exact science. Eventually, you learn to make them intuitively- adjusting quantities of sugar, water, and thickener as needed, and changing the fillings using what you like or what's on sale.

Learning to make pie has been a process of trial and error. I made the dough by hand, with a stand mixer, and with a food processor. I tried adding vodka and vinegar to my crusts to make them more tender. I tried rolling my crusts directly on the counter, between sheets of plastic wrap, and inside of gallon-sized ziplock bags. I've been making pies for years, and I still think there's more to learn.

If you make enough pies, your personal preferences will take over. For a long time, the only recipe I made was printed on cardboard Crisco wrappers. I made all of my crusts with butter-flavored shortening, because that was what my mother used. Now, I have a preferred arsenal of crust recipes, and several pies that I make repeatedly. I rarely follow recipes exactly.

In the case of last Friday's pies, I reduced the amount of sugar in both recipes. I substituted sour cherries for bing cherries and raspberries for a mixture of rasperries, blackberries, blueberries, and cherries. Both recipes came from Ken Haedrich's Pie. It's a great book, though some of the 300+ recipes are better than others. I'll leave you with the recipe for the Peach and Cherry pie.

Flaky Pie Pastry (for a double crust)
adapted from Ken Haedrich's Pie

3 cups all-purpose flour
1 tbsp sugar
1 tsp salt
1/2 cup (1 stick) cold unsalted butter, cut into 1/4 inch pieces
1/2 cup cold vegetable shortening, cut into pieces
1/2 cup cold water

1. Put the flour, sugar, and salt in a food processor. Pulse several times to mix. Scatter the butter over the dry ingredients and pulse the machine 5 or 6 times to cut it in. Fluff the mixture with a fork, lifting it up from the bottom of the bowl. Scatter the shortening over the flour and pulse 5 or 6 times. Fluff the mixture again. Drizzle half of the water over the flour mixture and pulse 5 or 6 times more, until the dough starts to form clumps. Overall, it will look like coarse crumbs. Dump the contents of the processor bowl into a large bowl. Test the pastry by squeezing some of it between your fingers. If it seems a little dry and not quite packable, drizzle a tsp or so of cold water over the pastry and work it in with your fingertips.

2. Using your hands, pack the pastry into 2 balls, making one slightly larger than the other; this larger will be your bottom crust. Knead each ball once or twice, then flatten into 3/4 inch disks on a floured work surface. Wrap the discs in plastic and refrigerate for at least an hour or overnight before rolling.

Peach and Sour Cherry Pie

Pie dough for a single crust

Filling:
4 cups peeled, pitted, and sliced ripe peaches
2 cups sour cherries, stemmed and pitted
2/3 cup granulated sugar
1 tbsp fresh lemon juice
1/4 cup firmly packed light brown sugar
3 tbsp corn starch
Big pinch of ground nutmeg

Oatmeal Crumb Topping:
1 cup all purpose flour
1/2 cup rolled oats (old-fashioned or quick cooking)
2/3 cup firmly packed light brown sugar
1/2 tsp ground cinnamon
1/4 tsp salt
1/2 cup (1 stick) cold unsalted butter, cut into 1/4 inch pieces

1. If you haven't already, prepare the pie dough and refrigerate until firm enough to roll, about 1 hour.

2. On a sheet of lightly floured waxed paper, roll the pastry into a 13-inch circle with a floured rolling pin. Invert the pastry over a 9.5 inch deep dish pie pan, center, and peel off the paper. Gently tuck the pastry into the pan, without stretching it, and sculpt the overhang into an upstanding ridge. Place in the freezer for 15 minutes.

3. Combine the peaches, cherries, granulated sugar, and lemon juice in a large bowl. Mix well, then set aside for 10 minutes to juice. Preheat the oven to 400F.

4. In a small bowl, combine the brown sugar and cornstarch. Stir the mixture into the fruit along with the nutmeg. Turn the filling into the chilled pie shell and smooth the top of the fruit with your hands. Place the pie on the center oven rack and bake for 30 minutes.

5. Meanwhile, make the crumb topping. Put the flour, oats, brown sugar, cinnamon, and salt in a food processor and pulse several times to mix. Scatter the butter over the top and pulse until the mixture resembles fine crumbs. Empty the crumbs into a large bowl and rub them between your fingers until you have large, buttery crumbs. Refrigerate until ready to use.

6. Remove the pie from the oven and reduce the temperature to 375F. Carefully dump the crumbs in the center of the pie, spreading them over the surface with your hands. Tamp them down lightly. Return the pie to the oven, placing it so that the part that faced the back of the oven now faces forward. Just in case, slide a large aluminum foil-lined baking sheet onto the rack below to catch any spills. Continue to bake until the top is dark golden brown and the juices bubble thickly at the edge, 35-40 minutes. If the topping starts to get too dark, loosely cover the pie with tented aluminum foil during the last 15 minutes of baking.

7. Transfer the pie to a wire rack and let cool for at least 2 hours before serving.

Monday, July 6, 2009

On Yogurt

Emmi Yogurt

An 2004 industry report on the US yogurt market estimated that market value in 2008 would be $5,023 million. Apparently, our country eats a lot of yogurt.

The market is dominated by General Mills and Groupe Danone (Dannon is their US subsidiary), whose yogurts I tend to avoid. The grocery stores I visit have a wide selection, and i've become particular about my choices.

I don't like very sweet yogurt, or yogurt that masquerades as dessert. I don't want to see the words pie or mousse anywhere on the container. It shouldn't have extra digestive aids, vitamin supplements, cooked grains, or anything that needs to be mixed in. Even the president of Fage said mixing ruins the yogurt.

Packaging and branding can be particularly misleading. There are differences between "all-natural" and "organic" yogurts (the latter cannot contain bovine growth hormones). Many premium brands are subsidiaries of larger companies. Rachel's and Horizon Organics are both owned by Dean Foods. Stonyfield Farms and Oikos are both owned by Danone. Chobani is owned by Agro-Farma Inc, who used to manufacture Oikos for Stonyfield.

That said, I choose my yogurt for taste and texture. I tend to stick to low-fat yogurt, as full-fat is a little rich for everyday eating, and non-fat just doesn't taste right. Here are some of my favorites, in no particular order:

  • Plain Yogurts: Seven Stars Farm low-fat, Fage 2% and 0%, Trader Joe's organic low-fat and low-fat kefir, Whole Foods organic low-fat, Wallaby low-fat, Emmi

  • Flavored Yogurts: Wallaby peach, strawberry, blueberry, raspberry, banana-vanilla, Emmi apricot, blueberry, raspberry, strawberry, Trader Joe's green tea, vanana, Chobani vanilla bean, honey

    I haven't tried making my own yogurt yet, but one of my neighbors recommends Harold Mcgee's recipe. No yogurt maker required- all you need is a heated bowl or thermos.

    Further reading:

    Anstine, Jeffrey. "Organic and All Natural: Do Consumers Know the Difference?." Journal of Applied Economics & Policy 26, no. 1 (May 2007): 15-28.

    "Yogurt in the United States." Yogurt Industry Profile: United States (February 2004): 1.

    Berry, Donna. "It's a Jungle Out There." Dairy Foods 110, no. 4 (April 2009): 30-38.
  • Devil's Food Cake with Espresso Frosting

    Devil's Food Cake

    Devil's Food Cake

    It takes a certain level of commitment to make a layer cake. You need time, space, equipment, and ridiculous amounts of butter. You also need patience and a steady hand, if you want a smooth finish and even piping. Most importantly, you need practice.

    It is expensive to practice making layer cakes, so I don't make them very often. Still, I like to have a few in my repertoire for birthdays and celebratory occasions. A homemade cake can be much cheaper (and in my opinion, better) than a store-bought cake, and making one can be a fun way to spend an afternoon.

    If you're worried about how the cake will look, you can always make a batch of frosting (or mashed potatoes) and practice piping on a cake pan. For this cake, you'll need about 5 cups of frosting. I used an easy recipe for espresso frosting- if you prefer vanilla, you can omit the espresso powder. You can also substitute your favorite buttercream.

    The layer cake recipes in The America's Test Kitchen Family Baking Book are very forgiving, and I recommend them if you like step-by-step photographs and tips. I've also had success with cakes from Tish Boyle's The Cake Book and Flo Braker's The Simple Art of Perfect Baking.

    Devil's Food Cake with Espresso Frosting
    adapted from The America's Test Kitchen Family Baking Book
    For the cake:
    1/2 cup dutch-processed cocoa powder
    1 1/2 cups all-purpose flour
    1 tsp baking soda
    1/2 tsp baking powder
    1/4 tsp salt
    1 1/4 cups boiling water
    4oz unsweetened chocolate, chopped
    1 tsp instant espresso powder
    10 tbsp unsalted butter, softened
    1 1/2 cups packed light brown sugar
    3 large eggs, at room temperature
    1/2 cup sour cream, at room temperature
    1 tsp vanilla extract

    1. Adjust the oven racks to the upper-middle and lower-middle positions and preheat to 350F. Grease 3 8-inch round cake pans, then dust with cocoa powder and line the bottoms with parchment paper. Whisk the flour, baking soda, baking powder, and salt together in a large bowl. In a medium bowl, whisk the boiling water, chocolate, 1/2 cup cocoa, and instant espresso together until smooth.

    2. In a large bowl, beat the butter and sugar with an electric mixer on medium speed until light and fluffy, 3-6 minutes. Beat in the eggs, one at a time, until combined, about 30 seconds. Add the sour cream and vanilla and beat until incorporated.

    3. With the mixer on low, beat in 1/3 of the dry ingredients followed by 1/2 of the chocolate mixture. Repeat with half of the remaining flour and the remaining chocolate. Beat in the remaining flour until just incorporated.

    4. Give the batter a final stir with a rubber spatula to make sure it is thoroughly combined. Scrape the batter into the prepared pans, smooth the tops, and gently tap the pans on the counter to settle the batter. Bake until a toothpick inserted in the center comes out with a few crumbs attached, 15-20 minutes, rotating the pans halfway through baking.

    5. Let the cakes cool in the pans for 10 minutes. Run a knife around the edge of the cakes, then flip them out onto wire racks. Peel off the parchment and flip cakes right side up. Let cool completely before frosting, about 2 hours.

    For the frosting:
    4 sticks unsalted butter, cut into chunks and softened
    1/4 cup heavy cream
    1 tbsp vanilla extract
    1/4 tsp table salt
    3 tsbp instant espresso powder
    4 cups confectioners' sugar


    1. Beat the butter, cream, vanilla, salt, and espresso powder together in a large bowl with an electric mixer on medium-high speed until smooth, 1-2 minutes.

    2. Reduce the speed to medium-low, slowly add the confectioners' sugar, and beat until smooth, 4-6 minutes. Increase the mixer speed to medium high and beat until the frosting is light and fluffy, 5-10 minutes.

    Sunday, June 28, 2009

    Lemon-Blueberry Cake

    Lemon Blueberry Cake

    Blueberries are on sale everywhere, it seems.

    This cake was a variation on the Perfect Party Cake from Dorie Greenspan's Baking From my Home to Yours. I added blueberries and a tart lemon curd from The America's Test Kitchen Family Baking Book.

    Summer isn't an ideal season for transporting layer cakes. It was about 90 degrees in the car and the piping details started to melt. Luckily, the cake arrived at its final destination in one piece.

    My favorite part of this recipe was the lemon curd. I've been pleased with the America's Test Kitchen Family Baking Book. It has a good balance of sweet and savory recipes for different skill-levels, and I think it would make an excellent gift for the novice baker.

    Tuesday, June 2, 2009

    Desserts I Dislike: Clafoutis

    Cherry Clafoutis

    The beautifully photographed clafoutis in Sarah Raven’s In Season convinced me to try the recipe. It was a bad idea. Clafoutis is a dessert that I just don’t like, even when expertly executed.

    I’m convinced that Clafoutis (clah-foo-tee) is a dessert whose prevalence is tied to excess or abundance. Unless I happen to have pounds of cherries lying around, I’d rather make any other fruit dessert: a crumble, crisp, cobbler, pie, pandowdy, shortcake, etc. When Pittsburgh cherries cost anywhere from 3.99-7.99 per pound, it seems tragic to waste them on a glorified pancake.

    The traditional cherry clafoutis is made with unpitted cherries. I know few people who want to work around pits during dessert. While most recipes (simple mixes of flour, eggs, sugar, and milk) seem designed to highlight the fruit, the low fat content makes them bland and rubbery. I have yet to make a clafoutis recipe that lived up to its promise of “custard-like” texture. If you want custard, why not make a flan?

    If you still want to make it, know that Clafoutis is best served shortly after baking, while it’s puffed and warm. I think it’s most attractive when served in individual portions or a cast-iron skillet, preferably with some ice cream or powdered sugar on top.

    Does anyone else dislike clafoutis?

    Friday, May 29, 2009

    NYT Chocolate Chip Cookies

    NYT Chocolate Chip Cookies

    NYT Chocolate Chip Cookies

    My boss bit into a cookie, looked at it thoughtfully and said, "this might be the best cookie i've ever had." It was good: crunchy at the edges and chewy in the middle, with strong chocolate and butterscotch flavors and a hint of sea-salt.

    Are they worth the 36 hours of resting time? I'd say yes, provided that you follow the directions exactly. The ingredients, size, and technique make the cookie.

    All-purpose flour will not yield the same results as the combination of cake and bread flours. Since chocolate is the featured flavor, it's important to use good-quality chips/discs/feves. I prefer using thin discs of couverture because they melt nicely and stack well within the cookie. Very large pieces won't distribute evenly. Small pieces aren't as prominent or indulgent (this vs this).

    If you like small cookies, I wouldn't recommend using this recipe. You'll lose the crunchy/chewy contrast, and the cookies will be done before they're really golden. The original recipe calls for 99g portions, which were best. Ultimately, I settled for 80g portions because they were a little more manageable for one person.

    I recommend using a kitchen scale to measure the ingredients and portions. Your cookies will be more consistent, and they'll look uniform and bake evenly. Good cookie sheets and an evenly-heating oven don't hurt either.

    This recipe is fairly popular, as is Cook's Illustrated's recipe for "Perfect Chocolate Chip Cookies" and Alton Brown's "The Chewy." Personally, i'm still a fan of David Lebovitz's recipe. I'd make any of those recipes, depending on the occasion and audience.

    You can find the New York Times recipe here.

    Thursday, May 14, 2009

    Experimental Meringue Roulade

    Meringue Roulade

    Meringue is a tricky thing. It gets sticky in humid weather. It weeps when over or under beaten, or when the sugar doesn't dissolve completely. It can be cooked or uncooked, and range in textures from light and fluffy to dense and stiff. And, when prepared badly with poor eggs, it can taste horrible.

    Harold Mcgee's entry on egg foams in On Food and Cooking will tell you everything you need to know about when and how to add sugar to egg whites. A basic knowledge of meringue-science can help you know what to expect from a recipe (and know when it's written badly).

    I prefer the smooth, marshmallowy texture of cooked meringues. I love the meringue cookies from Tartine- they're crisp on the outside, but chewy in the middle. I love the mountain of meringue on the Lemon Meringue Pie from the LA Times. I can live without the wet, spongy, eggy meringue that tops so many pies.

    I also like meringues with texture and flavor contrasts, like vacherins or pavlovas, or meringue based cakes filled with cream and fruit. Jin Patisserie makes a great one filled with mango and strawberries.

    I'd hoped this Meringue Roulade from Sarah Raven's In Season would be similar. The original recipe is baked in a half sheet pan and filled and topped with raspberries. I decided to test a half batch in a 9x13 pan, and i'm glad I did because it was enough for 6-8 servings.

    The unsweetened whipped cream filling is a nice contrast to the sugary meringue. Without the fruit, however, the finished cake is rather plain. This would be a great recipe to showcase ripe summer fruits.

    As much as I liked the concept of this dessert, I'm not I preferred the meringue to a light sponge cake. I also added half a sheet of gelatin to the whipped cream filling to make it slice better and maintain its texture. It worked well, and I recommend adding 1 sheet to the full recipe.

    Meringue Roulade with Raspberries
    Adapted from Sarah Raven’s In Season

    Sunflower oil, for the pan
    6 egg whites
    1 ½ cups superfine sugar
    3 tbsp sliced almonds
    1 ½ cups heavy cream
    2 cups fresh raspberries (or other berries)

    Preheat the oven to 400F. Line a swiss roll baking pan (I used a 13x18 sheet), with parchment paper and brush with oil.

    Whisk the egg whites in a clean, dry bowl, until very stiff. Gradually add the sugar, 1 tbsp at a time, whisking between each spoonful. Once the sugar has been added, continue whisking until the mixture is thick and glossy.

    Spread the meringue mixture into the prepared pan and scatter with the sliced almonds. Place the pan near the top of the preheated oven and bake for 8 minutes. Lower the oven temperature to 325F and continue baking until golden brown. Don’t cook too long, or the meringue will be difficult to roll.

    Remove from the oven and turn the cake, almond side down, onto a sheet of wax paper. Peel off the paper and allow to cool for 10-15 minutes.

    Whisk the cream until it stands in stiff peaks (if you’re adding gelatin, add it towards the end of whipping) and gently fold in half of the raspberries. Spread the cream and berries over the meringue. Letting the wax paper help you, roll the long side fairly tightly until it is all rolled up. Wrap in parchment paper and chill before serving. Scatter the rest of the berries on top to serve.

    Sunday, April 26, 2009

    Roasted Red Pepper Soup

    Roasted Red Pepper Soup

    The first time I visited Kitchen Arts and Letters, I had no idea what I wanted. There were professional cookbooks, vintage cookbooks, international cookbooks, baking books, preserving books- essentially any title a home cook would want.

    Feeling lost, I asked an employee to recommend a simple-but-really-good cookbook for everyday use. He handed me Cucina Fresca by Viana La Place and Evan Kleiman and started raving about a marinated wild rice salad. I flipped through the first few chapters and decided it was perfect.

    Since then, i've seen the book repeatedly mentioned in print and on the web. It's quickly become one of my favorites. Most of the recipes feature bold, fresh flavors from ingredients like herbs, meats, oils/extracts, and citrus, and techniques like marinating and grilling. I make the herb-stuffed eggplant and this roasted red pepper soup on a fairly regular basis.

    Since this soup is so simple, the quality of ingredients used will significantly impact the taste. Homemade chicken stock would taste best, but i've had good results using Swanson and Kitchen Basics brands. I use canned San Marzano tomatoes. While the original recipe says to seed whole canned tomatoes, I think diced tomatoes would taste just as good (and save some time).

    I like eating this soup warm, garnished with some grated parmesan and slivered basil.

    Roasted Red Pepper Soup
    adapted from La Place and Kleiman's Cucina Fresca

    4 meaty red bell peppers, roasted, peeled, and seeded
    2 cups imported italian canned tomatoes, seeded and drained
    3 tbsp olive oil
    2 cloves garlic, peeled and finely minced
    3 cups defatted chicken stck
    salt and freshly ground black pepper
    basil leaves for garnish
    paper thin lemon slices, for garnish

    Puree three of the peppers and all of the tomatoes in a food processor or blender until finely textured but not completely smooth. Cut the remaining pepper into thin julienne strips and set aside.

    Gently heat the olive oil and garlic. When the garlic releases its fragrance, after about 2 minutes, stir in the pureed pepper and tomato mixture. Add the chicken stock, bring to a boil and simmer for 15 minutes. Season with salt and pepper to taste.

    Let the soup cool, then cover and chill in the refrigerator. To serve, ladle the soup into bowls. Tear basil leaves into pieces and scatter over soup. Float a lemon slice in each bowl.

    Wednesday, April 8, 2009

    Notes from my Kitchen.

    Key Lime Tart

    I re-made this recipe for a dinner party in March. It's one of my favorite citrus desserts, and one of many recipes I find comforting. I love its tart, bright flavor and smooth consistency.

    Savory Bread Pudding

    I also remade this savory breakfast bread pudding, with no spinach and extra onions. I made a half-batch, and the reheated leftovers made good breakfasts.

    Monday, April 6, 2009

    Regarding the Photos.

    All entries from Feb 2007 to Nov 16, 2007 have lost their photographs.

    This is because my old image host (ie college) deleted my account. I'll be working on moving the photos to flickr in the near future.

    Rhubarb Upside-Down Cake

    Rhubarb Upside-down Cake

    Rhubarb Upside-down Cake

    I've probably said this before, but I am a sucker for pretty cookbooks. I like clear instructions, glossy photographs, and appetizing recipes with minimal anecdotal padding.

    There is, however, a point when cookbooks make me suspicious. I question how good the recipes are when every other page is a closeup of carrots covered in dirt or bodiless hands shelling peas, picking berries, or slicing potatoes. Many new cookbooks tout the author's credentials so frequently that I feel wary when the only author information is in a teeny paragraph on the last page.

    The lure of visual appeal and celebrity makes it easy to overlook excellent titles. I have to remind myself that the modern cookbook is a luxury. We're lucky to have step-by-step instructions, let alone any photographs. I've read recipes from the 1800s that assume you know how to skin and bone a lamb. In many cases, I think the only way to know a cookbook is to start cooking from it. Repeatedly.

    I almost returned Sarah Raven's In Season to the library. The recipes looked too simple. They're column-length, like the recipes in Breakfast, Lunch, Tea: The Many Little Meals of Rose Bakery (I wonder if both books were designed by the same person).

    I tried the "Rhubarb upside-down cake" on a whim, and was pleasantly surprised when the cake turned out perfectly. If other recipes turn out this well, I might buy the book. The content is well balanced and conveniently organized by season and ingredient.

    I halved this recipe and baked it in a 6-inch souffle dish. Instead of halving 3 eggs, I used one extremely large fresh egg. I prefer to bake upsidedown cakes in pans lined with parchment, as the fruit gets less mangled on unmolding. I highly recommend this cake. The rhubarb came out perfectly cooked and just sweet enough to mellow the tartness. The cake batter is dense- similar to a cobbler topping.

    Rhubarb Upside-Down Cake
    adapted from Sarah Raven's In Season

    1 pound rhubarb
    1/2 cup soft brown sugar
    1/4 cup (1/2 stick) butter
    grated zest of 1 orange
    1/2 cup (1 stick) butter
    3/4 cup granulated sugar
    3 eggs
    1 1/4 cups all purpose flour
    1 tsp baking powder
    1/2 tsp salt
    1 tbsp milk
    sliced almonds, toasted
    confectioners' sugar, for dusting
    Creme fraiche and demerara or raw sugar, to serve

    Preheat the oven to 350F.

    Cut the rhubarb at an angle into 2-inch slices. Melt the brown sugar and butter in a 10-inch cast iron skillet. Add the orange zest and remove from the heat. Cover the base of the pan with the rhubarb. (Alternately, you can melt the butter/sugar in a pot and pour the mixture into a parchment lined cake pan).

    Cream the butter and sugar. Add the eggs, one at a time, and mix until combined. Sift the flour, baking powder, and salt, and fold into the mixture. Add the milk and mix well. Spread the batter over the rhubarb with a spatula.

    Bake for 30 minutes, until the cake is firm to the touch. Leave to cool for about 20 minutes, then invert onto a serving plate.

    Sprinkle with the toasted almonds and dust with confectioners' sugar. Serve warm with creme fraiche or whipped cream. To reheat, put on a large baking sheet, sprinkle with the demerara sugar, and bake for 15-20 minutes at 350F.

    Sunday, March 29, 2009

    Gingerbread Stars with Royal Icing

    Gingerbread Stars

    I tried Donna Hay's recipe for gingerbread from Modern Classics Book 2. The cookies held their shape well and looked elegant topped with royal icing. I didn't care for the texture, but I liked the recipe enough to consider trying more iced cookies.

    This recipe uses Golden Syrup instead of molasses, and the ground ginger flavor is strong and spicy. Here's the cookie recipe, if you care to try it.

    I'd suggest finding a more reliable recipe for royal icing- the one in Modern Classics calls for way too much egg white.

    Gingerbread Cookies
    adapted from Donna Hay's Modern Classics, Book 2
    125g butter, softened
    1/2 cup brown sugar
    1/2 cup golden syrup
    2 1/2 cups all purpose flour, sifted
    2 tsp ground ginger
    1 tsp baking soda

    Preheat the oven to 375F. Place the butter and sugar in a bowl and beat with electric beaters until light and creamy. Add the golden syrup, flour, ginger, and baking soda and mix to form a smooth dough. Refrigerate for 10 minutes or until the dough is firm. Roll out the dough between sheets of wax paper to 1/4 inch thick. Place on baking sheets lined with parchment paper. Bake for 8-10 minutes or until golden brown. Do not overbake!

    Monday, March 23, 2009

    Apple Rhubarb Pandowdy

    Apple-Rhubarb Pandowdy

    Apple-Rhubarb Pandowdy

    Spring is here, and i'm feeling a renewed energy for cooking and baking. I've been revisiting old cookbooks, circling recipes I never thought i'd want to make. I've been checking out library cookbooks 30 pounds at a time, exploring topics like seasonal cooking, farmers markets, and kitchen gardens.

    Rhubarb will be in season soon, and I'm trying to expand my repertoire ahead of time. I never had rhubarb until two years ago, so I find it particularly exciting. I love the tartness it adds, especially when combined with strawberries, apples, and other sweet fruits.

    People have polarized opinions on rhubarb, which I don't find surprising. I really dislike rhubarb in a few cases:

    1. The rhubarb flavor gets completely masked by sugar or orange juice/zest
    2. The rhubarb is overcooked, stringy, and falling apart
    3. The overall texture of the dessert is mushy and liquidy

    Many fruit pies, cobblers, and crisps are plagued by similar problems. That said, a seasonal, ripe fruit dessert is heaven, and I think i'm getting the hang of picking desserts that suit my taste.

    This pandowdy's flavor was so well balanced that I was willing to overlook the liquidy filling. The fruit is sweetened with maple syrup instead of sugar, and it's topped with a crisp, browned pie crust. The sweetener and spices are subtle, so the filling still tastes tartly of rhubarb and apple. A pandowdy gets its name from the "dowdy-ing" of the pastry crust:

    dowdy–adjective
    1. not stylish; drab; old-fashioned
    2. not neat or tidy; shabby


    If you wanted a more attractive dessert, you could bake individual servings in ramekins or teacups. I rather like its homey appearance though. The recipe says to serve this warm, but I also like it chilled, for breakfast. The baking time and quality of ingredients really affect the finished recipe, so try not to overbake!

    Apple Rhubarb Pandowdy
    adapted from Deborah Madison's Local Flavors

    10 oz pie dough (enough to fit a 9 inch pie pan)
    4 large gala apples, peeled and cored
    1 pound rhubarb
    3/4 tsp ground cinnamon
    1/4 tsp ground allspice
    1/4 tsp ground nutmeg
    1/8 tsp ground clove
    2 tbsp all purpose flour
    1/2 tsp sea salt
    1/2 cup maple syrup
    1 tbsp unsalted butter
    cream or vanilla ice cream, for serving

    1. Preheat the oven to 400F. Lightly butter a 2 quart square or oval baking dish (a 7x11 pyrex works well).

    2. Quarter the apples and slice crosswise about 1/4 inch thick. Dice the rhubarb into 1/2 inch pieces. If the stalks are very wide, slice them lengthwise in half first. You should have 7-8 cups fruit. Toss the fruit with the spices, flour, and salt, then add the maple syrup and toss thoroughly. Distribute the fruit in the dish and dot with the butter.

    3. Roll our the dough about 1/8 inch thick and cut it about 3/4 inch wider than your dish. Lay the dough over the fruit, tucking the edges into the fruit. Bake until the crust is light gold, 30-35 minutes. Lower the heat to 350F.

    4. Remove the pandowdy from the oven and slice the crust into 2-inch squares in a crisscross fashion. Using a spatula, gently press down on the crust, allowing the juices to flow up and over it. Don't worry if there isn't much juice. Return the dish to the oven and continue to bake until the crust is really golden and glazed, another 20-30 minutes. Once or twice, brush the juices over the dough. Serve warm with cream or vanilla ice cream.

    Tuesday, March 17, 2009

    Buttermilk Loaf Bread

    Buttermilk Sandwich Loaf

    Buttermilk Toast w/ Kumquat Preserves

    When I am sick, I like hot soup. I like comforting food that's easy to stomach. But what do you eat when you're homesick, heartsick, or suffering from a bad case of what should I do with my life?

    Recipes can provide different kinds of comfort. One might trigger memories of family, holidays, or after-school lunches, while another might just salve a bad day with melted cheese and hot sauce. It's not stess-eating; it's food satisfying an emotional and physical hunger.

    These days, i'm hungry for simplicity. My schedule gets hectic, life gets complicated, and I gravitate towards simple recipes with few ingredients. I've been thinking about bread, mostly, and its fundamental role in food culture and history.

    This recipe for Buttermilk Bread isn't life-altering, but it's well suited to weekly bread baking. I eat it toasted with a smear of salted butter and homemade preserves. The preserves are simple too- a mix of fruit, raw sugar, and water. I'll post that recipe later.

    I'm hoping to try more breads and jams/jellies/conserves/chutneys. It'd be nice to expand my repertoire before summer's here.

    Buttermilk American Loaf Bread
    adapted from Cook's Illustrated

    3 1/2 cups bread flour
    2 tsp table salt
    1 cup buttermilk, cold
    1/3 cup boiling water
    2 tbsp unsalted butter, melted
    3 tbsp honey
    1 package (2 1/4 tsp) instant yeast

    1. Adjust oven rack to low position and heat oven to 200 degrees. Once oven temperature reaches 200 degrees, maintain heat 10 minutes, then turn off oven heat.

    2. Mix flour and salt in bowl of standing mixer fitted with dough hook. In 1-quart Pyrex liquid measuring cup, mix cold buttermilk and boiling water together (temperature should be about 110-degrees), add butter, honey, and yeast. Turn machine to low and slowly add liquid. When dough comes together, increase speed to medium and mix until dough is smooth and satiny, stopping machine two or three times to scrape dough from hook if necessary, about 10 minutes. Turn dough onto lightly floured work surface; knead to form smooth, round ball, about 15 seconds.

    3. Place dough in very lightly oiled bowl, rubbing dough around bowl to lightly coat. Cover bowl with plastic wrap; place in warm oven until dough doubles in size, 50 to 60 minutes.

    4. Form dough into loaf by gently pressing the dough into a rectangle, one inch thick and no wider than the length of the loaf pan. Next, roll the dough firmly into a cylinder, pressing with your fingers to make sure the dough sticks to itself. Turn dough seam side up and pinch it closed. Place dough in greased 9-by-5-by-3-inch loaf pan and press gently so dough touches all four sides of pan.

    5. Cover with plastic wrap; set aside in warm spot until dough almost doubles in size, 20 to 30 minutes. Heat oven to 350 degrees, placing empty loaf pan on bottom rack. Bring 2 cups water to boil.

    6. Remove plastic wrap from loaf pan. Place pan in oven, immediately pouring heated water into empty loaf pan; close oven door. Bake until instant-read thermometer inserted at angle from short end just above pan rim into center of loaf reads 195 degrees, about 40 to 50 minutes. Remove bread from pan, transfer to a wire rack, and cool to room temperature.

    Wednesday, March 4, 2009

    Chocolate Chocolate Chocolate.

    I am sick of chocolate. I am still baking with it.

    In the past month i've done a good deal of what I call educational baking. Baking for the sake of learning something new- whether it's a technique, a flavor combination, or a cookbook author's style. Here's some of what i've tried:

    1. Chocolate Bread from Tessa Kirios's Apples for Jam
    Chocolate Bread

    2. Chocolate Caramels from Scharffenberger's The Essence of Chocolate
    Chocolate Caramels

    3. Chocolate Souffle Cakes from Sara Foster's Fresh Every Day
    Chocolate Souffle Cakes

    4. Sour Cream Chocolate Cake Cookies from Dorie Greenspan's Baking From my Home to Yours

    5. Chocolate Wafers (can't remember the cookbook)

    6. Milk Chocolate Walnut Bars from Tish Boyle's Chocolate passion

    The only recipe i'd make again is #3. I've probably made it 5-6 times already. I wanted to revisit it because the ingredient quantities are similar to those listed for this Gateau de Zoe, though the techniques are slightly different. It's divine, and i'll blog about it eventually.

    Large quantities of all the other recipes went in the garbage. I don't want to rant about why they were bad. I'll just say they weren't worth eating. Big time texture and flavor issues.

    Monday, March 2, 2009

    Savory Breakfast Bread Pudding

    Savory Bread Pudding

    I had people over for brunch on Sunday. My favorite brunch dishes are crowd-pleasers that practically cook themselves: baked oatmeal, yeasted waffles, baked french toast, breakfast strata, or roasted vegetables. Basically anything that can be thrown in a casserole and baked.

    Make-ahead dishes let me spend more time socializing than cooking. Plus, everyone gets to eat at the same time, and no one's left waiting for something to finish frying in a skillet.

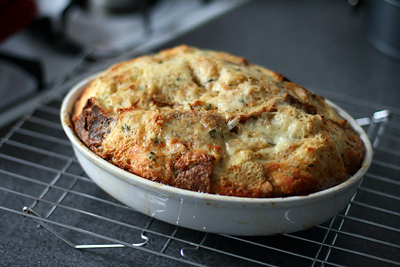
    This time I decided to try a savory bread pudding. Bread puddings aren't an exact science. I usually tweak the recipes I try until I get the product I want. Here are a few of my notes:

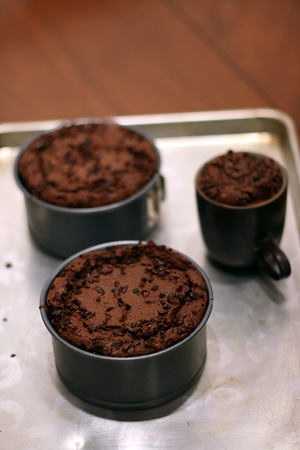
    Instead of using breakfast sausage, I substituted roasted and diced red peppers that had been dried on paper towels. Other vegetables can be substituted as well, but i'd avoid anything with a lot of liquid. I like thick bread puddings, so I used a large pot rather than a 9x13 pan.

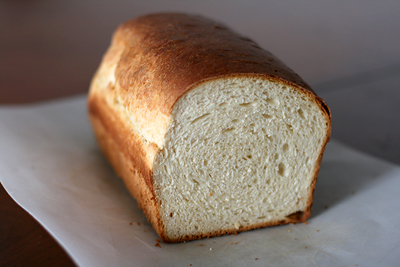
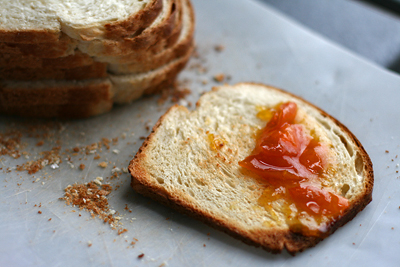
    For the bread, I used the "Country White" loaf from Allegro Hearth. It worked well, though a bread with slightly more structure might have been better. I love this bread- i'm pretty sure it's what they use for white toast at Coca Cafe, and it's one of my favorites. I started with a generous 6 cups of bread cubes, then poked more into the assembled dish until it looked like enough to eventually soak up all the liquid.

    This is one of the best breakfast recipes i've made in a while. The herbs, mustard, and cheese complement each other well, and the flavors are fresh and bright. It's a rich, comforting dish with crusty golden edges that beg to be scraped out of the pan. I'm hoping to make it again soon, maybe with some asparagus or butternut squash.

    Savory Breakfast Bread Pudding
    adapted from Sara Foster's Fresh Every Day

    2 tbsp unsalted butter, plus more for buttering the baking dish
    1 large yellow onion, diced
    1/2 pound breakfast or Italian sausage, removed from the casing (or substitute another vegetable)
    4 cups spinach leaves, washed and drained (about 6oz or 1 large bunch)
    2 1/2 cups whole milk
    8 large eggs, lightly beaten
    2 tbsp Dijon mustard
    1/2 tsp sea salt
    1/2 tsp freshly ground black pepper
    6 cups 1 1/2 inch cubes day-old country Italian or French bread
    1 1/2 cups shredded Swiss cheese (about 6 oz)
    1 cup grated parmesan cheese (about 3 oz)
    2 tbsp chopped fresh thyme leaves
    1 tbsp chopped fresh rosemary

    1. Butter a 9x13 inch glass baking dish. Melt the 2 tbsp butter in a large skillet over medium heat. Add the onion and cook for 3-5 minutes, until soft. Add the sausage and cook 4 minutes, breaking it up into pieces, until it's cooked through (if you want to substitute another raw vegetable, you can add it shortly after the onions, or mix in a cooked vegetable towards the end). Stir in the spinach and cook just until wilted, about 2 minutes. Remove skillet from the heat and drain off the liquid.

    2. Whisk the milk, eggs, mustard, salt, and pepper together in a large bowl. Add the bread and stir to coat. Stir in the sausage, cheeses, thyme, and rosemary and pour into the prepared baking dish. Cover and refrigerate for at least 1 hour or overnight.

    3. Preheat the oven to 350F.

    4. Twenty minutes before baking, remove the pudding from the refrigerator and bring to room temperature. Bake the bread pudding for 45-50 minutes, until it is puffy and light golden brown. Remove the pudding from the oven and let rest for 5 minutes before serving. Serve warm.

    Sunday, March 1, 2009

    Savory Pecan, Parmesan, and Thyme Shortbread

    Pecan, Parmesan, Thyme Shortbread

    Pecan, Parmesan, Thyme Shortbread

    Since I do more sweet than savory cooking, I tend to overlook cookbooks with few or no dessert recipes. That said, i've found great recipes in general cookbooks, usually by chance. A new item in the Carnegie Library will catch my eye and i'll flip though it. If I find an interesting recipe, i'll jot it down in my journal.

    When I noticed this recipe for Savory Pecan, Parmesan and Thyme Shortbread, I thought it'd be a great addition to my current repertoire of small butter cookies. The shortbread are elegant, crisp, and packed with the bold flavors of cheese and fresh herbs.

    Like the other shortbread i've made, these become quite bitter when over-baked. Bake the cookies until they're just golden at the edges. In the book, the photographed cookies were quite brown and the given baking time was 20 minutes. This was too long for small cookies, so i'd suggest checking them after 12-13 minutes. I only copied the ingredients and baking time/temperature from the book, so these directions are mostly from memory.

    Savory Pecan, Parmesan, and Thyme Shortbread
    loosely adapted from Outstanding in the Field by Jim Denevan

    8 tbsp unsalted butter, at room temperature
    1/2 cup freshly grated parmesan cheese
    1 cup all purpose flour
    1/2 tsp kosher salt
    1/4 tsp freshly ground black pepper
    1 tbsp chopped fresh thyme leaves
    1/2 cup toasted chopped pecans

    With a hand-mixer or spoon, beat the butter until smooth. Add the parmesan cheese and mix until combined. Add the flour, salt, pepper, thyme, and nuts, and mix until a cohesive dough just starts to form. Form the dough into logs or roll to 1/4 inch thickness between two sheets of wax paper. Chill for at least 1 hour. Preheat the oven to 350F and line a baking sheet with parchment paper. Slice the dough into 1/4 inch rounds or cut into shapes and place on the prepared baking sheet. Bake for 12-15 minutes, until lightly golden colored.

    Wednesday, February 25, 2009

    Thrift Store Finds: Enamelware

    On Saturday, I decided to visit the South Hills and Avalon locations of Red White and Blue. It's a thrift store i've used for years to find vintage bakeware, melamine dishes, enamelware, polaroid cameras, roller skates, cheap vases, tablecloths, curtains, clothes arranged by color, and other funky bric-a-brac.

    The last time I went there, I found an awesome dish set and a square tube pan. This time, I found some nice pieces of enamelware:

    Thrift Store Finds

    Thrift Store Finds

    I have a thing for brightly colored enamelware. This pot's yellow lid caught my eye, and several women in the store mentioned they'd looked at it when I headed towards the checkout. The exterior needed some cleaning, but otherwise it looked new. I'll probably use it to make some baked oatmeal this Sunday.

    The teapot is brand new and from Japan. It had the original care and cleaning instructions inside! For removing rust and stains/mineral deposits, it suggests boiling water with 2 tbsp baking soda and the juice of half a lemon for 45 minutes. I tried this technique on a badly tea-stained saucepot and it worked fairly well. Martha Stewart has additional guidelines on caring for vintage enamelware here here.

    I highly recommend checking out Red White and Blue if you haven't been to one. They are massive!

    Monday, February 23, 2009

    Nibby Buckwheat Butter Cookies

    Nibby Buckwheat Butter Cookies

    Nibby Buckwheat Butter Cookies

    Some cookies are best small. To be honest, i've never liked the big-as-your-head cookies found in so many bakeries and coffee shops. They often sacrifice good flavor and texture for size. I'm much happier with a good cup of coffee that has some dainty cookies perched on the saucer.

    I liked these Sea Salt and Cocoa Shortbreads so much that i've been exploring other recipes for butter cookies. I love the crisp, crumbly texture that comes from proper mixing and the occasional addition of corn starch or gluten-free flours (they contribute to the "shortness" of the cookie).

    These Nibby Buckwheat Butter Cookies were highly recommended by several bloggers, so I decided to try them. The original recipe is for slice-and-bake cookies, but I used a star shaped cutter instead. I used to think cut-out cookie required too much labor, but i've been more willing to make them since I started rolling out the soft dough inside of ziplock bags (a tip you can see demonstrated in this post).

    I made a half-batch of dough, which still yielded plenty of small cookies. Since I was out of vanilla extract, I used the seeds from half a vanilla bean and saved the pod to make vanilla sugar. I also lightly toasted the cocoa nibs to improve their flavor, and sprinkled a little sea salt over the top of the dough.

    The finished cookies are perfect for tea or snacking. They're not too sweet, and they're small enough that most people will happily indulge in a few. You can find Alice Medrich's original recipe here, courtesy of 101 Cookbooks.

    Wednesday, February 18, 2009

    Chocolate Chip Cookie Bars

    Chocolate Chip Cookie Bars

    I borrowed Flo Braker's latest cookbook, Baking for all Occasions, a few weeks ago. I didn't get a chance to try many recipes before I had to return it, but I photocopied a few for future testing. The recipes are interesting- many of them have creative names and mix new flavors with old techniques (a streusel topped cake with fresh pineapple and hazelnuts, anyone?)

    This recipe for a Chocolate Chip Cookie Cake caught my eye because it's simple, versatile, and yields a large quantity. It's basically a chocolate chip cookie dough that's pressed into a 9x13 pan and sliced into squares. Braker's book includes instructions for turning the same dough into individual cookies or chocolate chip biscotti.

    For this recipe, it's important to use well softened butter. The goal is to incorporate as little air into the dough as possible to make the texture more like a cookie than a cake. The texture will also vary greatly with baking time- the cake becomes crunchier the longer you bake it. Nuts and chocolate chips play a big role in flavor, and you'll have very different results depending on what you use.

    The finished bars aren't as rich tasting as some blondies or cookies. I'm interested in trying a variation using more brown sugar, or peanut butter. Both could lead to a chewier texture. I like using big pieces of chocolate for a nice visual and textural contrast. I used Nestle chocolate chunks for this batch, but any large chocolate pieces would work well.

    These were a huge hit at work, and several people asked for the recipe. Over a few days, the texture improved and the cinnamon flavor became more pronounced. I only used 1/2 tsp cinnamon and the flavor was still quite strong. The bars are great snacks to have on hand and they keep for a relatively long time. I usually line the pan with foil so I can just lift the bars out when they're done.

    Chocolate Chip Cookie Cake
    adapted from Flo Braker's Baking for all Occasions

    2 1/3 cups (300 grams) all-purpose flour
    2/3 cup (130 grams) granulated sugar
    2/3 cup (130 grams) light brown sugar
    1 tsp salt
    1/2 tsp baking soda
    1 tsp ground cinnamon or 1/2 tsp ground cardamom (optional)
    2 sticks (225 grams) unsalted butter, softened
    1 large egg
    1 tsp pure vanilla extract
    2 cups (340 grams) semisweet chocolate chips
    1 cup (115 grams) chopped walnuts, pecans, hazelnuts, or a combination
    *You can omit the nuts and mix in an additional 1 cup (170g) chocolate chips

    1. Center a rack in the oven and preheat to 350F. Have ready a 9x13 inch pan.

    2. In a stand mixer fitted with the paddle attachment, combine the flour, sugars, salt, cinnamon (if using), and baking soda and mix on the lowest speed just until blended. Add the butter and continue to mix until small, moist crumbs form that look similar to streusel, about 1 minute. Add the egg and vanilla and beat on low speed until the mixture begins to form a cohesive dough. Increase the speed to medium and add the chocolate chips and nuts. Beat just until they are incorporated- 20 to 30 seconds.

    3. Spoon dollows of the thick dough evenly over the bottom of the baking pan with a rubber spatula. To distribute the dough evenly, lay a sheet of plastic wrap or parchment paper over the dough and pat it evenly with your fingertips.

    4. Bake the cake until it is golden brown and feels more solid than soft when pressed in the center- 37-40 minutes. Be careful not to overbake- it will firm as it cools. Transfer to a wire rack and let cool in the pan for 30-35 minutes.

    5. Slip a thin metal spatula between the cake and the pan and run the spatula along the entire perimeter of the pan. Lift the pan, tilt it slightly, and tap it on a counter to help release the cake. Invert the cake onto a wire rack and lift it out of the pan. Invert so it is right side up and let cool completely.

    If serving within 2 days, wrap the cake in foil and store at room temperature. For longer storage, freeze for up to 1 month. Thaw at room temperature for about 3 hours.To serve, cut the cake into squares, rectanges, or sticks with a sharp knife.

    Friday, February 6, 2009

    Sea Salt and Cocoa Shortbread

    Sea Salt and Cocoa Shortbread

    Sea Salt and Cocoa Shortbread

    I think culinary encouragement goes a long way, especially for avid bakers and food bloggers.

    You reach a point where the learning curve plateaus and the people you’re feeding assume everything you create will be delicious and beautifully photographed. And believe me, it’s pretty disappointing when you spend hours preparing something, only to have a good friend pick at their plate and say polite things like “it’s okay” or “it’s pretty good” or “I’m just not that hungry.”

    Furthermore, there’s a sort of social detachment that comes with increased culinary ability. Suddenly, people don’t want to share their cooking with you, or they preface edible gifts with statements like “I made you these cookies, but you probably won’t like them” or “here is this pastry, but it’s store-bought so you don’t have to eat it.”

    So, it can be pretty tough when everything starts to go wrong. I found it very comforting that a bad week in the kitchen had Molly of Orangette on the verge of tears. Her description of failed dough as “oat-and-brown-sugar hummus” is priceless, and probably familiar to more than one baker.

    One of the things I love most about food blogs is that sense of shared baking failure that follows a post like Molly’s. Suddenly everyone has a kind word and a story about flipping pancakes onto the floor, cleaning spilled batter out of the oven, or substituting/omitting ingredients with disastrous results. And, in many cases, people will share a fantastic recipe to compensate for the troublesome one.

    I, too, have weeks where all recipes fail, and the possibility of baking something great is utterly squashed. I’ve been testing chocolate recipes for an upcoming presentation, and some of them were just terrible! Luckily, these sea salt and shortbread cookies turned out very well. They’re quite rich, and I think they’re best small, maybe served on a saucer alongside some coffee. The crisp, crumbly texture is addictive.

    I roll out the soft dough inside of a gallon-sized plastic bag, chill it, and then cut it into shapes. It’s best to leave the bag open while you do this, so air can escape. Dorie Greenspan gives a good description of this technique in Baking From my Home to Yours, which you can view here.

    Chocolate Shortbread with Cacao Nibs and Sea Salt
    Adapted from Elizabeth Falkner’s recipe in The Essence of Chocolate

    1 cup all purpose flour
    ¾ cup unsweetened cocoa powder
    ¼ cup + 2 tbsp cocoa nibs, crushed with a rolling pin
    1 tsp fine or coarse sea salt (I used fleur de sel)
    12 tbsp unsalted butter, at room temperature (don’t use cold butter!)
    ½ cup granulated sugar
    1 tsp vanilla extract

    Preheat the oven to 325F. Line two baking sheets with parchment paper or silicone mats.

    Sift the flour and cocoa into a small bowl and whisk to combine. In another bowl, combine the nibs and sea salt.

    In the bowl of a stand mixer fitted with the paddle attachment, cream the butter and sugar on medium speed for about 5 minutes, until light and fluffy, stopping occasionally to scrape the sides and bottom of the bowl. Mix in the vanilla. Add half of the flour mixture and mix on low speed. Add the remaining flour mixture, stopping as necessary to scrape down the bowl. Once incorporated, mix on medium speed for 1-2 minutes, or until well combined. Mix in the nibs and salt. (The dough can be refrigerated, well wrapped, for up to 1 week, or frozen for up to 2 months).

    On a lightly floured board or between two pieces of parchment paper, roll the dough into a square ¼ inch thick. Cut into 1 by 2.5 inch rectangles or other desired shape, and place on the prepared pans about 1 inch apart (they will spread a little).

    Bake for 15 minutes. It is sometimes difficult to tell when these are done- one of the best indications is the smell of baked cookies in the air. When the cookies are nudged, they shouldn’t feel soft, but the bottoms should seem crisp. Avoid over-baking to avoid a bitter flavor.

    Remove from the oven and transfer shortbread to a cooling rack to cool completely. The cookies can be stored in an airtight container for up to 1 week.

    Tuesday, February 3, 2009

    Black and Gold Baking

    Marble Cake

    Rice Krispie Treats

    Rice Krispie Treats

    Over the weekend, Pittsburgh bakeries, grocery stores, and Eat'n Parks cranked out seemingly enough black and gold sweets to fill a football stadium. Bakery workers in Johnstown worked overtime. By Friday my grocery store was sold out of individually packaged yellow food coloring, and a friend told me she couldn't find yellow sprinkles anywhere.

    Despite our local enthusiasm, I don't really associate the super bowl with baking. While many newspapers run a super bowl themed food section, they tend to focus on savory items. All of the Post Gazette's reader recipes were savory, and I noticed that most of my friends/coworkers preferred purchasing Steelers baked goods to making them.

    In some cases, it makes sense that savory super bowl fare outshines the sweet; i'd much rather eat wings, pierogies, and sauerkraut than oversized sugar cookies and artificially colored cupcakes. Still, I think some people avoid baking for a crowd because they assume it is difficult and expensive and yields a mediocre product. And sometimes it's hard to resist the novelty of a storebought cake shaped like a football field.

    Two days before the super bowl, I felt a rush of Steelers fever and decided to find some simple recipes that would be appetizing, even if I had to spend extra money for the multi-pack of food coloring. I have an aversion to black food coloring, so I picked recipes that used cocoa for color contrast.

    I added yellow food coloring to a plain batch of rice krispie treats and to the plain batter in this tried and true recipe for marble cake. The chocolate rice krispie treats are from Lora Brody's Chocolate American Style. The recipe is a simple but potent variation on the traditional one. Be sure to use a good-flavored cocoa as it really impacts the taste. I used dutch-process cocoa from Penzey's.

    If you're hungry for more black and gold baking, check out these black and gold pastries from Jean-Marc Chatellier, or the "Steelers Cupcake" flickr results.

    Chocolate Cereal Treats
    adapted from Lora Brody's Chocolate American Style
    4 tbsp unsalted butter
    1 10oz bag of mini marshmallows
    2/3 cup dutch-process cocoa powder
    6 cups rice krispies (or 4 cups + 2 cups cheerios)
    1/2 cup dried sweet or tart cherries (optional)

    Butter a 9x13in pan. In a large saucepan or pot, combine the butter and marshmallows. Cook and stir over low heat, until the marshmallows are almost completely melted. Add the cocoa powder and stir until the mixture is smooth and even-colored. Turn off the heat and stir in the cereal. Scrape the mixture into the prepared pan and use a piece of wax paper or plastic wrap to smooth the mixture in the pan. Sprinkle the cherries over the cereal and use the paper or plastic to press them in gently.

    When fully cooled, turn the contents out of the pan onto a cutting board and cut into squares. Store in an airtight container at room temperature for up to 1 week.

    Friday, January 30, 2009

    Croissants from Jean-Marc Chatellier

    Croissants from Jean Marc Chatellier

    Croissants from Jean Marc Chatellier

    Last week I stopped by Jean Marc Chatellier to buy pastries for work. I decided on assorted croissants: 2 plain, 2 almond, and 3 chocolate. I was sorely tempted by a tray of freshly made lemon tarts, but I thought they'd be a little much for breakfast.

    If you can get to Millvale, the bakery is worth a visit. Not all of the pastries are my favorite, but they are executed with elegance and attention to detail. There's always something interesting to see; on previous visits I've seen Jean-Marc working on exquisite wedding cakes with elaborate florals.

    These croissants were quite large. The almond croissant was filled with a pastry cream which was delicious, but not the almond cream I was expecting. Still, $9 dollars for 7 pastries is a bargain, and there are enough varieties for everyone to find something they like.