Tuesday, September 30, 2008

Whoopie Pies

Whoopie Pies

Whoopie Pies

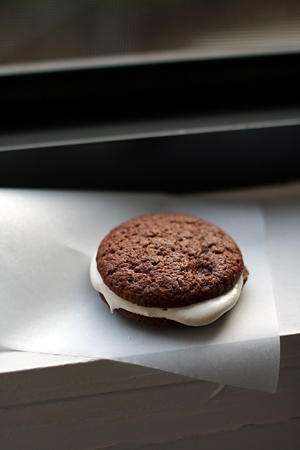
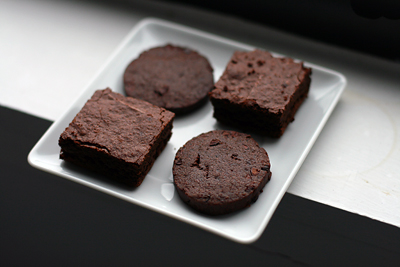
I think whoopie pies are rather whimsical. There's something about the fluffy marshmallow filling and bendy, cakelike cookies that makes me wish I liked eating them more than I do. Generally, I make whoopie pies because they elicit ecstatic reactions from other people. Especially if you coat them in sprinkles.

This recipe isn't difficult, but you can get wildly different results if you're not careful with ingredient temperatures. The cookie dough and filling are easiest to make when the butter is quite soft. I think room temperature buttermilk would be optimal as well. Cold butter will make the filling lumpy and the cookies less uniformly shaped.

Three-bite Whoopie Pies
adapted from Abigail Johnson Dodge's The Weekend Baker

For the chocolate wafers:
2 cups (255g) all purpose flour
2/3 cup (57g) unsweetened natural cocoa powder, sifted
1/2 tsp baking soda
1/2 tsp table salt
12 tbsp (170g) unsalted butter, at room temperature
1 1/2 cups (340g) granulated sugar
1 tsp pure vanilla extract
1 cup buttermilk

For the vanilla filling:
12 tbsp (170g) unsalted butter
1 1/3 cups (177g) marshmallow fluff (not creme)
3/4 cup (85g) confectioners' sugar
2 oz (57g) cream cheese, at room temperature
1 1/2 tsp pure vanilla etract
1/4 tsp table salt

1. To make the chocolate wafers, position an oven rack on the middle rung. Preheat the oven to 375F/190C. Line 3 cookie sheets with parchment paper.

2. In a medium bowl, combine the flour, cocoa, baking soda, and salt. Whisk until well blended. In a large bowl, combine the butter, sugar, and vanilla. Beat with an electric mixer on medium high speed until well blended. Pour in about 2/3 of the dry ingredients and mix on low speed just until blended. The mixture will look sandy, with small pebbles of dough. Add the buttermilk and continue mixing just until blended. Pour in the remaining flour mixture and mix just until blended.

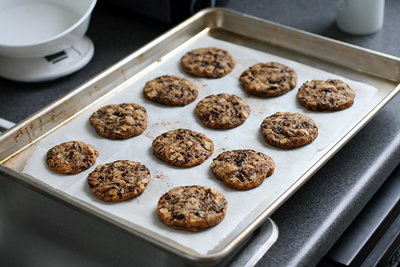
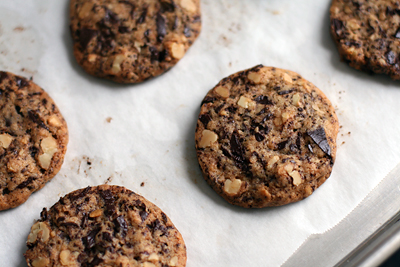
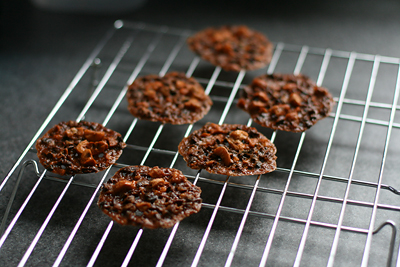
3. Using a small scoop or 2 tbsp, drop 2 tbsp mounds of dough onto the prepared cookie sheets, spacing them about 2 inches apart. Bake one sheet at a time until the mounds are puffed and a toothpick inserted in the center comes out clean, about 11 minutes. Transfer the cookie sheet to a rack and let cool for 5 minutes. Using a spatula, lift the cookies from the sheet onto a rack and let cool completely.

4. Prepare the filling while the chocolate wafers are baking. Combine the butter, marshmallow, confectioners' sugar, cream cheese, vanilla, and salt in a medium bowl. Beat with an electric mixer fitted with the whisk attachment on medium speed until well blended and smooth.

5. Cover the bowl with plastic wrap and set the filling aside until the chocolate wafers are ready to be assembled. If the filling is very soft, refrigerate it, stirring frequently, until it's firm enough to hold its shape.

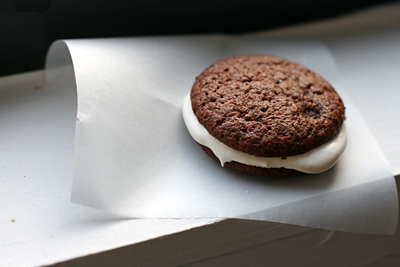
6. To assemble the pies, arrange half of the cooled wafers, flat side up, on a work surface. Mound about 1.5 tbsp of the filling in the center of each. Top with the remaining wafers and press gently on top until the filling spreads just to the edges. Refrigerate until the filling is firm, about 1 hour, or until ready to serve. The assembled pies will keep in the fridge for a week, or in the freezer for 3 months.

Sunday, September 28, 2008

David Lebovitz's Chocolate Chip Cookies

Chocolate Chip Cookies


Chocolate Chip Cookies

When I saw this photo, I knew I had to make these cookies. I did a quick Google search for "David Lebovitz's Chocolate Chip Cookies" and found the recipe on Heidi Swanson's blog. It's originally from Lebovitz's The Great Book of Chocolate.

I really like this recipe; it has a good ratio of nuts and chocolate to dough. I took care to use good quality semisweet chocolate and toast the heck out of the walnuts, and I found that the cookies can have a variety of different textures depending on how you bake them.

I shaped half of the dough with a tablespoon scoop. I rolled the remaining dough into a log, chilled it thoroughly, and sliced it into rounds. I think I prefer the slice-and-bake method; the finished cookies were visually striking and crispy. The scooped cookies were substantial, chunky, and a little softer in the middle. Baking time will also affect the texture.

I'm going to make these again with pecans instead of walnuts. I really couldn't be happier with how they turned out!

Tuesday, September 23, 2008

Crepes with Nutella

Making Crepes

Crepes with Nutella

I can never make sense of crepe-making instructions. They say things like "pour the batter into the pan, rotating the pan so a thin layer coats the entire bottom." If you've never made a crepe, it can be hard to picture this process. You might try and execute it, only to find that your pan is too hot, your batter is the wrong consistency, and you haven't poured enough to coat the whole pan.

I also notice that people tend to be very opinionated about crepes. In your effort to learn more, you might ask a friend for advice. They might insist that you buy an expensive, "authentic" crepe pan or (heaven forbid) one of these. They will probably have a strong opinion on how long to cook the crepe, and how brown it should be (if at all).

I think crepe technique is best observed and practiced, not read. Try a few batter recipes until you find one you like and can execute it consistently. I'm partial to David Lebovitz's Buckwheat Crepes. I cook them in a flimsy skillet that cost less than $10, using technical cues from Jacques Pepin and my old catering boss. Since i'm usually cooking for one, I like to make all of the crepes and store them in the freezer for later filling/reheating.

This is one of those moments i'd love to be able to make a video.

How do you cook your crepes?

Sunday, September 21, 2008

The Week in Review

Butternut Squash

1) I went to the Strip District and bought some vegetables, including a squash that I roasted with garlic, olive oil, sage, salt, and pepper. I also bought a delicious sesame-semolina baguette from Mediterra.

Espresso Swirl Brownies

2) I made the Espresso Swirl Brownies from Alice Medrich's Cookies and Brownies. Do not ignore the step that says to chill them for at least two hours. At room temperature they were a squishy, under-baked mess. Assuming they were ruined, I threw all but one into the garbage. The next morning, the chilled brownie was perfectly edible. That's what I get for trying to bake brownies when I have to rush out the door. They could've used 5-10 more minutes in the oven.

3) I booked tickets to Paris. My aunt and I are going October 26-November 2. Our itinerary is pretty flexible, but i'm pretty sure we'll be visiting the Salon du Chocolat.

I've been digging through books and websites trying to figure out all the places I want to visit/eat! Poilâne, Sadaharu Aoki, Pierre Herme, DOT (vintage kitchenware), Eric Kayser, Du Pain et des Idees, Grom, John-Charles Rochoux, Blé Sucré, pretty much anywhere mentioned on David Lebovitz and Dorie Greenspan's blogs.

In addition to planning, I will also be running and saving money like crazy...

Friday, September 19, 2008

Black Bottom Walnut Praline Bars

Black Bottom Praline Bars

Black Bottom Praline Bars

These bars were a big hit at work. They remind me of Abigail Johnson Dodge's Chocolate Chip Brownie Double Deckers from The Weekend Baker, but they're a little more sophisticated. The chocolate layer is richer, and the topping has a stronger butterscotch taste. I used toasted walnuts, but I think I would have preferred pecans.

This is the best brownie variation i've tried in a while. Cook's Illustrated's Triple Chocolate Espresso Brownies were a close second. I like Alice Medrich and Emily Luchetti's brownies well enough, but I still haven't found a recipe I can call my favorite. I can never get the exact texture and flavor i'm looking for.

You can use any half batch of Alice Medrich brownie batter for this recipe. I've included the half-recipe for her unsweetened chocolate, "new classic" brownies.

Black Bottom Pecan Praline Bars
adapted from Alice Medrich's Bittersweet

Brownie Layer
2 oz unsweetened chocolate
4 tbsp unsalted butter
1/2 cup + 1 tbsp sugar
1/2 tsp vanilla extract
1/8 tsp salt
1 cold large egg
1/4 cup all purpose flour

Place the chocolate and butter in a medium heatproof bowl set in a wide skillet of barely simmering water. Stir frequently until the chocolate is melted and the mixture is smooth. Remove the bowl from the skillet. Stir in the sugar, vanilla, and salt with a wooden spoon. Add the egg. Stir in the flour and beat with a wooden spoon until the batter is smooth, glossy, and beginning to come away from the sides of the bowl, 1-2 minutes. Proceed with the rest of the recipe.

Praline Layer
¼ cup all-purpose flour
¼ tsp Baking soda
4 tbsp unsalted butter, melted
¼ cup plus 2 tbsp packed brown sugar
¼ tsp salt
1 large egg yolk
½ tsp vanilla extract
1 ¼ cups coarsely chopped pecans or walnuts
9-inch square baking pan

Position a rack in the lower third of the oven and preheat the oven to 350°F. Line the bottom and sides of the baking pan with parchment paper or foil, leaving an overhang on two opposite sides.
Spread the brownie batter in a thin even layer in the bottom of the lined pan. Set aside.
Mix the flour and baking soda together thoroughly and set aside.
Combine the melted butter, sugar, and salt in a medium bowl. Stir in the egg yolk and vanilla, then the flour mixture, and finally the nuts. Drop spoonfuls all over the top of the brownie batter (they will spread and cover the brownies entirely during baking).
Bake until the edges of the topping are well browned and cracked, 20 to 25 minutes. Let cool completey in pan on a rack.
Lift up the ends of the parchment or foil liner, and transfer the brownies to a cutting board. Cut into 25 bars.

Tuesday, September 16, 2008

Cream Scones with Chocolate Chunks

Cream and Chocolate Scones

Cream and Chocolate Scones
Getting ready to bake

Cream and Chocolate Scones
Cooling down

If I spent a lot of time thinking about scones, i'd probably write a very long post that explained their many varieties and textures, and the technique needed to make them moist and flaky instead of dry and dense. The truth is, scones aren't my favorite pastries, and in most cases I prefer buying them to making them (I'm particularly fond of the scones from Enrico Biscotti and Jin Patisserie).

Generally, I will bake anything if I have the ingredients, regardless of whether or not I want to eat it. I chose this Alice Medrich recipe because I needed to use up some chocolate and cream. When I sampled one of the finished scones, I was surprised to find that I loved it. I loved the sweet, subtle taste of the cream and the dark contrast of the bittersweet chocolate. It had crispy edges and a moist interior.

Maybe I should give scone recipes some more thought.

Cream Scones with Chocolate Chunks
adapted from Alice Medrich's Bittersweet

2 cups all purpose flour
1/4 cup sugar, plus sugar for sprinkling
2 1/2 tsp baking powder
1/2 tsp salt
3 to 4 oz bittersweet or semisweet chocolate, coarsely chopped
1 1/4 cups heavy cream
1 tbsp milk or cream for brushing the tops

Position a rack in the center of the oven and preheat to 425F. Line a baking sheet with a double layer of parchment paper.

In a large bowl, whisk the flour, sugar, baking powder, and salt together thoroughly. Stir in the chopped chocolate. Make a well in the center and pour the cream into it. Use a rubber spatula to push the dry ingredients from the sides of the bowl into the well, cutting and turning the mixture just until the dry ingredients are almost entirely moistened and the dough looks rough and shaggy. Gather the dough into a lump and knead it gently against the sides of the bowl five or more times, pressing in the loose pieces, until the dough just holds together (it should not be smooth) and the sides of the bowl are fairly clean.

On a lightly floured surface, pat the dough into an 8.5 inch round about 3/4 inches thick. Cut into 12 wedges. Place them at least 1 inch apart on the lined baking sheet. Brush the tops with cream or milk and sprinkle lightly with sugar.

Bake until the tops are golden brown, 12-15 minutes. Let cool on a rack, and serve warm or at room temperature.

Sunday, September 14, 2008

Maple Cornmeal Drop Biscuits

Maple Cornmeal Drop Biscuits

These buttery, crispy-edged biscuits were pleasant on a rainy Friday morning. They're not the most exciting treats in Baking From my Home to Yours, but they're ridiculously easy to make. I think they'd be nice with bacon and eggs.

Now I have some completely unrelated things to mention:

1) I've had some really good food in Pittsburgh lately.
This could be somewhat subjective, but i've enjoyed big slices of pizza from Pizza Sola, shish kebab dinners at Istanbul Grille, cinnamon twists and almond mele next door to La Prima, honeycrisp apples from the farmer's market, and interesting baked goods from Dozen Bakeshop. Dozen had some especially good pumpkin muffins last week.

2) I'm planning a trip to Paris for the end of October.
I'm in the initial stages of planning, but I am pretty sure this will happen. I am ridiculously excited. I've been gathering all my notes/bookmarks on pastry places i'd like to see, and i'm trying to figure out who I know in the city who'd be willing to hang out for an afternoon.

I'm feeling settled into the new apartment too, although I think I need an oven thermometer. I've already over-baked three batches of brownies. I'm going to ease up on the baking this week- I waiting for the library to fill some of my cookbook requests. I'm curious to try Nick Malgieri's new book. It has an intriguing recipe for cheater puff pastry.

Maple Cornmeal Drop Biscuits
adapted from Dorie Greenspan's Baking From my Home to Yours

1 c all-purpose flour
1 c cornmeal
1 T baking powder
1/2 t salt
1/4 t baking soda
6 T cold unsalted butter
1/2 c milk
1/4 pure maple syrup

1. Mix the dry ingredients in a medium sized bowl.
2. Rub butter into the flour mixture with fingers or pastry blender, until butter is in various sizes from pea- to oatmeal flake-size pieces.
3. Add the milk and maple syrup and mix just until dry ingredients are wet. Drop by spoonfuls onto parchment paper-lined baking sheet and bake for about 15 minutes at 425 degrees.

Saturday, September 13, 2008

Brownies and Mocha Slices

Mocha Slices and Brownies

These days, most of my baking happens in the morning. I take morning photos on the windowsill because it's the only place that gets enough light.

I tried two chocolate recipes because the kitchen is well-stocked with several types of cocoa and chocolate. I went a little overboard in the Strip District last week...

I liked the brownies; they were fudgy without that undercooked, greasy texture that comes with too much butter fat. I ate my them plain, but you can do fancy things with them. The recipe is from A Passion for Ice Cream. Anita at Dessert First has tried some of the recipes- she takes great photos.

The mocha slices are an old favorite that I put in my Christmas cookie box a few years ago. The espresso powder, cocoa nibs and cinnamon give the cookies a dark, fruity flavor that pairs nicely with the cocoa. They're relatively soft and chewy. The original recipe coats the dough-logs with sparkling sugar, but I usually omit it. It also suggests storing the logs in a paper towel roll to hold their shape, which I never do.

I definitely ate my fair share of brownies, but now I'm tiring of chocolate. We'll see what I end up cooking next week.

Brownies
adapted from Emily Luchetti's A Passion for Ice Cream

8 ounces bittersweet chocolate, finely chopped
1 ounce unsweetened chocolate, finely chopped
5 ounces (10 tablespoons) unsalted butter
3 large eggs
1 1/4 cups sugar
1/2 cup all-purpose flour
1/8 teaspoon kosher salt
1/2 teaspoon baking powder
3 tablespoons unsweetened cocoa powder (I used dutch-process, which worked well.)

To make the brownies: Preheat the oven to 350°F. Grease the bottom of a 9-by-13-inch baking pan and line it with parchment paper. Melt the chocolates and butter in a double boiler over hot water. In a medium bowl, whisk together the eggs and sugar. Whisk in the melted chocolate mixture. Sift together and then stir in the flour, salt, baking powder, and cocoa powder. Spread the batter in the prepared pan.

Bake until a skewer inserted in the center, comes out fudgy and not dry, about 20 minutes. Let cool to room temperature. Run a knife around the inside edge of the pan. Place a cutting board on top of the pan. Invert the pan and board. Remove the pan and carefully peel off the parchment paper. Cut and serve.

Mocha Slices
adapted from Martha Stewart Magazine
Makes about 4 dozen

1 1/2 cups all-purpose flour, plus more for work surface
3/4 cup unsweetened Dutch-process cocoa powder
1/4 teaspoon salt
2 tablespoons instant espresso powder
1/4 teaspoon ground cinnamon
1 1/2 sticks unsalted butter, softened
1 cup granulated sugar
1 large egg
1 teaspoon pure vanilla extract
1/2 cup cocoa nibs
Coarse sanding sugar

Sift together flour, cocoa, salt, espresso powder, and cinnamon into a large bowl; set aside. Put butter and sugar into the bowl of an electric mixer fitted with the paddle; mix on medium until pale and fluffy. Mix in egg and vanilla. Reduce speed to low. Add flour mixture; mix until just combined. Stir in cocoa nibs.

Turn out dough onto a lightly floured surface; roll into a 2-inch-diameter log (I suggest dividing the dough and making 2 logs- much easier to manage.) Wrap in parchment; transfer to a paper towel tube to hold shape. Refrigerate until firm, at least 1 hour or up to overnight.

Preheat oven to 350 degrees. Unwrap log, and let soften slightly at room temperature, about 5 minutes. Brush with water, then roll in sanding sugar. Cut log into 1/4-inchthick rounds. Space 1 inch apart on baking sheets lined with parchment paper.
Bake until centers are set, about 10 minutes. Transfer to wire racks; cool completely. Store in airtight containers at room temperature up to 2 days.

Wednesday, September 10, 2008

Cocoa Nib and Hazelnut Florentines

florentines_8099

Cocoa Nib Hazelnut Florentines

It's been about a week since i've posted anything here. It's not that I haven't been baking- I made lemon bars, brownies, coconut chocolate chip cookies, mocha slices, and one or two other things. Unfortunately, most of these recipes turned out to be duds.

The brownie tart from Maxine Clark's Tarts: Sweet and Savory was too sweet and weakly flavored. 4 ounces of 72% chocolate was not enough to cut the 2 cups of sugar and 14 tbsp of butter. The brownies did have an interesting texture though.

The tangy lemon squares from The Weekend Baker tasted good, but they were extremely difficult to serve neatly. The smooth lemon curd topping tasted great, but it was messy and the shortbread crust got a little soggy. Since they were hard to handle, I ate them with a fork. I might try the recipe again with some modifications.

The chocolate chip coconut cookies from Pichet Ong's The Sweet Spot didn't spread much in the oven and had a weird texture. I probably over-measured the flour, but i'm wondering if other bakers have had problems following the weight measurements in this book. It's not the first time i've had weird results.

I think the bad baking and photography mojo is some combination of stress, personal error, and recipe troubles. After all of these frustrating attempts, I decided to make a recipe that always turns out well.

I've posted these florentines on the blog before, but I didn't include the recipe. They are thin, crunchy and elegant. They do spread a lot in the oven, so I suggest erring on the smaller side of 1 tsp while measuring the batter. Keep an eye on the baking time too, as these cookies quickly go from perfect to burnt.

Cocoa Nib Florentines
adapted from Emily Luchetti's A Passion for Ice Cream

2 oz (4 tbsp) unsalted butter
1/4 cup heavy (whipping) cream
6 tbsp sugar
2 tbsp + 3/4 tsp all purpose flour
1/3 cup (1.5 oz) pistachios (or other nuts), toasted, skinned, and chopped
1/2 cup cocoa nibs

Preheat the oven to 350F. Line 3 baking sheets with parchment paper. Melt the butter in a saucepan over medium heat. Add the cream, sugar, flour, the 1/3 cup nuts, and the cocoa nibs. Cook the mixture over medium-low heat, stirring constantly, until it thickens and comes clean from the bottom of the pan as you stir, about 3 minutes. Remove the pan from the heat.

Drop teaspoonsuls of the batter 3.5 inches apart on the prepared pans. The cookies will spread as they bake. Bake until golden brown, about 10 minutes. Let the cookies cool to room temperature on the pans and then remove them with a metal spatula.

Tuesday, September 2, 2008

Searching and Content.

Some of you have asked for a recipe index or an easier way to search this blog. I've added a google toolbar on the left. While it is similar to the search bar at the top of the page, I find it displays the content in a friendlier format (ie you don't have to dig through every post.)

This same result can be achieved by doing any search in google, then adding the text site:http://pghtasted.blogspot.com.

Part of the problem is words like "cookies" "brownies" and "cake" are often included in posts that don't have a recipe attached. With that in mind, I will try and compile a recipe index (for my own use as much as yours.)

I created this blog without much purpose. Now, over a year and a half later, I've been reflecting on what this blog is for and what content i'd like to include. I think it's best for photos, comments on cookbooks, and recipes. I don't want to do restaurant reviews, and I don't want to adapt the enviable literary style of blogs like Orangette.

With most food blogs, I look for interesting photos with recipes to try. Sometimes I look for comments on cookbooks I haven't tried or purchased. I spend much more time reading cookbooks than writing about food, so I think I may try and stick to a recipe-focused approach. We'll see. It's all speculative.

Monday, September 1, 2008

Creamy Eggplant Tarts with Slow Roasted Tomatoes

Creamy Eggplant Tarts

Creamy Eggplant Tarts

I love individual tarts. You don't have to slice them, so none of your guests will be stuck with a sorry, collapsing piece on their plate. They're also easy to shape and unmold, especially if you use rings instead of pans.

This is another recipe from Tarts: Sweet and Savory. The filling is a simple combination of pureed roast eggplant, garlic, spices, and eggs. It's a lighter, relatively inexpensive option that's perfect for summer. Grilled eggplants would taste especially good- the oven never achieves that charred, smoky flavor.

I only have a few notes on this recipe, mostly concerning the tomatoes. The two hour baking time was too long for my oven- I would check the tomatoes after one hour and evaluate how much more time they need. They should be bright red and not completely dried out.

The tart isn't the most attractive one in the book either. A simple garnish of chopped herbs and a drizzle of olive oil go a long way. I might even add a dollop of sour cream or thick greek yogurt in the future.

The original recipe uses a paprika and gruyere pastry dough, but I used leftover shortcrust pastry. The thin, crispy crust was a nice contrast to the creamy filling. Plan on budgeting 2 oz of dough per 4 inch diameter ring or pan.

Creamy Eggplant Tart with Slow Roasted Cherry Tomatoes
adapted from Maxine Clark's Tarts: Sweet and Savory

Paprika and Gruyere Pastry Dough
6 tbsp butter
1 cup plus 2 tbsp all purpose flour, plus extra for dusting
1/2 tsp sweet paprika
1/2 tsp dry mustard powder
1/2 cup freshly grated gruyere cheese
1 large egg yolk
2 tbsp ice water
sea salt and freshly ground black pepper

Slow Roasted Tomatoes
1 lb large ripe cherry tomatoes
2 garlic cloves, finely chopped
1 tbsp dried oregano
1/4 cup olive oil
sea salt and freshly ground black pepper

Eggplant Filling
2 medium eggplants
2 garlic cloves, crushed
1/2 tsp sweet paprika
1 tbsp dried oregano
3 large eggs, beaten
sea salt and freshly ground black pepper
2-3 tbsp of olive oil, to finish
a baking sheet
a 10x6 inch rectangular tart pan, or 6 4-inch diameter tart rings/pans

To prepare the tomatoes, preheat the oven to 325F. Cut the tomatoes in half horizontally and arrange them cut side up on a baking sheet. Put the garlic, oregano, olive oil, salt, and pepper in a bowl and mix well. Spoon or brush over the cut tomatoes. Bake slowly for about 2 hours, checking every now and then. They should be slightly shrunk and still a brilliant red color. If too dark, they will taste bitter. You can use the tomatoes right away or pack them into a container and cover with olive oil.

To make the pastry dough, rub the butter into the flour until it resembles fine bread crumbs. Stir in the paprika, mustard, gruyere, salt, and pepper. Mix the egg with 2 tbsp cold water and mix into the flour for a soft dough. Sprinkle with a little more water if the mixture is too dry.

Knead until smooth, wrap in plastic wrap, and chill for 30 minutes. Use to line the tart pan, then prick the base and chill or freeze for 15 minutes. Preheat the oven to 400F, line with parchment or foil filled with pie weights/dried beans, and blind bake for 10-12 minutes. Remove the weights and bake for an additional 5-7 minutes, until dry.

To make the filling, prick the eggplants all over and bake for 45 minutes or until soft. Remove from the oven and let cool. (Or prick each eggplant in 2-3 places and microwave on high for about 12 minutes until soft.)

Turn down the oven to 350. Halve the eggplants and scoop out the flesh into a food processor. Add the garlic, paprika, oregano, eggs, salt, and pepper to taste, then blend until smooth. Pour into the pie crust and bake for about 25 minutes or until set.

Remove from the oven and let cool. Arrange the roasted tomatoes over the surface to cover completely. Sprinkle with the olive oil, or use oil from the jar if you have stored the tomatoes, then serve.