I'm working on a new blog.
It will be very similar to this blog, just less Pittsburgh-centric. Be on the lookout for new photos and recipes!
Thursday, April 8, 2010
Monday, October 5, 2009
The End.

I think this was the last pie I made in Pittsburgh. It was the second to last pie I made in Pennsylvania, before I moved to Alabama for a new job. The unexpected opportunity has caused drastic changes in my life. If you told me three months ago that I'd be leaving Pittsburgh, I would have said you were crazy.
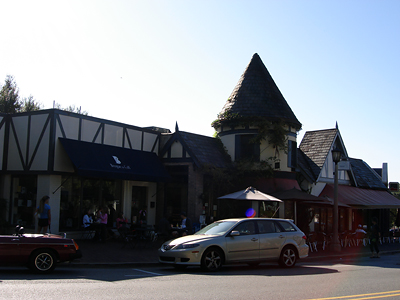
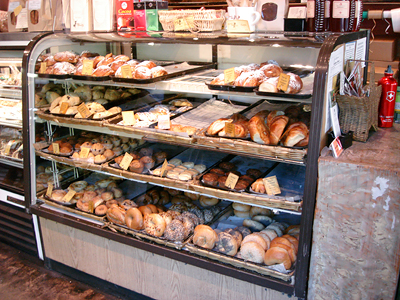
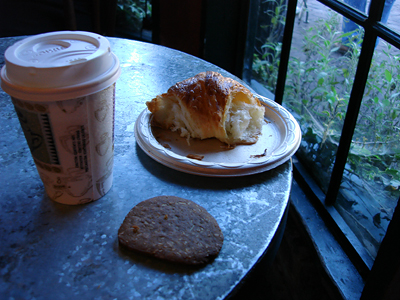
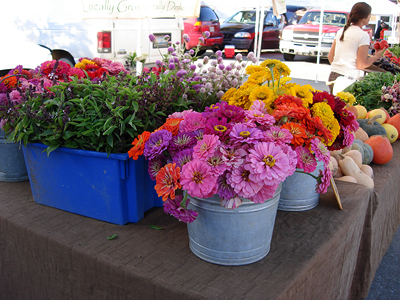
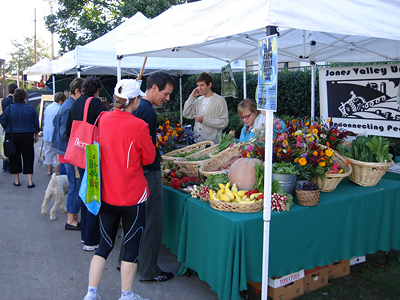
So instead of spending my weekends in the Strip, I am spending them visiting places like this:
Given that this blog was meant to be Pittsburgh centric, I think it's time to conclude it. I don't think blogs should go on forever- much has changed since I started this one, and i'm ready for new projects. Should I start a new baking or food related project, I will let you know. Pittsburgh has been good to me, and I will miss it.
Sunday, August 16, 2009
CSA Box Equals Less Baking
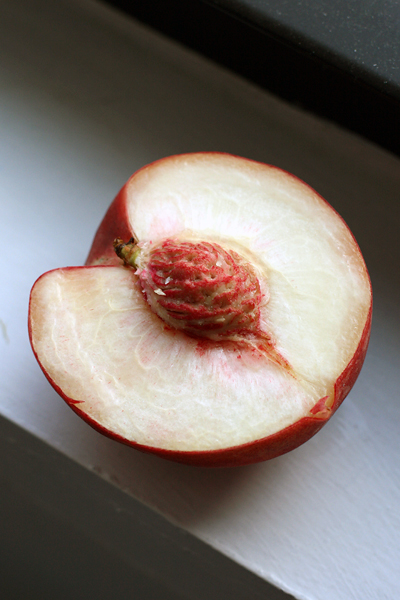
There were amazing peaches in my Penn's Corner Farm Alliance CSA box this week. I have included an extra-large photo to convey my extra-large love for them.
Friday, July 31, 2009
Banana Cream Pie

This pie was fantastic. I ate the first slice right after I assembled the pie. I ate the last slice on Friday at 8:30am after discovering it in the work fridge.
I'm picky about cream and custard pies. In my opinion, they have to taste good, look good, and slice well. Most recipes achieve sliceability with tapioca, cornstarch, or gelatin which, when abused, can ruin the pie's texture and taste.
The custard was so thick I worried that i'd inadvertently doubled the cornstarch. I thought it would taste bland and doughy, but this wasn't the case- brown sugar and cinnamon improved the flavor, and the texture was a nice contrast to the bananas and whipped cream/sour cream topping.
I'm definitely making it again. You can find the recipe here.
Monday, July 27, 2009
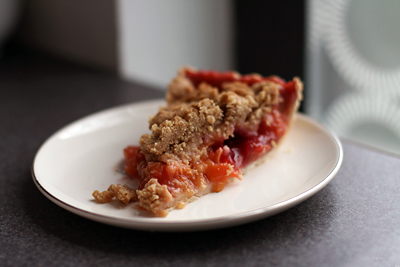
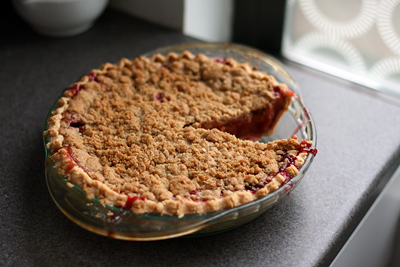
Strawberry Rhubarb Pie
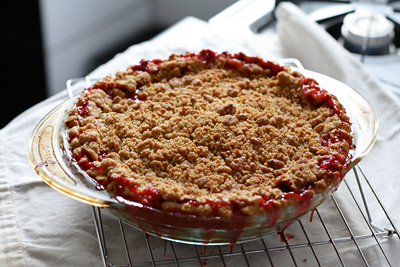
Another pie from Ken Haedrich's book. I thought the filling was a little runny, but that could be because I put too much fruit in. The cornmeal crumble topping, however, was fantastic. I'd put that on top of any pie.
I also made the sweet cherry pie with coconut almond crunch topping. I used a combination of bing cherries and ranier cherries. It was quite good, and I have plans to make it again soon.
I have few complaints about this book. It's been very reliable!
Sunday, July 26, 2009
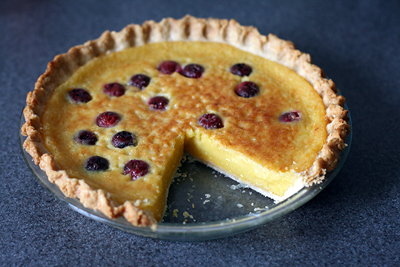
Lemon Chess Pie with Sour Cherries
Since I bake so often, I usually have treats to give away. I made seven pies last week, and while some of them were for specific people, others were up for grabs. Deciding who to give them to was an interesting process.
I have an unspoken bartering system with people who loan me ingredients. An egg will get them a slice. Two pounds of peaches might get them half the pie, possibly the whole pie if i'm feeling really friendly. It usually depends on how badly I need the ingredient.
I also consider things like, "when was the last time I took a pie to work?" or "when did I last give a pie to [some person]?" Given too frequently, treats cease to be special. If you take a pie to work every day, people will start grumbling on the days you don't bring a pie. I like having a rotation of multiple workplaces and people.
If i'm really undecided, i'll mention my indecision on Facebook or in the company of friends. Whoever expresses the most interest in the pie usually gets the pie. Sometimes my morning commute factors in; if taking two pies to work requires getting them on the 71A during the morning rush, i'll probably pass. Many a pie has gone to a friend who lives nearby, or a friend with a car.
I sent half of this lemon pie to work with a friend, where it was promptly devoured. People came looking for it long after it was gone. I love hearing what happens to baked goods after I give them away. Sometimes I enjoy the stories about the food more than the food itself.
This is a versatile recipe. The original recipe in The Foster's Market Cookbook includes variations for Eggnog Pie and Chocolate Chess Pie. You can also substitute other fresh or dried fruits. I would suggest adding more than 1/2 cup- in this photo, i've used about 3/4 cup of cherries, and I think more would have been better.
Lemon Chess Pie with Sour Cherries
adapted from Sara Foster's The Foster's Market Cookbook
1 1/2 cups sugar
1 tbsp yellow cornmeal
1 tbsp all purpose flour
3 large eggs, lightly beaten
Grated zest and juice of 2 lemons
4 tbsp unsalted butter, melted and cooled
1/2 cup heavy cream
1 tsp pure vanilla extract
1/2 cup fresh sour cherries, pitted
OR 1/2 cup dried cherries, soaked in hot water for 1 hour and drained
1 unbaked 9-inch pie crust
1. Preheat the oven to 350F.
2. Combine the sugar, cornmeal, and flour in a bowl and stir until blended.
3. Add the eggs to the sugar mixture and whisk until smooth and well blended.
4. Add the lemon zest, lemon juice, butter, cream, and vanilla, and mix until well blended.
5. Place the cherries in the bottom of the chilled, unbaked pie crust.
6. Pour the filling on tom of the cherries. Bake 50-55 minutes, or until the top is golden brown and a toothpick inserted in the center comes out clean.
7.Cool the pie completely on a baking rack before slicing.
Tuesday, July 21, 2009
Sour Cherry Pie
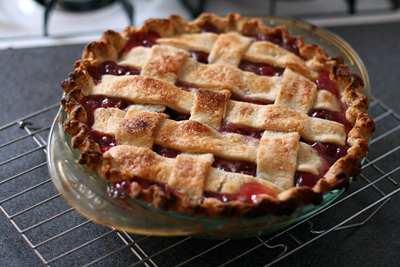
The produce store on Murray Avenue had sour cherries for $5 per quart. I bought two and used most of them to make this sour cherry pie from Ken Haedrich's book.
It's the first time i've seen sour cherries in Pittsburgh. I hear you have to order them; I know April from Cookworm ordered a flat from Patty's in Aspinwall. If anyone knows other places to source them, let me know!
I thought making a lattice would be complicated, but it wasn't. The book's clear directions and illustrations made the process simple and fun. I've tried four recipes from this book this week and i've liked them all. Right now I have a strawberry rhubarb pie in the oven- i'll let you know how it turns out.
Lattice-Top Deep-Dish Sour Cherry Pie
adapted from Ken Haedrich's Pie
1 recipe Flaky Pie Pastry
Filling:
6 cups fresh sour cherries, stemmed and pitted
1 1/4 cups + 3 tbsp sugar
1/4 cup cornstarch
2 tsp fresh lemon juice
Grated zest of 1 lemon
2 tbsp cold unsalted butter, cut into small pieces
Glaze:
Milk or light cream
Sugar
1. Roll the disk of pastry into a 13.5 inch circle between two sheets of wax paper. Peel off the top sheet of paper. Invert the pastry over a 9.5 inch deep-dish pie pan, center, and peel off the paper. Gently tuck the pastry into the pan without stretching it. Sculpt the overhang into an upstanding ridge. Refrigerate for 15 minutes.
2. Place the cherries in a large bowl. Mix sugar and cornstarch together in a small bowl, then stir the mixture into the fruit. Add the lemon juice and zest. Set aside for 10 minutes. Preheat the oven to 400F.
3. On another sheet of wax paper, roll the remaining pastry into a 12x10 inch rectangle. Cut the pastry into 8 lengthwise strips, each 1.25 inches wide. You should have at least 8. Set aside.
4. Turn the filling into the chilled pie shell. Smooth the top of the filling and dot it with the butter. Lay 5 pastry strips vertically across the pie, evenly spaced. Fold back strips 2 and 4 and lay another strip directly across the center of the pie. Unfold the folded strips, then fold back strips 1, 3, and 5. Lay another perpendicular strip across the pie. Unfold the folded strips, then fold up strips 1, 3, and 5 on the other side of the pie. Place another perpendicular strip across the pie, then unfold strips 1, 3, and 5. Trim the strips, then pinch the ends of the strips into the edge of the pastry. Lightly brush the strips with milk and sprinkle the top of the pie with sugar.
5. Bake for 30 minutes. Reduce the oven temperature to 375F and rotate the pie 180 degrees. Just in case, slide a large baking sheet onto the rack below to catch any spills. Bake until the top is golden brown and any visible juices bubble thickly, 35-40 minutes.
6. Transfer the pie to a wire rack and let cool for at least 2 hours before serving.
Monday, July 20, 2009
Photo Update
I've repaired all of the dead photo links, with exception of a few from 07/2007. I've also uploaded a ton of archived photos to flickr. Enjoy, and thanks for your patience with the fix!
Sunday, July 19, 2009
Friday Pie-Day
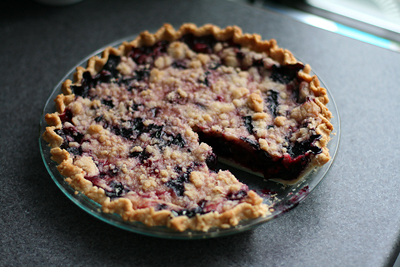
My friend Emily has this thing called "Friday Pie-Day." It involves making pies on Thursday night and delivering them to work the next morning. She wanted to improve her pie technique (which was excellent to begin with), so we met up in Squirrel Hill and made four pies: two Peach and Sour Cherry with Oatmeal Crumb Topping, and two Mixed Berry Crumb.
We baked for a good five hours, stopping to eat dinner and run to the store for extra flour and cornstarch. While the pies were baking, we watched the latest episode of So You Think You Can Dance. It was a nice change of pace; it's been a while since I baked with a friend, in someone else's kitchen.
Pies aren't an exact science. Eventually, you learn to make them intuitively- adjusting quantities of sugar, water, and thickener as needed, and changing the fillings using what you like or what's on sale.
Learning to make pie has been a process of trial and error. I made the dough by hand, with a stand mixer, and with a food processor. I tried adding vodka and vinegar to my crusts to make them more tender. I tried rolling my crusts directly on the counter, between sheets of plastic wrap, and inside of gallon-sized ziplock bags. I've been making pies for years, and I still think there's more to learn.
If you make enough pies, your personal preferences will take over. For a long time, the only recipe I made was printed on cardboard Crisco wrappers. I made all of my crusts with butter-flavored shortening, because that was what my mother used. Now, I have a preferred arsenal of crust recipes, and several pies that I make repeatedly. I rarely follow recipes exactly.
In the case of last Friday's pies, I reduced the amount of sugar in both recipes. I substituted sour cherries for bing cherries and raspberries for a mixture of rasperries, blackberries, blueberries, and cherries. Both recipes came from Ken Haedrich's Pie. It's a great book, though some of the 300+ recipes are better than others. I'll leave you with the recipe for the Peach and Cherry pie.
Flaky Pie Pastry (for a double crust)
adapted from Ken Haedrich's Pie
3 cups all-purpose flour
1 tbsp sugar
1 tsp salt
1/2 cup (1 stick) cold unsalted butter, cut into 1/4 inch pieces
1/2 cup cold vegetable shortening, cut into pieces
1/2 cup cold water
1. Put the flour, sugar, and salt in a food processor. Pulse several times to mix. Scatter the butter over the dry ingredients and pulse the machine 5 or 6 times to cut it in. Fluff the mixture with a fork, lifting it up from the bottom of the bowl. Scatter the shortening over the flour and pulse 5 or 6 times. Fluff the mixture again. Drizzle half of the water over the flour mixture and pulse 5 or 6 times more, until the dough starts to form clumps. Overall, it will look like coarse crumbs. Dump the contents of the processor bowl into a large bowl. Test the pastry by squeezing some of it between your fingers. If it seems a little dry and not quite packable, drizzle a tsp or so of cold water over the pastry and work it in with your fingertips.
2. Using your hands, pack the pastry into 2 balls, making one slightly larger than the other; this larger will be your bottom crust. Knead each ball once or twice, then flatten into 3/4 inch disks on a floured work surface. Wrap the discs in plastic and refrigerate for at least an hour or overnight before rolling.
Peach and Sour Cherry Pie
Pie dough for a single crust
Filling:
4 cups peeled, pitted, and sliced ripe peaches
2 cups sour cherries, stemmed and pitted
2/3 cup granulated sugar
1 tbsp fresh lemon juice
1/4 cup firmly packed light brown sugar
3 tbsp corn starch
Big pinch of ground nutmeg
Oatmeal Crumb Topping:
1 cup all purpose flour
1/2 cup rolled oats (old-fashioned or quick cooking)
2/3 cup firmly packed light brown sugar
1/2 tsp ground cinnamon
1/4 tsp salt
1/2 cup (1 stick) cold unsalted butter, cut into 1/4 inch pieces
1. If you haven't already, prepare the pie dough and refrigerate until firm enough to roll, about 1 hour.
2. On a sheet of lightly floured waxed paper, roll the pastry into a 13-inch circle with a floured rolling pin. Invert the pastry over a 9.5 inch deep dish pie pan, center, and peel off the paper. Gently tuck the pastry into the pan, without stretching it, and sculpt the overhang into an upstanding ridge. Place in the freezer for 15 minutes.
3. Combine the peaches, cherries, granulated sugar, and lemon juice in a large bowl. Mix well, then set aside for 10 minutes to juice. Preheat the oven to 400F.
4. In a small bowl, combine the brown sugar and cornstarch. Stir the mixture into the fruit along with the nutmeg. Turn the filling into the chilled pie shell and smooth the top of the fruit with your hands. Place the pie on the center oven rack and bake for 30 minutes.
5. Meanwhile, make the crumb topping. Put the flour, oats, brown sugar, cinnamon, and salt in a food processor and pulse several times to mix. Scatter the butter over the top and pulse until the mixture resembles fine crumbs. Empty the crumbs into a large bowl and rub them between your fingers until you have large, buttery crumbs. Refrigerate until ready to use.
6. Remove the pie from the oven and reduce the temperature to 375F. Carefully dump the crumbs in the center of the pie, spreading them over the surface with your hands. Tamp them down lightly. Return the pie to the oven, placing it so that the part that faced the back of the oven now faces forward. Just in case, slide a large aluminum foil-lined baking sheet onto the rack below to catch any spills. Continue to bake until the top is dark golden brown and the juices bubble thickly at the edge, 35-40 minutes. If the topping starts to get too dark, loosely cover the pie with tented aluminum foil during the last 15 minutes of baking.
7. Transfer the pie to a wire rack and let cool for at least 2 hours before serving.
Monday, July 6, 2009
On Yogurt
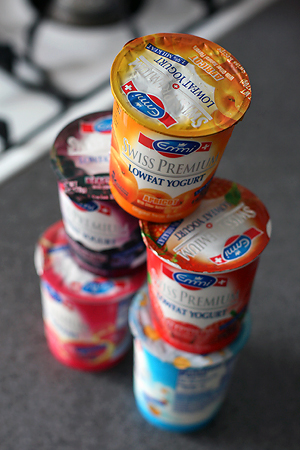
An 2004 industry report on the US yogurt market estimated that market value in 2008 would be $5,023 million. Apparently, our country eats a lot of yogurt.
The market is dominated by General Mills and Groupe Danone (Dannon is their US subsidiary), whose yogurts I tend to avoid. The grocery stores I visit have a wide selection, and i've become particular about my choices.
I don't like very sweet yogurt, or yogurt that masquerades as dessert. I don't want to see the words pie or mousse anywhere on the container. It shouldn't have extra digestive aids, vitamin supplements, cooked grains, or anything that needs to be mixed in. Even the president of Fage said mixing ruins the yogurt.
Packaging and branding can be particularly misleading. There are differences between "all-natural" and "organic" yogurts (the latter cannot contain bovine growth hormones). Many premium brands are subsidiaries of larger companies. Rachel's and Horizon Organics are both owned by Dean Foods. Stonyfield Farms and Oikos are both owned by Danone. Chobani is owned by Agro-Farma Inc, who used to manufacture Oikos for Stonyfield.
That said, I choose my yogurt for taste and texture. I tend to stick to low-fat yogurt, as full-fat is a little rich for everyday eating, and non-fat just doesn't taste right. Here are some of my favorites, in no particular order:
I haven't tried making my own yogurt yet, but one of my neighbors recommends Harold Mcgee's recipe. No yogurt maker required- all you need is a heated bowl or thermos.
Further reading:
Anstine, Jeffrey. "Organic and All Natural: Do Consumers Know the Difference?." Journal of Applied Economics & Policy 26, no. 1 (May 2007): 15-28.
"Yogurt in the United States." Yogurt Industry Profile: United States (February 2004): 1.
Berry, Donna. "It's a Jungle Out There." Dairy Foods 110, no. 4 (April 2009): 30-38.
Subscribe to:
Posts (Atom)
