Wednesday, March 5, 2008

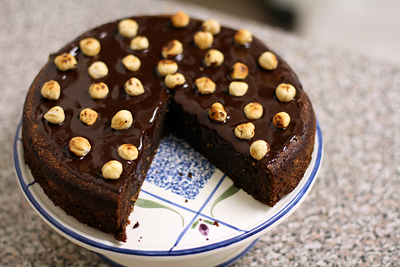
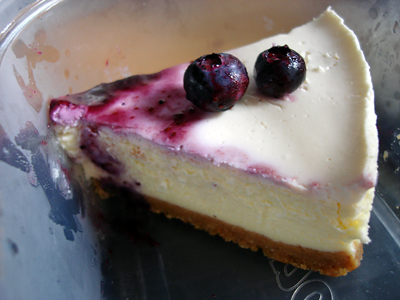
London Cheesecake, again.

lonchs

lonchs1

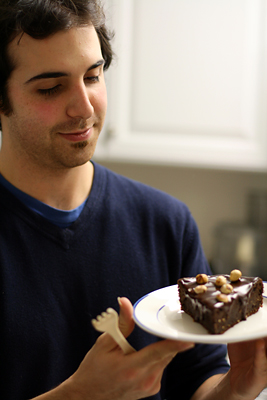
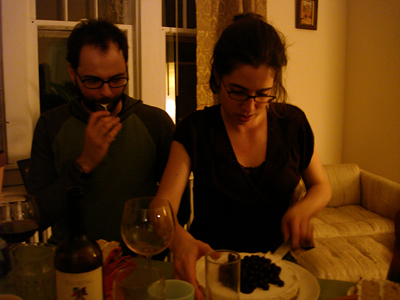
Eating Cheesecake

...just to prove these pretty things I make get eaten.

It was a small, five person dinner party. We made burritos and watched 30 Rock. Small dinner parties are under-rated, and i'd like to host some of my own eventually. Thanks to Brian (bottom left) for bringing the camera!

This recipe is here.

Tuesday, March 4, 2008

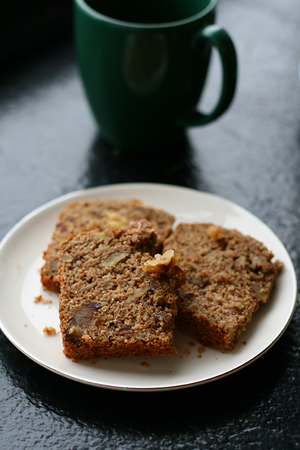
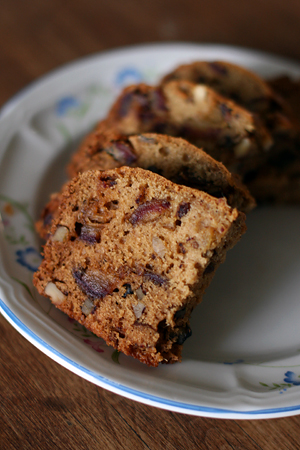
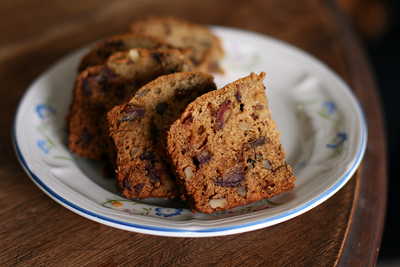
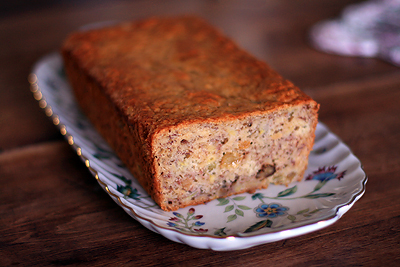
Healthy Banana and Date Loaf

Banana Date Walnut Loaf

Banana Date Walnut Loaf

I recently purchased Mix and Bake by Belinda Jeffery. Apparently, she's big in Australia. This book is a compilation of her "100 all-time favorite recipes for cakes, scones, muffins, biscuits, slices, quick breads, pies and tarts."

I need to try a few recipes, but I'll tell you what I like so far: it has entire chapters dedicated to scones and slices (bar cookies). There are some savory recipes too, like Egg, Leek, and Bacon Pie. I'm intrigued by the recipes that use grated pumpkin/butternut squash, olive oil, or whole-grain flours. Some of the recipes are decadent, and syrup-drenched while others are...healthy.

When I saw this recipe, I cringed a little. It had the word healthy in it. Still, I find that "healthy" recipes reveal much about the quality of a cookbook. I hate it when an author insists that a dense, cardboard-ish dessert tastes good.

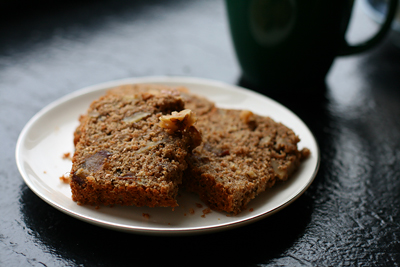
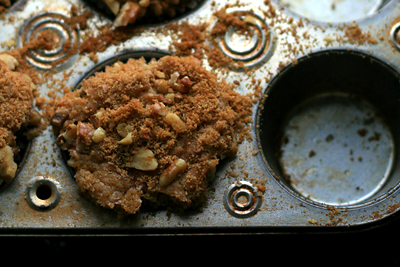
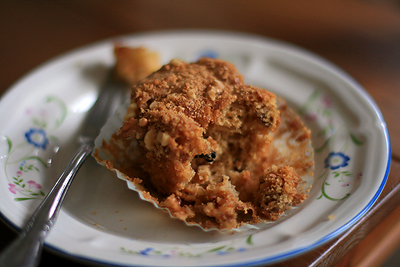
Belinda Jeffery doesn't falsely advertise this cake. It is more of a breakfast cake than a dessert. It isn't too sweet; I think the slight saltiness is very addictive and plays up the fruit and nut flavors. I'd suggest making it in muffin form- it's very, very difficult to slice unless it's completely cool, and even then it crumbles a little. If you like wheat bran and grains, you'd like this recipe.

This is another recipe for grain and bran lovers. Please: make it for breakfast or coffee. Don't substitute it for dessert. Put something on it if you like: Tony ate it with a pile of nutella, and the author says her customers frequently ask for ricotta, cottage cheese, or "lashings of butter" to go with it.

Healthy Banana and Date Loaf
Adapted from Belinda Jeffery's Mix and Bake

1 1/2 cups (240g) wholemeal self-raising flour*
1/2 tsp baking soda
1 cup (60g) wheat bran
1/3 cup (75g) raw sugar
1/4 tsp salt
1/2 cup (75g) chopped dates or dried apricots
1/2 cup (70g) coarsely chopped toasted walnuts or pecans
1/4 cup (60ml) milk
125g unsalted butter, cut into chunks
1/2 cup buttermilk
1 1/2 tsp vanilla extract
2 eggs
3 medium sized ripe bananas, mashed (about 3/4 cup mashed)
extra nuts for topping (optional)
ricotta, cottage cheese, or butter to serve (optional)

1. Preheat your oven to 350F/180C. Butter a 9x5in (23x13x6cm) loaf tin and line with parchment. Butter the parchment and dust the tin with flour, then set aside. (Alternately, you can just line the pan with foil.)

2. Put the flour, baking soda, bran, sugar, and salt into a large bowl and whisk them together until well combined. Add the apricots and pecans and toss them about so they're well coated in the flour mixture. Make a well in the middle of the mixture, then set aside.

3. Heat the milk in a small saucepan until it's just about to start boiling- you'll see little bubbles forming around the edges. Take it off the heat and stir in the butter until it's completely melted, then whisk in the buttermilk and vanilla extract.

4. In a separate bowl, lightly whisk the eggs, then pour in the buttermilk mixture, whisking as you pour. Scrape in the mashed bananas and whisk them in too. Tip this into the well in the dry ingredients and stir the two together until just combined. The batter will be very thick.

5. Scrape the batter into the prepared tin and smooth it out. At this point, you can top the loaf with extra nuts, raw sugar, streusel, or whatever you fancy.

6. Bake for about 45 minutes or until the loaf is golden and a fine skewer inserted in the center comes out clean. Leave it to cool in the tin for 5 minutes or so, then carefully ease the loaf out of the tin onto a wire rack. Gently pull away the parchment, put the loaf right side up, then leave it to cool completely on the wire rack. This cake keeps well in an airtight container in a cool place for 5 days. It also freezes well for up to three weeks.

*I can never find whole wheat self raising flour. I measured 240g whole wheat flour into my food scale, added 2 1/4 tsp baking powder and 3/4 tsp salt, then removed enough flour to make the weight 240g again. I did this using a conversion of 1 cup self raising flour= 1 cup flour+1 1/2 tsp baking powder+ 1/2 tsp salt. I wonder if the crumbliness of the loaf came from a conversion problem, so if anyone has better tips, let me know.

Friday, February 29, 2008

Bittersweet Chocolate and Hazelnut Cookies

Bittersweet Chocolate Hazelnut Cookies

Bittersweet Chocolate Hazelnut Cookies

The first time I checked out Dolce Italiano I thought it was boring and returned it. When I mentioned this to April, she seemed shocked and said she thought all the recipes looked delicious. Suddenly I felt like i'd been too hasty, too judgmental. I respect April's taste, so I decided to give the book another try.

I browsed the recipes one by one and realized that i've become horribly spoiled by photos. This book has a daunting amount of text, and many of the recipes don't explain what the finished product should look like. Sometimes you have to trust a recipe will be good without the reassurance of a glossy photo and multiple descriptive indicators. You have to read recipes and understand that simple ingredients can yield beautiful, rustic desserts with clean flavors.

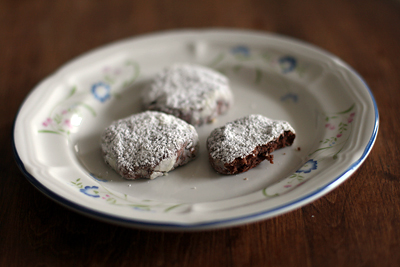
These chocolate and hazelnut cookies were a huge hit at work. Warm from the oven they were soft deeply chocolate flavored, almost like a tea cake. When cooled, they were slightly crunchy with a crumbly texture. The next day, they were softer but still rich and delicious.

Don't overmix the batter. It helps to fold the dry ingredients and butter/egg mixture several times with a spatula before turning on the mixer. My dough was very crumbly, but it came together when I formed it into discs. If you run the mixer long enough to make a very wet, cohesive dough, you'll end up with tough cookies. The cookies are rich, so it's better to make them smaller than bigger.

Bittersweet Chocolate and Hazelnut Cookies
adapted from Gina DePalma's Dolce Italiano
makes about 5 dozen cookies

2 cups unbleached all purpose flour
1/3 cup unsweetened dutch-processed cocoa powder
1/2 tsp baking powder
1/2 tsp kosher salt
1/2 cup whole hazelnuts, skinned or unskinned
1 cup (2 sticks) unsalted butter, softened
1/2 cup granulated sugar
1 large egg
1 tsp pure vanilla extract
5 oz semisweet or bittersweet chocolate, finely chopped (I used 60% Callebaut)
1 1/2 cups confectioners' sugar, for dusting

In a medium bowl, whisk together the flour, cocoa powder, baking powder, and salt. Place the hazelnuts in the bowl of a food processor and pulse them 2-3 times to chop them medium-fine. Add the hazelnuts to the bowl with the dry ingredients and stir to combine them.

In the bowl of an electric mixer fitted with the paddle attachment, cream together the butter and granulated sugar on medium speed until pale and fluffy, about 2 minutes. Beat in the egg and vanilla extract and scrape down the sides of the bowl. On low speed, beat in the dry ingredients, followed by the chocolate, and beat just until combined. Cover the bowl with plastic wrap and chill the dough until firm, about 30 minutes.

Preheat the oven to 325F. Lightly grease two baking sheets with nonstick cooking spray or butter or line them with parchment paper.

Place the confectioners' sugar in a shallow bowl. To form the cookies, roll 1 scant tablespoon of dough into a 1 inch ball, then flatten it slightly with your fingertips to form a small disc. Roll the cookie in the confectioners' sugar to coat it evenly and place it on the baking sheet. Repeat until all of the dough is used, spacing the cookies 1 inch apart on the baking sheets.

Bake the cookies until they are puffed and cracking, 8-10 minutes. Rotate the baking sheets 180 degrees halfway through the baking time to ensure that the cookies bake evenly. Allow the cookies to cool on the baking sheets for 1-2 minutes, then use a spatula to transfer them gently to a wire rack to cool completely. If desired, dust them with additional confectioners' sugar.

The cookies can be stored in an airtight container, layered between sheets of parchment paper, and kept in a cool, dry place for up to 1 week.

Wednesday, February 27, 2008

Meme.

Meme.

Aran from Cannelle et Vanille tagged me for a meme. I tried using Wikipedia to figure out what "meme" means. I found that entry rather indecipherable (and slightly hilarious).

Apparently i'm supposed to reveal some facts about myself. I prefer to focus on recipes, but I'll jump on this meme train and indulge you with some personal tidbits.

1) This is my favorite book. I almost bought it solely for the cover art. Another customer saw me pick it up and said "That book is amazing. You have to buy it." I think it's really beautiful.

2) I'm pretty frugal and try not to acquire more possessions than I can move myself. That said- there are certain items I'm willing to splurge on if I save a little: high quality bedding, japanese ceramics (or other fine china/earthenware), and nice stationery. Design Sponge gives me a lot of inspiration. I really treasure and use almost everything I own.

3) This is the first cookbook I ever used. I made a lot of chocolate chip cookies and brownies. Occasionally toad-in-the-hole (bread with an egg cooked in the middle).

4) I love going to sleep and waking up early. I really value my sleep; it's one of the highest things on my list of priorities. Sleep, exercise, and eating habits really affect my mood, so I try to keep them stable and maintain a certain amount of routine.

5) I really love costume dramas, especially if they make me cry. I've seen the new Pride and Prejudice five or six times. I love the costumes, the cinematography, the accents, the angst, the romance...Some of my current favorites include I Capture the Castle, Nicholas Nickelby, Daniel Deronda, Legends of the Fall, Jane Eyre, Mansfield Park, The Piano, Bleak House, Shakespeare in Love, Moll Flanders, The Remains of the Day, and many others.

6) I'm very punctual. I hate that many music and social events have an implied period of lateness. Ugh.

7) I'm smitten with Pittsburgh. Every time I exit the Fort Pitt tunnel and see the gorgeous view of the city, my heart catches in my throat. I have no desire to leave anytime soon (possibly ever).

Monday, February 25, 2008

Bran Muffins

Bran Muffin

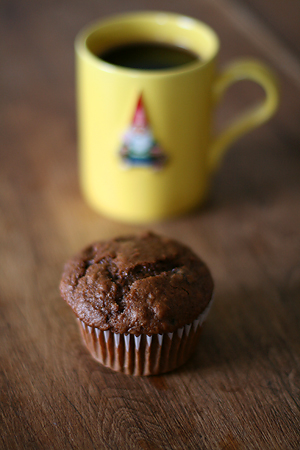
These muffins were, if anything, confusing. They almost tasted like a lot of things: chocolate, ginger, molasses, brown sugar, cinnamon, nutmeg, etc. Somehow, the flavors didn't quite mesh. They had a fluffy, bran-ish texture straight from the oven, but by day two they were sticky and dense.

When it's a dreary grey afternoon, a plain bran muffin doesn't exactly put a smile on my face. I've always equated wheat bran with health food. If you put a bran muffin and any other kind of muffin in front of me, i'd probably choose the latter. You'd probably like these if you like bran muffins and dark gingerbread cakes. They aren't too sweet and they're good with a strong cup of coffee.

I used Carole Walter's "Too Good to be True Bran Muffins" recipe. It says it yields 12 muffins, but I got 12 muffins and 12 mini muffins out of it. I'm not going to post it- i've posted quite a bit out of this book already.

Saturday, February 23, 2008

Nutella Cake

Tony w/ Nutella Cake

Nutella Cake

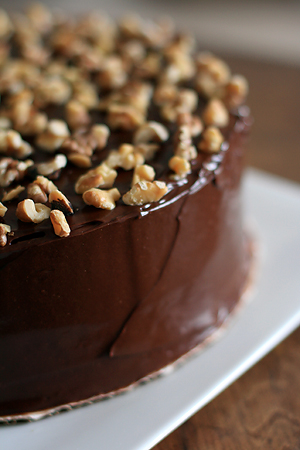
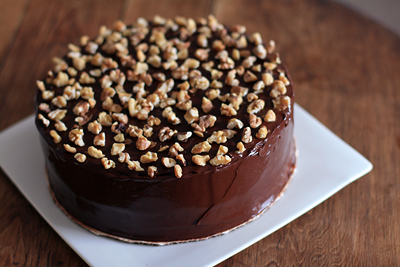
Kim and Tony made this Nutella cake last weekend. They were quite proud of it. The photo in How to be a Domestic Goddess is really striking; i've thought of making the cake multiple times, but I never seem to get around to it.

It's good to have a recipe like this in your repertoire: elegant and easier to make than it looks. It's the sort of dessert you could throw together for a dinner party with very little planning. It wasn't my favorite cake, but who can say no to something that looks so pretty?

Nutella Cake
Serves 8
Nigella Lawson: How to be a Domestic Goddess

for the cake
6 large eggs -- separated
1 pinch salt
115 g soft butter
1 jar of Nutella (400 g) (Yes, an entire jar.)
1 tablespoon Frangelico or water
100 g finely ground hazelnuts
120 g dark chocolate, melted

for the icing
100 hazelnuts
125 ml double cream
1 tablespoon Frangelico or water
125 g dark chocolate

Preheat oven to 175 degrees C. (350 F).

Prepare a 9-inch springform pan: grease and line with parchment or wax paper.

In a large bowl, whisk the eggs whites and salt until stiff but not dry. In a separate bowl, beat the butter and Nutella together, then add Frangelico (or what you're using), egg yolks, and ground hazelnuts. Fold in the cooled, melted chocolate, then lighten the mixture with a dollop of egg white, which you can beat in as roughly as you want, before gently folding the rest of them in a third at a time. Pour into the prepared pan and cook for 40 minutes or until the cake's beginning to come away at the sides, then let cool on rack.

Toast the hazelnuts in a dry frying pan until the aroma wafts upward and the nuts are golden brown in parts: keep shaking the pan so they don't burn on one side and stay too pallid on others. If you use unpeeled nuts, transfer them to a kitchen towel, and rub, rub, rub. Most of the skins should come off. Transfer to a plate and let cool. Leave them whole or chop them up, depending on how much skin you actually managed to get off.

In a heavy-bottomed sauce pan, add the cream, liquer or water, and chopped chocolate and heat gently. Once the chocolate's melted, take the pan off the heat and whisk until it reaches the right consistency to ice just the top of the cake. Unmold the cooled cake carefully. Ice the top with the chocolate icing, and decorate with the hazelnuts. Serve with a lightly sweetened whipped cream.

Friday, February 22, 2008

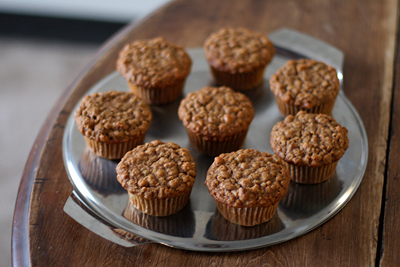
Oatmeal Raisin Muffins

Oatmeal Raisin Muffins

I'm steadily working my way through the Muffins & Quick Breads chapter of Carole Walter's latest book. I like the muffin recipes because they're not overly sweet or oily.

I picked these muffins for their simplicity. The easy combination of oatmeal, spices, raisins, walnuts, and buttermilk makes them great for breakfast. I'd suggest eating them the day they're made, or freezing and reheating them. After a day at room temperature they lose their delightfully crispy tops.

Yesterday one of my coworkers said, "Lisa, have you seen Stranger Than Fiction?" I told him I had, and ever since he's been calling me Miss Pascal (Maggie Gyllenhaal's character, who drops out of college to become a baker). He started laughing when I carried these muffins into the office. Word of my baking seems to have circulated.

Speaking of work, i'm busier than I expected to be this month. I missed a few blogging events i'd been hoping to try, and it's looking less and less likely that i'll complete this month's Daring Bakers challenge. It's a little dissapointing, but sometimes life gets a little crazy.

Oatmeal Raisin Muffins
adapted from Carole Walter's Great Coffee Cakes, Sticky Buns, Muffins & More

1 1/4 cups all purpose flour
1 1/4 cups old fashioned oats
1 tsp baking powder
1 tsp baking soda
1/4 tsp salt
1 1/2 tsp ground cinnamon
1/2 tsp ground nutmeg
1/4 tsp ground allspice
2 large eggs
3/4 cup (lightly packed) dark brown sugar
1 cup buttermilk
1/2 cup canola oil
1 tsp pure vanilla extract
1/2 cup dark raisins, plumped, drained, and patted dry
1/2 cup coarsely chopped toasted walnuts

1. Position the rack in the lower third of the oven. Heat the oven to 375F. Line a muffin pan with paper or foil cupcake liners.

2. Combine the flour, 3/4 cup of the oats, the baking powder, baking soda, salt, cinnamon, nutmeg, and allspice in the bowl of a food processor fitted with the steel blade. Pulse 10 times. Empty into a large bowl and add 1/2 cup oats. Make a well in the center.

3. In a medium bowl, whisk together the eggs and brown sugar, then add the buttermilk, oil, and vanilla and pour the mixture into the well. Using an oversize rubber spatula, incorporate the mixtures by pushing them from the side of the bowl toward the center. Fold in the raisins and nuts. Let stand for 5 minutes.

4. Portion the batter into the prepared pan using a 1/4 cup capacity ice cream scoop. The batter should be filled to slightly below the top of the paper liner (about 3/4 full). Bake for 23-25 minutes, or until the muffins are golden brown and the tops are springy to the touch. Remove from the oven and place on a rack to cool. Store at room temperature, tightly wrapped in foil, for up to 5 days. These muffins may be frozen.

Wednesday, February 20, 2008

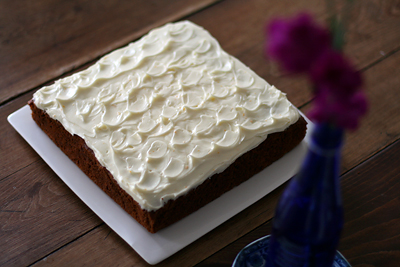
Carrot Honey Cake

Carrot Honey Cake

Carrot Honey Cake

My friend Liz needed a carrot cake recipe and gave me several guidelines: It had to be relatively simple (nothing fancy like pineapple or coconut), it couldn't require a food processor, and it needed to be appropriately sized for 4-5 people.

After I e-mailed her a few different recipes, I kept thinking why do I hate so many carrot cakes? All the store bought carrot cakes i've tried are oily, painfully sweet, and topped with those creepy, radioactive-orange carrots.

I like my carrot cakes simple, spicy, and lightly frosted. I prefer nut and raisin combinations to coconut and pineapple. I've only made this carrot cake though, so I figured it was time to start sampling a few other recipes.

I thought of Liz again when I read this Carole Walter recipe. It's the least labor intensive carrot cake recipe i've seen. I picked it for the orange zest, cardamom, and honey; these ingredients make the cake more interesting than usual. The zest gives the frosting a really fresh taste, and the cake itself is hearty without being greasy.

I took it to work around 9 and it was gone before noon. One of my co-workers laughed when I took a bite and exclaimed, "I really like this!" I was surprised. It was good.

Carrot Honey Cake
adapted from Carole Walter's Great Coffee Cakes, Sticky Buns, Muffins & More

3 large carrots (about 8 oz), peeled and trimmed
1 1/2 cups all purpose flour
2 tsp ground cinnamon
1 tsp baking soda
3/4 tsp ground cardamom
1/2 tsp salt
3 large eggs
1/2 cup granulated sugar
1/2 cup (lightly packed) very fresh light brown sugar
1 tsp freshly grated navel orange zest
3/4 cup canola oil
1/4 cup honey
1 tsp vanilla extract
1/2 cup medium chopped toasted pecans
1 recipe cream cheese frosting

1. Position the rack in the middle of the oven and preheat to 350F. Generously butter a 9x9x2 inch square pan and set aside (*you can also just line it with foil).

2. Shred the carrots. To shred in a food processor, fit the machine with the medium shredding disc. Cut the carrots into 1 inch chunks and place in the feeder tube. Shred using very light pressure. Remove the shredding disc and insert the steel blade. Pulse 4-5 times, then process for 5-6 seconds. You should have 1 1/2 to 1 2/3 cups. Set aside.

2. To shred by hand: finely shred the carrots using the smallest half-moon side of a box grater (scant 1/8 inch). You should have 1 1/2 to 1 2/3 cups. Set aside.

3. In a medium bowl, thoroughly whisk together the flour, cinnamon, baking soda, cardamom, and salt. Set aside.

4. Place the eggs in the bowl of an electric mixer fitted with the whip attachment. Beat for 2 minutes on medium speed, then add the granulated sugar, 1 tbsp at a time, taking 2-3 minutes. Add the brown sugar, 1 tbsp at a time, taking another 2 to 3 minutes, then beat in the orange zest.

5. Using a small whisk, mix together the oil, honey, and vanilla in a 1 quart mixing bowl, beating until the honey is thoroughly incorporated with the oil. Immediately pour into the egg/sugar mixture in a steady stream and beat well. Reduce the speed to medium-low and mix in the carrots. Add the dry ingredients in two additions, mixing only to blend after each addition. Scrape down the side of the bowl as needed. Then, quickly mix in the pecans. Note: This batter cannot stand before baking because the oil and honey will settle to the bottom of the bowl.

6. Immediately pour the batter into the prepared pan and baked for 40-45 minutes. The cake is done when it is firm to the touch, the sides begin to release, and a toothpick inserted in the center comes out clean.

7. While the cake is baking, prepare the frosting.

8. Remove the cake from the oven and place on a cooling rack. When the cake is cool, spread with the frosting, swirling it with the bottom of a soupspoon. Cut into 16 squares. Refrigerate for up to 7 days. The frosted cake may be frozen.

Cream Cheese Frosting

6 oz cream cheese, cold
6 oz butter, soft
1 1/2 cups powdered sugar, sifted
1 tsp pure vanilla extract
1/2 tsp freshly grated navel orange zest

Combine all the ingredients in the work bowl of a food processor fitted with the steel blade. Pulse 3-4 times, then process for 3-4 seconds. Stop the processor, scrape down the side of the bowl, and empty into a small bowl. Cover with plastic wrap and refrigerate until ready to use. (You can also make this in a bowl with a hand mixer).

Monday, February 18, 2008

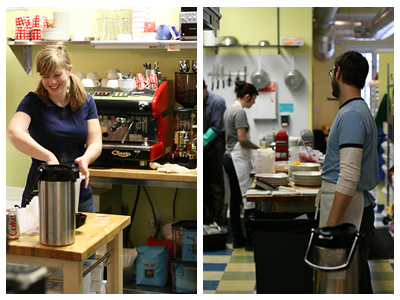
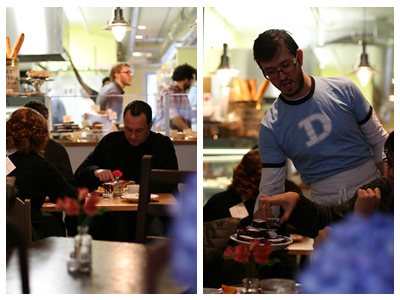
Brunch @ Dozen Bakeshop

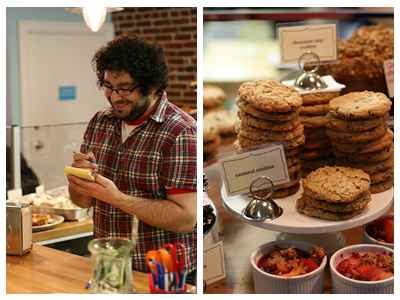
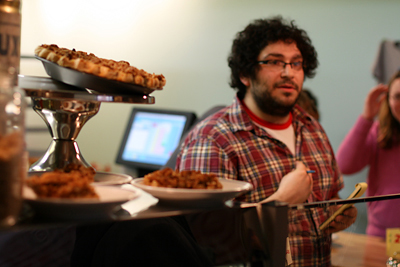
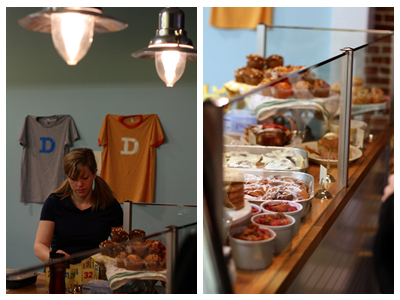
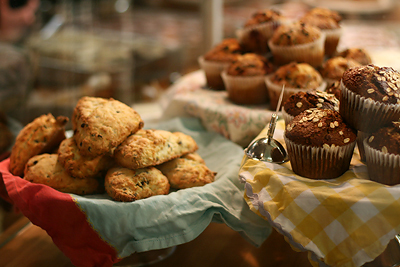
I'm going to waive my usual two-photo limit to show you some lovely images from brunch at Dozen Bakeshop. This place is obviously a labor of love, and every time I see their ads on craigslist I wish I was still baking for a living. The bakeshop is brilliantly efficient; you order at the counter, refill your coffee, and bus your own tables, which really cuts back wait time.

I love that efficiency hasn't made the bakeshop any less friendly. Someone has an eye for detail- there are lovely decorative touches like vintage tins and milk containers, flowers, christmas lights, brightly colored napkins, exposed brick, and mismatched tables and chairs.

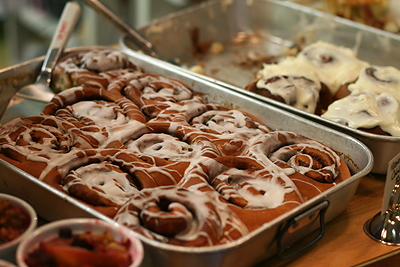
Brunch itself was delicious. We tried as much as we could stomach: beautifully presented, generous portions of quiche and baked french toast, cinnamon rolls, apple crumb cake, granola with fruit and yogurt...all the entrees came out at once, which was rather spectacular.

Best of all, everyone was hospitable. James walked around with a plate of brownies and offered every table a sample. This was also the first place i've recieved an enthusiastic response when I asked to take photos.

The pastries and entrees are familiar and well-executed. Some of the selections included cheesecakes, fruit crumbles, scones, cookies, brownies, cinnamon rolls, muffins, coffee cakes, and apple pie. They had a good selection of vegan options as well.

Dozen Bakeshop has only been open for a week or two, so I hope they continue to do well once the newness wears off. I wish them lots of success!
Brunch @ Dozen

Brunch @ Dozen

Brunch @ Dozen

Brunch @ Dozen

Brunch @ Dozen

Brunch @ Dozen

Brunch @ Dozen

Brunch @ Dozen

Saturday, February 16, 2008

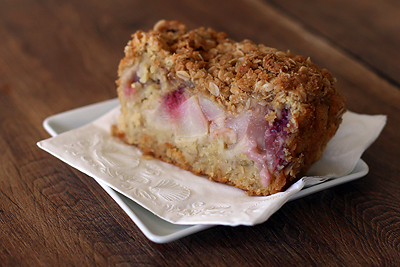
Oat, Pear and Raspberry Loaf

Oat, pear and raspberry loaf

Oat, pear, and raspberry loaf

"I have to stop reading your blog," Siobhan said. "I look at it and think, I have eggs. I have butter. I should bake."

I also experience this sentiment. I'll browse the contents of my fridge and calculate how many different recipes I can make without hitting a grocery store. It's not about making something specific; sometimes I just can't stand to see ingredients go bad. When you devote a good chunk of your budget to food, you feel guilty wasting it. Before you know it, you have three cakes or five plates of cookies on the counter (i'm only exaggerating a little) and you're struggling to give them away.

So why bake at all? Why not throw those overripe fruits and nearly empty jars/bags of ingredients in the garbage? I usually cite one of the following reasons: it's educational, it's productive, it's a creative outlet, it's an easy way to avoid homework, i love it.

None of those explanations entirely justifies the sheer amount of baking I do. The top questions I get are doesn't it get expensive? how do you not weigh 500 pounds? how do you make time for it?

I try not to think too hard about those questions. Maybe one day i'll be sick of baking. Until then, i'm going to just keep doing what i'm doing and let people keep pondering. Today I had two pears on their last legs, so I made Bill Granger's oat, pear and raspberry loaf. The batter tastes like a bowl of oatmeal loaded with brown sugar and butter.

When I cut into the cake it was still raw in the middle. Determined not to be dissapointed, I shoved the whole thing (cut piece and all) back into the loaf pan and baked it for another fourteen minutes. It was a dense, moist, falling apart mess. It's a very hearty cake that would be great for breakfast or brunch, and you'll love it if you're a fan of the 61c Cafe's oatmeal raspberry muffins.

Oat, Pear and Raspberry Loaf
adapted from Bill's Open Kitchen

topping:
25 g (1/4 cup) rolled oats
55 g (1/4 cup) brown sugar
2 tbsp plain all purpose flour
25 g (1 oz) chilled butter, cut into small pieces

cake:
100 g (1 cup) rolled oats
375 ml (1.5 cups) boiling water
150g (5.5oz) unsalted butter, diced
115g (1/2 cup) brown sugar
55g (1/4 cup) caster sugar (fine granulated sugar)
2 eggs
1 tsp natural vanilla extract
185g (1.5 cups) all purpose flour
a pinch of sea salt
1 tsp baking powder
2 ripe pears, peeled cored and diced
60g (1/2 cup) raspberries, fresh or frozen

Preheat the oven to 180C/350F. To make the topping, place all the ingredients into a bowl and rub the butter into the mixture with your fingertips until well incorporated and small clumps form.

To make the cake, place the oats into a bowl and pour over the boiling water. Stir and leave to cool until lukewarm. Cream the butter and sugars in a bowl until pale and creamy. Add the eggs, 1 at a time, beating well after each addition. Mix in the vanilla. Sift the flour, salt, and baking powder into the bowl. Drain any excess water off the oats. Add the oats to the mixture and fold to combine. Spread 2/3 of the mixture into a greased or nonstick 19x11cm (7.5x4.5in) loaf pan. Sprinkle with the pears and raspberries, top with the remaining cake batter then sprinkle the topping over evenly.

Bake for 1 hour 10 minutes, or until a skewer inserted into the centre of the cake comes out clean (*it should be well browned and feel springy to the touch. If the cake sinks significantly while cooling, it is probably under-baked). Turn out onto a plate before quickly transferring to a wire rack with the topping facing upwards. Leave to cool slightly before cutting. Serve in slices with butter. Makes 8-10 slices.

Thursday, February 14, 2008

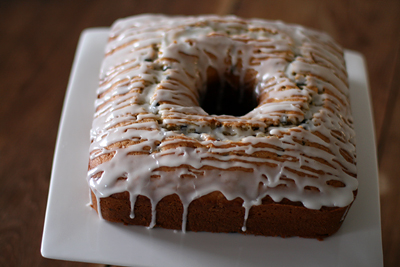
Banana Chocolate Chip Cake

Banana Chocolate Chip Cake

Banana Chocolate Chip Cake

I'm surprised that i'm not sick of banana desserts by now. This is the sixth banana recipe i've made since January. I have a habit of comparing banana bread/cake/muffin recipes. The little variations spark my curiosity.

This recipe has a higher proportion of fat than the others. A good dose of butter and sour cream makes the crumb very delicate and soft. It's more like a decadent pound cake than a traditional banana bread. Try to get the banana extract if you can; I thought my cake could have used more banana flavor. The mace is a nice peppery, nutmeg-like touch.

The directions might seem a little complicated or over the top. The details are related to texture. Pureeing and straining the bananas removes the seeds and improves their texture. Cake flour, sour cream, and superfine sugar improve the cake's tenderness and crumb. Creaming the butter and sugar and gently folding in the ingredients ensures a light, fluffy cake rather than a dense, tough one.

I cut up most of this cake and took it to work. It was definitely interesting and well enjoyed, but i'm not sure i'll make it again soon.

Banana Chocolate Chip Cake
adapted from Carole Walter's Great Coffee Cakes, Sticky Buns, Muffins & More

2 1/2 cups sifted cake flour, spooned in and leveled
1 tsp baking soda
1/2 tsp salt
1/2 tsp mace
2 large, very ripe bananas
1 tsp lemon juice
3/4 cup sour cream
1 tsp pure vanilla extract
3/4 tsp banana extract
3/4 cup unsalted butter (1.5 sticks) slightly firm
1 1/4 cups superfine sugar
3 large eggs
1/2 cup mini chocolate chips
1 large recipe vanilla glaze

1. Position the rack in the lower third of the oven. Heat the oven to 350F. Generously butter a 10 inch bundt pan, dust with flour, then invert it over the kitchen sink and tap firmly to remove the excess flour. Set aside.

2. In a large bowl, thoroughly whisk the flour, baking soda, salt, and mase. Set aside.

3. Cut the bananas into 1 inch pieces and place with the lemon juice in the bowl of a food processor fitted with the steel blade. Process for 30 seconds, then stop the machine and scrape down the sides of the bowl. Process for another 10 seconds, or until the bananas are pureed. Strain the puree through a medium-gauge strainer. You should have a generous cupful. Stir the sour cream and extracts into the bananas and set aside.

4. Cut the butter into 1 inch pieces and place in the bowl of an electric mixer fitted with the paddle attachment. Mix on medium speed until smooth and lightened in color, about 2 minutes. Add the sugar, 1 to 2 tablespoons at a time, taking 6 to 8 minutes. Blend in the eggs, one at a time, beating thoroughly after each addition, scraping down the side of the bowl as needed.

5. Reduce the mixer speed to low and add the dry ingredients alternately with the banana/sour cream mixture, dividing the flour mixture into four parts and the liquid into three parts, beginning and ending with the flour. Scrape down the side of the bowl, then mix for 10-15 seconds longer. Remove the bowl from the machine and, using a large rubber spatula, fold in the mini chocolate chips.

6. Spoon the batter into the prepared pan. Smooth the surface with the back of a large soupspoon and bake for 55-60 minutes. The cake is done when the top is golden brown and firm to the touch, and a wooden skewer inserted deeply in the center comes out clean.

7. Remove the cake from the oven and let stand on a cooling rack for 10 minutes. Invert the pan onto the rack and carefully lift it off. As the cake is cooling, prepare the vanilla glaze. While the cake is still warm, place a piece of parchment or wax paper under the rack and spoon the glaze onto the cake. The glaze will harden as the cake cools. Store under a cake dome or tightly covered with aluminum foil for up to 7 days. This cake may be frozen before glazing. You can also omit the chocolate chips and fold in 1/2 to 3/4 cup medium-chopped walnuts or pecans.

Vanilla Glaze
1 cup strained powdered sugar
3 to 4 tbsp hot water, milk, or cream
2 tsp light corn syrup
1/4 tsp pure vanilla extract
1/8 tsp lemon juice
2 pinches salt

Place the powdered sugar in a medium bowl. Add 3 tsp of the hot water or milk, the corn syrup, vanilla, lemon juice, and salt. Stir until smooth. Add additional liquid as needed to make a thin glaze. Use immediately if possible, or rewarm by setting the bowl in a bowl of hot water.

Tuesday, February 12, 2008

Thrift Store Finds.

Tube Pan and Cake Pan

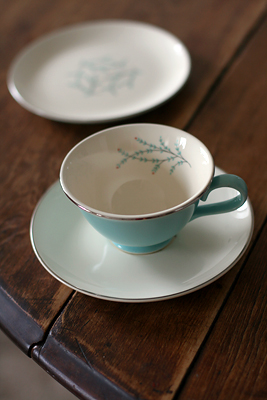
My New Dish Set

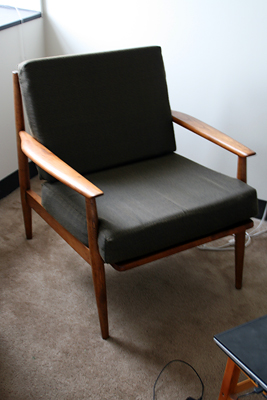
My Chair!


Red White and Blue is my favorite thrift store in Pittsburgh. I frequented the now closed location near Kennywood and bought random things like cheap polaroid cameras, vases, funny hats, welding goggles, and vintage teacups.

Now that I have friends with cars, I can visit the location at 890 Saw Mill Run Blvd. Siobhan and I went last week. I picked up a lovely 50s dish set, a stainless steel/acrylic cake container in the original German packaging, stainless steel air-tight storage containers, a square tube pan, a 10x6 baking pan, and a few other knick knacks. It's a great place to look for cheap cookware, dishes, and eclectically shaped baking pans. They also sort their clothes by color!

The chair was a craigslist find. I thought i'd include it because it's super cool. I'm going to recover the cushions with some happy, bold fabric.

Sunday, February 10, 2008

London Cheesecake

Serving a Cheesecake

London Cheesecake

I went to another fantastic potluck last night. The menu went like so:
  • Roasted tomato soup with browned butter, cream, cayenne pepper, and brandy
  • Homemade french bread
  • "Confetti Pizzas" with hummus or cream cheese, vegetables, and spices
  • Spinach salad with ricotta salata, oil-cured olives, red onions, and homemade vinaigrette
  • Roasted beet and squash salad
  • Homemade papardalle with mushroom sauce and thyme, or braised rabbit red sauce
  • Penne with avocados, broccoli, and white wine/herb sauce
  • London Cheesecake with blueberry topping
  • Spice cake with maple syrup meringue and toasted pecans
  • Lots of red wine, coffee, and tea

    Getting to the potluck was an adventure in itself. It's hard to be conspicuous on public transportation when you're carrying a large spice cake in a clear acrylic container. I sat directly across from a woman who took one look at the cake and wistfully said "I'm diabetic."

    I really enjoyed dinner. There were clear progressions between appetizers, main courses, and desserts, with nice breaks in between. Conversation was pleasant and we stayed up until after 1am playing trivial pursuit.

    Before dessert, I worried about the cakes. I worried the cheesecake's crust would be soggy because it leaked some water when I unwrapped it. I worried people wouldn't like the meringue frosting because I used a different vanilla extract that overpowered the maple flavor.

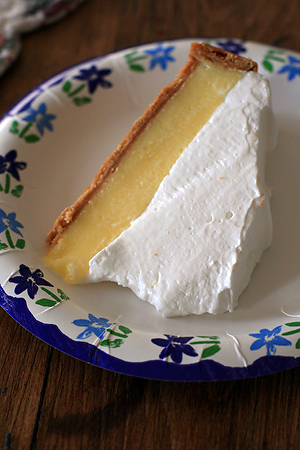
    Siobhan took a bite of cheesecake and said "this is the best cheesecake i've ever had." It definitely stole the show- there was one tiny piece left (the one in the photo). We managed to work through 3/4ths of the spice cake too. I felt pretty proud of myself.

    I topped the cheesecake with the blueberry topping from Claudia Fleming's The Last Course. The fruit and sour cream topping were a nice touch. I recommend lining the bottom of the springform pan with a circle of parchment. This will ensure neat slicing and easy removal. While I love my cheesecakes really cold, I do suggest pulling this one out twenty minutes ahead of time. It's very firm, and I think you can taste it better when it's warmed up a little.

    London Cheesecake
    adapted from Nigella Lawson's How to be a Domestic Goddess

    1/2 cup plus 2 tbsp or 5 ounces graham crackers
    6 tbsp unsalted butter, melted or very soft
    20 oz cream cheese
    1/2 cup plus 2 tbsp sugar
    3 large eggs
    3 large egg yolks
    1 1/2 tbsp vanilla extract
    1 1/2 tbsp lemon juice
    8 inch springform pan
    Heavy duty aluminum foil

    for the topping:
    3/4 cup sour cream
    1 tbsp sugar
    1/2 tsp vanilla extract

    Process the crackers until they are crumbs at this point, then add the butter and pulse again. Line the bottom of the springform pan, pressing the crumbs in with your hands or the back of a spoon. Put the pan in the refrigerator to set, and preheat the oven to 350F.

    Beat the cream cheese gently until it's smooth, then add the sugar. Beat in the eggs and egg yolks, then finally the vanilla and lemon juice. Put the kettle on.

    Line the outside of the chilled pan with foil so that it covers the bottom and sides in one large piece, then do the same again and put it in into a roasting pan. This will protect the cheesecake from the water as it is cooked in its water bath.

    Pour the cream cheese filling into the chilled base, and then pour hot water from the recently boiled kettle into the roasting pan around the cheesecake. It should come about halfway up; don't overfill as it will be difficult to lift up the pan. Put it into the oven and cook for 50 minutes. It should feel set, but not rigidly so: you just need to feel confident that when you pour the sour cream over, it will sit on the surface and not sink in. Whisk together the sour cream, sugar, and vanilla for the topping and pour over the cheesecake. Put it back in the oven for a further 10 minutes.

    Take the roasting pan out of the oven, then gingerly remove the springform, unwrap it, and stand it on a rack to cool. When it's cooled down completely, put it in the refrigerator, removing it 20 minutes before eating to take the chill off. Unmold and when you cut into it, plunge a knife in hot water first. Serves 8.
  • Saturday, February 9, 2008

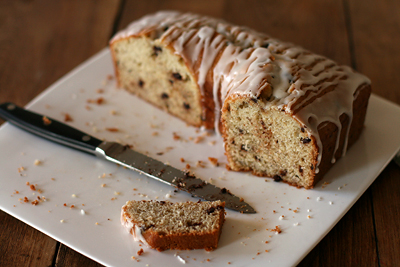
    Date and Nut Bread

    Date and Nut Bread

    Date and Nut Bread

    I'm pretty new to dates. As a child I got it into my head that they were gross. They looked sticky, wrinkly, and unappetizing. I heard people dismiss them as overly-sweet and tasteless, so I avoided them.

    Somehow, without much effort, i've grown to love dates (prunes too). Rather than remake Banana Date Muffins or Date Cake with Toffee Sauce, I decided to try a simple recipe for date and nut bread from Carole Walter's Great Coffee Cakes, Sticky Buns, Muffins, & More. It's simple, hearty, and satisfying. I put some in the freezer for the coming week.

    I've posted the recipe as it appears in the book. I rarely follow recipes to the letter- I halved the ingredients and made one loaf that only took 50 minutes to bake. I skipped the buttered parchment and just lined the loaf pan with foil. Keep an eye on your oven, and don't assume the loaf is done just because it looks very brown on top.

    Grandma Jennie's Date and Nut Bread
    adapted from Carole Walter's Great Coffee Cakes, Sticky Buns, Muffins, & More

    1 pound pitted dates, cut into 1/2 inch pieces
    2 cups boiling water
    2 tsp baking soda
    3 cups sifted all purpose flour, spooned in and leveled
    1/2 tsp salt
    1/2 tsp ground allspice
    1/2 cup (1 stick) unsalted butter, slightly firm
    1 tsp grated navel orange zest
    3/4 cup granulated sugar
    1/2 cup (lightly packed) very fresh dark brown sugar
    2 large eggs
    1 tsp pure vanilla extract
    1 1/4 cups walnuts, cut into 1/2 inch pieces

    1. Position the rack in the lower third of the oven. Heat the oven to 350F. Generously butter four 19oz tin cans using a pastry brush, line the bottoms with parchment circles, then butter the parchment. Or generously butter two 8.5x4.5x2.75 inch loaf pans, line the bottoms with parchment, then butter the parchment.

    2. Place the dates in a 2 quart bowl. Stir in the boiling water and the baking soda. Set aside.

    3. In a large bowl, thoroughly whisk together the flour, salt, and allspice. Set aside.

    4. Cut the butter into 1 inch pieces and place in the bowl of an electric mixer fitted with the paddle attachment. Add the orange zest and mix on medium speed until lightened in color, 1.5-2 minutes. Add the granulated sugar, 1 to 2 tablespoons at a time, taking about 2 minutes, then add the brown sugar, taking another two minutes, scraping down the sides of the bowl as necessary, and mix for 1 minute longer.

    5. Add the eggs, one at a time, mixing for 1 minute after each addition, then blend in the vanilla. Scrape down the sides of the bowl.

    6. Reduce the mixer speed to low and add the flour mixture alternately with the date mixture, dividing the flour into four parts and the dates into three parts, beginning and ending with the flour. Remove the bowl from the mixer, and using an oversized spatula, fold in the walnuts.

    7. If baking in tin cans, fill each can with 1.5 cups of batter. Tap the cans firmly on the counter to level the batter. Bake for 50-55 minutes. Alternatively, divide the batter between the prepared loaf pans and bake for 60-65 minutes. The bread is done when it is firm to the touch, the sides begin to release, and a toothpick inserted in the center comes out clean.

    8. Remove from the oven and let cool on racks for about 20 minutes. Invert each bread onto a rack and gently lift off the cans or pans and the parchment. When the breads are cool enough to handle, carefully turn them right side up. Store at room temperature, tightly covered with plastic wrap, for up to 5 days, or refrigerate for up to 10 days. These breads may be frozen.

    Tuesday, February 5, 2008

    Spice Cake with Maple Icing and Toasted Pecans

    Spice Cake w/ Maple Frosting

    Spice Cake w/ Maple Frosting

    How can you not enjoy a recipe when it tells you to throw nuts at the sides of your cake? I didn't bother trying to be precise or tidy. I literally took handfuls of pecans and whirled them at the cake. Most of them stuck, but many of them ended up on the countertops and the floor.

    I substituted the maple syrup cake from the original recipe for Flo Braker's spice cake. It was a good choice; the cake has a crumbly, rustic texture that reminds me of coffee cake. Combined with the maple syrup in the frosting, you could almost pass this cake off as a breakfast item.

    I was quite proud of how pretty the cake looked. I carried it, umbrella covered, through the rain to my friends at Apple. Everyone seemed to enjoy it, though Peter didn't care for the texture of the icing. He described it as "stretchy" or "stringy." Meringue tends to be hit or miss with most people. I like it when it's well-made. It's lighter than buttercream and reminds me of marshmallow fluff.

    This cake was fun to make, and I found myself smiling through the whole process. I find the flavors and textures playful and happy. It's an easy, elegant cake that would be good for birthdays or other occasions.

    Spice Cake with Maple Icing
    adapted from Nigella Lawson and Flo Braker

    For the cake:
    2 1/2 cups sifted cake flour
    1 teaspoon baking powder
    1/2 teaspoon baking soda
    1/2 teaspoon cinnamon
    1/2 teaspoon ground ginger
    1/4 teaspoon freshly grated nutmeg
    1/4 teaspoon salt
    1/8 teaspoon ground cloves
    1 cup buttermilk, at room temperature
    1 teaspoon pure vanilla extract
    1 1/2 sticks (6 ounces) unsalted butter, softened
    1 cup (packed) light brown sugar
    1/2 cup granulated sugar
    3 large eggs, at room temperature

    For the icing:
    2 large egg whites
    1/2 cup maple syrup
    7 tbsp sugar
    1/4 tsp cream of tartar
    1/4 tsp salt
    1 tsp vanilla extract
    1/2 cup or 4 oz pecans, lightly toasted

    1. Preheat the oven to 350° and position a rack in the lower third. Butter and flour two 8-by-2-inch round cake pans. Sift the flour with the baking powder, baking soda, cinnamon, ginger, nutmeg, salt and cloves onto a sheet of wax paper. Combine the buttermilk and vanilla in a small pitcher.

    2. In a standing electric mixer fitted with a paddle attachment, beat the butter at medium speed until creamy. Add the light brown and granulated sugars and beat until light and fluffy, about 4 minutes, stopping once to scrape down the bowl. Add the eggs, 1 at a time, beating well after each addition. Beat in the flour mixture at low speed in 3 batches, alternating with the buttermilk mixture, just until the batter is smooth; stop the mixer occasionally to scrape down the bowl.

    3. Divide the batter evenly between the pans. Transfer the pans to the oven and bake for 30 to 35 minutes, or until the cakes begin to shrink from the sides. Let the cakes cool for 10 minutes, then turn each out onto a rack, invert onto another rack and let cool completely. Wrap each cake in plastic and store at room temperature overnight.

    4. To make the frosting: Put everything except the extract and pecans into a glass or metal bowl that fits over a saucepan to form a double boiler. Fill the saucepan with enough water to come just below, but not touching, the bowl when it sits on top. Bring the water to the boil, set the boil on top, and using an electric mixer, beat the mixture vigorously for 5-7 minutes. It should stand up in peaks like a meringue mixture. Take the bowl off the saucepan, away from the heat, and add the extract, beating for another minute.

    5. Using the icing, frost the middle, sides, and top of the cake. Chop most of the pecans finely, leaving some pieces larger. Sprinkle over the top of the cake, and throw at the sides. This cake is best eaten the day it's made.
    .

    Sunday, February 3, 2008

    Peanut Butter Banana Muffins

    Peanut Butter Banana Muffins

    I'm enjoying the texture and flavor of Carole Walter's muffin recipes. These have mini chocolate chips, peanut butter, bananas, and salted peanuts. Kim says they taste like a peanut butter smoothie. They remind me of a peanut butter and banana sandwich. I'm going to take them to work and see how my coworkers like them.

    Peanut Butter Banana Muffins
    adapted from Carole Walter's Great Coffee Cakes, Sticky Buns, Muffins & More
    1 1/2 cups all purpose flour, spooned in and leveled
    1 tsp baking powder
    1/2 tsp salt
    1/4 tsp baking soda
    1/3 cup (2/3 stick) unsalted butter, very soft
    1/3 cup smooth peanut butter
    1/2 cup very fresh dark brown sugar
    1/3 cup granulated sugar
    1 large egg
    1 tsp pure vanilla extract
    1/2 cup plain yogurt
    1/2 cup mashed banana (about 1.5 medium, very ripe bananas)
    1/3 cup medium chopped salted Spanish peanuts
    1/2 cup mini chocolate chips
    4 tsp sparking sugar, for sprinkling (I used demerara sugar)

    1. Position the racks in the upper and lower thirds of the oven. Heat the oven to 375F. Line 14 muffin cups with paper or foil cupcake liners.

    2. In a medium bowl, thoroughly whisk together the flour, baking powder, salt, and baking soda.

    3. Combine the butter and peanut butter in the bowl of an electric mixer fitted with the paddle attachment. Mix on medium speed until smooth, about 1 minute.

    4. Add the brown sugar, then the granulated sugar, and mix on medium speed for 2 minutes, scraping down the sides of the bowl as needed. Add the egg and vanilla and mix for about 1 minute.

    5. Combine the yogurt with the banana. Reduce the mixer speed to low and add the dry ingredients alternately with the yogurt/banana mixture, dividing the flour in 3 parts and the yogurt mixture in 2 parts, starting and ending with the dry ingredients. Do not overmix.

    6. Set aside 2 tbsp of the peanuts for garnishing. Remove the bowl from the mixer. Using a rubber spatula, fold the remaining peanuts and the mini chocolate chips into the batter.

    7. Portion level scoops of the batter into the prepared pans using a no. 16 ice cream scoop (1/4 cup capacity). Sprinkle the top of each muffin with a scant 1/2 tsp of chopped peanuts and about 1/4 tsp of the sparkling sugar.

    8. Bake for 25-27 minutes, or until the muffins are golden brown and the tops are springy to the touch. To ensure even baking, toward the end of baking time, rotate the pans top to bottom and front to back. Remove from the oven and place on a rack to cool. Store at room temperature, tightly wrapped in aluminum foil, for up to 3 days. These muffins may be frozen.

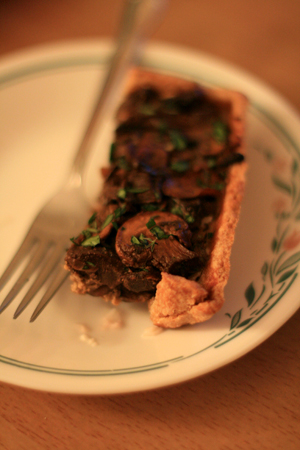
    Mushroom Tart.

    Mushroom Tart

    I made this recipe again for the potluck last week. I love a simple mushroom tart and this one gets plenty of flavor from dried porcinis and homemade mushroom stock.

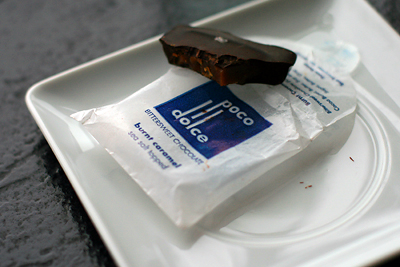
    I've also eaten my way through a box of poco dolce's bittersweet chocolate tiles with sesame brittle and sea salt. The coconut almond tiles are easily my favorite, but Mon Aimee Chocolat ran out.

    Poco Dolce

    The burnt caramel ones are also delicious. I think I just love anything with sea salt on top.

    Saturday, February 2, 2008

    Apple Crumble Cakes

    Apple Crumble Cakes

    Apple Crumble Cakes

    These photos don't communicate how delicious these cakes are fresh from the oven and topped with a generous scoop of vanilla ice cream. I think I ate three in one go. I love the crunchy topping and the big chunks of apples and chestnuts.

    I thought 8oz portions were too large. 6oz ramekins would work well for individual desserts and muffin tins make the cakes potable and good for snacking. The recipe yields 16-18 muffins, maybe more. I just eyeballed the portions and made sure not to fill the tins too full.

    Apple Crumble Cakes with Chestnuts
    adapted from Food and Wine Magazine

    INGREDIENTS
    1 1/2 cups coarsely chopped walnuts
    2/3 cup light brown sugar
    1 teaspoon cinnamon
    2 cups all-purpose flour
    1 teaspoon baking powder
    1 teaspoon baking soda
    1 stick unsalted butter, softened
    1 cup turbinado sugar
    1/2 cup dark brown sugar
    2 large eggs, beaten
    1 cup buttermilk
    2 large Granny Smith apples—peeled and cut into 1/2-inch dice
    1 cup roasted chestnuts, quartered
    Sesame or vanilla ice cream
    DIRECTIONS
    Preheat the oven to 350°. Place eight 8-ounce ramekins on a large rimmed baking sheet. In a bowl, toss the walnuts with the light brown sugar and cinnamon.
    In a medium bowl, whisk together the flour, baking powder and baking soda. In a large bowl, blend the butter with the turbinado sugar, dark brown sugar and eggs. Gently stir in the flour mixture and buttermilk until blended, then fold in the apples and chestnuts.
    Spoon the batter into the ramekins and sprinkle the walnut mixture on top. Bake for about 40 minutes, until the topping is browned and a cake tester inserted in the center of the cakes comes out clean. Let cool for 5 to 10 minutes, then serve with a scoop of ice cream.

    Wednesday, January 30, 2008

    Banana Date Muffins

    Banana Date Muffins

    Banana Date Muffins

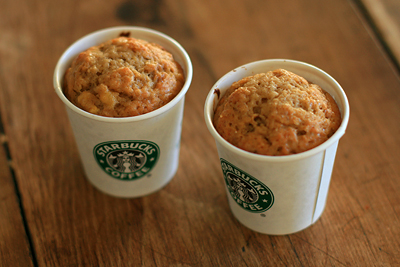
    I've been on a banana kick. These banana date muffins were well balanced and tasted as much of cardamom and nutmeg as they did of banana. They're great for breakfast! Try to use Medjool dates; there is a huge difference between good, unpitted dates and the small, hard things in most commercial packages.

    I'd heard you can bake in Starbucks cups. It's rather fun.

    Banana Date Muffins
    adapted from Carole Walter's Great Coffee Cakes, Sticky Buns, Muffins & More

    2 very ripe, medium bananas
    1 tsp fresh lemon juice
    1 3/4 cups all purpose flour, spooned in and leveled
    1/2 cup granulated sugar
    1 tsp baking powder
    1 tsp ground cardamom
    3/4 tsp salt
    1/2 tsp baking soda
    1/2 tsp ground nutmeg
    1/2 cup very fresh, pitted, hand-cut dates (1/4 inch dice)
    1/2 cup toasted pecans, coarsely chopped
    1/2 cup (1 stick) unsalted butter, melted and cooled to tepid
    1/2 cup very fresh dark brown sugar
    1/2 cup low-fat plain yogurt
    2 large eggs, lightly beaten
    1 tsp pure vanilla extract

    1. Position the racks in the upper and lower thirds of the oven. Heat the oven to 375 F. Line 14 muffin cups with paper or foil cupcake liners.

    2. Cut the bananas into 1 inch chunks and place them in a medium bowl. Mash with a potato masher or a fork. You should have about 1 cup banana pulp. Stir in the lemon juice and set aside.

    3. In a large bowl, thoroughly whisk together the flour, granulated sugar, baking powder, cardamom, salt, baking soda, and nutmeg. Toss the dates and nuts through the dry ingredients, separating the pieces of dates with your fingertips.

    4. In a medium bowl, whisk together the tepid butter and brown sugar. Blend in the bananas, yogurt, eggs, and vanilla.

    5. Make a well in the center of the dry ingredients and add the banana-egg mixture. Using an oversize spatula, incorporate the dry ingredients into the liquids by pushing them from the side of the bowl toward the center. DO NOT OVERMIX. It's okay if a few streaks of flour remain.

    6. Portion generous scoops of the batter into the prepared pans using a no. 16 ice cream scoop (1/4 cup capacity.)

    7. Bake for 25-28 minutes, or until the muffins are golden brown and the tops are springy to the touch. To ensure even baking, toward the end o baking time, rotate the pans from top to bottom and front to back. Remove from the oven and place on a rack to cool.

    Monday, January 28, 2008

    A Fantastic Lemon Meringue Pie

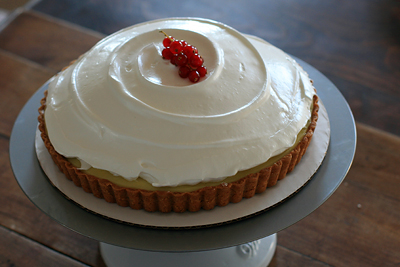
    Lemon Meringue Pie

    Lemon Meringue PIe

    This is the best lemon meringue pie i've had since elementary school. My best friend's grandmother Thelma would make pies and teach me about pinochle. I measure all lemon meringue pies against hers.

    So many lemon meringue pies aren't worth eating: they're too sweet, too sour, soggy crusted, sloppy looking, filled with nasty yellow goop, or topped with weeping meringue.

    I had a feeling this recipe would be good. I guessed that the use of gelatin sheets and Italian meringue would make the pie cohesive, easy to slice, and pretty to look at. The photo was gorgeous; I stuck it on the refrigerator and decided I had to try it.

    Instead of the printed crust recipe, I used the graham cracker dough from Claudia Fleming's The Last Course. It's flavored with cinnamon, honey, brown sugar, and a little whole wheat flour. I thought it was a nice change that took an edge off the sweetness and made the flavor more complex. It stayed nice and crisp too. The lemon curd was nice and tart, and I love the Italian meringue! It's very fluffy and marshmallow-like.

    Ironically, I made this right before all the folks from Daring Bakers posted their lemon meringue mini-tarts. It was a funny coincidence. I'd love to make this again soon. I'm going to try and get a blowtorch beforehand.

    Nick & Stef's lemon meringue pie
    adapted from The Los Angeles Times (latimes.com)
    Total time: 1 hour, 25 minutes plus chilling time
    Servings: 8 to 10
    Note: Adapted from a Nick & Stef's recipe. The dough makes enough for two pies. Half of the dough can be frozen, tightly wrapped, for up to 6 months.

    Sweet dough

    1 cup (2 sticks) butter
    3/4 cup plus 3 tablespoons sugar
    1 egg yolk
    1 whole egg
    1/3 cup almond flour
    3 1/4 cup flour
    1/2 teaspoon baking powder

    1. Cream the butter and sugar together in the bowl of a standing mixer fitted with a paddle attachment until it has a creamy consistency. Alternatively, cream the butter and sugar together in a large bowl using a hand mixer. With the mixer on, add the egg yolk until it is incorporated, then add the egg and incorporate completely.

    2. In a separate bowl, sift together the almond flour, flour and baking powder. Add the dry ingredients to the mixing bowl slowly and continue mixing until the dough is thoroughly combined. The dough should be slightly sticky but not wet. If the dough is too dry and crumbly, add up to 1 tablespoon of water to moisten the dough.

    3. Divide the dough into two equal portions. Shape each portion into a circle and cover tightly with plastic wrap. Refrigerate one of the portions, and allow it to rest for at least 1 hour. The remaining portion can be frozen for up to 6 months. (For frozen dough, thaw in the refrigerator before using.)

    4. Heat the oven to 350 degrees. Remove the chilled dough from the refrigerator, and place on a lightly floured work surface. Roll out the dough into a circle slightly less than one-fourth-inch thick and about 12 inches in diameter. Gently drape the dough into a 9-inch pie pan, and trim off any excess dough so that the crust is flush with the sides of the pan. With a fork, prick holes all over the dough to allow steam to escape during baking. Bake until golden brown, 15 to 25 minutes. Allow to cool on a rack.

    Lemon curd

    4 eggs
    2 egg yolks
    1 cup sugar
    Zest of 1 lemon
    1 cup fresh lemon juice
    2 gelatin sheets
    1/2 cup butter (1 stick), cut into 1/2 -inch cubes
    1 baked pie shell

    1. In a large heat-proof mixing bowl (you should be able to set it over a large pan or stock pot of simmering water to form a bain-marie), whisk together the eggs, egg yolks, sugar and lemon zest. Whisk in the lemon juice.

    2. Fill a small bowl with water, and insert the gelatin sheets to allow them to soften. Place the butter cubes into a medium bowl and set aside.

    3. Place the bowl with the lemon curd over a larger pot of gently simmering water to form a bain-marie. Cook the curd, stirring gently but constantly, until the curd begins to thicken and will lie on top of itself. Watch carefully to make sure the heat is not so hot that the eggs scramble. Immediately remove the curd from the stove, and pour the curd into the bowl with the butter. Remove the gelatin sheets from the water, wringing out any extra moisture, and add to the curd mixture. Gently stir the curd with a spatula to melt and incorporate the butter and gelatin into the mixture.

    4. Pour the lemon curd into the prebaked pie shell. Cover the surface of the curd with plastic wrap, and place in the refrigerator for at least a few hours, preferably overnight, until the curd is set.

    Meringue and assembly

    1 1/4 cup sugar
    4 egg whites
    1 lemon pie

    1. Place the sugar in a medium saucepan. Add one-half cup water, and stir with the sugar until it is the consistency of wet sand. Place the saucepan over medium-high heat, and cook the sugar until a thermometer inserted reads 240 degrees. (The sugar will form a firm ball when a little is dropped into a bowl of cold water).

    2. While the sugar is cooking, begin whipping the egg whites. Continue beating until the whites form stiff peaks, but be careful not to over-beat.

    3. When the sugar is ready, immediately remove it from the heat, and pour it into a heat-proof measuring cup to stop the cooking process. With the mixer speed on low, carefully begin pouring in the sugar, watching that the sugar does not touch the wire beaters and splatter. Once all of the sugar is added, increase the mixer speed to medium, and continue beating until the meringue cools and is very fluffy.

    4. Remove the chilled lemon pie from the refrigerator and remove the plastic wrap. Spoon the meringue on top of the curd with a rubber spatula, forming a dome on top of the pie. To toast the meringue (which is optional), use a small hand torch and lightly torch the meringue until it is golden brown. Serve immediately.

    Sunday, January 27, 2008

    Banana Bread ala Nigella

    Banana Bread

    "...it fills the kitchen with an aromatic fug which is the natural atmospheric setting for the domestic goddess" --Nigella Lawson

    My first thought on seeing this comment was: what the heck is a fug?

    fug (fŭg)
    n. A heavy, stale atmosphere, especially the musty air of an overcrowded or poorly ventilated room: "In spite of the open windows the stench had become a reeking fug" (Colleen McCullough).
    [Perhaps alteration of fogo, stench.]
    fug. (n.d.). The American Heritage® Dictionary of the English Language, Fourth Edition. Retrieved January 28, 2008, from Dictionary.com website: http://dictionary.reference.com/browse/fug


    That definition is less than delicious, but this banana bread is! The recipe originates from Jim Fobel's Old-Fashioned Baking Book: Recipes from an American Childhood. It's one of the few banana bread recipes i've made that doesn't involve buttermilk, yogurt, sour cream, or a similar dairy product. The rum-soaked raisins are sticky and sweet (you can't really taste the rum) and the bread is dense, moist and rustic with very simple, pronounced flavors.
    This is the third banana recipe i've made in a short amount of time. I think we've finally run out of over-ripe bananas. Phew!
    Banana Bread
    adapted from Nigella Lawson's How to be a Domestic Goddess

    scant 1/2 cup golden raisins
    6 tbsp or 3 oz bourbon or dark rum
    1 cup + 2 tbsp all purpose flour
    2 tsp baking powder
    1/2 tsp baking soda
    1/2 tsp salt
    1/2 cup unsalted butter, melted
    1/2 cup sugar
    2 large eggs
    4 small, very ripe bananas, mashed
    1/4 cup chopped walnuts
    1 tsp vanilla extract
    9x5 inch loaf pan, buttered and floured or lined with parchment or foil

    Put the golden raisins and rum or bourbon in a smallish saucepan and bring to a boil. Remove from the heat, cover, and leave for an hour if you can, or until the raisins have absorbed most of the liquid, then drain.

    Preheat the oven to 325F and get started on the rest. Put the flour, baking powder, baking soda, and salt in a medium sized bowl and, using your hands or a wooden spoon, combine well. In a large bowl, mix the melted butter and sugar and beat until blended. Beat in the eggs one at a time, then the mashed bananas. Then, with your spoon, stir in the walnuts, drained raisins, and vanilla extract. Add the flour mixture a third at a time, stirring well after each bit. Scrape into the loaf pan and bake in the middle of the oven for 1 to 1 1/4 hours. When it's ready, an inserted toothpick or fine skewer should come out cleanish. Leave in the pan on a rack to cool, and eat thickly or thinly sliced as you prefer.

    Variation: Replace 2 tbsp of the flour with good cocoa powder and add 4oz chopped bittersweet chocolate or chocolate chips.

    Banana Cake with Fudgy Frosting

    Banana Cake w/ Fudgy Frosting

    Banana Cake w/ Fudgy Frosting

    [UPDATE: If you are making this, I suggest adding 1/2 to 3/4 cup of the evaporated milk, then adding more if the frosting is too thin. I've made a few bad batches- all because I added too much liquid.]

    I had a fantastic potluck last night. I contributed a mushroom tart and this banana layer cake. We also had miso soup, mac and cheese, vegetarian chili, tofu scramble with gorgonzola, sweet and spicy nuts, and three bottles of wine.

    The last time I hosted a potluck I baked a recipe i'd never tried. It made me stressed, so this time I was determined to cook something familiar. I've made this cake seven or eight times and I knew it'd be fantastic. It has a frosting that I actually enjoy eating- it's rich, smooth, and has good texture even when it's cold. I have no problem piling it on.

    The Weekend Baker is one of my favorite cookbooks. It gives weight conversions for all the ingredients and suggestions for preparing components in advance. I baked the cake layers two days early and left them on the counter in gallon-sized ziplock bags. I cut the bags away the night before and frosted the cake, then pulled it out of the fridge two hours before the potluck.

    Everyone loved it. Liz said something like: "Lisa, how do you not make this cake all the time and get really fat?" I made an effort to post the recipe quickly because multiple people requested it.

    The consitency of the frosting can vary depending on the chocolate and butter you use. I suggest under-measuring the milk, and if the frosting seems too thin try adding a little more butter. Sometimes my frosting is firm enough to pipe, but sometimes it isn't. I used unsweetened baking chocolate from Trader Joes and I really preferred it to normal Bakers squares.

    Banana Layer Cake with Fudgy Frosting
    adapted from Abigal Johnson Dodge's The Weekend Baker

    For the cake:
    2 2/3 cups (340g) all purpose flour
    1 tbsp baking powder
    1/2 tsp table salt
    1/2 tsp baking soda
    16 tbsp (2 sticks) unsalted butter, at room temperature
    1 3/4 cups (397g) granulated sugar
    3 medium, very ripe bananas (397g total including peel), peeled
    2 tsp vanilla extract
    4 large eggs
    1/2 cup buttermilk
    3/4 cup (85g) chopped walnuts, optional

    For the fudgy frosting:
    6 oz unsweetened chocolate, chopped
    1 1/3 cups (298g) granulated sugar
    1 cup evaporated milk (not sweetened condensed)
    6 tbsp (85g) unsalted butter, cut in 2 pieces
    1 tbsp pure vanilla extract
    1/2 tsp table salt

    toppings: chopped toasted walnuts, other nuts, or toasted shredded unsweetened dried coconut.

    1. To make the cake: position an oven rack on the middle rung. Heat the oven to 350F (180C). Grease and flour the bottom and sides of two 9x2 inch (22.75x5cm) round cake pans, tapping out the excess flour. You can also line the bottoms of the pans with parchment to ensure easy and clean removal.

    2. In a medium bowl, combine the flour, baking powder, salt, and baking soda. Whisk until well blended. In a large bowl, beat the butter with an electric mixer (or a stand mixer with the paddle attachment) on medium high speed until smooth. Add the sugar and beat until well combined. Add the bananas and vanilla and beat until well blended and only small bits of banana remain. Add the eggs two at a time, beating well after each addition. The mixture will look curdled and a bit lumpy. Don't worry, it will all come together. Add half of the flour mixture and mix on low speed just until blended. Add the buttermilk and mix just until blended. Add the remaining flour and mix until blended. Stir in the walnuts, if using. Scrape the batter into the prepared pans, dividing it evenly.

    3. Bake until the tops are light brown and a toothpick or cake tester inserted into the center of one layer comes out clean, about 30 minutes. Transfer the pans to racks and let cool for about 15 minutes. Run a thin knife around the sides of each pan to loosen the cake. Invert the layers onto the racks, lift off the pans, and let cool completely.

    4. To make the frosting: While the cake is baking, make the frosting. Melt the unsweetened chocolate in a double boiler or microwave. Meanwhile, combine the sugar, evaporated milk, butter, vanilla, and salt in a blender; there's no need to blend at this point. If you think your blender might be too small, divide the recipe in half and make in 2 batches. When the chocolate is melted, remove it from the heat and give it a stir. Scrape the hot melted chocolate into the blender. Cover with the lid and blend on high speed until the mixture darkens and is very thick, about 2 minutes. You'll also hear the engine working harder when the frosting is sufficiently thick, and it will appear to be barely moving in the blender. It will not be pourable. Scrape the frosting into a clean bowl and set aside at room temperature. When the frosting is cool, cover the bowl with plastic wrap until the cake is completely cool and ready to frost.

    5. To frost the cake: Brush away any loose crumbs from the cake layers. Center 1 layer, top side down, on a flat serving plate. To protect the plate from smears during frosting, slide small strips of foil or parchment under the bottom of the cake to cover the plate. Using a metal spatula or the dull edge of a table knife, spread 1 cup of the frosting evenly over the layer. Place the second layer, top side down, on top of the frosting. Be sure the sides are lined up and then press gently on the layer. Apply a very thin layer of frosting over the entire cake to seal in any crumbs. Spread the remaining frosting over the top and sides of the cake. Garnish the top with coconut or walnuts, if using. The cake is best served at room temperature.

    The cake layers can be made in advance and stored at room temperature for up to 2 days, or frozen for up to 3 months. Thaw before using. The entire cake can be prepared, covered, and stored in the fridge for up to 3 days.

    Thursday, January 24, 2008

    Sugar-and-Spice Doughnuts

    Donuts

    Donuts

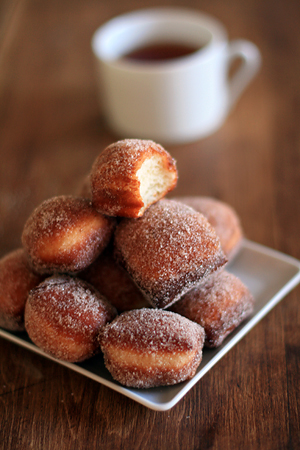
    I took these donuts to a meeting this morning. One of the reference staff bit into one and mentioned that his grandmother used to make something similar.

    My earliest memory of donuts comes from The Puzzle Place. There's an episode where Leon details the wonders of crullers. Somehow, after trying to con another child into not picking the cruller, he ends up not getting a donut at all (until the other children each give him a fifth of theirs made into some sort of franken-donut.)

    After seeing that, I always picked cruller donuts if I could find them. Mom occasionally took us to Mayer's Bakery for treats, and if they were out i'd order a chocolate cake donut with frosting and pastel sprinkles. Our family also went through a fierce, brief donut phase when Krispy Kreme franchises first exploded all over Southern California.

    There's only so much pleasure you can take from a too-sweet, chemically processed pastry that either came from a package or from SYSCO (the only sort of donuts I remember eating.)

    These, I could grow to love. I almost wish I had a grandmother to make me donuts. Making these was satisfying, even though I overheated the oil a few times and smelled like a fry-shop during work. I love the feel of the dough after 20 minutes of kneading, the way the donuts puff when they hit the hot oil, and the way they spring back after you bite into them. People really loved them; there weren't any leftover and I saw some people eat four or five.

    The ones I ate fresh from the fryer were the best. The spices were fantastic- the orange-flower water flavor is very strong in the raw dough but it mellows out in the finished product. I've submitted these donuts to the Time to Make Donuts event hosted by Peabody and Tartelette. A very fun challenge indeed.

    Sugar and Spice Doughnuts
    adapted from Claudia Fleming's The Last Course

    1/2 cup milk
    1/3 cup + 1/2 tbsp sugar
    1/2 tbsp active dry yeast
    2 1/2 cups all purpose flour
    1/8 tsp ground mace (or nutmeg)
    1/2 tsp salt
    1 large egg
    3 tbsp water
    1 tbsp orange flower water
    4 tbsp unsalted butter, melted
    vegetable oil for frying

    for the topping:
    1 cup sugar
    1 tsp ground cinnamon
    1/4 tsp salt
    1/8 tsp ground cardamom

    yield: 5 1/2 dozen doughnuts

    1. To make the doughnuts, in a small saucepan, heat the milk until it feels warm, not hot, to the touch. Pour the milk into a small bowl and stir in the 1/2 tbsp sugar and the yeast. Set aside for 10 minutes, until the mixture is bubbly.

    2. In the bowl of an electric mixer fitted with the paddle attachment, combine the flour, the remaining 1/3 cup sugar, the mace, and the salt. In a separate bowl, whisk together the egg, 3 tbsp of water, and the orange-flower water. On low speed, add the yeast mixture, egg mixture, and melted butter to the dry ingredients, mixing until just combined. Switch to a dough hook and knead the dough on medium speed until it begins to form a ball and pulls away from the sides of the bowl, 18-20 minutes. Place the dough in a large greased bowl and cover tightly with plastic wrap. Refrigerate overnight.

    3. Roll the dough out on a lightly floured surface to 1/4 inch thickness. Gently lift the dough up to allow it to contract slightly. Wrap it in plastic and chill it for 30 minutes to allow the dough to rest.

    4. Meanwhile, combine all the ingredients for the topping in a large mixing bowl and set aside.

    5. Line a baking sheet with parchment paper and spray the paper with cooking spray. Cut the dough into 1 inch squares and space them 1/2 inch apart on the prepared sheet. Spray a second sheet of parchment paper and use it to cover the doughnuts. Place the tray in a warm place and let rise for 30 minutes.

    6. Fill a deep, heavy saucepan halfway with oil and heat over medium-high heat to 375 F on a deep frying thermometer. Meanwhile, line a large platter or baking sheet with several layers of paper towels. Once the oil is at the proper temperature, carefully drop the doughnuts into the oil in batches, leaving enough space between them so they're not crowded. Fry for 1-2 minutes on each side, until lightly browned. Use a slotted spoon to transfer the doughnuts as they cook to the paper-towel lined platter. Always check the temperature between batches to allow the oil to come back up to 375 F. Once the doughnuts are cool enough to handle, but still warm, toss with the spice topping in the mixing bowl. Shake off any excess and serve immediately.

    To make these ahead, follow the recipe up to the point of rolling out the dough and shaping them, then wrap them in plastic and refrigerate for up to 24 hours. Take the doughnuts out of the refrigerator 30 minutes before you plan to fry them.

    Tuesday, January 22, 2008

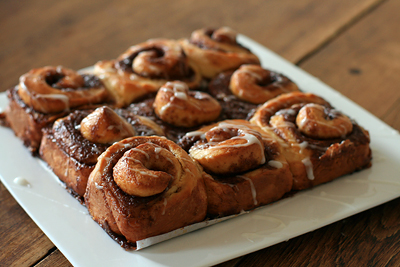
    Cinnamon Buns

    Cinnamon Rolls

    Cinnamon Rolls

    I thought about delaying some recent posts to have entries ready when school and work get busy. That plan fell through pretty quickly. I have trouble being patient when recipes and photos turn out well.

    This is a fabulous recipe from Carole Walter's Great Coffee Cakes, Sticky Buns, Muffins and More. I've heard great things about this book and i'm looking forward to trying more recipes. The directions are very well written.

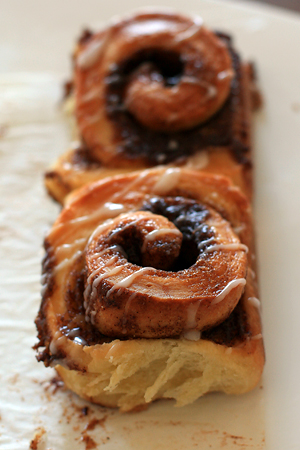
    These buns are rich, fluffy, and stuffed with a really tasty cinnamon/sugar filling. I really loved it- the filling i've used before is just soft butter sprinkled with cinnamon sugar. I do wish i'd put more sugar glaze on these. It had a fabulous consistency (though next time i'd use milk, not water). Don't be intimidated by the multiple sets of directions- these aren't very difficult to make, especially if you measure out most of the ingredients in advance.

    Simple Sweet Dough
    makes 2 pounds of dough, enough for 1 large or 2 medium coffee cake
    Ingredients:
    4 tbsp sugar
    1/4 cups warm water (110 to 115 F)
    1 package active dry yeast
    3 cups unbleached all purpose flour, spooned in and leveled
    1 tsp salt
    1 cup (2 sticks) unsalted butter, cut into cubes
    1/2 cup milk
    3 large egg yolks
    1 tsp vanilla extract

    Rinse a small bowl in hot water to warm it. Add 1 tbsp of the sugar and the warm water to the bowl. Sprinkle the yeast over the water. Do not stir. Cover the bowl with a saucer and let the mixture stand for 5 minutes. Stir it briefly with a fork, cover again, and let it stand for 2 to 3 minutes more, or until bubbly.

    In a bowl of an electric mixer fitted with a paddle attachment, mix on low speed the 3 cups of flour, remaining 3 tbsp of sugar, and the salt. Add the slightly firm cubed butter and continue to mix until meal-size crumbs form, 2 to 4 minutes depending on the temp of the butter. Stop the mixer.

    Using a fork, in a separate bowl, mix the milk, egg yolks and vanilla. Add the milk mixture to the flour, along with the dissolved yeast, and mix on low speed for about 15 seconds. Stop the mixer and scrape down the side of the bowl with a rubber spatula. Mix on low speed for another 30 seconds, or until smooth dough is formed. NOTE: this is a soft dough.

    Lightly butter a medium bowl for storing the dough. Empty the dough into the prepared bowl, smoothing the top with lightly floured hands. Spread a thin layer of softened butter over the top. Cover tightly with plastic wrap and refrigerate overnight. The dough may be kept in the fridge, tightly covered, for up to 3 days.

    Cinnamon Buns
    1/2 recipe (about 1 pound) Simple Sweet Dough
    3 tbsp unsalted butter, softened
    3 tbsp granulated sugar
    3 tbsp (firmly packed) dark brown sugar
    2 tbsp lyle's golden syrup or light corn syrup
    1 tbsp ground cinnamon
    1/8 tsp salt
    1 large egg, lightly beaten with 1 tsp water, for egg wash
    1 small recipe vanilla glaze, optional

    1. Remove the dough from the refrigerator 1 to 1.5 hours before using.
    2. Generously butter an 8x8x2 inch square pan. Line the bottom with parchment. Set aside.
    3. In a medium bowl, using a wooden spoon, mix the butter, sugars, syrup, cinnamon, and salt until smooth.
    4. Place the dough on a lightly floured surface. Gently knead six or eight times to coat with flour. Pat or shape the dough into a rectangle. Roll the dough into a 9x12 inch rectangle with the 9-inch side parallel to the edge of the counter.
    5. Spoon dollops of the cinnamon filling evenly across the dough, making three rows across and two rows down. Using a small offset spatula, spread the filling evenly across the dough, leaving a 1.5 inch border on the far edge. Lightly brush the border with the egg wash. Starting at the side of the rectangle closest to you, roll the dough tightly. Pinch the seam well to seal the flap. Roll the log back and forth a few times to seal the layers. With your hands, gently stretch the log until it measures about 12 inches.
    6. Cut the log into 9 1 1/4 inch pieces and place them cut side up in the baking pan, spacing them evenly, three rows across and three rows down. Press the tops of the buns gently to even the surface.
    7. Cover the pan with a tea towel and set it in a warmish place to allow the buns to rise until puffy and almost doubled, 45 to 60 minutes.
    8. Fifteen minutes before baking, position a rack in the middle of the oven. Preheat the oven to 350 F.
    9. Gently brush the tops of the buns with egg wash. Bake for 30-35 minutes, or until golden brown. If the buns are browning too quickly, lay a sheet of aluminum foil over the top to allow the center of the buns to bake through. Remove the buns from the oven and allow them to sit for 15 minutes. While the buns are cooling, make the glaze.
    10. To remove the pan, cover it with a cooling rack, invert the buns and carefully lift off the pan. Remove the parchment, then cover the buns with another rack and turn the buns top side up. If the buns have risen unevenly during baking, gently press the tops to level them. While the buns are still warm, drizzle the glaze over the top by dipping a small whisk or fork into the icing and waving it rapidly back and forth over the surface of the buns.

    Store at room temperature, tightly wrapped in foil, for up to 3 days. Heat before serving.

    Vanilla Glaze
    2/3 cup strained powdered sugar
    2-3 tsp very hot water
    1 1/2 tsp light corn syrup
    1/8 tsp pure vanilla extract
    few drops lemon juice
    pinch of salt

    Place the powdered sugar in a medium bowl. Add 2 tsp of the hot water, the corn syrup, vanilla, lemon juice, and salt. Stir until smooth. Add 1 additional tsp hot water or more as needed to make a thin glaze.

    *Make this just before using, or keep it warm in a bowl of hot water (it gets crusty very quickly.) You can also substitute milk or cream for a richer, whiter glaze.