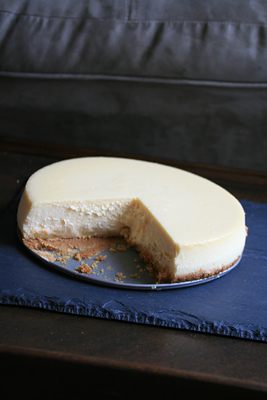
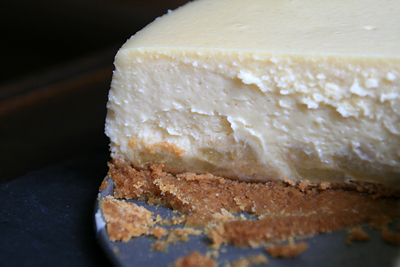
This apple cheesecake seemed appropriate for fall. It has a touch of ground cinnamon and ginger and a layer of caramelized apples sitting on top of the graham cracker crust.
I wasn't sure which photos to pick. I thought the above two had a nice character to the color/texture, but I also took this one which was also interesting- less washed out, but busier.
I'm going to drop this off with the guys at Apple again. There's no way 3/4ths of a cheesecake is going to get eaten in my apartment. I'm also pretty picky about cheesecake texture. This cake is pretty light and similar to cheesecakes i've tried at Juniors.
I'm more partial to cheesecakes that are very dense and crumbly with a crust that is crunchy instead of soggy and dense. The crust recipe I used on Pichet Ong's Kabocha Squash Cheesecake is one of my favorites and next time i'll probably substitute it in.
Sometimes my baking really reflects my mood. I'm still stuck in an empty, stressful, unmotivated funk. Lots of friends have moved away and my new apartment building gives me less opportunities to cook for people. I'm not sure if I need to take a break or simply find a new outlet for my work.
Apple Cheesecake Brulee
adapted from Tish Boyle's The Cake Book
Apple Layer:
2 medium granny smith apples
1 tbsp fresh squeezed lemon juice
2 tbsp unsalted butter
2 tbsp granulated sugar
3 tbsp heavy cream
Cinnamon Graham Cracker Crust:
1 1/4 cups (150g) cinnamon graham cracker crumbs
3 tbsp granulated sugar
4 tbsp unsalted butter, melted
Cream Cheese Filling:
1 1/2 pounds cream cheese, softened
1 1/2 cups granulated sugar
2 tsp vanilla extract
1/4 tsp ground cinnamon
1/4 tsp ground ginger
1/2 cup sour cream at room temp
1 tbsp corn starch
4 large eggs, at room temp
Brulee Topping:
1 1/2 tbsp granulated sugar
1. Position a rack in the center of the oven and preheat oven to 350. Grease the bottom and sides of a 9x3 springform pan. Cut an 18in square of heavy duty aluminum foil and wrap the foil around the outside of the pan.
2. Make the apple layer. Peel and core the apples and slice them in half. Cut them into 1/4 inch slices (don't cut too thin!) and place them in a bowl with the lemon juice, tossing the slices so they are evenly coated.
3. Melt the butter in a large skillet over medium high heat. When the butter is bubbling, add the apples and saute for 2 minutes. Sprinkle the sugar over the apple and continue to cook, stirring frequently until the apples are nicely browned, about 5 minutes. Add the cream and continue to cook until the apples are tender, about 10 mins. Remove skillet from heat and set the apples aside to cool.
4. Make the crust: in a medium bowl combine the crumbs, sugar, and butter. Pat the mixture evenly into the bottom of the prepared pan. Bake the crust for 8 minutes.
5. Set the pan on a wire rack and cool the crust completely. Reduce the oven temperature to 325.
6. When the apples are cool, arrange a tight circle of slices, without overlapping them, around the edge of the pan, on top of the crust. Arrange another circle of slices in the center, covering the crust completely.
7. Make the filling: In the bowl of an electric mixer, using the paddle attachment, beat the cream cheese at medium-low speed until creamy and smooth, about 2 minutes. Gradually add the sugar and beat until blended. Add the vanilla extract, salt, cinnamon, ginger, sour cream, and corn starch and mix until well blended. At low speed, add the eggs one at a time, mixing well after each addition and scraping down the sides of the bowl with a rubber spatula as needed.
8. Scrape the batter over the apple layer. Place the pan in a roasting pan or large baking pan. Pour enough hot water into the roasting pan to come about 1 inch up the side of the springform pan. Bake the cake in the water bath for 70 to 80 minutes, until the center is set but still slightly wobbly (the cake will continue to set up as it cools.) Remove the pan from the water bath and set it on a wire rack to cool completely.
9. Refrigerate the cheesecake for at least 4 hours before caramelizing the top.
10. Run a thin bladed knife between the edge of the pan and the cake to loosen it. Remove the side of the pan. Sprinkle the sugar over the top of the cake, covering it with a very thin, even layer. Caramelize the sugar with a butane or propane torch, holding it about 2 inches from the surface of the cake and slowly moving it over the top until the sugar melts and turns golden brown.

6 comments:
Beautiful! I love your unadorned pictures of the apple cheesecake. Very simple and elegant. A friend always makes an apple cheesecake too every autumn. Her cheesecake has a layer of thinly sliced apples between the graham cracker crust and the cheesecake filling.
Btw, you were in Chicago and I missed your band?!?!? Dang, girl! I wanna know when your band comes to Chicago next time, ya?
As one of the Apple guys you dropped the cheesecake off for, I gotta thank you again for it.
It was delicious, and I'm definitely going to have to try the layer-of-caramelized-fruit thing next time I make a cheesecake.
Your cheesecake is gorgeous! Question though.......why do some cheesecakes come out perfectly white and creamy-colored on top (like yours) and others have that cracked brown appearance?
Cyndi-
The top heating element of my oven doesn't heat very well. This, combined with the height of the cake pan I used kept the top of the cake from browning too much.
The cracking is usually the result of over baking, or too drastic changes in temperature. The water bath helps, as does cooling the cake completely before you put it in the fridge.
Most of the time, my cheesecakes crack. I guess this was a good recipe, or I pulled the cake out earlier than I usually do.
I too am impressed with the stark and lovely crack-free finish. You should let me know the next time you're making a delivery to Apple, as I'm only right next door ;)
hi ^^
I really want to thank you to you,
this is a very amazing recipe!
I did it for my daughter's 1st year birthday party yesterday, everybody laves it very very much.
Thank you for sharing a wonderful recipe ^^
Post a Comment