Showing posts sorted by relevance for query cookie. Sort by date Show all posts

Saturday, January 19, 2008

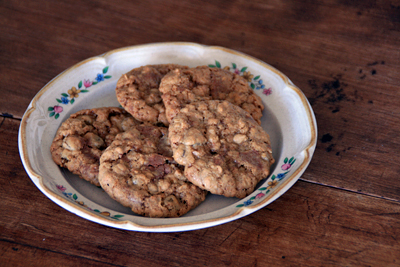
Ginger Oatmeal Raisin Cookies

Ginger Oatmeal Raisin Cookies

Ginger Oatmeal Raisin Cookies

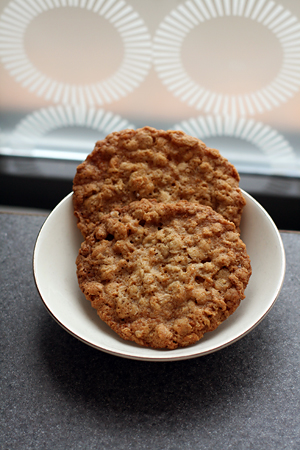
When a batch of cookies goes awry, sometimes it's the recipe's fault. Other times, it's your fault. Well- at least your equipment's fault.

Once, I took a batch of these gingersnaps to my friend's office the same day one of his coworkers did. Even though we used the same recipe, our cookies looked and tasted nothing alike. It was clear we approached things very differently; he mentioned spending time in Whole Foods searching for "packed brown sugar."

There are so many variables involved in cookie baking: technique, baking time, temperature, equipment, ingredients, cooling methods...to understand them, you must bake lots of cookies.

I made a big bowl of Ginger Oatmeal Raisin Cookie dough and experimented with each dozen I baked. I baked some batches for 10 minutes, and others for 12-16. I used different types of cookie sheets. I left some cookies on the sheet to cool and moved others to racks individually. I flattened the cookies to different thicknesses. I put little squares of candied ginger on some and left others plain. I fiddled with the oven temperature and oven rack position.

Eventually, I found my favorite combination: one inch balls of dough, flattened and garnished with ginger, baked on a parchment-lined half-sheet pan in the upper middle rack of my oven for 10 minutes at 325 F and an extra 2-3 minutes at 330 F, and cooled completely on the cookie sheet.

There's no guarantee this method will work for you. You probably have a different oven, different cookie sheets, different weather, and a different taste in cookies. I like mine crunchy at the edges, chewy in the middle, nicely golden, and well spiced.

I like this recipe. The cayenne pepper and ginger add a nice bite to an otherwise traditional, satisfying oatmeal raisin cookie.

Ginger Oatmeal Raisin Cookies
adapted from Pichet Ong's The Sweet Spot
1 1/2 cups (223g) all purpose flour
1 1/2 tsp baking powder
1 1/2 tsp baking soda
1 cup (226g) unsalted butter, cut into 1 inch cubes and chilled
2/3 cup (114g) packed light brown sugar
1/2 cup (114g) sugar
2 tbsp candied ginger, finely chopped, plus more for garnish if desired
1 1/2 tsp ground cinnamon
1/4 tsp salt
1/4 tsp cayenne pepper (optional)
2 large eggs
1 tbsp whole milk
2 tsp vanilla extract
2 cups (170g) old fashioned rolled oats
1 1/4 cups (170g) raisins, preferably golden

1. Sift together the flour, baking powder, and baking soda and set aside.

2. Put the butter, both sugars, the ginger, cinnamon, salt, and cayenne, into the bowl of an electric mixer fitted with the paddle attachment. Beat on medium speed until light and fluffy, about 4 minutes. With the machine running, add the eggs one at a time, then add the milk and vanilla. As soon as the liquids are incorporated, stop the mixer and scrape down the sides and bottom of the bowl.

3. Turn the mixer speed to low and add half the flour mixture. When it is incorporated, add the remaining flour and mix until no traces of flour remain. Stir in the oats and raisins. If you have time, cover the dough and let chill for at least 2 hours, or up to 3 days, before baking.

4. When ready to bake, preheat the oven to 325 F. Line two baking sheets with parchment paper.

5. Scoop the cookie dough into 1 inch balls and put 2 inches apart on the baking sheets. Use your palm to slightly flatten each ball, then sprinkle the tops with chopped candied ginger, if desired.

6. Bake the cookies until lightly golden brown, about 10 minutes*. Transfer to a cooling rack to cool completely. The cookies can be stored in an airtight container for up to 3 days.

*I pulled one batch of cookies at exactly 10 minutes and they were way under-baked. My baking time also varied depending on the type of cookie sheet I used. Wait until the cookies are no longer wet/shiny on top. They should be just golden at the edges. Bake them longer for a crispier cookie.

Tuesday, July 22, 2008

Almond-less Biscotti and Coconut Sticks

Biscotti

Biscotti and Coconut Sticks

Some of my favorite "biscotti" are just biscotti-shaped butter cookies. I suppose whether or not you like biscotti depends on how you define them. Are Almondinas biscotti? What about Mediterra's decadent chocolate-hazelnut cookies?

I usually associate the term with crunchy, twice-baked cookies that don't involve much butter. I'd say once you make something richer than the biscotti at Enrico's, you're making cookies.

When you read a biscotti recipe, consider the ingredients. Egg whites will make the dough stiffer and crunchier. Egg yolks and butter will contribute to a richer taste and crumbly texture.

I tried two different biscotti recipes last week: Cook's Illustrated's spiced biscotti, and Alice Medrich's almond biscotti (minus the whole almonds). Both recipes omitted butter. One called for 3 eggs, while one called for 2 eggs and 2 yolks. While both recipes insisted the final cookies would be crunchy but not tooth-breaking, I found them slightly too hard.

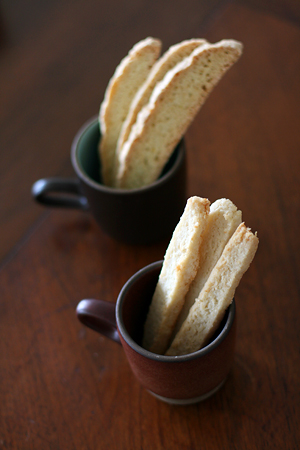
I much preferred Alice Medrich's coconut sticks, which are very similar to the almond sticks with cocoa nibs I make so frequently. They are once baked, biscotti-shaped cookies that are pleasantly crunchy and rich tasting. I really liked the coconut taste- they reminded me of these macaroons from my childhood, only fancier and more delicate.

I'll leave you with recipes for the almond biscotti and coconut sticks, which are pictured above. If you have a great recipe, let me know. I would love to be able to replicate Mediterra's biscotti...they're pretty amazing.

Almond Biscotti
from Alice Medrich's Cookies and Brownies

2 cups all purpose flour
1 cup sugar
1 tsp baking powder
1/8 tsp salt
3 large eggs
2 tbsp amaretto, or 2 tbsp rum with 1 tsp almond extract
1 tsp vanilla extract
1 tsp anise extract (optional)
1 cup whole almonds, toasted and chopped
Cookie sheet, lined with parchment or greased and floured

Preheat the oven to 300F. Position a rack in the middle of the oven.

Combine the flour, sugar, baking powder, and salt in a medium bowl and mix together thoroughly with a whisk or fork. Set aside.

Whisk the eggs, amaretto, vanilla, and anise extract, if using, in a large bowl until well blended. Stir in the flour mixture and then the almonds. The dough will be thick and sticky. Scrape the dough into a long log shape lengthwise on the cookie sheet. Flour your hands and shape the dough into a long flat loaf about 10 inches long and 5 inches wide.

Bake until firm and dry, about 50 minutes. Remove from the oven and let cool for about 10 minutes. Transfer the loaf carefully to a cutting board. Using a long serrated knife, cut the loaf on the diagonal into slices 1/2 inch wide. Lay the slices, cut side down, on the cookie sheet. Bake for 20 minutes; turn each cookie over and bake for 15-20 minutes longer, or until the cookies are golden brown. Place the cookie sheet on a rack to cool. Cool the cookies completely before stacking or storing. May be stored, airtight, for several weeks.

Coconut Sticks
from Alice Medrich's Cookies and Brownies

6 tbsp unsalted butter, softened
2/3 cup sugar
1/4 tsp salt
1 tsp vanilla extract
1 cup unsweetened dried coconut
1 cup + 2 tbsp all purpose flour
2 tbsp water
1 or 2 cookie sheets, lined with parchment or greased (I didn't bother greasing or lining them)

Using the back of a large spoon or with an electric mixer, in a medium bowl mix the butter with the sugar and salt until smooth and creamy, not at all fluffy. Mix in the vanilla. Mix in the coconut. Add the flour and mix with your fingers, pinching and gathering the mixture until it resembles damp crumbs. Drizzle in the water and continue to mix with your fingers, pinching and gathering the dough until the water seems well distributed. The dough will not form a smooth, cohesive mass; it will be crumbly, but it will stick together when you press it. Turn it out onto a large sheet of foil. Press the dough into a 6x9 inch rectangle a scant 1/2 inch thick. Fold the foil over the rectangle, and wrap the dough airtight. Slide a cookie sheet under the package and refrigerate it for 2 hours or overnight.

(*Or, you can do all of that in a food processor. Pulse the flour, sugar, and salt. Add the butter, chilled and cut into pieces, and pulse until the mixture looks well combined/sandy. Add the water and vanilla and pulse until the mixture begins to look damp. Add the coconut and pulse until the mixture starts to clump together. Turn out onto a piece of foil and continue with the recipe)

Preheat the oven to 350F. Position rack in the upper and lower thirds of the oven.

Use a long sharp knife to trim 1 short edge of the dough rectangle. Then cut a slice a scant 3/8 inch wide. Use the knife to transfer the slice to the cookie sheet, placing it cut side up. Cut and transfer each slice, placing them at least 1 inch apart. If some break, just push them back together or bake them broken; they will look and taste great anyway.

Bake for 12-14 minutes, or until the cookies just begin to turn golden at the edges. Rotate the cookie sheets from top to bottom and front to back halfway through the baking time to ensure even baking.

Slide the parchment carefully onto a rack or set the pan itself on a rack to cool. Cool cookies completely before stacking or storing. Cookies are most delicious on the day they are baked (*I disagree). May be stored, airtight, for several days.

Friday, April 25, 2008

Melting Chocolate Cookie Tartlets

Melting Chocolate Cookie Tartlets

Melting Chocolate Cookie Tartlets

I've been working through some untried recipes in Bittersweet. I had some tartlet crusts in the freezer and I filled them with this chocolate/nut meringue mixture.

I like this filling; it's easy to assemble, intensely chocolate flavored, and studded with chopped pecans. It doesn't have that crunchy, chalky meringue texture. I had extra filling left over, so I scooped piles onto a cookie sheet and baked them. This worked fine, and I enjoyed eating the cookies.

Next time I think i'll pipe the filling into the tart shells. I might put more filling in too; it has structure, so there's no danger of spilling.

Melting Chocolate Cookie Tartlets
adapted from Alice Medrich's Bittersweet

For the crust:
8 tbsp unsalted butter, melted
3 tbsp sugar
3/4 tsp vanilla extract
1/8 tsp salt
1 cup all purpose flour

For the filling:
6oz bittersweet or semisweet chocolate, coarsely chopped (50-62%. For 64-66%, use 5 oz)
2 large egg whites, at room temperature
1/8 tsp cream of tartar
1/2 tsp pure vanilla extract
1/4 cup sugar
3/4 cup chopped pecans or walnutes

Eight 4in tartlet pans, or 10 3.5in tartlet pans. (I used 12 very small tartlet tins and still had filling left over)

Position a rack in the lower third of the oven and preheat the oven to 350F.

To make the crust: Mix the butter, sugar, vanilla, and salt in a medium bowl. Add the flour and mix just until well blended. Don't worry if the dough seems too soft. Divide the dough into 8-10 equal pieces. Press one piece of dough very thinly and evenly across the bottom and up the sides of each tartlet pan. Place the pans on a cookie sheet. Bake for 15-20 minutes, until a deep golden brown.

While the crusts are baking, make the filling: Melt the chocolate in a medium heatproof bowl set in a wide skillet of barely simmering water, or in the microwave. Remove from the heat and stir until completely melted.

In a large bowl, beat the egg whites with the cream of tartar and vanilla until soft peaks form when you lift the beaters. Gradually add the sugar and continue to beat until the egg whites are stiff but not dry. Pour the nuts and all of the warm chocolate over the egg whites and fold with a rubber spatula until the color of the batter is uniform.

As soon as the tartlet crusts are ready, divide the filling equally among them. Make sure the batter touches the crust around all the edges. Return to the oven and bake the filling until it is dry or slightly cracked on top, about 10 minutes. Cool on a rack.

To unmold, use the point of a paring knife to loosen one edge of the crust from the pan, then tip the tarts into your hand. Serve warm or at room temperature.

Variations: Fold in 2 oz of crystallized ginger, finely chopped; 4 oz moist prunes, chopped into 1/4in pieces; 4 oz candied chestnuts, chopped. You can also substitute other nuts, like pine nuts.

Saturday, September 1, 2007

Oatmeal, Milk Chocolate, Raisin Cookies.

Milk Chocolate Oatmeal Raisin Cookies

Milk Chocolate Oatmeal Raisin Cookies

I wasn't expecting anything too special from the oatmeal cookie recipe in The Sweet Life: Desserts from Chanterelle. Lately I've been dissapointed by many cookie recipes.

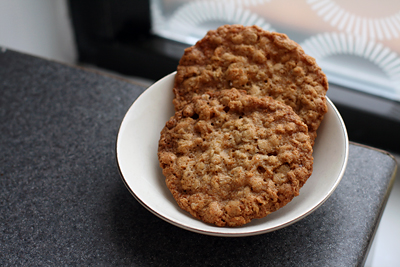
This recipe was fantastic. I love a cookie that's pretty crispy on the edges, but not hard all the way through. These cookies have great texture: not too full of oatmeal, not too chewy from brown sugar.

The book also suggests using dark chocolate and dried cherries or pears rather than milk chocolate and raisins. I thought the original flavor combination was interesting, but the milk chocolate I used didn't have enough flavor. I think this recipe would be great with nuts, chocolate chips, or any sort of add-ins. I'd definitely make it again.

Oatmeal Cookies with Golden Raisins and Milk Chocolate Chips
adapted from The Sweet Life: Desserts from Chanterelle

1 1/4 cups flour
1 tsp baking soda
1/2 tsp salt
16 tbsp unsalted butter, at room temp
1 cup sugar
1 cup dark brown sugar
2 eggs plus 1 egg white, at room temp
3 cups raw oatmeal
8 oz milk chocolate, chopped into 1/4 inch pieces
1 cup golden raisins

Preheat the oven to 350. Line cookie sheets with parchment or silicone.

In a dry bowl, whisk together the flour, baking soda, salt, and oats.

Place the butter in the bowl of a stand mixer with the paddle attachment and beat on medium speed for 1 minute. Add the sugar, and beat on med-high speed until fluffy and light in color, approximately 5 minutes. Add the dark brown sugar and continue creaming for 3-4 minutes, stopping occasionally to scrape down the sides of the bowl. Turn the mixer down to slow speed. Add the eggs and white, one at a time, and continue to beat until they are fully incorporated and the batter looks smooth and glossy, 1-2 mins.

Add the dry mixture, all at once, to the butter mixture. Using a rubber spatula, fold together for a few turns. With the mixer on slow speed, mix the dough until combined. Add the chopped milk chocolate and raisins. Scrape down the sides of the bowl and mix for another 30 seconds. The dough can be made up to this point and refrigerated for 3 days.

Using 2 teaspoons, scoop the dough into mounds and place 2 inches apart on your cookie sheets. Flatten each mound with the back of a spoon or two fingertips (*I didn't flatten them and they still turned out well.) Bake until the cookies spread and rise, 12-15 minutes until a light golden brown. If you continue to bake the cookies they will color more and result in a crunchy, caramelized cookie.
Wednesday, February 18, 2009

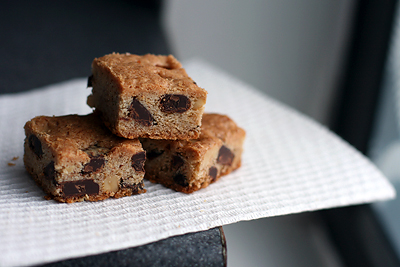
Chocolate Chip Cookie Bars

Chocolate Chip Cookie Bars

I borrowed Flo Braker's latest cookbook, Baking for all Occasions, a few weeks ago. I didn't get a chance to try many recipes before I had to return it, but I photocopied a few for future testing. The recipes are interesting- many of them have creative names and mix new flavors with old techniques (a streusel topped cake with fresh pineapple and hazelnuts, anyone?)

This recipe for a Chocolate Chip Cookie Cake caught my eye because it's simple, versatile, and yields a large quantity. It's basically a chocolate chip cookie dough that's pressed into a 9x13 pan and sliced into squares. Braker's book includes instructions for turning the same dough into individual cookies or chocolate chip biscotti.

For this recipe, it's important to use well softened butter. The goal is to incorporate as little air into the dough as possible to make the texture more like a cookie than a cake. The texture will also vary greatly with baking time- the cake becomes crunchier the longer you bake it. Nuts and chocolate chips play a big role in flavor, and you'll have very different results depending on what you use.

The finished bars aren't as rich tasting as some blondies or cookies. I'm interested in trying a variation using more brown sugar, or peanut butter. Both could lead to a chewier texture. I like using big pieces of chocolate for a nice visual and textural contrast. I used Nestle chocolate chunks for this batch, but any large chocolate pieces would work well.

These were a huge hit at work, and several people asked for the recipe. Over a few days, the texture improved and the cinnamon flavor became more pronounced. I only used 1/2 tsp cinnamon and the flavor was still quite strong. The bars are great snacks to have on hand and they keep for a relatively long time. I usually line the pan with foil so I can just lift the bars out when they're done.

Chocolate Chip Cookie Cake
adapted from Flo Braker's Baking for all Occasions

2 1/3 cups (300 grams) all-purpose flour
2/3 cup (130 grams) granulated sugar
2/3 cup (130 grams) light brown sugar
1 tsp salt
1/2 tsp baking soda
1 tsp ground cinnamon or 1/2 tsp ground cardamom (optional)
2 sticks (225 grams) unsalted butter, softened
1 large egg
1 tsp pure vanilla extract
2 cups (340 grams) semisweet chocolate chips
1 cup (115 grams) chopped walnuts, pecans, hazelnuts, or a combination
*You can omit the nuts and mix in an additional 1 cup (170g) chocolate chips

1. Center a rack in the oven and preheat to 350F. Have ready a 9x13 inch pan.

2. In a stand mixer fitted with the paddle attachment, combine the flour, sugars, salt, cinnamon (if using), and baking soda and mix on the lowest speed just until blended. Add the butter and continue to mix until small, moist crumbs form that look similar to streusel, about 1 minute. Add the egg and vanilla and beat on low speed until the mixture begins to form a cohesive dough. Increase the speed to medium and add the chocolate chips and nuts. Beat just until they are incorporated- 20 to 30 seconds.

3. Spoon dollows of the thick dough evenly over the bottom of the baking pan with a rubber spatula. To distribute the dough evenly, lay a sheet of plastic wrap or parchment paper over the dough and pat it evenly with your fingertips.

4. Bake the cake until it is golden brown and feels more solid than soft when pressed in the center- 37-40 minutes. Be careful not to overbake- it will firm as it cools. Transfer to a wire rack and let cool in the pan for 30-35 minutes.

5. Slip a thin metal spatula between the cake and the pan and run the spatula along the entire perimeter of the pan. Lift the pan, tilt it slightly, and tap it on a counter to help release the cake. Invert the cake onto a wire rack and lift it out of the pan. Invert so it is right side up and let cool completely.

If serving within 2 days, wrap the cake in foil and store at room temperature. For longer storage, freeze for up to 1 month. Thaw at room temperature for about 3 hours.To serve, cut the cake into squares, rectanges, or sticks with a sharp knife.

Friday, May 29, 2009

NYT Chocolate Chip Cookies

NYT Chocolate Chip Cookies

NYT Chocolate Chip Cookies

My boss bit into a cookie, looked at it thoughtfully and said, "this might be the best cookie i've ever had." It was good: crunchy at the edges and chewy in the middle, with strong chocolate and butterscotch flavors and a hint of sea-salt.

Are they worth the 36 hours of resting time? I'd say yes, provided that you follow the directions exactly. The ingredients, size, and technique make the cookie.
All-purpose flour will not yield the same results as the combination of cake and bread flours. Since chocolate is the featured flavor, it's important to use good-quality chips/discs/feves. I prefer using thin discs of couverture because they melt nicely and stack well within the cookie. Very large pieces won't distribute evenly. Small pieces aren't as prominent or indulgent (this vs this).
If you like small cookies, I wouldn't recommend using this recipe. You'll lose the crunchy/chewy contrast, and the cookies will be done before they're really golden. The original recipe calls for 99g portions, which were best. Ultimately, I settled for 80g portions because they were a little more manageable for one person.

I recommend using a kitchen scale to measure the ingredients and portions. Your cookies will be more consistent, and they'll look uniform and bake evenly. Good cookie sheets and an evenly-heating oven don't hurt either.

This recipe is fairly popular, as is Cook's Illustrated's recipe for "Perfect Chocolate Chip Cookies" and Alton Brown's "The Chewy." Personally, i'm still a fan of David Lebovitz's recipe. I'd make any of those recipes, depending on the occasion and audience.

You can find the New York Times recipe here.

Wednesday, December 5, 2007

Crispy, Chewy Chocolate Chip Cookies

Chocolate Pecan Cookies and Truffles

Chocolate Pecan Cookies

I took this tray of cookies and truffles to class. The treats were well received; only a few truffles were left afterwards.

These cookies were best right out of the oven, when the melted chocolate was hot enough to burn my tongue. It's a good recipe. My cooled cookies were very crunchy, so err on the short end of the baking time if you'd like them chewier. I used chopped Guittard chocolate and pecans instead of walnuts.

I like cookies. There's not much else I can say.

Crispy, Chewy Chocolate Chip Cookies
adapted from The Sweet Life by Kate Zuckerman

16 tbsp unsalted butter, at room temperature
1 1/2 cups light brown sugar
1 egg, at room temperature
1 egg white, at room temperature
1 tsp baking soda
1/4 tsp salt
1 3/4 cups flour
8 oz semisweet chocolate chips (or chopped chocolate with 61-66% cocoa solids)
1/2 tsp vanilla extract
1 1/2 cups (6oz) chopped walnuts (optional.)

Preheat the oven to 350. Spray cookie sheets with oil or line with parchment.

Place the butter in the bowl of the stand mixer with the paddle attachment and beat on medium speed for 1 minutes. Add the sugar and beat on medium-high speed until the mixture becomes fluffy and lighter in color, 6-8 minutes, stopping the mixer occasionally to scrape down the sides of the bowl. Add the egg and egg white and continue to beat until they are fully incorporated and the batter looks smooth and glossy, 1-2 minutes.

In a dry bowl, whisk together the baking soda, flour, and salt. Add the dry mixture, all at once, to the butter mixture. Using a rubber spatula, fold together for a few turns. With the mixer on slow speed, mix the dough until thoroughly combined, 1 minute. Add the chocolate, vanilla, and walnuts if you are using them. Scrape down the sides of the bowl and mix for another 30 seconds. The batter can be made up to this point and refrigerated, well wrapped, for up to 4 days.

Using 2 teaspoons, scoop the dough into mounds arranged 2 inches apart on the prepared cookie sheets. Bake until they are a light golden brown with darker coloring at the edges, 12-15 minutes. For a crunchier, darker, more caramelized cookie, bake a little longer. For even browning, rotate the cookie sheets during baking.

These cookies will keep, sealed in a container, for 3 days.

Tuesday, September 30, 2008

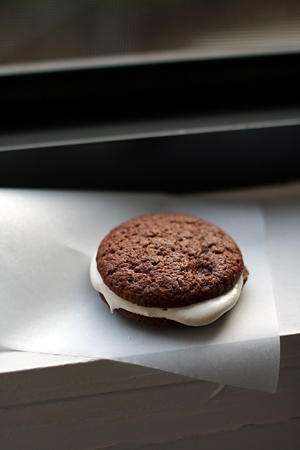
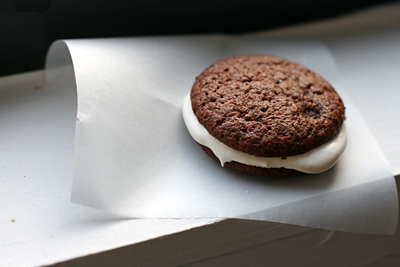
Whoopie Pies

Whoopie Pies

Whoopie Pies

I think whoopie pies are rather whimsical. There's something about the fluffy marshmallow filling and bendy, cakelike cookies that makes me wish I liked eating them more than I do. Generally, I make whoopie pies because they elicit ecstatic reactions from other people. Especially if you coat them in sprinkles.

This recipe isn't difficult, but you can get wildly different results if you're not careful with ingredient temperatures. The cookie dough and filling are easiest to make when the butter is quite soft. I think room temperature buttermilk would be optimal as well. Cold butter will make the filling lumpy and the cookies less uniformly shaped.

Three-bite Whoopie Pies
adapted from Abigail Johnson Dodge's The Weekend Baker

For the chocolate wafers:
2 cups (255g) all purpose flour
2/3 cup (57g) unsweetened natural cocoa powder, sifted
1/2 tsp baking soda
1/2 tsp table salt
12 tbsp (170g) unsalted butter, at room temperature
1 1/2 cups (340g) granulated sugar
1 tsp pure vanilla extract
1 cup buttermilk

For the vanilla filling:
12 tbsp (170g) unsalted butter
1 1/3 cups (177g) marshmallow fluff (not creme)
3/4 cup (85g) confectioners' sugar
2 oz (57g) cream cheese, at room temperature
1 1/2 tsp pure vanilla etract
1/4 tsp table salt

1. To make the chocolate wafers, position an oven rack on the middle rung. Preheat the oven to 375F/190C. Line 3 cookie sheets with parchment paper.

2. In a medium bowl, combine the flour, cocoa, baking soda, and salt. Whisk until well blended. In a large bowl, combine the butter, sugar, and vanilla. Beat with an electric mixer on medium high speed until well blended. Pour in about 2/3 of the dry ingredients and mix on low speed just until blended. The mixture will look sandy, with small pebbles of dough. Add the buttermilk and continue mixing just until blended. Pour in the remaining flour mixture and mix just until blended.

3. Using a small scoop or 2 tbsp, drop 2 tbsp mounds of dough onto the prepared cookie sheets, spacing them about 2 inches apart. Bake one sheet at a time until the mounds are puffed and a toothpick inserted in the center comes out clean, about 11 minutes. Transfer the cookie sheet to a rack and let cool for 5 minutes. Using a spatula, lift the cookies from the sheet onto a rack and let cool completely.

4. Prepare the filling while the chocolate wafers are baking. Combine the butter, marshmallow, confectioners' sugar, cream cheese, vanilla, and salt in a medium bowl. Beat with an electric mixer fitted with the whisk attachment on medium speed until well blended and smooth.

5. Cover the bowl with plastic wrap and set the filling aside until the chocolate wafers are ready to be assembled. If the filling is very soft, refrigerate it, stirring frequently, until it's firm enough to hold its shape.

6. To assemble the pies, arrange half of the cooled wafers, flat side up, on a work surface. Mound about 1.5 tbsp of the filling in the center of each. Top with the remaining wafers and press gently on top until the filling spreads just to the edges. Refrigerate until the filling is firm, about 1 hour, or until ready to serve. The assembled pies will keep in the fridge for a week, or in the freezer for 3 months.

Monday, February 26, 2007

Kringles

Kringles

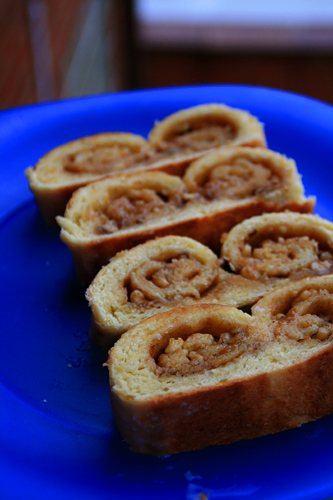
I found this recipe at Penzey's Spices. It seemed mildly interesting, so I made the dough while focusing more intently on kumquat preserves and the previously posted ginger cake.

I baked the Kringles this morning, and I could hardly believe how delicious they were; crunchy on the bottom but deliciously soft on the inside and packed with warm brown sugar, cinnamon, butter, and walnuts. I would make them again in a heartbeat.

The glaze was a little thin though, for my tastes. I might look into a thicker glaze recipe.


Kringles
This looks like a lot of work/ingredients but it really isn't. This is another recipe with yeast that is nearly foolproof, as in this case the yeast stays cold throughout and there is no rising. So easy!

This recipe makes two kringles and can easily serve 8-10 polite people or fewer unrestrained ones.

Dough:
4 Cups all-purpose flour
1 Cup butter, slightly softened
2 TB. sugar
1 tsp. salt
1 pkg. dry yeast (2 1/4 TB.)
2 eggs, beaten
1 Cup milk

Filling:
1/2 Cup sugar
1/2 Cup brown sugar, lightly packed
1 tsp. cinnamon
5 TB butter, melted
1 Cup chopped nuts (in order of preference I would use pecans, almonds, hazelnuts, or walnuts)

Glaze:
2 2/3 cups powdered sugar
2 TB butter, softened
4 TB hot water
1 TB milk
1-2 tsp. vanilla extract

To make the dough:
Combine the first four ingredients in a bowl. Use a pastry blender, two knives of your hands blend together until mixture is crumbly. In a separate bowl mix the yeast, eggs, and milk. Add this mixture to the dry ingredients, making sure no yeast remains in the wet mixture bowl. Mix well until all is blended, it will pull away from the sides and form a ball. Divide it into two equal pieces, flatten them into discs, wrap in plastic wrap and put them into the refrigerator overnight (I left mine in for 24 hours and they were fine) or at least 6 hours.

Preheat the oven to 350F. Mix together the two sugars and the cinnamon in a small bowl and set aside. Place each disc on an ungreased cookie sheet. Roll out each piece of dough to 1/8" thickness about the length of your cookie sheet and as wide as 1/8" thickness will allow. Brush half the melted butter over each piece of dough, sprinkle each piece with half the sugar mixture, and top with half of the nuts. Turn the cookie sheet so that the long side faces you and roll up the dough like a jellyroll stopping at the halfway point. Then turn the sheet again, so that the other long side is facing you and roll up the other side to the halfway point, so that the two rolls meet in the middle. Pinch the rolls together very firmly down the center line (they are going to want to separate in the oven so pinch like you mean it) and fold the ends under. Bake 20-25 minutes, changing racks halfway through the baking time, (switch the top to bottom, and front to back) Remove the kringles to a cooling rack and let cool at least 10 minutes before glazing.


Sunday, November 23, 2008

Sables Korova (World Peace Cookies)

Sables Korova (Chocolate and Fleur de Sel)

Sables Korova (Chocolate and Fleur de Sel)

Sables Korova (Chocolate and Fleur de Sel)

In the world of food blogging, Pierre Herme's Sables Korova, renamed World Peace Cookies by Dorie Greenspan, are somewhat legendary. If you don't believe me, take a look through the google or flickr results.

Since so many people have described the addictive qualities of these indulgent, chocolate-studded, teasingly salty cookies, i'm going to spend more time talking about making them rather than eating them.

The nice thing about making a widely tried recipe is you can see the differences in others' results. I don't know about you, but I find photographic evidence of cookie diversity very comforting when a recipe doesn't turn out as expected.

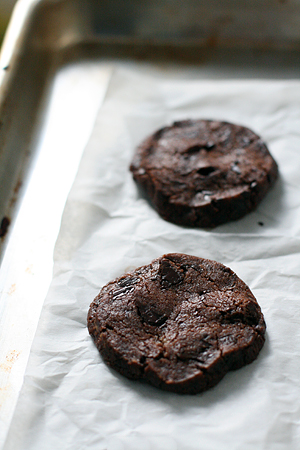
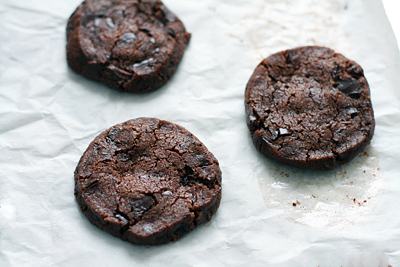
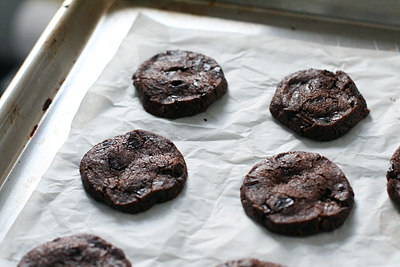
I got a little impatient and baked a few cookies before the dough was thoroughly chilled. This batch yielded flat cookies that spread a little strangely. They looked a little like this. The photos above are from day two, when I sliced the well-chilled dough a little thicker.

In addition to temperature and size, ingredient distribution also effects these cookies. I'd suggest using very soft butter; cold butter doesn't incorporate as quickly, or as well. I had to mix my dough longer than i'd have liked, and my finished dough wasn't exactly homogenous. Foodbeam is a good blog for browsing photos and comments on sable technique.

Shaping the dough into logs takes a little practice too- I think this is a case where I would have liked to compress the logs in parchment paper, using the technique on page 185 of The Simple Art of Perfect Baking. I'll upend the dough onto some parchment, gently knead/shape it into a rough log, and then use the parchment and a straight-edged cookie sheet or dough scraper to shape it into a nicer circle.

You can view the recipe here. It's also been printed in Dorie Greenspan's Paris Sweets and Baking From my Home to Yours. The cookies were a hit at work, and I think they'd be an elegant addition to a holiday cookie box. You can freeze the logs ahead of time and bake them as needed.

Thursday, December 18, 2008

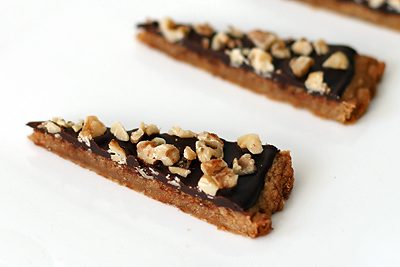
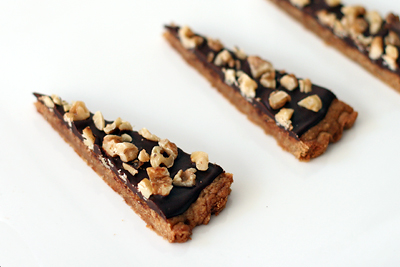
Toffee Chocolate Nut Wedges

Toffee Chocolate Nut Wedges

Toffee Chocolate Nut Wedges

Sometimes I feel like the holiday season is an unspoken competition. It can be a competition to give the best food gift, cook the best meal, or distribute the most cookies to the most people. When I go to a holiday party, I feel like it's a competition to make the most talked-about dish and go home with the least leftovers, without upstaging the hostess.

I know the holiday doesn't have to be competetive. Still, as a baker, there's nothing worse than to spend hours working on something elaborate and seasonal only to have no one eat it. Or have someone tell you they wanted to eat it, but they ate too many Candy Cane Joe-Joe's, or one too many pieces of Aunt So-and-So's super wonder fudge bark thing.

To cut back on holiday baking stress, it's good to have a repertoire of quick, impressive, cost-effective recipes. If you, like me, put off most of your holiday baking until the very last minute, you'll love this recipe for Toffee Chocolate Nut Wedges. With minimal effort, these delicious, elegant cookies can be baked and assembled in less than an hour.

Rather than crunchy, like shortbread, these cookies are tender with crisped edges. The toasted nuts add a needed textural contrast to the cookie base and smooth, creamy ganache.

I think these cookies could be even more visually striking with different topping combinations. I had mendiants in mind when I thought of different ingredients to add: cocoa nibs, sea salt, pistachios, almonds, candied orange peel, dried tart cherries, cranberries, and raisins. Even white chocolate with candy cane pieces.

I don't think these cookies would go unnoticed at anyone's party! Even if they did...at least they keep well.

Toffee Chocolate Nut Wedges
adapted from Abigail Johnson Dodge's The Weekend Baker
8 tbsp unsalted butter, at room temperature
½ c dark brown sugar, firmly packed
¼ tsp table salt
1 yolk from large egg
½ tsp pure vanilla extract
1 c all-purpose flour
5 oz bittersweet or semisweet chocolate, chopped
3 tbsp heavy cream
½ c chopped pecans (or walnuts), toasted

Position an oven rack in the middle and preheat to 350F. Lightly grease a 9.5" tart pan with a removable bottom. A pie plate or similarly sized baking pan will work, but you won't get the nice fluted edges.

In a large bowl, combine the butter, dark brown sugar and salt. Beat with an electric mixer on medium speed until well blended. Add the egg yolk and vanilla and beat just until combined. Pour in the flour and beat on low speed until the dough begins to clump together. Scrape the dough into the prepared pan, scattering the pieces evenly. Pat the dough into the bottom (not up the sides) of the prepared pan to form an even layer. Bake until the top looks dry and the dough begins to pull away from the sides of the pan, about 25 to 27 minutes.

Meanwhile, melt the chocolate with the cream in a double boiler or in the microwave. Stir until smooth. When the crust is baked, transfer the pan to a rack. Pour the warm ganache over the warm crust and spread evenly to within 1/2” of the edge. Scatter the nuts over the ganache and gently press them into the chocolate. Let cool until the chocolate is set, about 4 hours at room temperature or about 2 hours in the refrigerator. Remove the outer ring of the tart pan and cut the “cookie tart” into 16 wedges. Serve the wedges chilled or at room temperature.


Monday, February 23, 2009

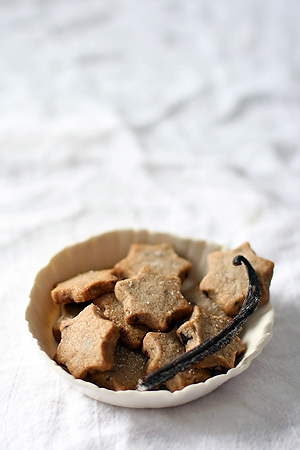
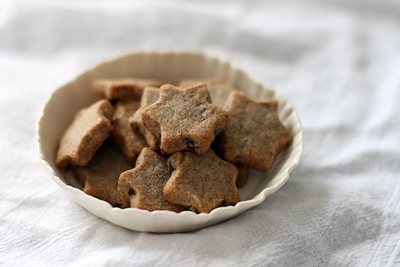
Nibby Buckwheat Butter Cookies

Nibby Buckwheat Butter Cookies

Nibby Buckwheat Butter Cookies

Some cookies are best small. To be honest, i've never liked the big-as-your-head cookies found in so many bakeries and coffee shops. They often sacrifice good flavor and texture for size. I'm much happier with a good cup of coffee that has some dainty cookies perched on the saucer.

I liked these Sea Salt and Cocoa Shortbreads so much that i've been exploring other recipes for butter cookies. I love the crisp, crumbly texture that comes from proper mixing and the occasional addition of corn starch or gluten-free flours (they contribute to the "shortness" of the cookie).

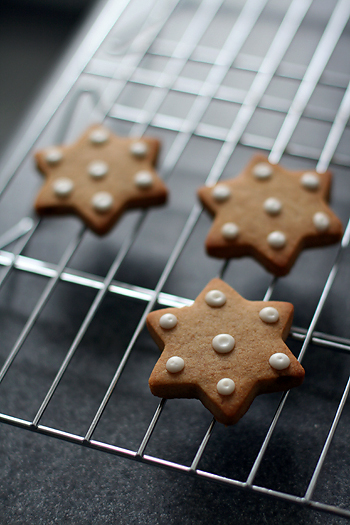
These Nibby Buckwheat Butter Cookies were highly recommended by several bloggers, so I decided to try them. The original recipe is for slice-and-bake cookies, but I used a star shaped cutter instead. I used to think cut-out cookie required too much labor, but i've been more willing to make them since I started rolling out the soft dough inside of ziplock bags (a tip you can see demonstrated in this post).

I made a half-batch of dough, which still yielded plenty of small cookies. Since I was out of vanilla extract, I used the seeds from half a vanilla bean and saved the pod to make vanilla sugar. I also lightly toasted the cocoa nibs to improve their flavor, and sprinkled a little sea salt over the top of the dough.

The finished cookies are perfect for tea or snacking. They're not too sweet, and they're small enough that most people will happily indulge in a few. You can find Alice Medrich's original recipe here, courtesy of 101 Cookbooks.

Sunday, December 16, 2007

Cornmeal Currant Biscotti

Cornmeal Currant Biscotti

Cornmeal Currant Biscotti

I don't make biscotti much. Mediterra makes fabulous hazelnut and chocolate biscotti that are more like sables/butter cookies than traditional biscotti. I need to try a few more recipes before I know how to get the texture i'm looking for. This Alice Medrich recipe was pretty simple. I'm not sure i'd use currants next time; I think a slightly sweeter fruit would have been better with the cornmeal.

The graduation party went well last night. All of the baked goods were devoured, excepting one poundcake which i'm taking home for my parents. I have plenty of photos to share later: more gingersnaps, blondies, glazed lemon cake, and more!

Cornmeal and Fruit Biscotti
adapted from Alice Medrich's Cookies and Brownies
1 cup all-purpose flour
1 cup cornmeal
1/2 tsp baking powder
1/4 tsp salt
4 tbsp unsalted butter, softened
1 cup sugar
2 large eggs
1 tsp vanilla extract
1 tsp finely grated lemon zest
1 cup raisins or dried cherries, cranberries, or blueberries, or chopped dried apricots

Preheat oven to 350. Position a rack in the middle of the oven.

Combine the flour, cornmeal, baking powder, and salt in a medium bowl and mix together thoroughly with a whisk or fork. Set aside.

Beat the butter and sugar in a large bowl with an electric mixer until blended. Add the eggs, vanilla, and lemon zest, and beat until light and fluffy.

Add the flour mixture, stirring until all of the ingredients are moistened. Add the raisins, mixing with your hands if necessary. Shape the dough into a 12x2 inch log and place it on a cookie sheet.

Bake for 35-40 minutes, or until lightly browned and cracked on top. Cool for 5-10 minutes. Transfer the loaf carefully to a cutting board. Using a long serrated knife, cut the loaf on the diagonal into slices about 3/8 inch wide. Lay the slices, cut side down, on the cookie sheet. Bake for 10 minutes, or until the cookies are barely beginning to brown at the edges. Set the pan on a rack. Cool the cookies completely before stacking or storing. May be stored, airtight, for at least 2 weeks.

Monday, August 27, 2007

Oat Crisps.

Oat Crisps

I'm not a huge fan of those placemats, but I suppose oatmeal cookies feel very all-american.

Anyway, Emily Luchetti has fantastic cookie recipes. The more I make them, the more I think we have the exact same taste in cookies. She really has a knack for texture. These oat crisps were wonderfully crispy and delicate. Emily Luchetti seems to appreciate crunch as much as I do.

This recipe came from Classic Stars Desserts. She serves them with creme fraiche and blueberries for desserts and with yogurt for breakfasts. They're simple, fast, and really delicious.

Oat Crisps
adapted from Classic Stars Desserts
2 1/2 tbsp unsalted butter, melted
1/4 cup firmly packed dark brown sugar
2 tbsp granulated sugar
2 tbsp dark corn syrup
1 cup old fashioned rolled oats

Preheat the oven to 350. Line 2 baking sheets with parchment paper.
In a bowl, combine the butter, brown sugar, granulated sugar, and corn syrup and stir until blended. Stir in the oats, mixing well.
To form the crisps, drop the oat mixture, one tbsp per cookie, onto the prepared baking sheets, spacing them about 2.5 inches apart. Bake, rotating the sheets at the midway point, until golden brown and bubbly, about 15 minutes. Let cool for 5 minutes on the baking sheets. Then, using a metal spatula, transfer the crisps to a large flat plate to cool.

Wednesday, March 19, 2008

Ranger Cookies

Ranger Cookies

Ranger Cookies

Emily Luchetti never lets me down. When I crack open A Passion for Ice Cream it's usually to make cookies. I'm particularly fond of the pistacio and cocoa nib florentines, as well as the walnut cookies, oat crisps, and brandy snaps. The recipes are simple, straightforward, and consistent. I always get perfect results.

I love eating these. They have all the best qualities of chocolate chip and oatmeal cookies, with a few twists. They're crispy and full of brown sugar flavor without that toothsome over-sugared texture. I used chopped premium organic flaked coconut that I bought from the East End Food Co-op. I liked the bigger pieces, and i'd suggest trying to find the big flakes of unsweetened coconut rather than the fine stuff.

In the book, these ranger cookies are sandwiched with peanut butter ice cream. I prefer them plain with milk or coffee. I'm really looking forward to trying the recipe again with cashews!

Ranger Cookies
adapted from Emily Luchetti's A Passion for Ice Cream

4oz/8tbsp unsalted butter, softened
1/2 cup granulated sugar
1/2 cup dark brown sugar, firmly packed
1 tsp vanilla extract
1 large egg
1 cup all-purpose flour
1/2 tsp baking soda
1/8 tsp baking powder
1/4 tsp kosher salt
1/4 cup unsweetened coconut
1/2 cup (2 oz) unsalted roasted peanuts, coarsely chopped (I used walnuts, and I think cashews would be amazing)
1/2 cup old fashioned rolled oats
1/3 cup chocolate chips

To make the cookies: Preheat the oven to 350F. Line 3 baking sheets with parchment paper.

In a large bowl, beat together the butter and the granulated and brown sugars until smooth and creamy. Stir in the vanilla extract and the egg. Sift together the flour, baking soda, and baking powder. Add the salt. Stir the dry ingredients into the butter mixture. Stir in the coconut, peanuts, oats, and chocolate chips.

Using about 1 1/2 tablespoonfuls for each cookie, place mounds of the cookie dough 3 inches apart on the prepared sheets. Bake until golden brown, about 12 minutes. Let the cookies cool to room temperature before removing them from the pans with a spatula.

Yields 2-3 dozen cookies, depending on size.

Monday, June 4, 2007

Melting Moments

Melting Moments

Melting Moments

I'd never heard of Melting Moments until recently. They remind me a little of rosketti- a simple chamorro corn starch cookie that melts in your mouth. Mexican wedding cookies also have that similar crumbly, sandy texture.

These are from Donna Hay's Modern Classics 2. The best part is they're incredibly simple and fast to prepare. They're filled with a simple lemon frosting.

Melting Moments
adapted from Donna Hay
175g (about a stick and a half) butter, softened
1/4 cup powdered sugar
1 tsp vanilla
1 cup all purpose flour, sifted
1/4 cup corn starch, sifted
60g butter (about half a stick), softened
2 tsp lemon juice
2 tsp lemon zest
1 cup powdered sugar

Preheat oven to 350.
Cream the butter, sugar, and vanilla until smooth.
Add the flour and cornstarch and mix until it comes together.
Put the batter in a bag and with a fluted tip and pipe 1" circles onto parchment lined baking sheets.
Bake 12-14 minutes until golden brown.

For the frosting, cream the butter, sugar, lemon juice and zest.
When the cookies are cool, sandwich them together with some frosting.
Makes about 16 sandwiches.

Friday, February 29, 2008

Bittersweet Chocolate and Hazelnut Cookies

Bittersweet Chocolate Hazelnut Cookies

Bittersweet Chocolate Hazelnut Cookies

The first time I checked out Dolce Italiano I thought it was boring and returned it. When I mentioned this to April, she seemed shocked and said she thought all the recipes looked delicious. Suddenly I felt like i'd been too hasty, too judgmental. I respect April's taste, so I decided to give the book another try.

I browsed the recipes one by one and realized that i've become horribly spoiled by photos. This book has a daunting amount of text, and many of the recipes don't explain what the finished product should look like. Sometimes you have to trust a recipe will be good without the reassurance of a glossy photo and multiple descriptive indicators. You have to read recipes and understand that simple ingredients can yield beautiful, rustic desserts with clean flavors.

These chocolate and hazelnut cookies were a huge hit at work. Warm from the oven they were soft deeply chocolate flavored, almost like a tea cake. When cooled, they were slightly crunchy with a crumbly texture. The next day, they were softer but still rich and delicious.

Don't overmix the batter. It helps to fold the dry ingredients and butter/egg mixture several times with a spatula before turning on the mixer. My dough was very crumbly, but it came together when I formed it into discs. If you run the mixer long enough to make a very wet, cohesive dough, you'll end up with tough cookies. The cookies are rich, so it's better to make them smaller than bigger.

Bittersweet Chocolate and Hazelnut Cookies
adapted from Gina DePalma's Dolce Italiano
makes about 5 dozen cookies

2 cups unbleached all purpose flour
1/3 cup unsweetened dutch-processed cocoa powder
1/2 tsp baking powder
1/2 tsp kosher salt
1/2 cup whole hazelnuts, skinned or unskinned
1 cup (2 sticks) unsalted butter, softened
1/2 cup granulated sugar
1 large egg
1 tsp pure vanilla extract
5 oz semisweet or bittersweet chocolate, finely chopped (I used 60% Callebaut)
1 1/2 cups confectioners' sugar, for dusting

In a medium bowl, whisk together the flour, cocoa powder, baking powder, and salt. Place the hazelnuts in the bowl of a food processor and pulse them 2-3 times to chop them medium-fine. Add the hazelnuts to the bowl with the dry ingredients and stir to combine them.

In the bowl of an electric mixer fitted with the paddle attachment, cream together the butter and granulated sugar on medium speed until pale and fluffy, about 2 minutes. Beat in the egg and vanilla extract and scrape down the sides of the bowl. On low speed, beat in the dry ingredients, followed by the chocolate, and beat just until combined. Cover the bowl with plastic wrap and chill the dough until firm, about 30 minutes.

Preheat the oven to 325F. Lightly grease two baking sheets with nonstick cooking spray or butter or line them with parchment paper.

Place the confectioners' sugar in a shallow bowl. To form the cookies, roll 1 scant tablespoon of dough into a 1 inch ball, then flatten it slightly with your fingertips to form a small disc. Roll the cookie in the confectioners' sugar to coat it evenly and place it on the baking sheet. Repeat until all of the dough is used, spacing the cookies 1 inch apart on the baking sheets.

Bake the cookies until they are puffed and cracking, 8-10 minutes. Rotate the baking sheets 180 degrees halfway through the baking time to ensure that the cookies bake evenly. Allow the cookies to cool on the baking sheets for 1-2 minutes, then use a spatula to transfer them gently to a wire rack to cool completely. If desired, dust them with additional confectioners' sugar.

The cookies can be stored in an airtight container, layered between sheets of parchment paper, and kept in a cool, dry place for up to 1 week.

Wednesday, January 21, 2009

Salty Thin and Crispy Oatmeal Cookies

Thin and Crispy Oatmeal Cookies

Thin and Crispy Oatmeal Cookies

Several people have asked for this recipe since I posted the photos in November, so I figured it was time to post it. It yields a thin, very crisp cookie that's good for snacking. Since the dough is heavy on sugar, it's important to wait until the cookies are fully cooled before eating them (unless you're a fan of that tough, stick-to-your teeth texture).

While the sea salt topping is optional, I think it's a great contrast to the sweet cookies. My cookies spread to 3.5-4 inches in diameter (too large for my tastes), so next time i'd divide the dough into smaller portions. I think smaller, uniformly shaped cookies would bake more evenly.

Do avoid overbaking the cookies- they quickly change from perfect to burnt. Golden brown and dark brown cookies have a marked difference in taste. I forgot a batch in the oven and when I finally pulled them out they were carbon...happens to the best of us!

Salty Thin and Crispy Oatmeal Cookies
adapted from Cook's Illustrated
1 cup all-purpose flour
3/4 teaspoon baking powder
1/2 teaspoon baking soda
1/4 teaspoon table salt
14 tablespoons unsalted butter, softened but still cool, about 65 degrees
1 cup granulated sugar
1/4 cup packed light brown sugar
1 large egg
1 teaspoon vanilla extract
2 1/2 cups old-fashioned rolled oats
1/2 teaspoon coarse sea salt

Instructions
1. Adjust oven rack to middle position and preheat to 350 degrees. Line 3 large baking sheets with parchment paper. Whisk flour, baking powder, baking soda, and salt in medium bowl.

2. In standing mixer fitted with paddle attachment, beat butter and sugars at medium-low speed until just combined. Increase speed to medium and continue to beat until light and fluffy, about 1 minute. Scrape down bowl with rubber spatula. Add egg and vanilla and beat on medium-low until fully incorporated, about 30 seconds. Scrape down bowl again. With mixer running at low speed, add flour mixture and mix until just incorporated and smooth, 10 seconds. With mixer still running on low, gradually add oats and mix until well incorporated, 20 seconds. Give dough final stir with rubber spatula to ensure that no flour pockets remain and ingredients are evenly distributed.

3. Divide dough into 24 equal portions, each about 2 tablespoons, then roll between palms into balls. Place cookies on prepared baking sheets, spacing them about 2 1/2 inches apart, 8 dough balls per sheet. Using fingertips, gently press each dough ball to 3/4-inch thickness. Lightly sprinkle sea salt evenly over flattened dough balls before baking.

4. Bake 1 sheet at a time until cookies are deep golden brown, 13 to 16 minutes. Transfer baking sheet to wire rack; cool cookies completely on sheet.

Thursday, April 5, 2007

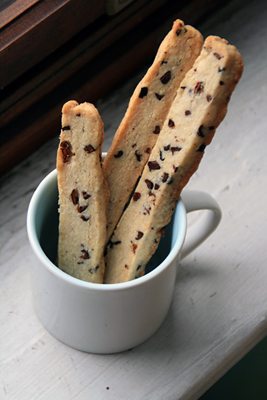
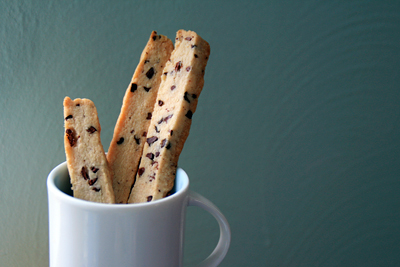
Almond Sticks with Cocoa Nibs

Cocoa Nib Almond Sticks

This week, i've been drawn to new recipes rather than old favorites. These almond dunking cookies are the fourth recipe Alice Medrich recipe i've baked in the past few days. I love cookies that are very convenient for dipping in a tall glass of milk.

Almond Sticks with Cocoa Nibs
adapted from Alice Medrich's Bittersweet.
3/4 cup whole blanched almonds
1 cup+ 2 T all purpose flour
2/3 cup sugar
1/4 tsp salt
6 T unsalted butter, cut into chunks
2 T water
1 tsp vanilla extract
1/8 tsp pure almond extract
1/4 cup cocoa nibs

Combine the almonds, flour, sugar, and salt in a food processor and pulse until it is a fine meal. Add the butter and pulse until the dough looks crumbly. Combine the water, vanilla, and almond extract and add it to the bowl, pulsing until it just looks damp. Add the cocoa nibs and pulse until evenly distributed.

On a big sheet of foil, press the dough into a 6x9 in rectangle that's 1/2 inch thick. Refrigerate for 2 hours or overnight. Preheat the oven to 350. Using a long, sharp knife, cut 3/8 in thick slices and place them on parchment lined cookie sheets, about 1 inch apart. Bake 12-14 minutes, until golden at the edges.


Cocoa Nib Almond Sticks

Sunday, March 29, 2009

Gingerbread Stars with Royal Icing

Gingerbread Stars

I tried Donna Hay's recipe for gingerbread from Modern Classics Book 2. The cookies held their shape well and looked elegant topped with royal icing. I didn't care for the texture, but I liked the recipe enough to consider trying more iced cookies.

This recipe uses Golden Syrup instead of molasses, and the ground ginger flavor is strong and spicy. Here's the cookie recipe, if you care to try it.

I'd suggest finding a more reliable recipe for royal icing- the one in Modern Classics calls for way too much egg white.

Gingerbread Cookies
adapted from Donna Hay's Modern Classics, Book 2
125g butter, softened
1/2 cup brown sugar
1/2 cup golden syrup
2 1/2 cups all purpose flour, sifted
2 tsp ground ginger
1 tsp baking soda

Preheat the oven to 375F. Place the butter and sugar in a bowl and beat with electric beaters until light and creamy. Add the golden syrup, flour, ginger, and baking soda and mix to form a smooth dough. Refrigerate for 10 minutes or until the dough is firm. Roll out the dough between sheets of wax paper to 1/4 inch thick. Place on baking sheets lined with parchment paper. Bake for 8-10 minutes or until golden brown. Do not overbake!