Showing posts sorted by relevance for query cinnamon. Sort by date Show all posts

Tuesday, November 4, 2008

Cinnamon Buns

Cinnamon Rolls

Cinnamon Rolls

I'm still working on a post about my trip. For now, I thought i'd share some of the baking I did beforehand.

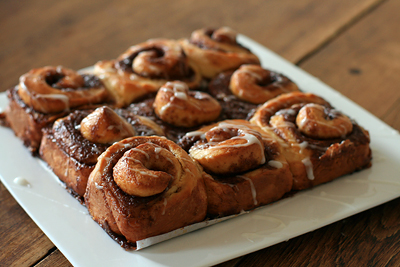
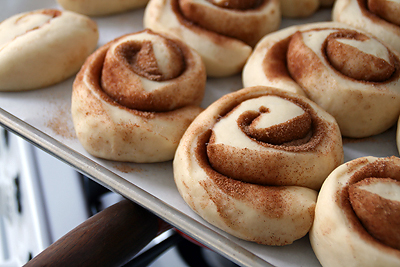
I'd been meaning to try this recipe for a while, and i'm really pleased I did. Most of the cinnamon bun recipes i've tried yield rich, danish-like pastries as opposed to fluffy, bread-like ones. The relatively low fat content of the dough makes these buns ideal for topping with sugary glaze or creamy frosting.

I used whole milk, all purpose flour, and lemon extract for the dough. I think bread flour would have been better, and i'm eager to try the buttermilk variation. I encourage you to be very cautious with the lemon extract. The Nielsen-Massey brand is incredibly potent, and I wish i'd cut the amount in half. Most of my friends liked the lemon flavor, but I think I would have preferred vanilla.

I haven't included the fondant glaze from the original recipe; it was a pretty standard combination of confectioners' sugar, warm milk, and lemon extract. Instead, i've added a cream cheese frosting recipe from another blog. These buns are texturally similar to the ones sold at Dozen Bakeshop in Lawrenceville, so if you're a fan i'd try out the recipe.

There's nothing quite like biting into a huge, freshly-baked cinnamon roll. I spent a leisurely afternoon proofing, shaping, and baking the dough, and then end product was incredibly satisfying.

Cinnamon Buns
From Peter Reinhart’s The Bread Baker’s Apprentice
Makes 8-12 large or 12-16 smaller buns

6 1/2 tablespoons (3.25 ounces) granulated sugar
1 teaspoon salt
5 1/2 tablespoons (2.75 ounces) shortening or unsalted butter, room temperature
1 large egg, slightly beaten
1 teaspoon lemon extract or zest
3 1/2 cups (16 ounces) unbleached bread or all-purpose flour
2 teaspoons (.22 ounce) instant yeast
1 1/8 to 1 1/4 cups (9 to 10 ounces) whole milk or buttermilk, room temperature
1/2 cup (4 ounces) cinnamon sugar (6 1/2 tablespoon granulated sugar plus 1 1/2 tablespoons cinnamon

1. Cream together the sugar, salt, and shortening on medium-high speed in an electric mixer with a paddle attachment. Whip in the egg and lemon extract until smooth. Then add the flour, yeast, and milk. Mix on low speed until the dough forms a ball. Switch to the dough hook and increase the speed to medium, mixing for approximately 10 minutes, or until the dough is silky and supple, tacky but not sticky. Lightly oil a large bowl and transfer the dough to the bowl, rolling it around to cover it with oil. Cover bowl with plastic wrap.

2. Ferment at room temperature for approximately 2 hours, or until the dough doubles in size.

3. Mist the counter with spray oil and transfer the dough to the counter. Roll out the dough with a rolling pin, lightly dusting the top of the dough with flour. Roll it into a rectangle about 2/3 inch thick and 14 inches wide by 12 inches long for larger buns, or 18 inches wide by 9 inches long for smaller buns. Sprinkle the cinnamon sugar over the surface of the dough and roll the dough up into a cigar-shaped log, creating a spiral as you roll. With the seam side down, cut the dough into 8 to 12 even pieces, each about 1 3/4 inches thick for larger buns; or 12 to 16 pieces each 1 1/4 inch thick for smaller buns.

4. Line 1 or more sheet pans with baking parchment. Place the buns approximately 1/2 inch apart so that they aren’t touching but are close to one another.

5. Proof at room temperature for 75 to 90 minutes, or until the pieces have grown into one another and have nearly doubled in size. You may also retard the shaped buns in the refrigerator for up to 2 days, pulling the pans out of the refrigerator 3 to 4 hours before baking to allow the dough to proof.

6. Preheat the oven to 350 degrees F with the oven rack on the middle shelf.

7. Bake the buns for 20 to 30 minutes, or until golden brown.

8. Cool the buns in the pan for about 10 minutes and then glaze the tops. Remove the buns from the pans and place them on a cooling rack. Wait at least 20 minutes before serving.

Cinnamon Bun Glaze
From Molly Wizenberg, Bon Appétit, March 2008

4 ounces cream cheese, room temperature
1 cup powdered sugar
1/4 cup (1/2 stick) unsalted butter, room temperature
1/2 teaspoon vanilla extract

Combine cream cheese, powdered sugar, butter, and vanilla in medium bowl. Using electric mixer, beat until smooth. Spread glaze on rolls. Serve warm or at room temperature.

Tuesday, January 22, 2008

Cinnamon Buns

Cinnamon Rolls

Cinnamon Rolls

I thought about delaying some recent posts to have entries ready when school and work get busy. That plan fell through pretty quickly. I have trouble being patient when recipes and photos turn out well.

This is a fabulous recipe from Carole Walter's Great Coffee Cakes, Sticky Buns, Muffins and More. I've heard great things about this book and i'm looking forward to trying more recipes. The directions are very well written.

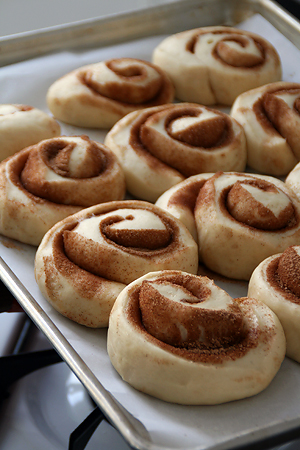
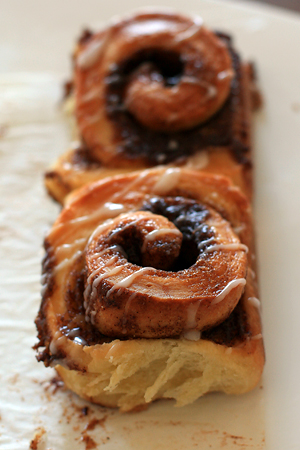
These buns are rich, fluffy, and stuffed with a really tasty cinnamon/sugar filling. I really loved it- the filling i've used before is just soft butter sprinkled with cinnamon sugar. I do wish i'd put more sugar glaze on these. It had a fabulous consistency (though next time i'd use milk, not water). Don't be intimidated by the multiple sets of directions- these aren't very difficult to make, especially if you measure out most of the ingredients in advance.

Simple Sweet Dough
makes 2 pounds of dough, enough for 1 large or 2 medium coffee cake
Ingredients:
4 tbsp sugar
1/4 cups warm water (110 to 115 F)
1 package active dry yeast
3 cups unbleached all purpose flour, spooned in and leveled
1 tsp salt
1 cup (2 sticks) unsalted butter, cut into cubes
1/2 cup milk
3 large egg yolks
1 tsp vanilla extract

Rinse a small bowl in hot water to warm it. Add 1 tbsp of the sugar and the warm water to the bowl. Sprinkle the yeast over the water. Do not stir. Cover the bowl with a saucer and let the mixture stand for 5 minutes. Stir it briefly with a fork, cover again, and let it stand for 2 to 3 minutes more, or until bubbly.

In a bowl of an electric mixer fitted with a paddle attachment, mix on low speed the 3 cups of flour, remaining 3 tbsp of sugar, and the salt. Add the slightly firm cubed butter and continue to mix until meal-size crumbs form, 2 to 4 minutes depending on the temp of the butter. Stop the mixer.

Using a fork, in a separate bowl, mix the milk, egg yolks and vanilla. Add the milk mixture to the flour, along with the dissolved yeast, and mix on low speed for about 15 seconds. Stop the mixer and scrape down the side of the bowl with a rubber spatula. Mix on low speed for another 30 seconds, or until smooth dough is formed. NOTE: this is a soft dough.

Lightly butter a medium bowl for storing the dough. Empty the dough into the prepared bowl, smoothing the top with lightly floured hands. Spread a thin layer of softened butter over the top. Cover tightly with plastic wrap and refrigerate overnight. The dough may be kept in the fridge, tightly covered, for up to 3 days.

Cinnamon Buns
1/2 recipe (about 1 pound) Simple Sweet Dough
3 tbsp unsalted butter, softened
3 tbsp granulated sugar
3 tbsp (firmly packed) dark brown sugar
2 tbsp lyle's golden syrup or light corn syrup
1 tbsp ground cinnamon
1/8 tsp salt
1 large egg, lightly beaten with 1 tsp water, for egg wash
1 small recipe vanilla glaze, optional

1. Remove the dough from the refrigerator 1 to 1.5 hours before using.
2. Generously butter an 8x8x2 inch square pan. Line the bottom with parchment. Set aside.
3. In a medium bowl, using a wooden spoon, mix the butter, sugars, syrup, cinnamon, and salt until smooth.
4. Place the dough on a lightly floured surface. Gently knead six or eight times to coat with flour. Pat or shape the dough into a rectangle. Roll the dough into a 9x12 inch rectangle with the 9-inch side parallel to the edge of the counter.
5. Spoon dollops of the cinnamon filling evenly across the dough, making three rows across and two rows down. Using a small offset spatula, spread the filling evenly across the dough, leaving a 1.5 inch border on the far edge. Lightly brush the border with the egg wash. Starting at the side of the rectangle closest to you, roll the dough tightly. Pinch the seam well to seal the flap. Roll the log back and forth a few times to seal the layers. With your hands, gently stretch the log until it measures about 12 inches.
6. Cut the log into 9 1 1/4 inch pieces and place them cut side up in the baking pan, spacing them evenly, three rows across and three rows down. Press the tops of the buns gently to even the surface.
7. Cover the pan with a tea towel and set it in a warmish place to allow the buns to rise until puffy and almost doubled, 45 to 60 minutes.
8. Fifteen minutes before baking, position a rack in the middle of the oven. Preheat the oven to 350 F.
9. Gently brush the tops of the buns with egg wash. Bake for 30-35 minutes, or until golden brown. If the buns are browning too quickly, lay a sheet of aluminum foil over the top to allow the center of the buns to bake through. Remove the buns from the oven and allow them to sit for 15 minutes. While the buns are cooling, make the glaze.
10. To remove the pan, cover it with a cooling rack, invert the buns and carefully lift off the pan. Remove the parchment, then cover the buns with another rack and turn the buns top side up. If the buns have risen unevenly during baking, gently press the tops to level them. While the buns are still warm, drizzle the glaze over the top by dipping a small whisk or fork into the icing and waving it rapidly back and forth over the surface of the buns.

Store at room temperature, tightly wrapped in foil, for up to 3 days. Heat before serving.

Vanilla Glaze
2/3 cup strained powdered sugar
2-3 tsp very hot water
1 1/2 tsp light corn syrup
1/8 tsp pure vanilla extract
few drops lemon juice
pinch of salt

Place the powdered sugar in a medium bowl. Add 2 tsp of the hot water, the corn syrup, vanilla, lemon juice, and salt. Stir until smooth. Add 1 additional tsp hot water or more as needed to make a thin glaze.

*Make this just before using, or keep it warm in a bowl of hot water (it gets crusty very quickly.) You can also substitute milk or cream for a richer, whiter glaze.

Tuesday, December 4, 2007

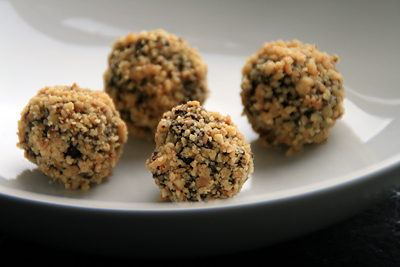
Dark Chocolate, Cinnamon, and Espresso Truffles

Dark Chocolate, Cinnamon, and Espresso Truffles

Dark Chocolate, Cinnamon, and Espresso Truffles

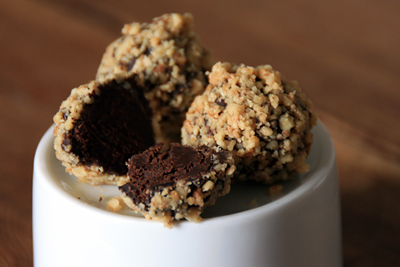
I'm picky about truffles; they often suffer from bad chocolate, boring or horribly wrong flavors, or an overly-dense texture. Luckily I loved this recipe from The Sweet Life. The flavor of coffee and cinnamon is sophisticated and the walnuts add a nice crunch. The ganache isn't so dense that it's hard to bite into.

I used a 63% Guittard chocolate. If you're in Pittsburgh, you can find good baking chocolate in the back of Mon Aimee Chocolat for 4-5 dollars per pound. This is a steal, considering that Whole Foods charges 9-13 dollars a pound for Callebaut and El Rey coverture.

I will probably take these to class, along with some chocolate chip-pecan cookies. I'd consider making them again for holiday parties too.

Dark Chocolate, Cinnamon, and Espresso Truffles w/ Walnuts
adapted from The Sweet Life by Kate Zuckerman

Truffles:
1/2 cup + 2 tbsp heavy cream
1/2 tsp ground fresh cinnamon
8 oz bittersweet chocolate (61-66%)
2 tbsp unsalted butter, at room temperature, diced into 6 pieces
1 tbsp coarsely ground fresh dark coffee

Coating:
3oz bittersweet chocolate
1 1/4 cups ground walnuts

In a small saucepan, combine the cream and cinnamon and cook over medium heat to almost boiling. Remove from the heat, cover, and let the cream steep for 10 minutes. Meanwhile, in the bowl of a double boiler, melt the chocolate, stirring with a rubber spatula as it melts. Do not overheat- it should never be so hot that you cannot dip a finger in it.

Remove the melted chocolate from the heat and slowly whisk in the infused cream. Continue to whisk until the mixture (now a ganache) is smooth, creamy, and holds the lines of a whisk. Slowly whisk in the butter and ground coffee until incorporated. Scrape the ganache into a small bowl and refrigerate for 2 hours.

Fill a glass with very hot tap water. Dip a small mellon baller into the hot water and tap on the counter to remove any excess water. Plunge the mellon baller into the chilled ganache far enough down so that it sits completely in the ganache. Rotate the mellon baller 360 degrees and remove from the ganache. Tap the melon baller to release the ball onto a plate or tray. Repeat this process until all the ganache has been scooped into balls. Transfer the plate to the refrigerator and chill.

In the bowl of a double boiler, melt the bittersweet chocolate, stirring with a rubber spatula as it melts. Remove from the heat and cool for 15 minutes.

Set up an assembly line on your counter. From left to right place the chilled ganache balls, the bowl of melted chocolate, a tray with the ground walnuts, and a container to hold the finished truffles.

With your left hand, pick up 2 ganache balls and dip them quickly into the melted chocolate and roll them around until coated. Drop the balls with your left hand into the walnuts. With your right hand roll the balls until completely enrobed. Pick up the finished candies with your right hand and place them in the container.

These truffles will keep, in a sealed container and refrigerated, for 2 weeks.

Thursday, November 15, 2007

Apple Cheesecake

Apple Cheesecake

Apple Cheesecake

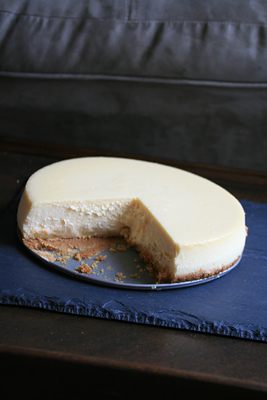
This apple cheesecake seemed appropriate for fall. It has a touch of ground cinnamon and ginger and a layer of caramelized apples sitting on top of the graham cracker crust.

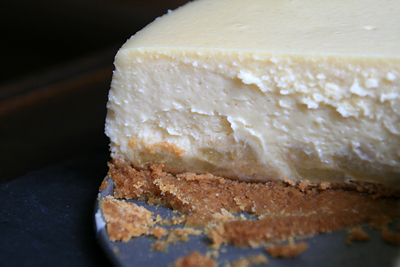
I wasn't sure which photos to pick. I thought the above two had a nice character to the color/texture, but I also took this one which was also interesting- less washed out, but busier.

I'm going to drop this off with the guys at Apple again. There's no way 3/4ths of a cheesecake is going to get eaten in my apartment. I'm also pretty picky about cheesecake texture. This cake is pretty light and similar to cheesecakes i've tried at Juniors.

I'm more partial to cheesecakes that are very dense and crumbly with a crust that is crunchy instead of soggy and dense. The crust recipe I used on Pichet Ong's Kabocha Squash Cheesecake is one of my favorites and next time i'll probably substitute it in.

Sometimes my baking really reflects my mood. I'm still stuck in an empty, stressful, unmotivated funk. Lots of friends have moved away and my new apartment building gives me less opportunities to cook for people. I'm not sure if I need to take a break or simply find a new outlet for my work.

Apple Cheesecake Brulee
adapted from Tish Boyle's The Cake Book
Apple Layer:
2 medium granny smith apples
1 tbsp fresh squeezed lemon juice
2 tbsp unsalted butter
2 tbsp granulated sugar
3 tbsp heavy cream

Cinnamon Graham Cracker Crust:
1 1/4 cups (150g) cinnamon graham cracker crumbs
3 tbsp granulated sugar
4 tbsp unsalted butter, melted

Cream Cheese Filling:
1 1/2 pounds cream cheese, softened
1 1/2 cups granulated sugar
2 tsp vanilla extract
1/4 tsp ground cinnamon
1/4 tsp ground ginger
1/2 cup sour cream at room temp
1 tbsp corn starch
4 large eggs, at room temp

Brulee Topping:
1 1/2 tbsp granulated sugar

1. Position a rack in the center of the oven and preheat oven to 350. Grease the bottom and sides of a 9x3 springform pan. Cut an 18in square of heavy duty aluminum foil and wrap the foil around the outside of the pan.

2. Make the apple layer. Peel and core the apples and slice them in half. Cut them into 1/4 inch slices (don't cut too thin!) and place them in a bowl with the lemon juice, tossing the slices so they are evenly coated.

3. Melt the butter in a large skillet over medium high heat. When the butter is bubbling, add the apples and saute for 2 minutes. Sprinkle the sugar over the apple and continue to cook, stirring frequently until the apples are nicely browned, about 5 minutes. Add the cream and continue to cook until the apples are tender, about 10 mins. Remove skillet from heat and set the apples aside to cool.

4. Make the crust: in a medium bowl combine the crumbs, sugar, and butter. Pat the mixture evenly into the bottom of the prepared pan. Bake the crust for 8 minutes.

5. Set the pan on a wire rack and cool the crust completely. Reduce the oven temperature to 325.

6. When the apples are cool, arrange a tight circle of slices, without overlapping them, around the edge of the pan, on top of the crust. Arrange another circle of slices in the center, covering the crust completely.

7. Make the filling: In the bowl of an electric mixer, using the paddle attachment, beat the cream cheese at medium-low speed until creamy and smooth, about 2 minutes. Gradually add the sugar and beat until blended. Add the vanilla extract, salt, cinnamon, ginger, sour cream, and corn starch and mix until well blended. At low speed, add the eggs one at a time, mixing well after each addition and scraping down the sides of the bowl with a rubber spatula as needed.

8. Scrape the batter over the apple layer. Place the pan in a roasting pan or large baking pan. Pour enough hot water into the roasting pan to come about 1 inch up the side of the springform pan. Bake the cake in the water bath for 70 to 80 minutes, until the center is set but still slightly wobbly (the cake will continue to set up as it cools.) Remove the pan from the water bath and set it on a wire rack to cool completely.

9. Refrigerate the cheesecake for at least 4 hours before caramelizing the top.

10. Run a thin bladed knife between the edge of the pan and the cake to loosen it. Remove the side of the pan. Sprinkle the sugar over the top of the cake, covering it with a very thin, even layer. Caramelize the sugar with a butane or propane torch, holding it about 2 inches from the surface of the cake and slowly moving it over the top until the sugar melts and turns golden brown.

Friday, October 12, 2007

Chocolate-nut Wedges

Chocolate Nut Wedges

Chocolate Nut Wedges

I met a fellow Pittsburgh blogger for coffee at Enrico's Tazza D'oro yesterday. Antonio, a very friendly barista, made me the best double macchiato i've ever had in Pittsburgh (possibly ever.) His foam technique is really solid.

I really appreciate a good cup of coffee. I never know what to say when a barista asks me how much milk I want on my macchiato. I especially hate it when the beverage i'm handed is just a shot of espresso with some milk dumped in.

Anyway, one topic of conversation was boxed cake mix. I don't think box mix is -that- convenient, especially considering that many people doctor their box mix with other ingredients. I'm not saying you're not allowed to enjoy box cake; If you are simply intimidated by baking, there are many simple, delicious, and forgiving recipes you can try.

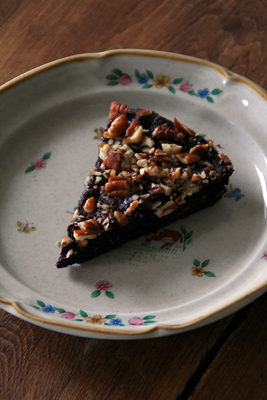
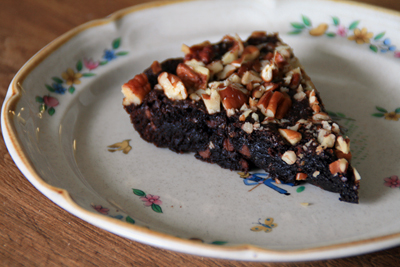
These chocolate-nut wedges from The Weekend Baker can be made in half an hour, possibly less. The prep time is especially fast if you use a food scale. All the dry ingredients get thrown together. The wet ingredients are piled on top and mixed in. The resulting treat is something in between cake and a brownie.

Because this recipe is so simple, your finished product will only be as your ingredients. I used some leftover valrhona cocoa powder and chinese cassia cinnamon from Penzey's Spices. I used mini chocolate chips so they'd be better distributed and I chose pecans because I love them combined with cinnamon.

The cake may seem underbaked when you pull it out of the oven, but it will harden up as it cools. Believe me- if you wait until the whole cake is solid and tests completely done, it will be way overcooked. These wedges taste much better when they've fully cooled. Right out of the oven the texture is a little off, and the flavor of cinnamon isn't as pronounced.

This might not be the best treat you ever eat, but for something that takes a half hour it's delicious. Some days I need a recipe that doesn't take three hours and make a mess of the kitchen.


Chocolate-nut Wedges
adapted from The Weekend Baker by Abigail Johnson Dodge
3/4 cup (99g) all purpose flour
3/4 cup (170g) granulated sugar
1/3 cup (57g) semi-sweet chocolate chips
1/2 cup (43g) unsweetened cocoa powder, sifted
1/4 tsp ground cinnamon
1/4 tsp baking powder
1/4 tsp table salt
1/3 cup (73ml) canola or corn oil
2 large eggs
1/2 cup (57g) chopped nuts (hazelnuts, walnuts, or pecans) no need to toast

1. Position an oven rack on the middle rung. Heat the oven to 350/180C degrees. Lightly grease the bottom and sides of a 9in(22.75cm) pie plate.

2. In a medium bowl, combine the flour, sugar, chocolate chips, cocoa powder, cinnamon, baking powder, and salt. Whisk until well blended. Mix together the oil and eggs with a fork until just blended. Pour the liquid over the flour mix and mix with a rubber spatula until well blended. Scrape into the prepared pie plate and spread evenly (the batter will be quite thick.) Scatter the chopped nuts over the top.

3. Bake until a toothpick inserted in the center comes out with only a few gooey pieces clinging to it, about 20 minutes. Transfer the baking dish to a rack and let cool. Cut the pie into 8 wedges.

Monday, September 10, 2007

Kabocha Squash Cheesecake

Kabocha Squash Cheesecake

Kabocha Squash Cheesecake

I need to have more faith in cookbooks. Lately i've been so wary even though the recipes have been great!

Fall is just around the corner. I'd been in the mood for comforting, spiced baked goods, so I picked up a 3 lb red kabocha squash from the Food Co-op and decided to try Pichet Ong's recipe for Kabocha Squash Cheesecake.

This isn't your average cheesecake. It's a little more like a pumpkin pie in that the filling has a very high ratio of squash flesh to cream cheese. Consequently, it's not nearly as dense and retains that silky but not mushy texture of good pumpkin pie.

The crust is amazing too. I worried the Mi-Del graham crackers would be too dense, but they worked perfectly. The crust is a little thicker than usual, and it stayed nice and crunchy. I loved the balance of spices too!

A nice dollop of whipped cream would suit if the cake isn't quite rich enough for you. The cookbook suggests a little condensed milk chantilly cream. I will probably make this for Thanksgiving.


Kabocha Squash Cheesecake with Walnut Crust
adapted from Pichet Ong's The Sweet Spot
Kabocha Squash Filling
one 3 lb kabocha squash
8 oz cream cheese, at room temp
1 cup sugar
1.5 tsp ground cinnamon
1 tsp ground ginger
1/3 tsp nutmeg
1/2 tsp salt
1.5 tsp brandy (I used rum.)
2 large eggs, room temp

Walnut Crust
1/4 cup unsalted butter, melted
1/2 cup walnuts
1/2 cup packed light brown sugar
11 graham crackers (174 g), crushed into fine crumbs, about 1.5 cups
(I used mi-del honey grahams.)
2 tsp grated lime zest
1/2 tsp cinnamon
1/8 tsp ginger
1/4 tsp salt

1. To make the filling: Prepare a steamer by filling a large round casserole with water to a depth of 3 inches; the casserole should be able to hold the squash comfortably and have a tight fitting lid. Put a steamer rack or enough crumpled heavy-duty foil to support the squash on the bottom; the rack or foil should be just above the waterline. Set over medium heat and bring to a steady simmer. Put the whole squash on the rack, cover the pot, and steam until a knife pierces the flesh easily (about 1hr.)

2. Remove from the heat, uncover the pot, and cool the squash in the steamer until cool enough to handle.

3. Meanwhile, make the crust: Preheat the oven to 325. Lightly butter a 9-inch springform pan, line with paper and butter the paper. Set aside.

4. Spread the walnuts on a rimmed baking sheet and toast, shaking the pan occasionally, until fragrant, about 15 minutes. Cool completely. Turn the oven down to 300.

5. Put the walnuts and 1/4 cup of the brown sugar in the bowl of a food processor and pulse until the walnuts are coarsley ground. Transfer the walnuts to a mixing bowl and add the graham cracker crumbs, zest, cinnamon, ginger, and salt, and the remaining 1/4 cup brown sugar. Mix well, then add the melted butter and mix with your hands until everything is moistened. Transfer the mixture to the prepared pan and press into an even layer on the bottom.

6. Bake the crust until golden brown, about 12 minutes. Cool completely. Leave the oven on.

7. When the squash is cool enough to handle, remove it from the steamer, cut it in half, and scoop out and discard the seeds and strings. Scoop out 2.5 cups of the squash flesh into a small bowl. Reserve any remaining squash for another use.

8. Put the cream cheese, sugar, cinnamon, ginger, nutmeg, and salt into the bowl of a food processor and process, scraping down the sides and bottom of the bowl occasionally, until the mixture is light and smooth. Add the squash and process again, scraping down the sides of the bowl of the bowl occasionally, until smooth. Add the brandy and eggs and process until just incorporated. Transfer to a bowl and finish mixing with a rubber spatula.

9. Transfer the filling to the cooled crust. Bake until the center is set but still slightly jiggly, about 1 hour. Cool completely and unmold.

NOTES: I think steaming your squash upside down would be good. The top of my squash was much thicker than the bottom, and didn't quite cook all the way through.

Keeping the walnuts pretty coarse adds a nice crunch.

Sunday, November 9, 2008

Pumpkin Muffins x 2

Pumpkin Muffins

What autumn would be complete without pumpkin muffins? Certainly not a typical autumn in Pittsburgh, when bakeries, street vendors, workplaces, and Starbuckses are brimming with pumpkin pies, cakes, breads, rolls, scones, and lattes.

Pumpkin desserts seem tied to thoughts of limited availability. They also seem to incite seasonal compulsion; last week I overheard several people saying they were hopelessly addicted to the glazed pumpkin cookies at Eat Unique. I've also seen people chase a venti pumpkin spice latte with a pumpkin cream cheese muffin.

I'm not saying this is a bad thing, or that i'm immune. I quite enjoyed Dozen Bakeshop's baked french toast with pumpkin/cream cheese custard today, and I have plans to try some more pumpkin pie recipes. I do wonder how this phenomenon evolved, and whether it significantly impacts food sales.

As much as I enjoy pumpkin, I haven't found a favorite pumpkin muffin recipe. Before my trip to Paris, I tried two different recipes: one from Belinda Jeffery's Mix and Bake and one from Dorie Greenspan's Baking From my Home to Yours.

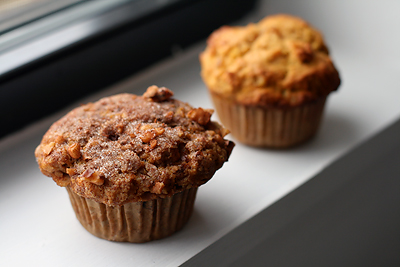
I can't say which I liked better, since they were completely different. Jeffery's recipe (pictured in the front) has a rich, cake-like texture, a strong nutmeg flavor, and a delicious cinnamon sugar and walnut topping. Greenspan's recipe is simpler with a more balanced spice blend, but the resulting muffins reminded me more of biscuits than cakes. They'd be good spread with butter or jam.

I will print both below and leave you to decide which you prefer. I'm also planning to try the recipe from Sara Foster's Fresh Every Day. I'd love to know if any of you have recipe recommendations.

Spicy Pumpkin, Pecan, and Maple Muffins
adapted from Belinda Jeffery's Mix and Bake
1 cup pumpkin or butternut squash pulp
1 cup (150g) all purpose flour
1/2 cup whole wheat flour (80g) (I added extra all purpose)
1 tsp baking soda
3/4 tsp salt
1/2 tsp baking powder
1 tsp nutmeg
1 1/2 tsp cinnamon
120g toasted pecans or walnuts
120g raisins or dried cranberries
2 eggs
1/2 cup (110g) brown sugar
1/2 cup maple syrup
1/2 cup light olive oil (I used melted butter)
1 1/2 tsp vanilla extract
1/2 cup buttermilk

Topping
1/4 cup (55g) sugar
1/4 cup (40g) chopped pecans or walnuts
1 1/2 tsp ground cinnamon

1. Preheat your oven to 200C/350F. Grease a 12 cup muffin tin, or line the cups with paper liners.

2. Combine the flours, baking soda, salt, baking powder, nutmeg, and cinnamon in a large bowl and whisk them to combine. Add the nuts and raisins and toss them about to coat in the flour mixture. Set aside.

3. Lightly whisk the eggs in another bowl, then add the remaining ingredients and the cup of mashed pumpkin. Whisk them together until thoroughly mixed.

4. Make a well in the middle of the dry ingredients and pour in the pumpkin mixture. Stir them together until just combined; the mixture will be quite loose and sloppy so let them sit for 1 minute to thicken up. Divide the batter among the muffin holes, filling them to the top.

5. For the topping, stir all the ingredients together. Sprinkle the topping mixture thickly over each muffin.

6. Bake for 25-30 minutes, or until a skewer inserted in the center of a muffin comes out clean. Cool muffins in the tin on a wire rack for a few minutes, then turn them out onto the rack to cool completely. Serve warm or at room temperature.
Pumpkin Muffins from Dorie Greenspan

Wednesday, February 18, 2009

Chocolate Chip Cookie Bars

Chocolate Chip Cookie Bars

I borrowed Flo Braker's latest cookbook, Baking for all Occasions, a few weeks ago. I didn't get a chance to try many recipes before I had to return it, but I photocopied a few for future testing. The recipes are interesting- many of them have creative names and mix new flavors with old techniques (a streusel topped cake with fresh pineapple and hazelnuts, anyone?)

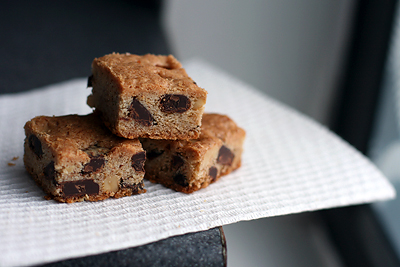
This recipe for a Chocolate Chip Cookie Cake caught my eye because it's simple, versatile, and yields a large quantity. It's basically a chocolate chip cookie dough that's pressed into a 9x13 pan and sliced into squares. Braker's book includes instructions for turning the same dough into individual cookies or chocolate chip biscotti.

For this recipe, it's important to use well softened butter. The goal is to incorporate as little air into the dough as possible to make the texture more like a cookie than a cake. The texture will also vary greatly with baking time- the cake becomes crunchier the longer you bake it. Nuts and chocolate chips play a big role in flavor, and you'll have very different results depending on what you use.

The finished bars aren't as rich tasting as some blondies or cookies. I'm interested in trying a variation using more brown sugar, or peanut butter. Both could lead to a chewier texture. I like using big pieces of chocolate for a nice visual and textural contrast. I used Nestle chocolate chunks for this batch, but any large chocolate pieces would work well.

These were a huge hit at work, and several people asked for the recipe. Over a few days, the texture improved and the cinnamon flavor became more pronounced. I only used 1/2 tsp cinnamon and the flavor was still quite strong. The bars are great snacks to have on hand and they keep for a relatively long time. I usually line the pan with foil so I can just lift the bars out when they're done.

Chocolate Chip Cookie Cake
adapted from Flo Braker's Baking for all Occasions

2 1/3 cups (300 grams) all-purpose flour
2/3 cup (130 grams) granulated sugar
2/3 cup (130 grams) light brown sugar
1 tsp salt
1/2 tsp baking soda
1 tsp ground cinnamon or 1/2 tsp ground cardamom (optional)
2 sticks (225 grams) unsalted butter, softened
1 large egg
1 tsp pure vanilla extract
2 cups (340 grams) semisweet chocolate chips
1 cup (115 grams) chopped walnuts, pecans, hazelnuts, or a combination
*You can omit the nuts and mix in an additional 1 cup (170g) chocolate chips

1. Center a rack in the oven and preheat to 350F. Have ready a 9x13 inch pan.

2. In a stand mixer fitted with the paddle attachment, combine the flour, sugars, salt, cinnamon (if using), and baking soda and mix on the lowest speed just until blended. Add the butter and continue to mix until small, moist crumbs form that look similar to streusel, about 1 minute. Add the egg and vanilla and beat on low speed until the mixture begins to form a cohesive dough. Increase the speed to medium and add the chocolate chips and nuts. Beat just until they are incorporated- 20 to 30 seconds.

3. Spoon dollows of the thick dough evenly over the bottom of the baking pan with a rubber spatula. To distribute the dough evenly, lay a sheet of plastic wrap or parchment paper over the dough and pat it evenly with your fingertips.

4. Bake the cake until it is golden brown and feels more solid than soft when pressed in the center- 37-40 minutes. Be careful not to overbake- it will firm as it cools. Transfer to a wire rack and let cool in the pan for 30-35 minutes.

5. Slip a thin metal spatula between the cake and the pan and run the spatula along the entire perimeter of the pan. Lift the pan, tilt it slightly, and tap it on a counter to help release the cake. Invert the cake onto a wire rack and lift it out of the pan. Invert so it is right side up and let cool completely.

If serving within 2 days, wrap the cake in foil and store at room temperature. For longer storage, freeze for up to 1 month. Thaw at room temperature for about 3 hours.To serve, cut the cake into squares, rectanges, or sticks with a sharp knife.

Saturday, August 16, 2008

Crepes with Peaches and Blueberry Sauce

Crepes w/ Peaches and Blueberry Sauce

Crepes w/ Peaches and Blueberry Sauce

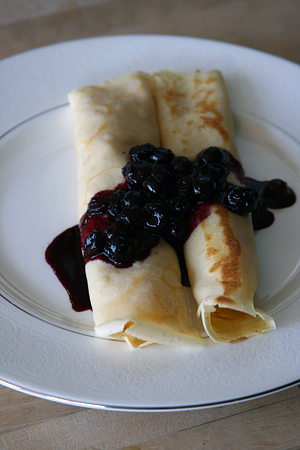
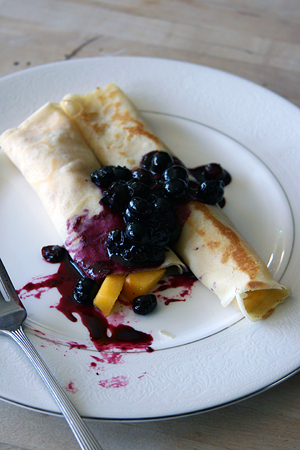
I like eating plain buckwheat crepes fresh from the pan. Sometimes I spread them with nutella or jam, or top them with a drizzle of maple syrup. I've tried several recipes for crepe batter, and while this one is my favorite, I prefer others for different occasions.

These crepes are flexible and sturdy enough for fresh fruit or cheese fillings. They don't color much- probably because there's little butter in the batter and I don't add much to the pan. A second frying can add color and bring out the cinnamon flavor. If you omit the cinnamon, the crepes can be used with savory fillings.

It took a few tries to figure out how I wanted to serve them. I tried spreading the crepes with cream cheese and greek yogurt. I tried sprinkling them with sugar and lemon juice before adding the peaches. I tried folding them into quarters and rolling them.

I decided I liked rolled crepes with diced peaches and blueberry sauce best. The fruit (especially the peaches) didn't need any accompaniment. The peaches are some of the best i've ever had- they're large, juicy, and very smooth textured. They're extremely ripe and not at all mushy.

It was a very successful breakfast!

Crepes
from Emily Luchetti's A Passion for Desserts

2 large eggs
1/4 cup water
1 cup milk
3/4 cup all purpose flour
6 tbsp cornstarch
1/4 tsp cinnamon
1/4 tsp salt
2 tbsp unsalted butter, melted
1/2 tsp vanilla extract

Whisk the eggs, water, and milk in a bowl until combined. Sift together and then whisk in the flour, cornstarch, cinnamon and salt. Whisk in the melted butter and vanilla. Chill in the refrigerator for 30 minutes.

Heat a 6 inch crepe pan or nonstick skillet over medium heat (*I used an 8 inch). Lightly grease the bottom of the pan. Fill a 1/4 cup measure about 3/4 full with the crepe batter and pour it into the pan, rotating the pan so that a thin layer covers the entire bottom. Cook for about 1 1/2 minutes, until lightly browned. Using a knife, loosen a corner of the crepe from the pan. With your fingers, flip the crepe over and cook for another 15 seconds. Place the finished crepe on a plate.

Continue cooking crepes, stacking them, slightly overlapping, on top of each other, until there are at least 12 crepes. It is not necessary to grease the pan after each crepe. Wrap the crepes in plastic wrap until ready to use. Store at room temperature for several hours, but refrigerate overnight. Crepes can be refrigerated for 2 days or frozen for 2 weeks. Defrost for 30 minutes before using.

Blueberry Sauce
1 1/2 pints fresh blueberries
3 tbsp sugar
1 1/2 tsp lemon juice

Combine 1 pint of blueberries, sugar, and lemon juice in a medium saucepan. Cook over medium heat until the berries have mostly burst and cooked down, about 3 minutes. Stir in the remaining 1/2 pint blueberries, then serve.

Tuesday, July 17, 2007

Peach-Raspberry Crostata


This recipe came from Sarah Foster's Casual Cooking. I own all three of the Foster's Market cookbooks and they're all fantastic. The recipes are always fresh and easy to execute.

This crostata dough was particularly good. Adding egg yolk and milk made the dough a little more tender than a pure short crust, but it still was really really crispy. The filling had a hint of ginger and cinnamon, and enough cornstarch to keep the crostata from becoming too liquidy.

Peach Raspberry Crostatas
For the crust:
2 cups all purpose flour
3 T sugar
1/4 tsp kosher or sea salt
2 sticks cold unsalted butter, cut into cubes
1 large egg yolk
3-4 T ice water or milk (i used milk.)

For the filling:
2 pounds peaches, peeled, pitted, and thinly sliced
1 cup fresh raspberries
1/3 cup sugar plus extra for sprinkling
3 T cornstarch
1/2 tsp ground cinnamon
1/4 tsp ground ginger
1/4 tsp kosher or sea salt
4 T unsalted butter, cut into 8 pieces (I omitted this.)
1 large egg
1-2 T milk

To make the crust, stir the flour, sugar, and salt together in a large bowl. Add the butter and blend it in with the flour using a pastry blender or two knives in a crisscrossing motion until the mixture resembles coarse meal. Whisk the egg yolk and 3 T of milk together in a small bowl and add it to the flour mixture. Stir until the dough just comes together and starts to form a ball, adding the remaining milk if necessary. Dust your hands lightly with flour and press the dough together to form a fat, round disk. Cover the dough with plastic wrap and place it in the refrigerator to chill for at least 1 hour or overnight.

Lightly grease 2 baking sheets or cover with parchment and set aside.

To make the filling, combine the peaches, raspberries, sugar, cornstarch, cinnamon, ginger, and salt in a large bowl and stir gently to mix.

Remove the dough from the refrigerator and cut it into 8 equal size pieces. Lightly flour the work surface and roll each piece into a 6 inch round. Place the rounds onto prepared baking sheets.

Scoop the filling and juices into the center of each round, dividing it evenly and leaving a 1 inch border around the edges. Place a piece of butter on top of the fruit, if you like. Folkd the dough over the fruit all the way around to form an edge.

Whisk the egg and milk together to make an egg wash. (I usually strain this to avoid ugly lumpy bits of egg.) Brush the edges of each tart and sprinkle with sugar. Put the tarts in the fridge and chill for about 30 mins.

Preheat the oven to 375. Bake the tarts for 40-45 minutes, rotating the sheets halfway through, until the crusts are golden brown and the fruit is bubbling. Cool the tarts slightly and serve warm. (I like a little dollop of vanilla ice cream on top :))

Monday, February 26, 2007

Kringles

Kringles

I found this recipe at Penzey's Spices. It seemed mildly interesting, so I made the dough while focusing more intently on kumquat preserves and the previously posted ginger cake.

I baked the Kringles this morning, and I could hardly believe how delicious they were; crunchy on the bottom but deliciously soft on the inside and packed with warm brown sugar, cinnamon, butter, and walnuts. I would make them again in a heartbeat.

The glaze was a little thin though, for my tastes. I might look into a thicker glaze recipe.


Kringles
This looks like a lot of work/ingredients but it really isn't. This is another recipe with yeast that is nearly foolproof, as in this case the yeast stays cold throughout and there is no rising. So easy!

This recipe makes two kringles and can easily serve 8-10 polite people or fewer unrestrained ones.

Dough:
4 Cups all-purpose flour
1 Cup butter, slightly softened
2 TB. sugar
1 tsp. salt
1 pkg. dry yeast (2 1/4 TB.)
2 eggs, beaten
1 Cup milk

Filling:
1/2 Cup sugar
1/2 Cup brown sugar, lightly packed
1 tsp. cinnamon
5 TB butter, melted
1 Cup chopped nuts (in order of preference I would use pecans, almonds, hazelnuts, or walnuts)

Glaze:
2 2/3 cups powdered sugar
2 TB butter, softened
4 TB hot water
1 TB milk
1-2 tsp. vanilla extract

To make the dough:
Combine the first four ingredients in a bowl. Use a pastry blender, two knives of your hands blend together until mixture is crumbly. In a separate bowl mix the yeast, eggs, and milk. Add this mixture to the dry ingredients, making sure no yeast remains in the wet mixture bowl. Mix well until all is blended, it will pull away from the sides and form a ball. Divide it into two equal pieces, flatten them into discs, wrap in plastic wrap and put them into the refrigerator overnight (I left mine in for 24 hours and they were fine) or at least 6 hours.

Preheat the oven to 350F. Mix together the two sugars and the cinnamon in a small bowl and set aside. Place each disc on an ungreased cookie sheet. Roll out each piece of dough to 1/8" thickness about the length of your cookie sheet and as wide as 1/8" thickness will allow. Brush half the melted butter over each piece of dough, sprinkle each piece with half the sugar mixture, and top with half of the nuts. Turn the cookie sheet so that the long side faces you and roll up the dough like a jellyroll stopping at the halfway point. Then turn the sheet again, so that the other long side is facing you and roll up the other side to the halfway point, so that the two rolls meet in the middle. Pinch the rolls together very firmly down the center line (they are going to want to separate in the oven so pinch like you mean it) and fold the ends under. Bake 20-25 minutes, changing racks halfway through the baking time, (switch the top to bottom, and front to back) Remove the kringles to a cooling rack and let cool at least 10 minutes before glazing.


Sunday, March 30, 2008

Sbrisolona- Italian Crumbly Cake

Sbrisolona

Sbrisolona

Sometimes, I choose recipes because I know exactly where to find the ingredients. When I read some grumpy comments regarding Gina DePalma's use of "specialty ingredients" like almond flour, chestnut flour and "00" flour, I thought haha! "00" flour and chestnut flour are on a shelf near the pasta at Penn Mac.

Pittsburgh is a great city for bakers. In California, I drive three or four places before I have everything I need. Here, I can walk two blocks to the Indian mini-mart and choose from several types of shredded coconut. I can take a quick bus to the Strip District and pick up chestnut cream, salt cod, lavender, dulce de leche, or twenty kinds of fish sauce.

I try to restrain myself and avoid buying things I don't need, but I do keep an eye out for ingredients. I ogle the baking aisles at Whole Foods and the East End Food Co-op. I wander into random Asian or Eastern European grocery stores and make a mental note of what they have. It's relaxing, in a way.

I picked this recipe because I was curious about the flour. "00" flour is very finely milled flour with as much of the germ and bran removed as possible. It was interesting; the batter was extremely thick and the finished cake was dense and chewy with a fine crumb.

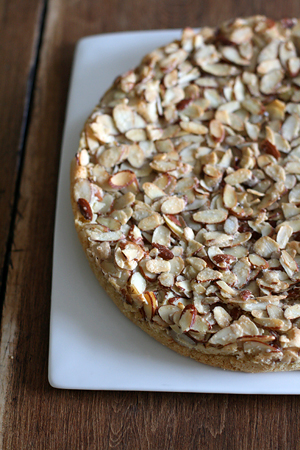
I'd say this cake was worth buying the extra ingredients. After it cooled, I sat down and had a large piece with a cup of coffee. The flavors were clean and simple: vanilla and almond with a hint of cinnamon. The crunchy, toasted almond topping was nice too. I broiled it a little for color. I thought it tasted very Italian, if that means anything. It also reminded me a little of sugar cookie dough, which seems like a weird association.

Italian Crumbly Cake
from Gina DePalma's Dolce Italiano
makes one 10-inch cake, approximately 10 servings

For the cake
1 1/4 cups "00" flour
1/4 cup almond flour
1/2 tsp kosher salt
1/2 tsp baking powder
1/2 tsp ground cinnamon
1 large egg
4 large egg yolks
1 cup granulated sugar
1 tsp pure vanilla extract
1/2 cup (1 stick/4oz) unsalted butter, melted and cooled

For the topping
1 1/2 cups sliced blanched almonds
1 large egg white
3 tbsp granulated sugar

Preheat the oven to 325F and position a rack in the center. Lightly grease a 10-inch springform pan* with nonstick cooking spray or butter, dust it with flour, and tap to knock out the excess.

To make the cake: In a medium bowl, whisk together the "00" flour, almond flour, salt, baking powder and cinnamon and set aside.

In an electric mixer fitted with the paddle attachment, beat the egg, egg yolks, and sugar on medium speed until they are thick and pale yellow, about three minutes. On low speed, add the dry ingredients and beat well, scraping down the sides of the bowl. Beat in the vanilla extract, followed by the melted butter. Switch to medium speed and beat for 30 seconds.

Spread the batter evenly in the prepared pan and smooth the top with a spatula.

To make the topping: Put the sliced almonds in a medium bowl. Lightly beat the egg white in a small bowl with a fork until it is foamy and light, then pour half of it over the almonds, stirring to coat them evenly (discard the rest of the egg white). Sprinkle the almonds with the sugar and toss to coat them. Spread the almond topping evenly over the surface of the batter.

Bake the cake for 25-30 minutes, or until it is springy to the touch and golden brown on top and a cake tester inserted in the center comes out clean. Allow the cake to cool for 10 minutes in the pan, then remove the sides and allow the cake to cool completely on a wire rack.

To serve, carefully remove the bottom of the springform pan with an offset spatula and transfer the cake to a serving plate. Any leftover cake can be wrapped in plastic and served the next day.

*I used a plain 10 inch cake pan lined with foil. I inverted it onto a rack, then placed another rack on top of the cake and turned it right-side up.

Saturday, September 13, 2008

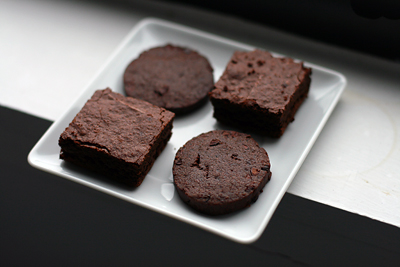
Brownies and Mocha Slices

Mocha Slices and Brownies

These days, most of my baking happens in the morning. I take morning photos on the windowsill because it's the only place that gets enough light.

I tried two chocolate recipes because the kitchen is well-stocked with several types of cocoa and chocolate. I went a little overboard in the Strip District last week...

I liked the brownies; they were fudgy without that undercooked, greasy texture that comes with too much butter fat. I ate my them plain, but you can do fancy things with them. The recipe is from A Passion for Ice Cream. Anita at Dessert First has tried some of the recipes- she takes great photos.

The mocha slices are an old favorite that I put in my Christmas cookie box a few years ago. The espresso powder, cocoa nibs and cinnamon give the cookies a dark, fruity flavor that pairs nicely with the cocoa. They're relatively soft and chewy. The original recipe coats the dough-logs with sparkling sugar, but I usually omit it. It also suggests storing the logs in a paper towel roll to hold their shape, which I never do.

I definitely ate my fair share of brownies, but now I'm tiring of chocolate. We'll see what I end up cooking next week.

Brownies
adapted from Emily Luchetti's A Passion for Ice Cream

8 ounces bittersweet chocolate, finely chopped
1 ounce unsweetened chocolate, finely chopped
5 ounces (10 tablespoons) unsalted butter
3 large eggs
1 1/4 cups sugar
1/2 cup all-purpose flour
1/8 teaspoon kosher salt
1/2 teaspoon baking powder
3 tablespoons unsweetened cocoa powder (I used dutch-process, which worked well.)

To make the brownies: Preheat the oven to 350°F. Grease the bottom of a 9-by-13-inch baking pan and line it with parchment paper. Melt the chocolates and butter in a double boiler over hot water. In a medium bowl, whisk together the eggs and sugar. Whisk in the melted chocolate mixture. Sift together and then stir in the flour, salt, baking powder, and cocoa powder. Spread the batter in the prepared pan.

Bake until a skewer inserted in the center, comes out fudgy and not dry, about 20 minutes. Let cool to room temperature. Run a knife around the inside edge of the pan. Place a cutting board on top of the pan. Invert the pan and board. Remove the pan and carefully peel off the parchment paper. Cut and serve.
Mocha Slices
adapted from Martha Stewart Magazine
Makes about 4 dozen

1 1/2 cups all-purpose flour, plus more for work surface
3/4 cup unsweetened Dutch-process cocoa powder
1/4 teaspoon salt
2 tablespoons instant espresso powder
1/4 teaspoon ground cinnamon
1 1/2 sticks unsalted butter, softened
1 cup granulated sugar
1 large egg
1 teaspoon pure vanilla extract
1/2 cup cocoa nibs
Coarse sanding sugar

Sift together flour, cocoa, salt, espresso powder, and cinnamon into a large bowl; set aside. Put butter and sugar into the bowl of an electric mixer fitted with the paddle; mix on medium until pale and fluffy. Mix in egg and vanilla. Reduce speed to low. Add flour mixture; mix until just combined. Stir in cocoa nibs.

Turn out dough onto a lightly floured surface; roll into a 2-inch-diameter log (I suggest dividing the dough and making 2 logs- much easier to manage.) Wrap in parchment; transfer to a paper towel tube to hold shape. Refrigerate until firm, at least 1 hour or up to overnight.

Preheat oven to 350 degrees. Unwrap log, and let soften slightly at room temperature, about 5 minutes. Brush with water, then roll in sanding sugar. Cut log into 1/4-inchthick rounds. Space 1 inch apart on baking sheets lined with parchment paper.
Bake until centers are set, about 10 minutes. Transfer to wire racks; cool completely. Store in airtight containers at room temperature up to 2 days.

Wednesday, September 5, 2007

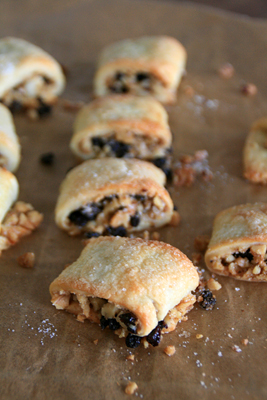
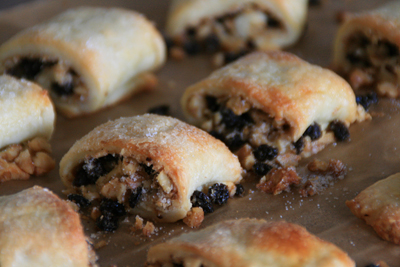
Cinnamon Currant Walnut Rugelach

Cinnamon Currant Walnut Rugelach

Cinnamon Currant Walnut Rugelach

Another recipe from the Desserts from Chanterelle book. The dough is really delicious- creaming the butter and cream cheese seems to be a good technique.

While the cookies turned out well, they were really difficult to shape. I think alice medrich's recipe shapes them individually. That might be much easier than managing a 16 inch log.

Saturday, January 19, 2008

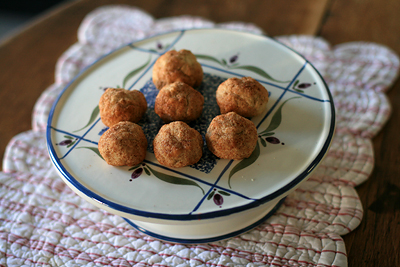
Nigella Lawson's Snickerdoodles.

Nigella's Snickerdoodles

I love it when my roommate borrows my cookbooks. I get to sample treats I might never make myself and I don't have to wash any dishes!

I'd passed over this recipe before, thinking oh i've made tons of snickerdoodles already. When Kim said she'd made snickerdoodles, I was surprised to see these donut-hole looking things on the table. They actually taste quite a bit like donut holes when they're fresh from the oven.

They're definitely satisfying, given the minimal effort that goes into making them.

Snickerdoodles
adapted from Nigella Lawson's How to be a Domestic Goddess

1 2/3 cups all purpose flour
1/2 tsp ground nutmeg
3/4 tsp baking powder
1/2 tsp salt
1/2 cup butter, at room temperature
1/3 cup + 2 tbsp sugar
1 large egg
1 tsp vanilla extract
1 tbsp cinnamon
2 baking sheets, lined with parchment or greased

Preheat the oven to 350 F.

Combine the flour, nutmeg, baking powder, and salt, and set aside for a moment. In a large bowl, cream the butter with the 1/3 cup sugar until light in texture and pale in color, then beat in the egg and vanilla. Now stir in the dry ingredients until you have a smooth, coherent mixture. Spoon out the remaining sugar and the cinnamon onto a plate. Then, with your fingers, squeeze out pieces of the dough and roll between the palms of your hands into walnut sized balls. Roll each ball in the cinnamon-sugar mixture and arrange on your prepared baking sheets.

Bake for about 15 minutes, by which time they should be turning golden brown. Take out of the oven and leave to rest on the baking sheets for 1 minute before transferring to a wire rack to cool.

Variation: replace 2 tbsp of the flour with cocoa to make "chocodoodles."

Friday, November 16, 2007

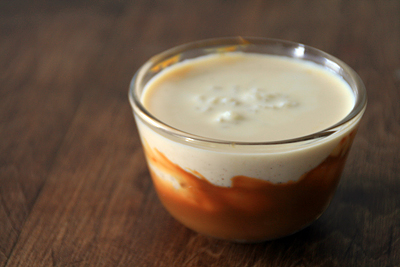
Rice Pudding with Dulce de Leche.

Rice Pudding w/ Dulce De Leche

Rice Pudding w/Dulce De Leche

I rarely eat rice pudding; I think I can count the number of times i've had it on one hand. Still, I think it's the epitome of comfort food: simple, good, and loaded with dairy.

I'm not sure I cooked this pudding long enough. I stopped about 15 minutes early because the rice started to feel very soft. Consequently, it came out very soupy but the flavor was amazing.

I used Chinese cassia cinnamon from Penzey's and Organic Valley whole milk. There is a huge difference in taste between a good organic milk and the grocery store brand. I recommend you go for the good milk if you're making a dessert where milk is the star ingredient.

I microwaved some dulce de leche in the ramekins to soften it, then dumped the cold pudding on top. It was a great combination- the silky texture of the caramel really stands out against the creamy pudding.

It was a good dessert to have on the first real day of snow.

Rich Risotto Rice Pudding
adapted from Jill O'Connor's Sticky, Chewy, Messy, Gooey.
1/2 cup arborio rice
8 cups whole milk
1/2 cup sugar
1/4 tsp ground cinnamon
1/4 tsp salt
1 vanilla bean, split length-wise
2 large egg yolks
1/2 cup heavy cream
2 tsp pure vanilla extract
freshly grated nutmeg (optional.)

Combine the rice, milk, sugar, vanilla bean, cinnamon, and salt in a large, heavy bottomed saucepan over medium-high heat and stir to combine. Bring the mixture to a boil, stirring constantly. Reduce the heat to medium-low and simmer, stirring every 5 minutes as the mixture starts to thicken, for about 30 minutes. Continue cooking until the rice is tender but not too mushy, about 15 minutes more. The milk will be thick and the rice tender, but the mixture will still be a little soupy, which is what you want. (As the pudding cools, it thickens, and if it is too thick while still hot, it will firm up into a thick, stodgy lump without the creaminess of a great rice pudding.)

In a bowl, whisk the yolks and cream together and stir into the rice pudding. Continue cooking the pudding for 2-3 minutes, until the eggs are cooked through and the pudding is creamy and glossy, but still fairly soupy. Remove from the heat and stir in the vanilla. Grate a little nutmeg into the pudding, if desired. Remove the vanilla bean. Pour the pudding into a serving bowl and press plastic wrap over the top to prevent a skin from forming. Refrigerate until cold, at least 2-3 hours. Serve cold.

Monday, December 31, 2007

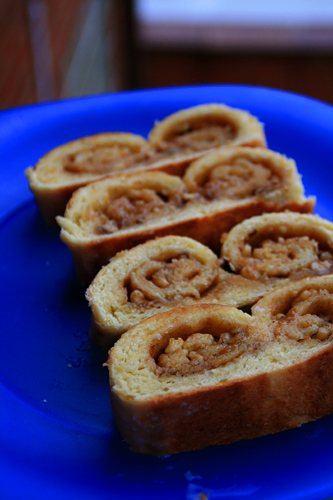
Cinnamon Raisin Swirl Bread

Cinnamon Raisin Swirl Bread

Cinnamon Raisin Swirl Bread

While I love brioche, I wanted to try a new bread for breakfast.

I decided on Raisin Swirl Bread from Baking From my Home to Yours because our next-door neighbor gave us a huge bag of raisins from a grower in Napa. They are the best raisins i've ever tasted and nearly three times the size of typical grocery store raisins.

I'm not sure I added enough flour; working with the dough was very difficult. Still, it felt right when I rolled it out to shape the loaf. Don't stint on the raisins and don't roll the dough too thin or your swirl won't be very pronounced.

I'll definitely make this bread again. It wasn't overly rich or sweet and i'm sure it would make some wicked french toast. I prefer to eat it lightly toasted, with a cup of coffee.

My dad liked the bread too. It's not the best photo, but he insisted I document his enthusiasm.

The loaf won't last the day.

Sunday, August 24, 2008

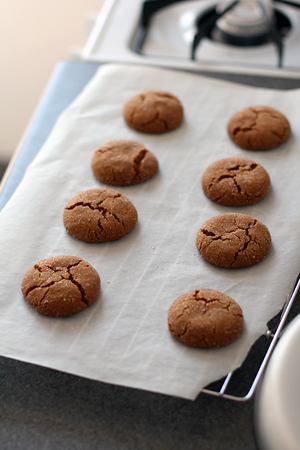
Molasses Spice Cookies

Molasses Spice Cookies

Molasses Spice Cookies

I strongly believe that gingersnaps and molasses cookies should be enjoyed year-round. While some people save cinnamon, ginger, allspice, and cloves for fall and Christmas recipes, I use them for any occasion. Especially breakfast.

I've tried many kinds of spiced cookies and I definitely have favorites. So, when I tried this Cook's Illustrated recipe, I wasn't expecting much. I just wanted to use up the molasses.

As soon as the cookies came out of the oven, I knew they'd be perfect. They were beautiful: big, sugary, crinkled, and perfectly round. I've tried similar recipes that weren't nearly as consistent- the cookies spread too much, or they looked nothing like they were supposed to. Conversely, these cookies turned out perfectly every time.

I highly recommend this recipe if you like chewy molasses cookies. Don't over bake them, or they will lose their wonderfully chewy texture!

Molasses Spice Cookies
from Cook's Illustrated

Measure the molasses in a liquid measuring cup. If you find that the dough sticks to your palms as you shape the balls, moisten your hands occasionally in a bowl filled with cold water and shake off the excess. Bake the cookies one sheet at a time. If baked two sheets at a time, the cookies started on the bottom rack won’t develop the attractive cracks. The cookies should look slightly raw and underbaked when removed from the oven.

1/3 cup granulated sugar (about 2 1/2 ounces), plus 1/2 cup for dipping
2 1/4 cups unbleached all-purpose flour (11 1/4 ounces)
1 teaspoon baking soda
1 1/2 teaspoons ground cinnamon
1 1/2 teaspoons ground ginger
1/2 teaspoon ground cloves
1/4 teaspoon ground allspice
1/4 teaspoon ground black pepper
1/4 teaspoon table salt
12 tablespoons unsalted butter (1 1/2 sticks), softened but still cool
1/3 cup dark brown sugar (about 2 1/2 ounces)
1 large egg yolk
1 teaspoon vanilla extract
1/2 cup molasses (about 6 ounces), light or dark

1. Adjust oven rack to middle position and heat oven to 375 degrees. Line 2 baking sheets with parchment paper. Place 1/2 cup sugar for dipping in 8- or 9-inch cake pan.

2. Whisk flour, baking soda, spices, and salt in medium bowl until thoroughly combined; set aside.

3. In standing mixer fitted with paddle attachment, beat butter with brown and granulated sugars at medium-high speed until light and fluffy, about 3 minutes. Reduce speed to medium-low and add yolk and vanilla; increase speed to medium and beat until incorporated, about 20 seconds. Reduce speed to medium-low and add molasses; beat until fully incorporated, about 20 seconds, scraping bottom and sides of bowl once with rubber spatula. Reduce speed to lowest setting; add flour mixture and beat until just incorporated, about 30 seconds, scraping bowl down once. Give dough final stir with rubber spatula to ensure that no pockets of flour remain at bottom. Dough will be soft.

4. Using tablespoon measure, scoop heaping tablespoon of dough and roll between palms into 11/2-inch ball; drop ball into cake pan with sugar and repeat to form about 4 balls. Toss balls in sugar to coat and set on prepared baking sheet, spacing them about 2 inches apart. Repeat with remaining dough. Bake 1 sheet at a time until cookies are browned, still puffy, and edges have begun to set but centers are still soft (cookies will look raw between cracks and seem underdone), about 11 minutes, rotating baking sheet halfway through baking. Do not overbake.

5. Cool cookies on baking sheet 5 minutes, then use wide metal spatula to transfer cookies to wire rack; cool cookies to room temperature.
Monday, October 22, 2007

Sweet and Spicy Nuts.

I had a library student potluck last night. The blackout cake went over well; the outer frosting got way too hard in the fridge, but the inside was very moist. I'd happily eat a bowl of the pudding filling by itself.

I also made this recipe for Sweet and Spicy Nuts from The Macrina Bakery and Cafe Cookbook. I have no photo because everyone ate them! The cayenne pepper gives these spiced nuts a pleasant kick. They'd make a good holiday gift or holiday party contribution. Feel free to substitute other nuts; I used 2c walnuts, 1c almonds/pecans, and 1c hazelnuts.

Sweet and Spicy Nuts
1 cup whole almonds
1 cup whole peanuts
1 cup whole pecans
1 cup walnut halves
1 tsp cinnamon
1/2 tsp ground allspice
1/4 tsp ground cardamom
1/2 tsp ground ginger
1/4 tsp ground black pepper
1/2 tsp cayenne pepper
1/2 tsp kosher salt
1/2 cup honey
1/2 cup light corn syrup

Preheat the oven to 350. Line a rimmed baking sheet with parchment paper, then brush the top of the paper with canola oil.

Combine almonds, peanuts, pecans, and walnuts in a medium bowl.

Combine cinnamon, allspice, cardamom, ginger, pepper, cayenne and salt in a small bowl. Mix well, then pour the spice mixture over the nuts and toss together thoroughly.

Combine honey and corn syrup in a medium saucepan and place over low heat, stirring frequently, until the mixture is just warm. Pour the mixture over the nuts and toss together until the nuts are evenly coated.

Pour the nuts onto the prepared baking sheet and spread them in a single layer. Bake on a center rack of oven for 15-20 minutes, or until the nuts take on a rich mahogany color. Let the nuts cool completely. At this point they will have formed a single, crispy layer in the baking sheet. Break the nuts apart with your hands and store in an airtight container. Store in a cool place, as heat will melt the syrup on the nuts and make them sticky.

Wednesday, February 20, 2008

Carrot Honey Cake

Carrot Honey Cake

Carrot Honey Cake

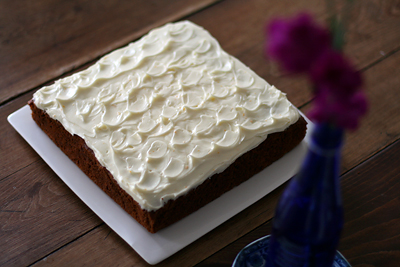
My friend Liz needed a carrot cake recipe and gave me several guidelines: It had to be relatively simple (nothing fancy like pineapple or coconut), it couldn't require a food processor, and it needed to be appropriately sized for 4-5 people.

After I e-mailed her a few different recipes, I kept thinking why do I hate so many carrot cakes? All the store bought carrot cakes i've tried are oily, painfully sweet, and topped with those creepy, radioactive-orange carrots.

I like my carrot cakes simple, spicy, and lightly frosted. I prefer nut and raisin combinations to coconut and pineapple. I've only made this carrot cake though, so I figured it was time to start sampling a few other recipes.

I thought of Liz again when I read this Carole Walter recipe. It's the least labor intensive carrot cake recipe i've seen. I picked it for the orange zest, cardamom, and honey; these ingredients make the cake more interesting than usual. The zest gives the frosting a really fresh taste, and the cake itself is hearty without being greasy.

I took it to work around 9 and it was gone before noon. One of my co-workers laughed when I took a bite and exclaimed, "I really like this!" I was surprised. It was good.

Carrot Honey Cake
adapted from Carole Walter's Great Coffee Cakes, Sticky Buns, Muffins & More

3 large carrots (about 8 oz), peeled and trimmed
1 1/2 cups all purpose flour
2 tsp ground cinnamon
1 tsp baking soda
3/4 tsp ground cardamom
1/2 tsp salt
3 large eggs
1/2 cup granulated sugar
1/2 cup (lightly packed) very fresh light brown sugar
1 tsp freshly grated navel orange zest
3/4 cup canola oil
1/4 cup honey
1 tsp vanilla extract
1/2 cup medium chopped toasted pecans
1 recipe cream cheese frosting

1. Position the rack in the middle of the oven and preheat to 350F. Generously butter a 9x9x2 inch square pan and set aside (*you can also just line it with foil).

2. Shred the carrots. To shred in a food processor, fit the machine with the medium shredding disc. Cut the carrots into 1 inch chunks and place in the feeder tube. Shred using very light pressure. Remove the shredding disc and insert the steel blade. Pulse 4-5 times, then process for 5-6 seconds. You should have 1 1/2 to 1 2/3 cups. Set aside.

2. To shred by hand: finely shred the carrots using the smallest half-moon side of a box grater (scant 1/8 inch). You should have 1 1/2 to 1 2/3 cups. Set aside.

3. In a medium bowl, thoroughly whisk together the flour, cinnamon, baking soda, cardamom, and salt. Set aside.

4. Place the eggs in the bowl of an electric mixer fitted with the whip attachment. Beat for 2 minutes on medium speed, then add the granulated sugar, 1 tbsp at a time, taking 2-3 minutes. Add the brown sugar, 1 tbsp at a time, taking another 2 to 3 minutes, then beat in the orange zest.

5. Using a small whisk, mix together the oil, honey, and vanilla in a 1 quart mixing bowl, beating until the honey is thoroughly incorporated with the oil. Immediately pour into the egg/sugar mixture in a steady stream and beat well. Reduce the speed to medium-low and mix in the carrots. Add the dry ingredients in two additions, mixing only to blend after each addition. Scrape down the side of the bowl as needed. Then, quickly mix in the pecans. Note: This batter cannot stand before baking because the oil and honey will settle to the bottom of the bowl.

6. Immediately pour the batter into the prepared pan and baked for 40-45 minutes. The cake is done when it is firm to the touch, the sides begin to release, and a toothpick inserted in the center comes out clean.

7. While the cake is baking, prepare the frosting.

8. Remove the cake from the oven and place on a cooling rack. When the cake is cool, spread with the frosting, swirling it with the bottom of a soupspoon. Cut into 16 squares. Refrigerate for up to 7 days. The frosted cake may be frozen.

Cream Cheese Frosting

6 oz cream cheese, cold
6 oz butter, soft
1 1/2 cups powdered sugar, sifted
1 tsp pure vanilla extract
1/2 tsp freshly grated navel orange zest

Combine all the ingredients in the work bowl of a food processor fitted with the steel blade. Pulse 3-4 times, then process for 3-4 seconds. Stop the processor, scrape down the side of the bowl, and empty into a small bowl. Cover with plastic wrap and refrigerate until ready to use. (You can also make this in a bowl with a hand mixer).