Showing posts sorted by relevance for query bittersweet. Sort by date Show all posts

Friday, February 29, 2008

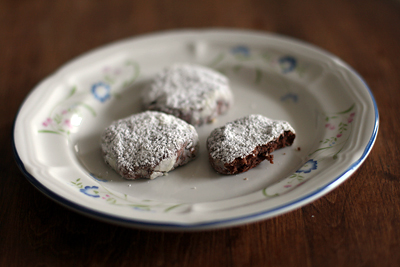
Bittersweet Chocolate and Hazelnut Cookies

Bittersweet Chocolate Hazelnut Cookies

Bittersweet Chocolate Hazelnut Cookies

The first time I checked out Dolce Italiano I thought it was boring and returned it. When I mentioned this to April, she seemed shocked and said she thought all the recipes looked delicious. Suddenly I felt like i'd been too hasty, too judgmental. I respect April's taste, so I decided to give the book another try.

I browsed the recipes one by one and realized that i've become horribly spoiled by photos. This book has a daunting amount of text, and many of the recipes don't explain what the finished product should look like. Sometimes you have to trust a recipe will be good without the reassurance of a glossy photo and multiple descriptive indicators. You have to read recipes and understand that simple ingredients can yield beautiful, rustic desserts with clean flavors.

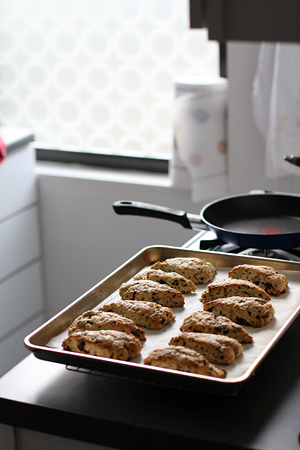
These chocolate and hazelnut cookies were a huge hit at work. Warm from the oven they were soft deeply chocolate flavored, almost like a tea cake. When cooled, they were slightly crunchy with a crumbly texture. The next day, they were softer but still rich and delicious.

Don't overmix the batter. It helps to fold the dry ingredients and butter/egg mixture several times with a spatula before turning on the mixer. My dough was very crumbly, but it came together when I formed it into discs. If you run the mixer long enough to make a very wet, cohesive dough, you'll end up with tough cookies. The cookies are rich, so it's better to make them smaller than bigger.

Bittersweet Chocolate and Hazelnut Cookies
adapted from Gina DePalma's Dolce Italiano
makes about 5 dozen cookies

2 cups unbleached all purpose flour
1/3 cup unsweetened dutch-processed cocoa powder
1/2 tsp baking powder
1/2 tsp kosher salt
1/2 cup whole hazelnuts, skinned or unskinned
1 cup (2 sticks) unsalted butter, softened
1/2 cup granulated sugar
1 large egg
1 tsp pure vanilla extract
5 oz semisweet or bittersweet chocolate, finely chopped (I used 60% Callebaut)
1 1/2 cups confectioners' sugar, for dusting

In a medium bowl, whisk together the flour, cocoa powder, baking powder, and salt. Place the hazelnuts in the bowl of a food processor and pulse them 2-3 times to chop them medium-fine. Add the hazelnuts to the bowl with the dry ingredients and stir to combine them.

In the bowl of an electric mixer fitted with the paddle attachment, cream together the butter and granulated sugar on medium speed until pale and fluffy, about 2 minutes. Beat in the egg and vanilla extract and scrape down the sides of the bowl. On low speed, beat in the dry ingredients, followed by the chocolate, and beat just until combined. Cover the bowl with plastic wrap and chill the dough until firm, about 30 minutes.

Preheat the oven to 325F. Lightly grease two baking sheets with nonstick cooking spray or butter or line them with parchment paper.

Place the confectioners' sugar in a shallow bowl. To form the cookies, roll 1 scant tablespoon of dough into a 1 inch ball, then flatten it slightly with your fingertips to form a small disc. Roll the cookie in the confectioners' sugar to coat it evenly and place it on the baking sheet. Repeat until all of the dough is used, spacing the cookies 1 inch apart on the baking sheets.

Bake the cookies until they are puffed and cracking, 8-10 minutes. Rotate the baking sheets 180 degrees halfway through the baking time to ensure that the cookies bake evenly. Allow the cookies to cool on the baking sheets for 1-2 minutes, then use a spatula to transfer them gently to a wire rack to cool completely. If desired, dust them with additional confectioners' sugar.

The cookies can be stored in an airtight container, layered between sheets of parchment paper, and kept in a cool, dry place for up to 1 week.

Friday, April 25, 2008

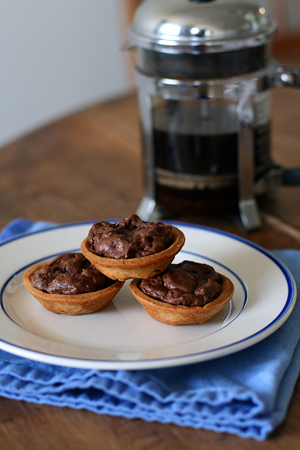
Melting Chocolate Cookie Tartlets

Melting Chocolate Cookie Tartlets

Melting Chocolate Cookie Tartlets

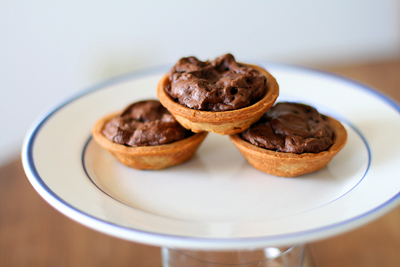
I've been working through some untried recipes in Bittersweet. I had some tartlet crusts in the freezer and I filled them with this chocolate/nut meringue mixture.

I like this filling; it's easy to assemble, intensely chocolate flavored, and studded with chopped pecans. It doesn't have that crunchy, chalky meringue texture. I had extra filling left over, so I scooped piles onto a cookie sheet and baked them. This worked fine, and I enjoyed eating the cookies.

Next time I think i'll pipe the filling into the tart shells. I might put more filling in too; it has structure, so there's no danger of spilling.

Melting Chocolate Cookie Tartlets
adapted from Alice Medrich's Bittersweet

For the crust:
8 tbsp unsalted butter, melted
3 tbsp sugar
3/4 tsp vanilla extract
1/8 tsp salt
1 cup all purpose flour

For the filling:
6oz bittersweet or semisweet chocolate, coarsely chopped (50-62%. For 64-66%, use 5 oz)
2 large egg whites, at room temperature
1/8 tsp cream of tartar
1/2 tsp pure vanilla extract
1/4 cup sugar
3/4 cup chopped pecans or walnutes

Eight 4in tartlet pans, or 10 3.5in tartlet pans. (I used 12 very small tartlet tins and still had filling left over)

Position a rack in the lower third of the oven and preheat the oven to 350F.

To make the crust: Mix the butter, sugar, vanilla, and salt in a medium bowl. Add the flour and mix just until well blended. Don't worry if the dough seems too soft. Divide the dough into 8-10 equal pieces. Press one piece of dough very thinly and evenly across the bottom and up the sides of each tartlet pan. Place the pans on a cookie sheet. Bake for 15-20 minutes, until a deep golden brown.

While the crusts are baking, make the filling: Melt the chocolate in a medium heatproof bowl set in a wide skillet of barely simmering water, or in the microwave. Remove from the heat and stir until completely melted.

In a large bowl, beat the egg whites with the cream of tartar and vanilla until soft peaks form when you lift the beaters. Gradually add the sugar and continue to beat until the egg whites are stiff but not dry. Pour the nuts and all of the warm chocolate over the egg whites and fold with a rubber spatula until the color of the batter is uniform.

As soon as the tartlet crusts are ready, divide the filling equally among them. Make sure the batter touches the crust around all the edges. Return to the oven and bake the filling until it is dry or slightly cracked on top, about 10 minutes. Cool on a rack.

To unmold, use the point of a paring knife to loosen one edge of the crust from the pan, then tip the tarts into your hand. Serve warm or at room temperature.

Variations: Fold in 2 oz of crystallized ginger, finely chopped; 4 oz moist prunes, chopped into 1/4in pieces; 4 oz candied chestnuts, chopped. You can also substitute other nuts, like pine nuts.

Tuesday, December 4, 2007

Dark Chocolate, Cinnamon, and Espresso Truffles

Dark Chocolate, Cinnamon, and Espresso Truffles

Dark Chocolate, Cinnamon, and Espresso Truffles

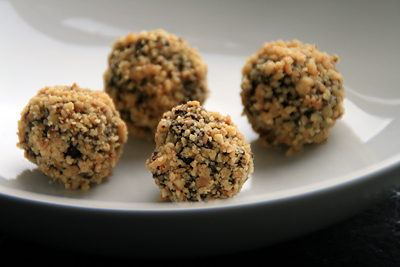
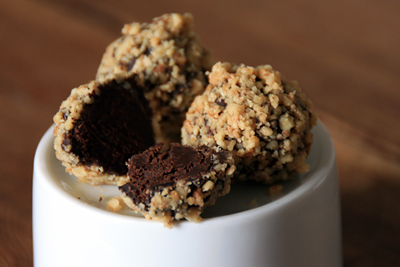
I'm picky about truffles; they often suffer from bad chocolate, boring or horribly wrong flavors, or an overly-dense texture. Luckily I loved this recipe from The Sweet Life. The flavor of coffee and cinnamon is sophisticated and the walnuts add a nice crunch. The ganache isn't so dense that it's hard to bite into.

I used a 63% Guittard chocolate. If you're in Pittsburgh, you can find good baking chocolate in the back of Mon Aimee Chocolat for 4-5 dollars per pound. This is a steal, considering that Whole Foods charges 9-13 dollars a pound for Callebaut and El Rey coverture.

I will probably take these to class, along with some chocolate chip-pecan cookies. I'd consider making them again for holiday parties too.

Dark Chocolate, Cinnamon, and Espresso Truffles w/ Walnuts
adapted from The Sweet Life by Kate Zuckerman

Truffles:
1/2 cup + 2 tbsp heavy cream
1/2 tsp ground fresh cinnamon
8 oz bittersweet chocolate (61-66%)
2 tbsp unsalted butter, at room temperature, diced into 6 pieces
1 tbsp coarsely ground fresh dark coffee

Coating:
3oz bittersweet chocolate
1 1/4 cups ground walnuts

In a small saucepan, combine the cream and cinnamon and cook over medium heat to almost boiling. Remove from the heat, cover, and let the cream steep for 10 minutes. Meanwhile, in the bowl of a double boiler, melt the chocolate, stirring with a rubber spatula as it melts. Do not overheat- it should never be so hot that you cannot dip a finger in it.

Remove the melted chocolate from the heat and slowly whisk in the infused cream. Continue to whisk until the mixture (now a ganache) is smooth, creamy, and holds the lines of a whisk. Slowly whisk in the butter and ground coffee until incorporated. Scrape the ganache into a small bowl and refrigerate for 2 hours.

Fill a glass with very hot tap water. Dip a small mellon baller into the hot water and tap on the counter to remove any excess water. Plunge the mellon baller into the chilled ganache far enough down so that it sits completely in the ganache. Rotate the mellon baller 360 degrees and remove from the ganache. Tap the melon baller to release the ball onto a plate or tray. Repeat this process until all the ganache has been scooped into balls. Transfer the plate to the refrigerator and chill.

In the bowl of a double boiler, melt the bittersweet chocolate, stirring with a rubber spatula as it melts. Remove from the heat and cool for 15 minutes.

Set up an assembly line on your counter. From left to right place the chilled ganache balls, the bowl of melted chocolate, a tray with the ground walnuts, and a container to hold the finished truffles.

With your left hand, pick up 2 ganache balls and dip them quickly into the melted chocolate and roll them around until coated. Drop the balls with your left hand into the walnuts. With your right hand roll the balls until completely enrobed. Pick up the finished candies with your right hand and place them in the container.

These truffles will keep, in a sealed container and refrigerated, for 2 weeks.

Tuesday, September 16, 2008

Cream Scones with Chocolate Chunks

Cream and Chocolate Scones

Cream and Chocolate Scones
Getting ready to bake

Cream and Chocolate Scones
Cooling down

If I spent a lot of time thinking about scones, i'd probably write a very long post that explained their many varieties and textures, and the technique needed to make them moist and flaky instead of dry and dense. The truth is, scones aren't my favorite pastries, and in most cases I prefer buying them to making them (I'm particularly fond of the scones from Enrico Biscotti and Jin Patisserie).

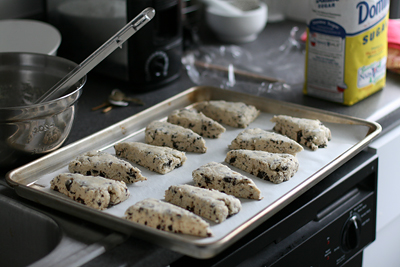
Generally, I will bake anything if I have the ingredients, regardless of whether or not I want to eat it. I chose this Alice Medrich recipe because I needed to use up some chocolate and cream. When I sampled one of the finished scones, I was surprised to find that I loved it. I loved the sweet, subtle taste of the cream and the dark contrast of the bittersweet chocolate. It had crispy edges and a moist interior.

Maybe I should give scone recipes some more thought.

Cream Scones with Chocolate Chunks
adapted from Alice Medrich's Bittersweet

2 cups all purpose flour
1/4 cup sugar, plus sugar for sprinkling
2 1/2 tsp baking powder
1/2 tsp salt
3 to 4 oz bittersweet or semisweet chocolate, coarsely chopped
1 1/4 cups heavy cream
1 tbsp milk or cream for brushing the tops

Position a rack in the center of the oven and preheat to 425F. Line a baking sheet with a double layer of parchment paper.

In a large bowl, whisk the flour, sugar, baking powder, and salt together thoroughly. Stir in the chopped chocolate. Make a well in the center and pour the cream into it. Use a rubber spatula to push the dry ingredients from the sides of the bowl into the well, cutting and turning the mixture just until the dry ingredients are almost entirely moistened and the dough looks rough and shaggy. Gather the dough into a lump and knead it gently against the sides of the bowl five or more times, pressing in the loose pieces, until the dough just holds together (it should not be smooth) and the sides of the bowl are fairly clean.

On a lightly floured surface, pat the dough into an 8.5 inch round about 3/4 inches thick. Cut into 12 wedges. Place them at least 1 inch apart on the lined baking sheet. Brush the tops with cream or milk and sprinkle lightly with sugar.

Bake until the tops are golden brown, 12-15 minutes. Let cool on a rack, and serve warm or at room temperature.

Tuesday, April 22, 2008

Tiger Cake

Tiger Cake

Tiger Cake

Tiger Cake

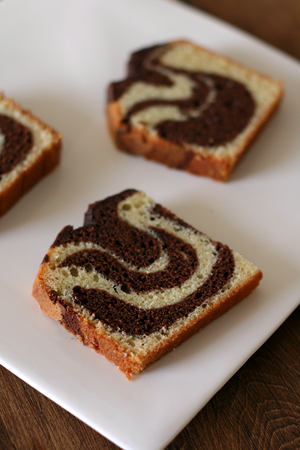
How cool is this cake?!

I rarely notice this recipe when I leaf through Bittersweet. I think the page sticks. Or maybe, subconsciously, I think that marble cake tastes boring.

This is a recipe worth looking at. It's moist, easy to prepare, and more complex than typical recipes. Given the simplicity of the cake, I suggest using good cocoa, spices, and oil. I enjoy it lightly toasted, with coffee. I've been toasting everything these days...banana bread, muffins cut in half, you name it.

I felt childishly enthusiastic while making this. I loved the way the outside and inside looked. The individual slices had character; I think the one in the bottom photo looks like a bird! Other pieces reminded me of ships, tulips, and smiling faces.

The quantity is awesome too. I think I have enough cake to take to every class this week! I am confident it will be a hit.

Tiger Cake
adapted from Alice Medrich's Bittersweet

1/2 cup natural process cocoa powder
1/2 cup sugar
1/3 cup water

3 cups all purpose flour
2 tsp baking powder
1/4 tsp salt
2 cups sugar
1 cup flavorful extra-virgin olive oil
1 tsp pure vanilla extract
1/2 tsp finely ground white pepper
5 cold large eggs
1 cup cold milk

A 10-12 cup tube or bundt pan, or two 6 cup loaf pans.

Position a rack in the lower third of the oven and preheat the oven to 350F. Grease and flour the cake pan or line the loaf pans with parchment.

In a small bowl, whisk together the cocoa, sugar, and water until well blended.

Mix the flour, baking powder, and salt thoroughly and sift together onto a piece of paper. Set aside.

In a large mixer bowl (preferably fitted with the whisk attachment) beat the sugar, oil, vanilla, and pepper until well blended. Add the eggs one at a time, beating well after each addition. Continue to beat until the mixture is thick and pale, 3-5 minutes. Stop the mixer and add 1/3 of the flour mixture*. Beat on low speed until just blended. Stop the mixer and add half the milk. Beat just until it is blended. Repeat with another third of the flour, the remaining milk, and then the remaining flour.

Pour 3 cups of batter into another bowl and stir in the cocoa mixture. Pour 1/3 of the plain batter into the prepared tube pan (or divide it between the loaf pans) and top with 1/3 of the chocolate batter. Repeat with the remaining batters. Don't worry about marbling the batters- that happens during the baking**

Bake until a cake tester comes out clean, about 1 hour and 10 minutes for either the tube or loaf pans. Cool the cake in the pan(s) on a rack for about 15 minutes. Slide a thin knife around the sides of the pan(s) to release the cake. Invert the pan(s) and invert again, setting the cake right side up on a rack to cool completely.***

*I find it helps to fold the dry ingredients a few times with a spatula between additions.
**Don't try too hard when layering the batters. I just plopped big piles of batter in the pan and they came out beautifully.
***If you are using a tube pan, it can be hard to invert the cake. I used an offset spatula to release the cake from the sides and bottom of the pan, then I used two large, flat, icing spatulas to lift the cake from the removable portion of the pan and set it on a rack.

Monday, October 8, 2007

Peanut Butter Brownies

Peanut Butter Brownies

Peanut Butter Brownies

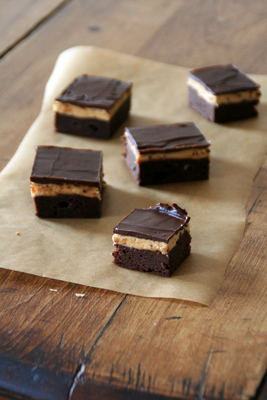
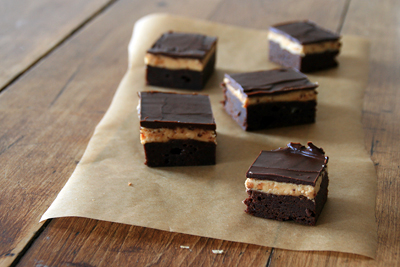
These pictures are rather similar, but I couldn't choose between them.

This is a decadent recipe from Dorie Greenspan. The key is to let the brownies reach room temperature before you eat them- otherwise the ganache will be hard to bite through and the peanut butter frosting will pull away from the brownie.

They are ridiculously decadent.

Peanut Butter Brownies
reposted from epicurious.com

Brownies
3/4 cup (1 1/2 sticks) unsalted butter
7 ounces bittersweet or semisweet chocolate, chopped
3 ounces unsweetened chocolate, chopped
1 1/2 cups sugar
1 1/2 teaspoons vanilla extract
1/4 teaspoon salt
4 large eggs
1 cup all purpose flour
1 cup roasted salted peanuts, coarsely chopped

Frosting and ganache
1 cup chunky peanut butter (do not use natural or old-fashioned)
1/2 cup (1 stick) unsalted butter, divided, room temperature
3/4 cup powdered sugar
1/8 teaspoon salt
1/8 teaspoon ground nutmeg
1 tablespoon whole milk
1 teaspoon vanilla extract

7 ounces bittersweet or semisweet chocolate, chopped

For brownies:
Position rack in center of oven and preheat to 325°F. Line 13x9x2-inch metal baking pan with foil, leaving long overhang; butter foil.

Place 3/4 cup butter in heavy large saucepan. Add both chocolates; stir over low heat until smooth. Remove from heat. Whisk in sugar, vanilla, and salt, then eggs, 1 at a time. Fold in flour, then nuts. Spread in prepared pan. Bake until tester inserted into center comes out with moist crumbs attached, about 30 minutes. Place pan on rack; cool.

For frosting and ganache:
Using electric mixer, beat peanut butter and 1/4 cup butter in medium bowl to blend. Beat in powdered sugar, salt, and nutmeg, then milk and vanilla. Spread frosting over brownies.

Stir chocolate and 1/4 cup butter in heavy small saucepan over low heat until smooth. Drop ganache all over frosting; spread to cover. Chill until set, about 1 1/2 hours. Do ahead Can be made 1 day ahead. Cover and keep chilled.

Using foil as aid, transfer brownie cake to work surface; cut into squares. Bring to room temperature; serve.

Thursday, April 17, 2008

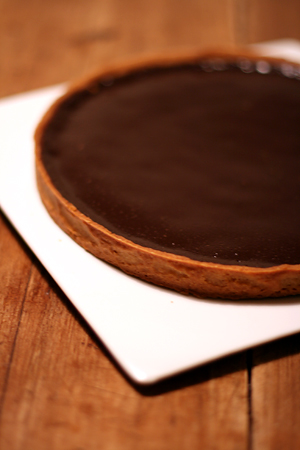
Warm Mocha Tart

Warm Mocha Tart

Warm Mocha Tart

While i've aspired (and sometimes still aspire) to a career in pastry, i've realized that I have little desire to replicate professional desserts at home. I am referring to desserts that employ advanced techniques, multiple components, garnishes, fancy plating, and expensive specialty equipment.

I feel very wistful when I look at Keiko's gorgeous pastries. This level of baking isn't practical for me right now: it takes time, space, money, and tools I don't have. I don't want to spend hours, days making a recipe if i'm not sure i'll like it, or if i'll have trouble storing it and giving it away.

For now, i'm content to bake in a manner that suits my lifestyle. I try to learn new techniques and recipes and execute them with care and creativity. I have a repertoire of good recipes and skills, and I know what I like to eat. More importantly, I know what my friends and co-workers like to eat.

Alice Medrich's Bittersweet is full of sophisticated recipes that require minimal effort. This warm mocha tart is fantastic and can be made in less than an hour. A simple filling of cream, butter, sugar, cocoa, espresso powder, and egg is poured into a hot tart crust and left to set in a turned-off oven.

The filling is something between silky chocolate pudding and very thick hot cocoa. By substituting different cocoas, extracts, and infusions, you can make any number of variations. It also slices well.

I used a Claudia Roden recipe for the crust. I love this tart dough; I've made it five or six times and it's always perfect. You can roll it very thin and as long as you bake it thoroughly it will be crunchy and full of flavor. I like to nibble on the extra scraps of dough or make them into cookies.

I ate this with some classmates last night and it didn't last long. I found it just as satisfying as anything i've ordered in a restaurant lately.

Warm Mocha Tart
adapted from Alice Medrich's Bittersweet

For the crust:
1 stick unsalted butter, melted
1/4 cup sugar
1/8 tsp salt
3/4 tsp pure vanilla extract
1 cup all purpose flour

For the filling:
3 tbsp unsalted butter, cut into chunks
1/2 cup sugar
1/4 cup unsweetened cocoa powder (natural or dutch process)
1 cup heavy cream
1 1/4 tsp instant espresso powder (or more to taste)
1/2 tsp pure vanilla extract
1 large egg, lightly beaten

A 9 1/2-inch fluted tart pan with removable bottom

For the crust:
1. Position a rack in the lower third of the oven and preheat the oven to 350°F (175°C).

2. Mix the butter, sugar, salt, and vanilla in a medium bowl. Add the flour and mix just until well blended. Don't worry if the dough seems too soft. Press all of the dough very thinly and evenly into the bottom and up the sides of the tart pan.

3. Bake for 20 to 25 minutes or until the crust is a deep golden brown.

For the filling:
1. Place the butter, sugar, cocoa powder, and cream in a medium saucepan and cook over medium heat, stirring, until the mixture is blended and smooth and begins to simmer around the edges. Remove from the heat and stir in the espresso powder and vanilla.

2. Just before the crust is ready, whisk the egg thoroughly into the hot chocolate mixture.

3. Pour the filling into the hot crust and turn off the oven. Leave the tart in the oven until it quivers like tender Jell-O in the center when the pan is nudged, about 10 to 12 minutes. Cool on a rack.

4. Serve the tart warm or at room temperature.

CHOCOLATE NOTE: Either natural or Dutch-process cocoa works well here. The former has a livelier, more complex, fruity flavor, while the latter has a cozy old-fashioned flavor reminiscent of chocolate pudding. You choose.

Friday, December 7, 2007

Fresh Ginger and Chocolate Gingerbread

Fresh Ginger and Chocolate Gingerbread

Fresh Ginger and Chocolate Gingerbread

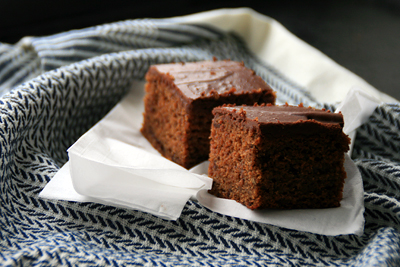
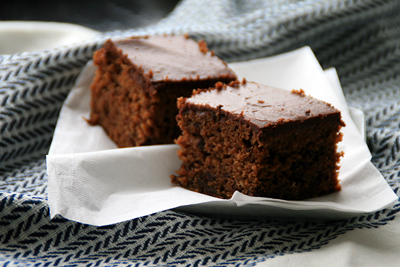
This is the gingerbread i've been waiting for. The fresh ginger adds great flavor and heat, and the chunks of chopped chocolate melt in your mouth. I love the subtle blend of spices and the smooth consistency of the frosting.

Do sift the confectioners' sugar, or your icing will be rather lumpy.

I didn't mind that the edges were slightly over-baked. I trimmed them off and ate them immediately. This gingerbread is a keeper. I almost don't want to take it to the holiday party I made it for...

Fresh Ginger and Chocolate Gingerbread
adapted from Baking from my Home to Yours by Dorie Greenspan

For the cake:
2 tbsp finely chopped peeled fresh ginger
1 tbsp sugar
2 cups all purpose flour
1 tsp baking soda
2 tsp ground ginger
3/4 tsp ground cinnamon
1/4 tsp ground cloves
1 stick + 3 tbsp unsalted butter, at room temperature
3/4 cup packed light brown sugar
3 large eggs
1/2 cup molasses
6 oz bittersweet chocolate, 2 oz melted and cooled, 4 oz finely chopped
1 cup buttermilk
1 tbsp finely chopped stem ginger in syrup (optional)

For the icing:
3 oz bittersweet chocolate, coarsely chopped
1 tbsp strong coffee
3 tbsp unsalted butter, at room temperature
3 tbsp confectioners sugar

Center a rack in the oven and preheat the oven to 350 degrees. Butter a 9in square baking pan and put it on a baking sheet.

Put the fresh ginger and sugar in a small bowl, stir and set aside.

Whisk the flour, baking soda, and spices together.

Working with a stand mixer fitted with the paddle attachment, or a hand mixer in a large bowl, beat the butter and brown sugar together at medium speed until light and fluffy, about 3 minutes. Add the eggs one at a time, beating for 1 minute after each egg goes in. Don't worry if the mixture looks curdled at this stage. Pour in the molasses and beat until smooth. Reduce the mixer speed to low and add the melted chocolate, along with the sugared ginger. Still on low speed, add the dry ingredients in 3 additions and the buttermilk in two (begin and end with dry ingredients,) mixing the batter only as much as needed to blend the ingredients. Fold in the chopped chocolate and the ginger in syrup (if using.) Pour the batter into the pan.

Bake for about 40 minutes, or until the cake starts to pull away from the sides of the pan and a thin knife inserted into the center comes out clean. Don't be concerned if the cake has domed and cracked- it will settle down as it cools. Transfer the cake to a rack and cool for 10 minutes, then unmold the cake. Turn right side up to cool to room temperature before icing the cake. The edges might be quite brown, but don't fret- you can trim them after you ice the cake.

To make the icing: Set a heatproof bowl over a pan of simmering water, put the chocolate and coffee in the bowl, and stir occasionally until the chocolate is melted. Remove the bowl and, using a small whisk, stir in the butter 1 tbsp at a time. Sift the confectioners sugar over the chocolate and stir in. Transfer the bowl to a counter and let the icing sit for about 10 minutes.

Put the gingerbread, still on the rack, on a pice of wax paper or foil. Pour the icing onto the center of the cake and use a long metal spatula to spread the icing evenly over the top. Allow the icing to set for 30 minutes. If the edges of the cake are overbaked, now's the time to trim them. Then cut the gingerbread into 9 even pieces.

Thursday, March 13, 2008

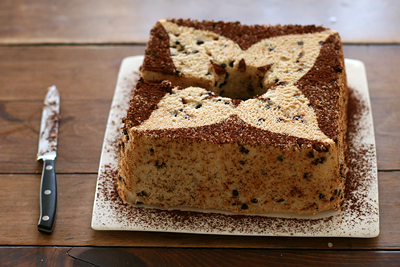
Espresso-Chocolate Chip Angel Food Cake.

Espresso Chocolate Chip Angel Food Cake

Espresso Chocolate Chip Angel Food Cake

My baking disasters are often egg-white related. Every now and then i'll end up with deflated batter, despite my best efforts to fold gently and quickly. Egg foam cakes aren't easy, especially if you have to incorporate a lot of fat and dry ingredients.

This is the first time i've made an angel food cake. Given my egg-white whipping anxiety, I thought it'd be a great confidence booster. It's much harder to mess up than genoise, and it gave me an occasion to use my square tube pan.

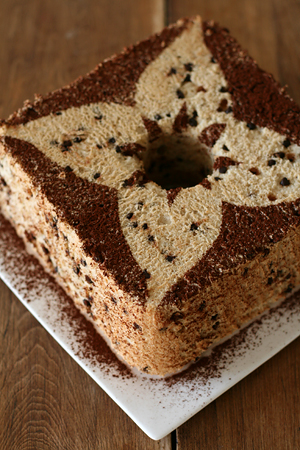
Homemade angel food cake is very different than what you get from a box mix. This is a good recipe; it's more moist and substantial, and the espresso flavor is really subtle.

I used mini-chocolate chips, but next time i'd use finely chopped 65-70% bittersweet chocolate. It would have been a nice contrast to the sweetness of the cake. A light dusting of Valrhona cocoa powder (as pictured), coffee ice cream, or chocolate sauce would be nice accompaniments.

Espresso-Chocolate Chip Angel Food Cake
adapted from Emily Luchetti’s Classic Stars Desserts

2 tsp instant espresso powder
1 1/3 cups cake flour, sifted
1/8 tsp kosher salt
1 ¾ cups (about 12) large egg whites
1 tsp cream of tartar
1 ¾ cups granulated sugar
1 ½ tsp vanilla extract
1 ¼ tsp freshly squeezed lemon juice
¾ cup bittersweet chocolate chips, coarsely chopped

Preheat the oven to 350F. Have ready an ungreased 10-inch angel food cake pan.

Sift together the espresso powder and flour onto a piece of parchment paper or into a bowl. Add the salt and set aside.

Put the egg whites in the large bowl of a stand mixer fitted with the whisk attachment and whisk on medium speed until frothy. Add the cream of tartar, increase the speed to high, and continue whipping while slowly pouring in the sugar until the whites are firm and satiny, about 3 minutes.

Reduce the speed to low, add the vanilla and lemon juice and then add the dry ingredients. When the flour mixture is almost completely incorporated, remove the bowl from the mixer stand and fold in the chocolate chips with a spatula. Make sure that the chips are spread evenly throughout the batter and that the flour is evenly incorporated. But be careful not to overmix or you will deflate the batter and the cake will not rise fully in the oven.

Pour the batter into the cake pan. Cut through the batter a few times with a table knife to break up any air pockets. Bake until a skewer inserted into the center comes out clean, 40-45 minutes. Invert the cake and let cool completely upside down in the pan. If your pan does not have feet, balance the inverted pan on the neck of a bottle, or rest the edge of the pan rim on 3-4 ramekins.

To unmold the cake, run a long knife around the inside edge of the pan. Then, holding the center tube, free the cake from the pan sides. Slip a knife between the cake and the bottom of the pan to loosen the cake and gently flip the cake over, letting it fall onto a platter. To serve, cut into slices with a serrated knife, using a gentle sawing motion.

The cake may be made a day in advance. Wrap in plastic wrap and store at room temperature.

To transform it into a dinner party dessert, serve it with warm chocolate caramel sauce or any kind of ice cream you fancy. This espresso and chocolate chips contribute enough flavor for it to be eaten plain too, or with coffee.

Thursday, December 18, 2008

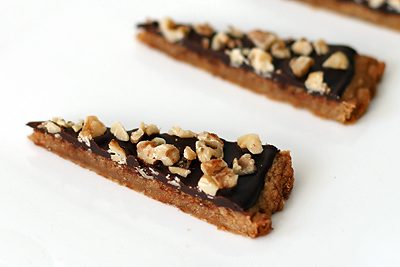
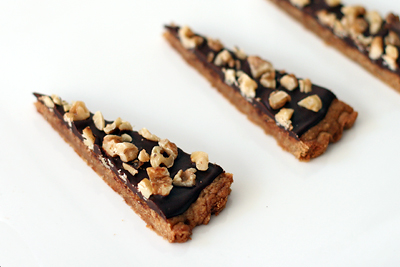
Toffee Chocolate Nut Wedges

Toffee Chocolate Nut Wedges

Toffee Chocolate Nut Wedges

Sometimes I feel like the holiday season is an unspoken competition. It can be a competition to give the best food gift, cook the best meal, or distribute the most cookies to the most people. When I go to a holiday party, I feel like it's a competition to make the most talked-about dish and go home with the least leftovers, without upstaging the hostess.

I know the holiday doesn't have to be competetive. Still, as a baker, there's nothing worse than to spend hours working on something elaborate and seasonal only to have no one eat it. Or have someone tell you they wanted to eat it, but they ate too many Candy Cane Joe-Joe's, or one too many pieces of Aunt So-and-So's super wonder fudge bark thing.

To cut back on holiday baking stress, it's good to have a repertoire of quick, impressive, cost-effective recipes. If you, like me, put off most of your holiday baking until the very last minute, you'll love this recipe for Toffee Chocolate Nut Wedges. With minimal effort, these delicious, elegant cookies can be baked and assembled in less than an hour.

Rather than crunchy, like shortbread, these cookies are tender with crisped edges. The toasted nuts add a needed textural contrast to the cookie base and smooth, creamy ganache.

I think these cookies could be even more visually striking with different topping combinations. I had mendiants in mind when I thought of different ingredients to add: cocoa nibs, sea salt, pistachios, almonds, candied orange peel, dried tart cherries, cranberries, and raisins. Even white chocolate with candy cane pieces.

I don't think these cookies would go unnoticed at anyone's party! Even if they did...at least they keep well.

Toffee Chocolate Nut Wedges
adapted from Abigail Johnson Dodge's The Weekend Baker
8 tbsp unsalted butter, at room temperature
½ c dark brown sugar, firmly packed
¼ tsp table salt
1 yolk from large egg
½ tsp pure vanilla extract
1 c all-purpose flour
5 oz bittersweet or semisweet chocolate, chopped
3 tbsp heavy cream
½ c chopped pecans (or walnuts), toasted

Position an oven rack in the middle and preheat to 350F. Lightly grease a 9.5" tart pan with a removable bottom. A pie plate or similarly sized baking pan will work, but you won't get the nice fluted edges.

In a large bowl, combine the butter, dark brown sugar and salt. Beat with an electric mixer on medium speed until well blended. Add the egg yolk and vanilla and beat just until combined. Pour in the flour and beat on low speed until the dough begins to clump together. Scrape the dough into the prepared pan, scattering the pieces evenly. Pat the dough into the bottom (not up the sides) of the prepared pan to form an even layer. Bake until the top looks dry and the dough begins to pull away from the sides of the pan, about 25 to 27 minutes.

Meanwhile, melt the chocolate with the cream in a double boiler or in the microwave. Stir until smooth. When the crust is baked, transfer the pan to a rack. Pour the warm ganache over the warm crust and spread evenly to within 1/2” of the edge. Scatter the nuts over the ganache and gently press them into the chocolate. Let cool until the chocolate is set, about 4 hours at room temperature or about 2 hours in the refrigerator. Remove the outer ring of the tart pan and cut the “cookie tart” into 16 wedges. Serve the wedges chilled or at room temperature.


Thursday, April 5, 2007

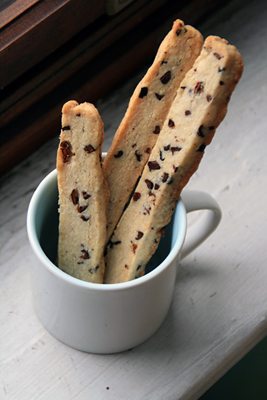
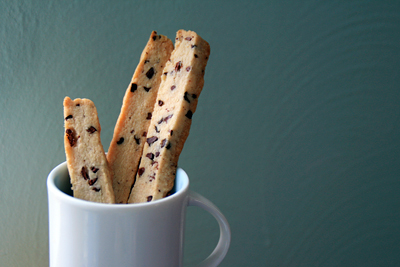
Almond Sticks with Cocoa Nibs

Cocoa Nib Almond Sticks

This week, i've been drawn to new recipes rather than old favorites. These almond dunking cookies are the fourth recipe Alice Medrich recipe i've baked in the past few days. I love cookies that are very convenient for dipping in a tall glass of milk.

Almond Sticks with Cocoa Nibs
adapted from Alice Medrich's Bittersweet.
3/4 cup whole blanched almonds
1 cup+ 2 T all purpose flour
2/3 cup sugar
1/4 tsp salt
6 T unsalted butter, cut into chunks
2 T water
1 tsp vanilla extract
1/8 tsp pure almond extract
1/4 cup cocoa nibs

Combine the almonds, flour, sugar, and salt in a food processor and pulse until it is a fine meal. Add the butter and pulse until the dough looks crumbly. Combine the water, vanilla, and almond extract and add it to the bowl, pulsing until it just looks damp. Add the cocoa nibs and pulse until evenly distributed.

On a big sheet of foil, press the dough into a 6x9 in rectangle that's 1/2 inch thick. Refrigerate for 2 hours or overnight. Preheat the oven to 350. Using a long, sharp knife, cut 3/8 in thick slices and place them on parchment lined cookie sheets, about 1 inch apart. Bake 12-14 minutes, until golden at the edges.


Cocoa Nib Almond Sticks

Wednesday, July 18, 2007

Espresso-Chocolate Semifreddo


Usually I don't care for semifreddo; it's not quite ice cream and not quite a substantial torte, cake, or pudding. I picked this recipe out of food and wine magazine because the picture was really pretty, and i'm happy to say it turned out quite well.

I'm a fan of Sherry Yard's recipes. They're usually very sophisticated, though sometimes a little hard to execute at home. This recipe didn't give an indication of just how much batter it produced. Make sure you use a very large mixing bowl.

This recipe was also a good excuse to play with my dad's huge La Cimbali espresso machine. I brewed shot after shot and tasted them all before measuring them out for the recipe O.o

If you like Tiramisu, I think you'll like this. It's got great coffee taste and a really nice texture. It'd be great with some raspberry coulis, or at least some muddled fruit.

Espresso Chocolate Semifreddo
(adapted from Food and Wine Magazine)
1.5 cup sugar
3/4 cup water+ 2tbsp
1.25 cup strongly brewed espresso
1/2 cup whole milk
1 vanilla bean, split and seeds scraped
1 tsp gelatin dissolved in 2 tsp water
2 oz bittersweet chocolate, chopped
4 large eggs
1/4 cup light corn syrup
1.25 cups heavy cream
18 dry ladyfingers
1 tbsp cocoa for sprinkling
Raspberries, for serving

1. In a small saucepan, combine 1 cup of the sugar with the 3/4 cup water and 1/4 cup of the espresso. Bring to a simmer over moderate heat and stir to dissolve the sugar. Let the espresso syrup cool.

2. In a small saucepan, boil the remaining 1 cup of espresso over high heat until reduced to 1/4 cup (about 8 minutes) Pour into a medium heatproof bowl.

3. Warm the milk with the vanilla bean and seeds over moderate heat until bubbles form around the edge. Remove from heat and stir in the gelatin until melted. Discard the vanilla bean. Add the hot milk to the reduced espresso and whisk in the chocolate until melted.

4. In the bowl of a standing mixer, beat the eggs at high speed until light yellow and foamy. In a small saucepan bring the corn syrup, the remaining 1/2 cup of sugar, and 2 T of water to a simmer. Cook over moderately high heat until the syrup registers to 235 on a candy thermometer*, about 5 minutes. With the mixer on medium speed, gradually beat the hot syrup into the eggs. Continue beating until the mixture is very pale and has tripled in volume, about 4 mins. Fold in the espresso mixture**

5. In a bowl, whip the heavy cream until stiff peaks form. Fold into the mousse mixture until no streaks remain**

6. Spoon about 1/4 of the mousse into a 9 inch springform pan. Dip 6 lady fingers into the espresso syrup until just soaked through. Arrange the ladyfingers over the mousse in rows. Repeat the process 2 more times, then top with the remaining mousse. Cover with plastic wrap and freeze at least 6 hours.

7. Before serving, warm a thin sharp knife under hot water. Run the knife around the edge of the semifreddo and remove the ring (you can refreeze after this if the sides are a little melty) Sift cocoa over the top of the semifreddo. Cut into wedges and serve with raspberries. The semifreddo will keep frozen for up to three days (so says the magazine.)

*If you don't have a candy thermometer, you can cook the syrup and periodically drop a little of it into a bowl of cold water. You want to cook it until a little before the soft ball phase. You should be able to shape the cold syrup with your fingers, but it shouldn't form a really dense ball. It takes a little practice sometimes.

** I was running out of room in my bowl, so I just gently whisked in these ingredients. It didn't deflate the mix or anything.


Friday, September 19, 2008

Black Bottom Walnut Praline Bars

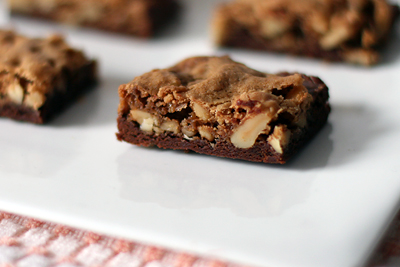
Black Bottom Praline Bars

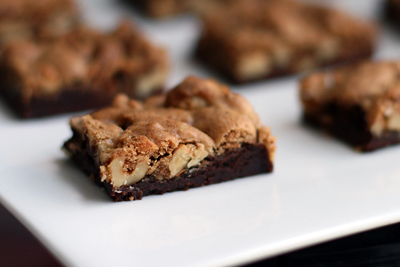
Black Bottom Praline Bars

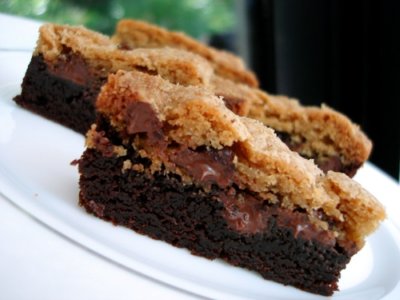
These bars were a big hit at work. They remind me of Abigail Johnson Dodge's Chocolate Chip Brownie Double Deckers from The Weekend Baker, but they're a little more sophisticated. The chocolate layer is richer, and the topping has a stronger butterscotch taste. I used toasted walnuts, but I think I would have preferred pecans.

This is the best brownie variation i've tried in a while. Cook's Illustrated's Triple Chocolate Espresso Brownies were a close second. I like Alice Medrich and Emily Luchetti's brownies well enough, but I still haven't found a recipe I can call my favorite. I can never get the exact texture and flavor i'm looking for.

You can use any half batch of Alice Medrich brownie batter for this recipe. I've included the half-recipe for her unsweetened chocolate, "new classic" brownies.

Black Bottom Pecan Praline Bars
adapted from Alice Medrich's Bittersweet

Brownie Layer
2 oz unsweetened chocolate
4 tbsp unsalted butter
1/2 cup + 1 tbsp sugar
1/2 tsp vanilla extract
1/8 tsp salt
1 cold large egg
1/4 cup all purpose flour

Place the chocolate and butter in a medium heatproof bowl set in a wide skillet of barely simmering water. Stir frequently until the chocolate is melted and the mixture is smooth. Remove the bowl from the skillet. Stir in the sugar, vanilla, and salt with a wooden spoon. Add the egg. Stir in the flour and beat with a wooden spoon until the batter is smooth, glossy, and beginning to come away from the sides of the bowl, 1-2 minutes. Proceed with the rest of the recipe.

Praline Layer
¼ cup all-purpose flour
¼ tsp Baking soda
4 tbsp unsalted butter, melted
¼ cup plus 2 tbsp packed brown sugar
¼ tsp salt
1 large egg yolk
½ tsp vanilla extract
1 ¼ cups coarsely chopped pecans or walnuts
9-inch square baking pan

Position a rack in the lower third of the oven and preheat the oven to 350°F. Line the bottom and sides of the baking pan with parchment paper or foil, leaving an overhang on two opposite sides.
Spread the brownie batter in a thin even layer in the bottom of the lined pan. Set aside.
Mix the flour and baking soda together thoroughly and set aside.
Combine the melted butter, sugar, and salt in a medium bowl. Stir in the egg yolk and vanilla, then the flour mixture, and finally the nuts. Drop spoonfuls all over the top of the brownie batter (they will spread and cover the brownies entirely during baking).
Bake until the edges of the topping are well browned and cracked, 20 to 25 minutes. Let cool completey in pan on a rack.
Lift up the ends of the parchment or foil liner, and transfer the brownies to a cutting board. Cut into 25 bars.

Sunday, February 3, 2008

Mushroom Tart.

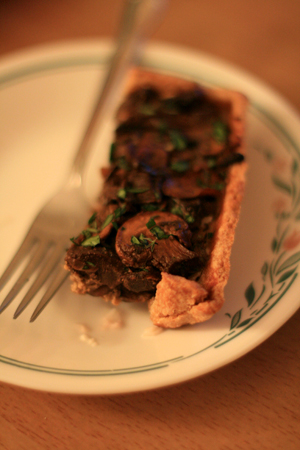
Mushroom Tart

I made this recipe again for the potluck last week. I love a simple mushroom tart and this one gets plenty of flavor from dried porcinis and homemade mushroom stock.
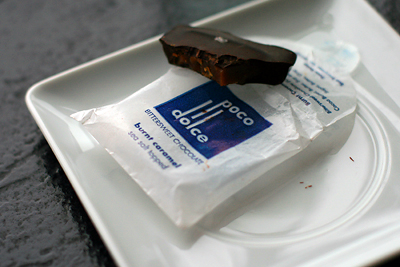
I've also eaten my way through a box of poco dolce's bittersweet chocolate tiles with sesame brittle and sea salt. The coconut almond tiles are easily my favorite, but Mon Aimee Chocolat ran out.

Poco Dolce

The burnt caramel ones are also delicious. I think I just love anything with sea salt on top.

Thursday, March 22, 2007

Mocha-Hazelnut Roulade.

Mocha-Hazelnut Roulade

Mocha-Hazelnut Roulade

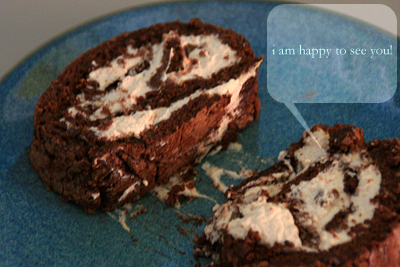
I thought my roulade was smiling at me.

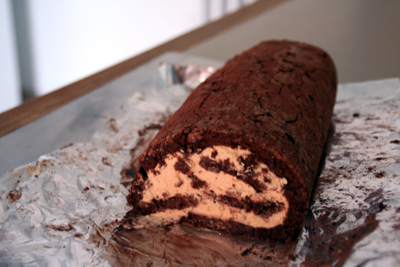
This is another recipe from Chocolate Holidays by Alice Medrich. The souffle cake base is wonderfully moist and studded with just noticeable bits of hazelnut. The filling is a sinfully delicate espresso flavored whipped cream. I picked this recipe because i've never made a jelly roll, and i'm a sucker for anything flavored with coffee and hazelnut.

Baking is very relaxing to me, and I find it very theraputic/stress relieving. Since I was very small, i've needed time alone to recharge.

Sometimes between ages three and five i'd get upset and tell my mother "I just need to be alone with my animals." I would shut myself in my room and sit on my animal-covered bed until I felt better.

Now that i'm older, i'm more likely to bake, work out, read, or take a short walk. It gives me time to process and recover.

Chocolate Hazelnut Roulade
(paraphrased.)

Cake:
1/4 cups hazelnuts, toasted and cooled, skins rubbed off
2 tbsp all purpose flour
6 oz bittersweet chocolate, coarsely chopped
8 tbsp unsalted butter, cut into pieces
4 eggs, separated
3/4 cup sugar
1/8 tsp cream of tartar
2-3 tbsp dutch process cocoa powder

Filling
1 cup heavy cream, cold
2 tsp instant espresso powder
1/2 tsp vanilla extract
1.5-2 tbsp sugar

Equipment:
16x12 or 11x17 jelly roll pan, lined with parchment or foil

Preheat the oven to 350.

Finely grind the nuts and flour in a food processor. Set aside.

Melt the chocolate and the butter in a double boiler or a microwave. Stir until smooth and melted.

In a large bowl, whip the egg yolks and 1/2 cup sugar until pale and thick. Stir in the chocolate mixture.

In a seperate bowl, whip the egg whites and cream of tartar until soft peaks form. Gradually add the remaining 1/4 cup sugar until stiff but not dry.Fold 1/4 of the egg whites into the chocolate along with all the hazelnut/flour mix. Fold in the remaining egg whites. Spread into the prepared pan and bake 12-15 minutes until a toothpick comes out with moist crumbs. Cool the cake completely on a rack, in the pan.

Dust some of the cocoa on a 16inch sheet of foil. Upend the cooled cake onto the foil and peel off the parchment.

To make the filling, whip the cream, vanilla, and espresso powder until it starts to thicken. Gradually add the sugar and beat until soft peaks (make sure it is stiff enough, or your roll will be squashy.) Spread the cream over the cake and roll up with the help of the foil. Don't worry if it cracks a bit, it will be okay in the end.

Wrap in foil and refrigerate before serving. To serve, transfer it to a platter and dust with additional cocoa, powdered sugar, or decorate it however you like.

Thursday, November 1, 2007

Pecan Tassies.

Pecan Tassies

Pecan Tassies

Somehow in class today I ended up with a two inch doodle that reads "Pecan Tassies!" It's hard to concentrate when the lecture is about TCP/IP and the history of the internet.

I said I needed time to regroup from baking failure, but then I started thinking about how easy Pecan Tassies would be since Alice Medrich's recipe uses melted butter.

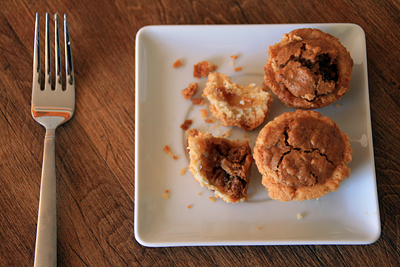
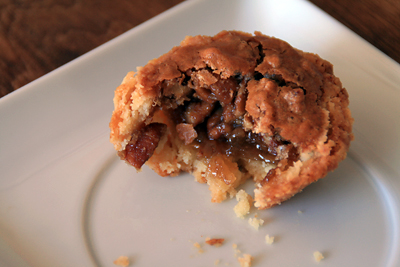
They were incredible fresh from the oven; extremely crunchy on the outside but chewy inside with some runny brown sugar/butter sauce that you can almost see in the first photo. The crust was flecked with real vanilla bean since I ran out of extract.

I liked this recipe so much that I wanted to give away the product immediately. My roommates and I don't go through pastries very quickly and it seemed tragic to let these sit for days and get soggy.

I ended up taking them to some friends who work for Apple. Their office is amazing; simple and well designed with some incredible furniture and a gorgeous view of Oakland. I only felt a little jealous!

It was nice to meet some new people and share the baked goods. I really love baking for others, and the folks at Apple said I could ditch things any time. Someone chimed in that they love cheesecakes.

Honestly, if you're in Pittsburgh and have a horde of hungry coworkers I can hook you up. As long as I don't blow my budget on ingredients.

Pecan Tassies
adapted from Alice Medrich's Cocoa Bean Tassies in Bittersweet
for the pastry:
12 tbsp unsalted butter, melted
1/4 cup + 2 tbsp sugar
1 tsp pure vanilla extract
scant 1/4 tsp salt
1.5 cups all purpose flour

for the filling:
1 large egg white
3/4 cup packed light brown sugar
1 tbsp unsalted butter, melted
1 cup pecans (or cocoa nibs), chopped
1 tsp pure vanilla extract
generous pinch of salt
2 12-cup miniature muffin pans

Position a rack in the lower third of the oven and preheat to 400 degrees.
To make the pastry: combine the melted butter, sugar, vanilla, and salt in a medium bowl. Add the flour and mix until just incorporated.

Divide the dough in half and press each half into a flattened 4 inch square. Cut each square into 12 equal pieces and shape each piece into a ball. Place one ball in each muffin cup and press it evenly over the bottom and all the way up the sides of the cup, forming a neat rim. Set aside.

To make the filling: in a medium bowl, beat the egg white until foamy. Stir in the brown sugar, melted butter, pecans, vanilla, and salt. Divide the filling evenly among the tartlet shells, about 1 tsp each.

Bake the tassies for 10 minutes, then reduce the oven temperature to 250 degrees and bake for 20 minutes more, or until the pastry is well browned on the edges and underneath (lift one out with the point of a knife to check.) Let cool in the pans on a rack.

Saturday, September 13, 2008

Brownies and Mocha Slices

Mocha Slices and Brownies

These days, most of my baking happens in the morning. I take morning photos on the windowsill because it's the only place that gets enough light.

I tried two chocolate recipes because the kitchen is well-stocked with several types of cocoa and chocolate. I went a little overboard in the Strip District last week...

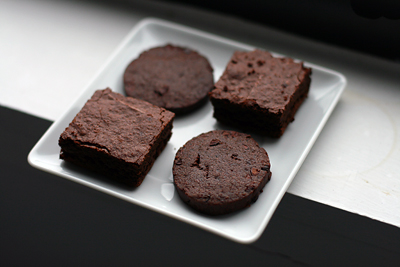
I liked the brownies; they were fudgy without that undercooked, greasy texture that comes with too much butter fat. I ate my them plain, but you can do fancy things with them. The recipe is from A Passion for Ice Cream. Anita at Dessert First has tried some of the recipes- she takes great photos.

The mocha slices are an old favorite that I put in my Christmas cookie box a few years ago. The espresso powder, cocoa nibs and cinnamon give the cookies a dark, fruity flavor that pairs nicely with the cocoa. They're relatively soft and chewy. The original recipe coats the dough-logs with sparkling sugar, but I usually omit it. It also suggests storing the logs in a paper towel roll to hold their shape, which I never do.

I definitely ate my fair share of brownies, but now I'm tiring of chocolate. We'll see what I end up cooking next week.
Brownies
adapted from Emily Luchetti's A Passion for Ice Cream

8 ounces bittersweet chocolate, finely chopped
1 ounce unsweetened chocolate, finely chopped
5 ounces (10 tablespoons) unsalted butter
3 large eggs
1 1/4 cups sugar
1/2 cup all-purpose flour
1/8 teaspoon kosher salt
1/2 teaspoon baking powder
3 tablespoons unsweetened cocoa powder (I used dutch-process, which worked well.)

To make the brownies: Preheat the oven to 350°F. Grease the bottom of a 9-by-13-inch baking pan and line it with parchment paper. Melt the chocolates and butter in a double boiler over hot water. In a medium bowl, whisk together the eggs and sugar. Whisk in the melted chocolate mixture. Sift together and then stir in the flour, salt, baking powder, and cocoa powder. Spread the batter in the prepared pan.

Bake until a skewer inserted in the center, comes out fudgy and not dry, about 20 minutes. Let cool to room temperature. Run a knife around the inside edge of the pan. Place a cutting board on top of the pan. Invert the pan and board. Remove the pan and carefully peel off the parchment paper. Cut and serve.

Mocha Slices
adapted from Martha Stewart Magazine
Makes about 4 dozen

1 1/2 cups all-purpose flour, plus more for work surface
3/4 cup unsweetened Dutch-process cocoa powder
1/4 teaspoon salt
2 tablespoons instant espresso powder
1/4 teaspoon ground cinnamon
1 1/2 sticks unsalted butter, softened
1 cup granulated sugar
1 large egg
1 teaspoon pure vanilla extract
1/2 cup cocoa nibs
Coarse sanding sugar

Sift together flour, cocoa, salt, espresso powder, and cinnamon into a large bowl; set aside. Put butter and sugar into the bowl of an electric mixer fitted with the paddle; mix on medium until pale and fluffy. Mix in egg and vanilla. Reduce speed to low. Add flour mixture; mix until just combined. Stir in cocoa nibs.

Turn out dough onto a lightly floured surface; roll into a 2-inch-diameter log (I suggest dividing the dough and making 2 logs- much easier to manage.) Wrap in parchment; transfer to a paper towel tube to hold shape. Refrigerate until firm, at least 1 hour or up to overnight.

Preheat oven to 350 degrees. Unwrap log, and let soften slightly at room temperature, about 5 minutes. Brush with water, then roll in sanding sugar. Cut log into 1/4-inchthick rounds. Space 1 inch apart on baking sheets lined with parchment paper.
Bake until centers are set, about 10 minutes. Transfer to wire racks; cool completely. Store in airtight containers at room temperature up to 2 days.

Monday, September 3, 2007

Labor Day Baking.

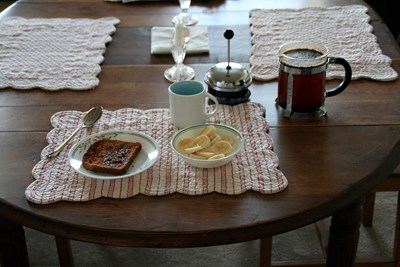
This morning I ate some breakfast.

Breakfast

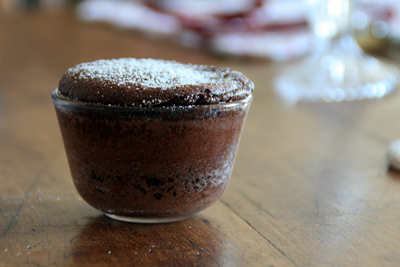
I made a souffle.

souffle

I ate a souffle.

Cocoa Souffle

Then I worked on nasty homework.
The souffle is from Alice Medrich's Bittersweet. The breakfast is yogurt and bananas, toast with ficoco, and coffee. And I didn't have souffle right after breakfast. It was more like 2pm. Happy Labor Day!
Sunday, January 27, 2008

Banana Bread ala Nigella

Banana Bread

"...it fills the kitchen with an aromatic fug which is the natural atmospheric setting for the domestic goddess" --Nigella Lawson

My first thought on seeing this comment was: what the heck is a fug?

fug (fŭg)
n. A heavy, stale atmosphere, especially the musty air of an overcrowded or poorly ventilated room: "In spite of the open windows the stench had become a reeking fug" (Colleen McCullough).
[Perhaps alteration of fogo, stench.]
fug. (n.d.). The American Heritage® Dictionary of the English Language, Fourth Edition. Retrieved January 28, 2008, from Dictionary.com website: http://dictionary.reference.com/browse/fug


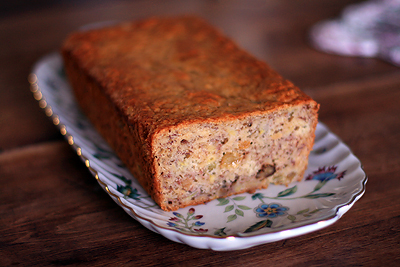
That definition is less than delicious, but this banana bread is! The recipe originates from Jim Fobel's Old-Fashioned Baking Book: Recipes from an American Childhood. It's one of the few banana bread recipes i've made that doesn't involve buttermilk, yogurt, sour cream, or a similar dairy product. The rum-soaked raisins are sticky and sweet (you can't really taste the rum) and the bread is dense, moist and rustic with very simple, pronounced flavors.

This is the third banana recipe i've made in a short amount of time. I think we've finally run out of over-ripe bananas. Phew!

Banana Bread
adapted from Nigella Lawson's How to be a Domestic Goddess

scant 1/2 cup golden raisins
6 tbsp or 3 oz bourbon or dark rum
1 cup + 2 tbsp all purpose flour
2 tsp baking powder
1/2 tsp baking soda
1/2 tsp salt
1/2 cup unsalted butter, melted
1/2 cup sugar
2 large eggs
4 small, very ripe bananas, mashed
1/4 cup chopped walnuts
1 tsp vanilla extract
9x5 inch loaf pan, buttered and floured or lined with parchment or foil

Put the golden raisins and rum or bourbon in a smallish saucepan and bring to a boil. Remove from the heat, cover, and leave for an hour if you can, or until the raisins have absorbed most of the liquid, then drain.

Preheat the oven to 325F and get started on the rest. Put the flour, baking powder, baking soda, and salt in a medium sized bowl and, using your hands or a wooden spoon, combine well. In a large bowl, mix the melted butter and sugar and beat until blended. Beat in the eggs one at a time, then the mashed bananas. Then, with your spoon, stir in the walnuts, drained raisins, and vanilla extract. Add the flour mixture a third at a time, stirring well after each bit. Scrape into the loaf pan and bake in the middle of the oven for 1 to 1 1/4 hours. When it's ready, an inserted toothpick or fine skewer should come out cleanish. Leave in the pan on a rack to cool, and eat thickly or thinly sliced as you prefer.

Variation: Replace 2 tbsp of the flour with good cocoa powder and add 4oz chopped bittersweet chocolate or chocolate chips.

Saturday, October 13, 2007

Nibby Nut and Raisin Cookies

NIbby Nut and Raisin Cookies

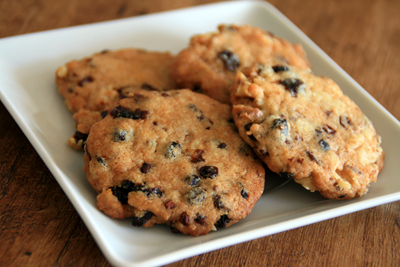
These are the Nibby Nut and Raisin Cookies from Alice Medrich's Bittersweet.

I used a little too much flour. The cookies didn't spread well, so I flattened the tablespoons of dough with a glass. I felt pretty shocked and dissapointed when the first batch didn't look anything like the picture in the book.

This recipe is nice because it's loaded with currants (in place of raisins,) cocoa nibs, and chopped walnuts. It also omits the creaming step and uses melted butter.

I'd be interested to talk to anyone who's had great success with this recipe. Given my results I think dark brown sugar would work much better than light brown, and I would have liked to throw in a few pinches of cinnamon. Baking the dough without parchment or silicone made the cookies much crispier on the bottom too.