Showing posts sorted by date for query vanilla bean. Sort by relevance Show all posts

Monday, July 6, 2009

On Yogurt

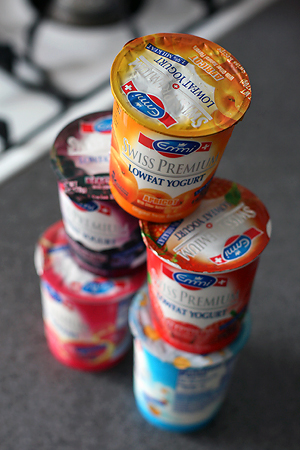
Emmi Yogurt

An 2004 industry report on the US yogurt market estimated that market value in 2008 would be $5,023 million. Apparently, our country eats a lot of yogurt.

The market is dominated by General Mills and Groupe Danone (Dannon is their US subsidiary), whose yogurts I tend to avoid. The grocery stores I visit have a wide selection, and i've become particular about my choices.

I don't like very sweet yogurt, or yogurt that masquerades as dessert. I don't want to see the words pie or mousse anywhere on the container. It shouldn't have extra digestive aids, vitamin supplements, cooked grains, or anything that needs to be mixed in. Even the president of Fage said mixing ruins the yogurt.

Packaging and branding can be particularly misleading. There are differences between "all-natural" and "organic" yogurts (the latter cannot contain bovine growth hormones). Many premium brands are subsidiaries of larger companies. Rachel's and Horizon Organics are both owned by Dean Foods. Stonyfield Farms and Oikos are both owned by Danone. Chobani is owned by Agro-Farma Inc, who used to manufacture Oikos for Stonyfield.

That said, I choose my yogurt for taste and texture. I tend to stick to low-fat yogurt, as full-fat is a little rich for everyday eating, and non-fat just doesn't taste right. Here are some of my favorites, in no particular order:

  • Plain Yogurts: Seven Stars Farm low-fat, Fage 2% and 0%, Trader Joe's organic low-fat and low-fat kefir, Whole Foods organic low-fat, Wallaby low-fat, Emmi

  • Flavored Yogurts: Wallaby peach, strawberry, blueberry, raspberry, banana-vanilla, Emmi apricot, blueberry, raspberry, strawberry, Trader Joe's green tea, vanana, Chobani vanilla bean, honey

    I haven't tried making my own yogurt yet, but one of my neighbors recommends Harold Mcgee's recipe. No yogurt maker required- all you need is a heated bowl or thermos.

    Further reading:

    Anstine, Jeffrey. "Organic and All Natural: Do Consumers Know the Difference?." Journal of Applied Economics & Policy 26, no. 1 (May 2007): 15-28.

    "Yogurt in the United States." Yogurt Industry Profile: United States (February 2004): 1.

    Berry, Donna. "It's a Jungle Out There." Dairy Foods 110, no. 4 (April 2009): 30-38.
  • Monday, February 23, 2009

    Nibby Buckwheat Butter Cookies

    Nibby Buckwheat Butter Cookies

    Nibby Buckwheat Butter Cookies

    Some cookies are best small. To be honest, i've never liked the big-as-your-head cookies found in so many bakeries and coffee shops. They often sacrifice good flavor and texture for size. I'm much happier with a good cup of coffee that has some dainty cookies perched on the saucer.

    I liked these Sea Salt and Cocoa Shortbreads so much that i've been exploring other recipes for butter cookies. I love the crisp, crumbly texture that comes from proper mixing and the occasional addition of corn starch or gluten-free flours (they contribute to the "shortness" of the cookie).

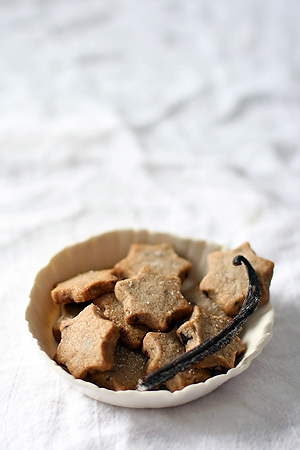
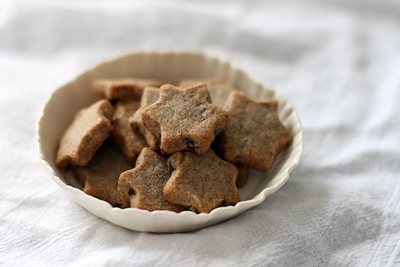
    These Nibby Buckwheat Butter Cookies were highly recommended by several bloggers, so I decided to try them. The original recipe is for slice-and-bake cookies, but I used a star shaped cutter instead. I used to think cut-out cookie required too much labor, but i've been more willing to make them since I started rolling out the soft dough inside of ziplock bags (a tip you can see demonstrated in this post).

    I made a half-batch of dough, which still yielded plenty of small cookies. Since I was out of vanilla extract, I used the seeds from half a vanilla bean and saved the pod to make vanilla sugar. I also lightly toasted the cocoa nibs to improve their flavor, and sprinkled a little sea salt over the top of the dough.

    The finished cookies are perfect for tea or snacking. They're not too sweet, and they're small enough that most people will happily indulge in a few. You can find Alice Medrich's original recipe here, courtesy of 101 Cookbooks.

    Tuesday, January 6, 2009

    Tuscan Bean Stew with Sausage and Kale

    Tuscan Bean Stew with Sausage and Kale

    I did some baking during the holidays, but not much. Some of my favorite items were Pains D'Amande and Bill Granger's Pear Cake with Vanilla Custard (made with apples instead).

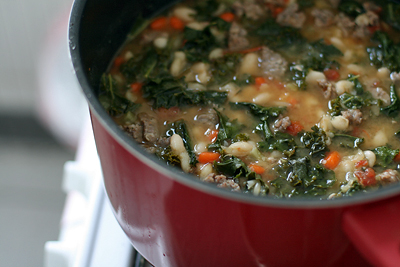
    Now that the holiday season is over and the weather is less than optimal, i'm in the mood for soup. I've started to cooking huge pots of soup on Sundays. I'll divvy the soup into tupperwares for work and freeze the extra for weeks when i'm too tired to cook (which are often at the moment).

    I used this recipe as an opportunity to (finally) buy some sausage from the Parma Sausage Company. It had great flavor, though it made the soup a little rich and I might use less next time. You can buy loose sausage in relatively inexpensive 1.5lb packages. I've made the vegetarian version of this soup as well, which is flavored with extra herbs and porcini mushrooms instead of meat.

    I should start baking more once I settle back into work. I've been reading lots of recipes for slice and bake cookies, and i'm looking for an excuse to use the 40% butterfat, not "ultra-pasteurized" Turner's cream from Whole Foods. Too bad I sold the ice cream maker...

    Tuscan Bean Stew with Sausage and Cabbage
    adapted from Cook's Illustrated

    Table salt
    1 pound dried cannellini beans (about 2 cups)
    1 tablespoon extra virgin olive oil
    1 1/2 pounds sweet Italian sausage, casings removed
    1 large onion, chopped medium (about 1 1/2 cups)
    2 medium celery ribs, cut into 1/2-inch pieces (about 3/4 cup)
    2 medium carrots, peeled and cut into 1/2-inch pieces (about 1 cup)
    8 medium garlic cloves, peeled and crushed
    4 cups low-sodium chicken broth
    3 cups water
    2 bay leaves
    1/2 medium head savoy cabbage, cut into 1-inch pieces (I used kale)
    1 (14.5-ounce) can diced tomatoes drained and rinsed
    1 sprig fresh oregano leaves
    Ground black pepper

    Instructions
    1. Dissolve 3 tablespoons salt in 4 quarts cold water in large bowl or container. Add beans and soak at room temperature for at least 8 hours and up to 24 hours. Drain and rinse well.

    2. Adjust oven rack to lower-middle position and heat oven to 250 degrees. Heat oil and sausage in large Dutch oven over medium heat. Cook, breaking meat into small pieces with wooden spoon until it loses its raw color, about 8 minutes. Transfer sausage to paper towel-lined plate and place in refrigerator. Add onion, celery, and carrots. Cook, stirring occasionally, until vegetables are softened and lightly browned, 10 to 16 minutes. Stir in garlic and cook until fragrant, about 1 minute. Stir in broth, water, bay leaves, and soaked beans. Increase heat to high and bring to simmer. Cover pot, transfer to oven, and cook until beans are almost tender (very center of beans will still be firm), 45 minutes to 1 hour.

    3. Remove pot from oven and stir in greens, sausage, and tomatoes. Return pot to oven and continue to cook until beans and greens are fully tender, 30 to 40 minutes longer.

    4. Remove pot from oven and submerge oregano sprig in stew. Cover and let stand 15 minutes. Discard bay leaves and oregano sprig and season stew with salt and pepper to taste. If desired, use back of spoon to press some beans against side of pot to thicken stew.

    Sunday, March 9, 2008

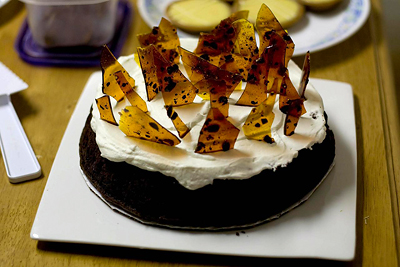
    One-Pan Mocha Cake with Coffee Bean Brittle.

    Mocha Cake w/ Coffee Bean Brittle

    Mocha Cake w/ Coffee Bean Brittle

    I am fortunate to have friends who enjoy good food and, perhaps more importantly, good hospitality. They RSVP. They invite people out for brunch or veggie dogs and a screening of North by Northwest. They say thank you. They take pictures and share them. Sometimes they pick up the tab. They bring not one bottle of wine, but two (or three!)

    Kim asked, "do all library students like to cook? They seem like a type." I'm not sure if we're a type, or if I just gravitate towards foodies. This is the first year i've had so many friends who cook well, and adventurously.

    I've hosted and attended several incarnations of dinner parties. There's the small dinner party: four or five people, a pre-planned menu, and cohesive conversation. Maybe a movie. There's the 8-12 person potluck or formal dinner party with wine and sometimes clear course progressions. That sort of party is usually dependent on whose apartment has the most space.

    And then there's the party.

    20-30 people scattered throughout a living room, dining room, and eat-in kitchen. Piles of food that comes in waves. Some of it gets eaten and some of it gets ignored. Someone makes cocktails. People dance. Believe me, it is something to see when every person brings food to a party that size.

    Last night there was a party. We had onion tarts, curry with squash and brussels sprouts, two kinds of challah, bread from Wood Street Bakery, wheatberry salad with ginger and scallions, 5-6 kinds of cheese, olive tapenade, baba ghanoush, pita, mashed potatoes, some sort of cream cheese dip/salsa, peanutty noodles, rice noodles with chickpeas and spinach, red beans and rice, rice salad with pine nuts and raisins, endive salad with pecans, roasted potatoes and green beans, lasagna, chips, espresso, key lime tartlets, vegan chocolate and peanut butter cupcakes, sachertorte, and this one-pan mocha cake with coffee bean brittle.

    I am probably forgetting a few things. I took home a huge tupperware of lasagna. Every dinner party has its place. While I prefer smaller gatherings, an occasional party can be fun.

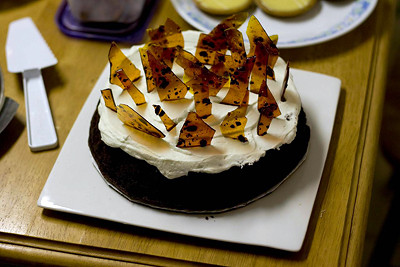
    This mocha cake was a big hit. It's very easy to prepare and looks very dramatic (though I think it would taste better and be easier to slice if you crushed the brittle instead). People started calling it "the broken bottle cake," to my amusement.

    One-Pan Mocha Cake w/ Coffee Bean Brittle
    adapted from Belinda Jeffery's Mix and Bake

    1/3 cup (35g) dutch process cocoa powder
    75g unsalted butter (about 6 tbsp)
    1/3 cup (80ml) light olive oil
    2/3 cup strong black coffee, cooled (or 3 tsp instant espresso powder dissolved in 2/3 cup boiling water)
    90g (about 3 ounces) good quality dark chocolate, finely chopped
    250g castor sugar (about 1 cup + 2 tbsp)
    1 large egg
    1 1/2 tsp vanilla extract
    1 1/4 cups (185g) all purpose flour
    2 tsp baking powder
    1/3 cup (80ml) buttermilk (or sour cream or yogurt, in a pinch)

    topping:
    350ml heavy cream, lightly whipped
    coffee bean brittle, coarsely crushed, or shards of dark chocolate, for garnish

    1. Preheat your oven to 150C/300F. Butter a 23cm/9in round cake pan (preferably 3 inches high). Line the base with buttered parchment paper, then dust the pan with flour. Shake out the excess flour and set aside.

    2. Put the cocoa, butter, oil, and coffee into a largish saucepan. Bring them to the boil over medium heat, stirring frequently until the mixture is silky, then take it off the heat. Add the chocolate and sugar and whisk them in until the chocolate has melted and the mixture is smooth.

    3. Once the mixture has cooled, add the egg and vanilla extract, whisking them in thoroughly. Sift the flour and baking powder into the mixture and stir them in until they're just combined. Whisk in the buttermilk.

    4. Pour the batter into the prepared tin and give it a gentle shake to level it out. Bake for about 50 minutes, or until a fine skewer inserted in the middle of the cake comes out clean. Cool the cake in the pan on a wire rack for 5 minutes. Invert the cake onto a rack, remove the paper and leave it to cool completely.

    5. When you're ready to serve, transfer the cake to a serving plate. Just before serving, spread the cream on top, then use the back of a spoon to swirl it a bit. To finish off, sprinkle some of the coffee bean brittle (see below) or chocolate shavings over the cream. This cake keeps well in the fridge for a few days (ungarnished) and freezes well without the topping for about 3 weeks.

    Coffee Bean Brittle
    1 cup (220g) sugar
    1/2 (125ml) water
    1 tbsp roasted coffee beans, coarsely chopped

    1. Line a large, shallow baking tray with parchment, foil, or a silpat and sit it on a chopping board or thick tea towel.

    2. Put the sugar and water into a small saucepan over high heat. Stir it constantly until the sugar dissolves, then stop stirring and bring the mixture to a boil. As it boils, wash down the sides occasionally with a pastry brush dipped in water to dissolve any sugar crystals. The mixture will slowly change from being quite liquid to a thicker syrup, with lazy bubbles on the surface.

    3. As soon as it turns a light amber color, add the chopped coffee beans and swirl the pan to mix them in. Continue to cook until the syrup is a deep golden brown, then immediately take it off the heat and carefully pour the mixture into the prepared baking tray. Hold the tray with a thick cloth or potholders and tilt it gently to spread the syrup evenly. Leave the brittle to cool and set, then carefully peel away the paper and break it into large shards.

    4. To store the brittle, layer the shards in an airtight container between sheets of parchment to stop them sticking together, then freeze. When you need it, take out as much as you want, crush it coarsely (or leave it in bigger pieces) and return the rest to the freezer. It will keep in the freezer for 12 months.
    Friday, November 16, 2007

    Rice Pudding with Dulce de Leche.

    Rice Pudding w/ Dulce De Leche

    Rice Pudding w/Dulce De Leche

    I rarely eat rice pudding; I think I can count the number of times i've had it on one hand. Still, I think it's the epitome of comfort food: simple, good, and loaded with dairy.

    I'm not sure I cooked this pudding long enough. I stopped about 15 minutes early because the rice started to feel very soft. Consequently, it came out very soupy but the flavor was amazing.

    I used Chinese cassia cinnamon from Penzey's and Organic Valley whole milk. There is a huge difference in taste between a good organic milk and the grocery store brand. I recommend you go for the good milk if you're making a dessert where milk is the star ingredient.

    I microwaved some dulce de leche in the ramekins to soften it, then dumped the cold pudding on top. It was a great combination- the silky texture of the caramel really stands out against the creamy pudding.

    It was a good dessert to have on the first real day of snow.

    Rich Risotto Rice Pudding
    adapted from Jill O'Connor's Sticky, Chewy, Messy, Gooey.
    1/2 cup arborio rice
    8 cups whole milk
    1/2 cup sugar
    1/4 tsp ground cinnamon
    1/4 tsp salt
    1 vanilla bean, split length-wise
    2 large egg yolks
    1/2 cup heavy cream
    2 tsp pure vanilla extract
    freshly grated nutmeg (optional.)

    Combine the rice, milk, sugar, vanilla bean, cinnamon, and salt in a large, heavy bottomed saucepan over medium-high heat and stir to combine. Bring the mixture to a boil, stirring constantly. Reduce the heat to medium-low and simmer, stirring every 5 minutes as the mixture starts to thicken, for about 30 minutes. Continue cooking until the rice is tender but not too mushy, about 15 minutes more. The milk will be thick and the rice tender, but the mixture will still be a little soupy, which is what you want. (As the pudding cools, it thickens, and if it is too thick while still hot, it will firm up into a thick, stodgy lump without the creaminess of a great rice pudding.)

    In a bowl, whisk the yolks and cream together and stir into the rice pudding. Continue cooking the pudding for 2-3 minutes, until the eggs are cooked through and the pudding is creamy and glossy, but still fairly soupy. Remove from the heat and stir in the vanilla. Grate a little nutmeg into the pudding, if desired. Remove the vanilla bean. Pour the pudding into a serving bowl and press plastic wrap over the top to prevent a skin from forming. Refrigerate until cold, at least 2-3 hours. Serve cold.

    Thursday, November 1, 2007

    Pecan Tassies.

    Pecan Tassies

    Pecan Tassies

    Somehow in class today I ended up with a two inch doodle that reads "Pecan Tassies!" It's hard to concentrate when the lecture is about TCP/IP and the history of the internet.

    I said I needed time to regroup from baking failure, but then I started thinking about how easy Pecan Tassies would be since Alice Medrich's recipe uses melted butter.

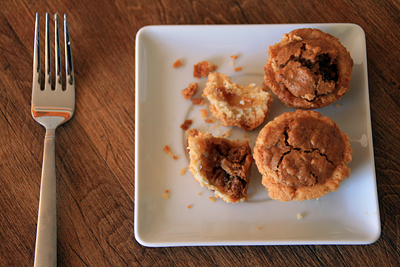
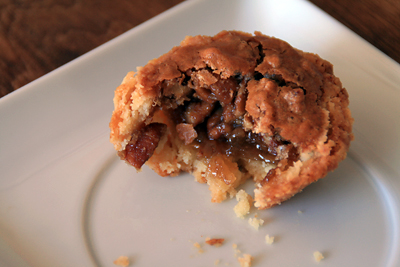
    They were incredible fresh from the oven; extremely crunchy on the outside but chewy inside with some runny brown sugar/butter sauce that you can almost see in the first photo. The crust was flecked with real vanilla bean since I ran out of extract.

    I liked this recipe so much that I wanted to give away the product immediately. My roommates and I don't go through pastries very quickly and it seemed tragic to let these sit for days and get soggy.

    I ended up taking them to some friends who work for Apple. Their office is amazing; simple and well designed with some incredible furniture and a gorgeous view of Oakland. I only felt a little jealous!

    It was nice to meet some new people and share the baked goods. I really love baking for others, and the folks at Apple said I could ditch things any time. Someone chimed in that they love cheesecakes.

    Honestly, if you're in Pittsburgh and have a horde of hungry coworkers I can hook you up. As long as I don't blow my budget on ingredients.

    Pecan Tassies
    adapted from Alice Medrich's Cocoa Bean Tassies in Bittersweet
    for the pastry:
    12 tbsp unsalted butter, melted
    1/4 cup + 2 tbsp sugar
    1 tsp pure vanilla extract
    scant 1/4 tsp salt
    1.5 cups all purpose flour

    for the filling:
    1 large egg white
    3/4 cup packed light brown sugar
    1 tbsp unsalted butter, melted
    1 cup pecans (or cocoa nibs), chopped
    1 tsp pure vanilla extract
    generous pinch of salt
    2 12-cup miniature muffin pans

    Position a rack in the lower third of the oven and preheat to 400 degrees.
    To make the pastry: combine the melted butter, sugar, vanilla, and salt in a medium bowl. Add the flour and mix until just incorporated.

    Divide the dough in half and press each half into a flattened 4 inch square. Cut each square into 12 equal pieces and shape each piece into a ball. Place one ball in each muffin cup and press it evenly over the bottom and all the way up the sides of the cup, forming a neat rim. Set aside.

    To make the filling: in a medium bowl, beat the egg white until foamy. Stir in the brown sugar, melted butter, pecans, vanilla, and salt. Divide the filling evenly among the tartlet shells, about 1 tsp each.

    Bake the tassies for 10 minutes, then reduce the oven temperature to 250 degrees and bake for 20 minutes more, or until the pastry is well browned on the edges and underneath (lift one out with the point of a knife to check.) Let cool in the pans on a rack.

    Wednesday, July 25, 2007

    A Very Aromatic Brioche.

    Almond Brioche

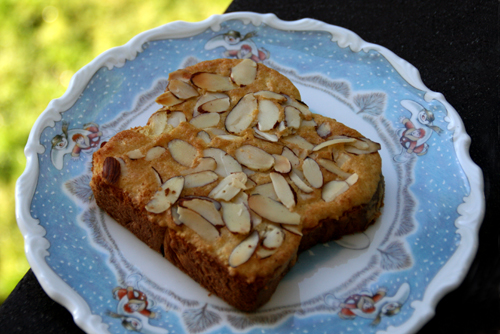
    I'm a huge fan of Bostock: day old brioche brushed with syrup, slathered with almond cream, and baked to a crisp. Michel Richard is my favorite place to eat almond brioche, hands down.

    I used Melissa's recipe for vanilla bean/brown butter brioche, and Clotilde's recipe for the almond cream.

    I added some strawberries on a whim and was pleasantly surprised when they resulted in a very aromatic and delicious brioche. I am a huge fan of the strawberry/almond extract combination, and these bostock really played up those flavors. I highly recommend them with some coffee or a glass of orange juice.

    Thanks for all the nice comments from newer readers. It's nice to know that people actually look at this blog.

    Wednesday, July 18, 2007

    Espresso-Chocolate Semifreddo


    Usually I don't care for semifreddo; it's not quite ice cream and not quite a substantial torte, cake, or pudding. I picked this recipe out of food and wine magazine because the picture was really pretty, and i'm happy to say it turned out quite well.

    I'm a fan of Sherry Yard's recipes. They're usually very sophisticated, though sometimes a little hard to execute at home. This recipe didn't give an indication of just how much batter it produced. Make sure you use a very large mixing bowl.

    This recipe was also a good excuse to play with my dad's huge La Cimbali espresso machine. I brewed shot after shot and tasted them all before measuring them out for the recipe O.o

    If you like Tiramisu, I think you'll like this. It's got great coffee taste and a really nice texture. It'd be great with some raspberry coulis, or at least some muddled fruit.

    Espresso Chocolate Semifreddo
    (adapted from Food and Wine Magazine)
    1.5 cup sugar
    3/4 cup water+ 2tbsp
    1.25 cup strongly brewed espresso
    1/2 cup whole milk
    1 vanilla bean, split and seeds scraped
    1 tsp gelatin dissolved in 2 tsp water
    2 oz bittersweet chocolate, chopped
    4 large eggs
    1/4 cup light corn syrup
    1.25 cups heavy cream
    18 dry ladyfingers
    1 tbsp cocoa for sprinkling
    Raspberries, for serving

    1. In a small saucepan, combine 1 cup of the sugar with the 3/4 cup water and 1/4 cup of the espresso. Bring to a simmer over moderate heat and stir to dissolve the sugar. Let the espresso syrup cool.

    2. In a small saucepan, boil the remaining 1 cup of espresso over high heat until reduced to 1/4 cup (about 8 minutes) Pour into a medium heatproof bowl.

    3. Warm the milk with the vanilla bean and seeds over moderate heat until bubbles form around the edge. Remove from heat and stir in the gelatin until melted. Discard the vanilla bean. Add the hot milk to the reduced espresso and whisk in the chocolate until melted.

    4. In the bowl of a standing mixer, beat the eggs at high speed until light yellow and foamy. In a small saucepan bring the corn syrup, the remaining 1/2 cup of sugar, and 2 T of water to a simmer. Cook over moderately high heat until the syrup registers to 235 on a candy thermometer*, about 5 minutes. With the mixer on medium speed, gradually beat the hot syrup into the eggs. Continue beating until the mixture is very pale and has tripled in volume, about 4 mins. Fold in the espresso mixture**

    5. In a bowl, whip the heavy cream until stiff peaks form. Fold into the mousse mixture until no streaks remain**

    6. Spoon about 1/4 of the mousse into a 9 inch springform pan. Dip 6 lady fingers into the espresso syrup until just soaked through. Arrange the ladyfingers over the mousse in rows. Repeat the process 2 more times, then top with the remaining mousse. Cover with plastic wrap and freeze at least 6 hours.

    7. Before serving, warm a thin sharp knife under hot water. Run the knife around the edge of the semifreddo and remove the ring (you can refreeze after this if the sides are a little melty) Sift cocoa over the top of the semifreddo. Cut into wedges and serve with raspberries. The semifreddo will keep frozen for up to three days (so says the magazine.)

    *If you don't have a candy thermometer, you can cook the syrup and periodically drop a little of it into a bowl of cold water. You want to cook it until a little before the soft ball phase. You should be able to shape the cold syrup with your fingers, but it shouldn't form a really dense ball. It takes a little practice sometimes.

    ** I was running out of room in my bowl, so I just gently whisked in these ingredients. It didn't deflate the mix or anything.


    Friday, March 16, 2007

    I Broached the Brioche.

    Browned Butter and Vanilla Bean Brioche

    Browned Butter and Vanilla Bean Brioche

    Brioche is one of my favorite foods. I'd been eating almond brioche for years without even realizing it; there was a small french bakery next to my sister's ballet studio and my mom would usually buy me a pastry when we picked her up (probably to compensate for the many hours spent waiting in the parking lot for ballet class to end.)

    The most memorable almond brioches i've had resently came from Ollie's Bakery in Winston-Salem, NC and Michel Richard in Los Angeles. I highly recommend them both.

    The prospect of making brioche intimidated me. It's a long process, and I didn't expect the nervous anticipation that came with it. I was paranoid that despite the 15 minutes of kneading and multiple rises, my loaves would ultimately result in failure.

    Thankfully, Melissa of The Traveler's Lunchbox posted a fantastic recipe for a vanilla bean brown butter brioche that is really hard to mess up.

    I have a few suggestions of my own. If the butter isn't soft enough to incorporate after you've removed it from the fridge, you can beat it in your electric mixer using the paddle attachment to soften it. Also, Melissa suggests creating surface tension by rolling up the dough jelly-roll style. I did one loaf that way and the other using a folding method (you fold the outer thirds of the square to the middle like an envelope, then reshape the dough and do it in the opposite direction.)

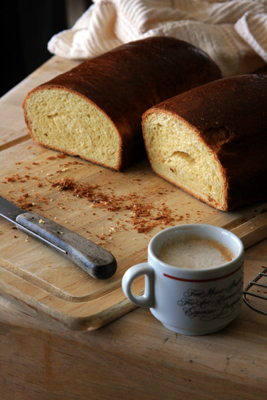
    The latter technique made for a much lighter loaf that rose higher. Even though it did get a little pocket in the middle, the air bubbles were bigger, and the crust was crustier.

    I highly recommend trying your own brioche! It was really perfect with the Kumquat preserves I made.