Showing posts sorted by date for query ginger. Sort by relevance Show all posts

Sunday, March 29, 2009

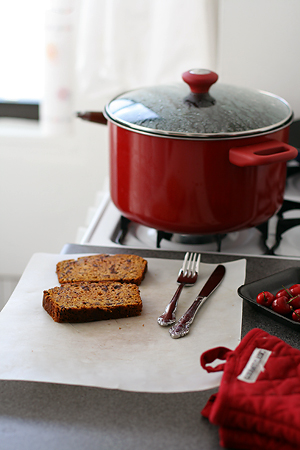
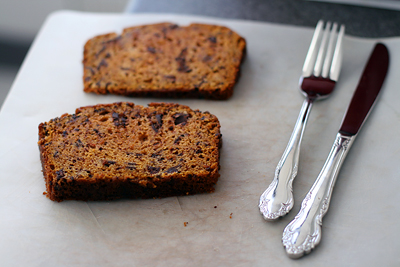
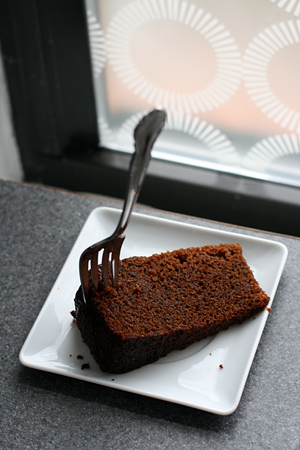
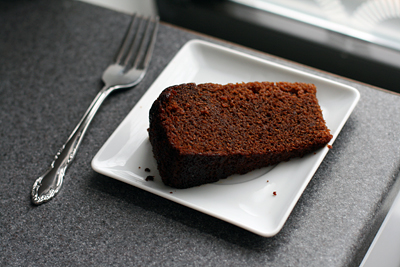
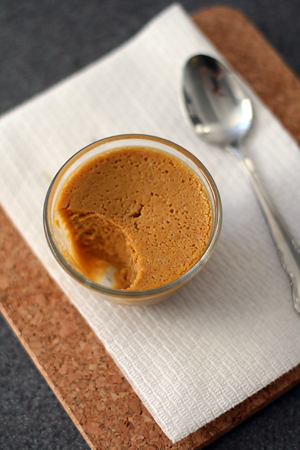
Gingerbread Stars with Royal Icing

Gingerbread Stars

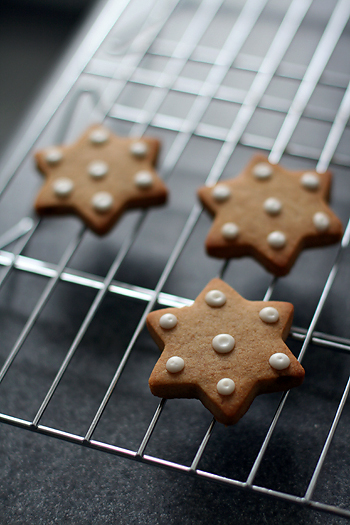
I tried Donna Hay's recipe for gingerbread from Modern Classics Book 2. The cookies held their shape well and looked elegant topped with royal icing. I didn't care for the texture, but I liked the recipe enough to consider trying more iced cookies.

This recipe uses Golden Syrup instead of molasses, and the ground ginger flavor is strong and spicy. Here's the cookie recipe, if you care to try it.

I'd suggest finding a more reliable recipe for royal icing- the one in Modern Classics calls for way too much egg white.

Gingerbread Cookies
adapted from Donna Hay's Modern Classics, Book 2
125g butter, softened
1/2 cup brown sugar
1/2 cup golden syrup
2 1/2 cups all purpose flour, sifted
2 tsp ground ginger
1 tsp baking soda

Preheat the oven to 375F. Place the butter and sugar in a bowl and beat with electric beaters until light and creamy. Add the golden syrup, flour, ginger, and baking soda and mix to form a smooth dough. Refrigerate for 10 minutes or until the dough is firm. Roll out the dough between sheets of wax paper to 1/4 inch thick. Place on baking sheets lined with parchment paper. Bake for 8-10 minutes or until golden brown. Do not overbake!

Thursday, December 11, 2008

Pumpkin Chocolate Chip Loaf

Pumpkin Chocolate Loaf

Pumpkin Chocolate Loaf

This is a recipe for Pumpkin Chocolate Chip Bread, but we like to call it Super Chocolate Awesome Bread. These were literally the first words out of my friend's mouth when he took a bite.

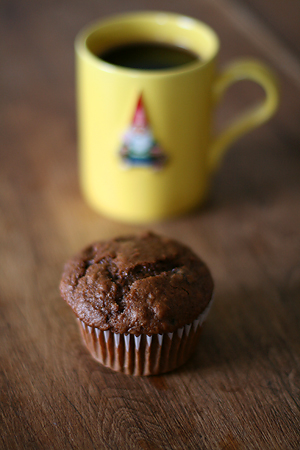
It's one of two recipes i've tried from Baked: New Frontiers in Baking- the second one being the Banana Espresso Chocolate Chip Muffins, which were also nicknamed Super Chocolate Awesome Muffins. The same friend had already devoured two before I'd had two bites. They were that good.

It's the simplicity of these two recipes that made me want to try them first. Both can be mixed up in practically no time, and they yield beautiful, moist cakes oozing with melting chocolate. The pumpkin bread is quite spicy; several people actually thought it was gingerbread. I'm tempted to try it without the chocolate, as i've been hurting for a good plain pumpkin bread recipe.

For the muffins, I bought already over-ripe bananas from Penn Mac. It's usually a good place to go if you don't want to wait for bananas to ripen. The espresso powder in the batter is a nice, dark complement to the chocolate. The coffee flavor was hard to identify in the final product- I thought it was nicely balanced. You can view a reprint of the recipe here, but the original uses only semisweet chocolate.

Not all of the recipes in this book appeal to me, but I liked these two so much that i'll probably try a few more!

Pumpkin Chocolate Chip Bread
adapted from Baked: New Frontiers in Baking
3 1/4 cups all purpose flour
2 tsp baking soda
2 tsp cinnamon
1/2 tsp nutmeg
1/2 tsp clove
1/2 tsp ginger
2 tsp salt
1 cup vegetable oil
1 3/4 cups pumpkin puree (15oz can)
3 cups granulated sugar
4 large eggs
1 tsp vanilla extract
2/3 cup water, room temperature
1 cup (12 oz) chocolate chips or chopped semisweet chocolate

Preheat the oven to 350F and position a rack in the middle. Grease and flour two 9x5 inch loaf pans or line them with foil or parchment paper.

In a large bowl, whisk together the flour, baking soda, spices, and salt. Set aside.

In another large bowl, whisk together the oil and pumpkin puree. Add the granulated sugar and whisk to combine. Add the eggs, one at a time, followed by the vanilla extract and water. Mix in the chocolate with a rubber spatula.

Fold the dry ingredients into the wet ingredients until just combined. Do not overmix (and don't worry if you see a few small streaks of flour). Divide into the two pans and bake for 1 hour and 15 minutes, or until a toothpick inserted in the center comes out clean. Transfer pans to a wire rack to cool for 10 minutes, then unmold leave to cool completely.

Sunday, November 23, 2008

David Lebovitz's Fresh Ginger Cake

Ginger Cake

Ginger Cake

Now that Thanksgiving is over and there's snow on the ground, I'm thinking less about pumpkin and more about cinnamon, nutmeg, ginger, cloves, allspice, peppermint, rum, cider, hot cocoa, candied citrus peels and nuts, and cranberries.

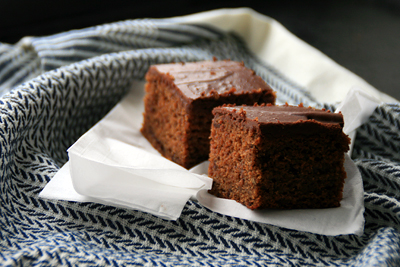
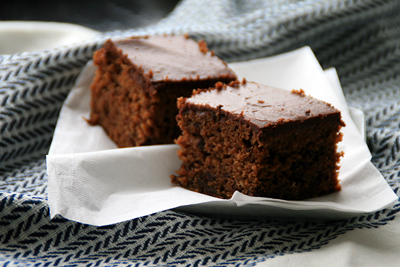
This simple, spicy cake that was once David Lebovitz's most requested recipe. It's very moist, and the flavor improves with age. My cake domed quite a bit and started to burn, so after it cooled I just sliced off the top and flipped the whole thing over. It made a nice breakfast for several days and I thought it was seasonally appropriate.

The cake was one of my last forays into Richard Sax's Classic Home Desserts (it's titled "East West Ginger Cake" in the book). I also tried the "Rich Soft Spice Cake" and "Hilda's Apple Cake"; both were good, but neither was my favorite from the book. As much as I've enjoyed it, I think it's time to return it to the library.

This recipe is available here.

Sunday, November 16, 2008

Pear and Walnut Muffins and Coffee Cake

I had mixed success with last week's baking.

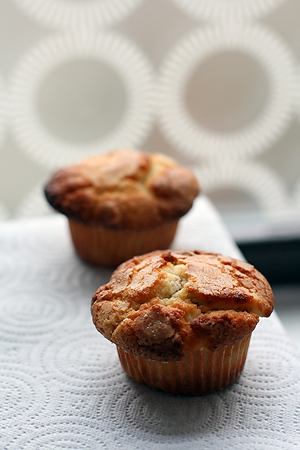
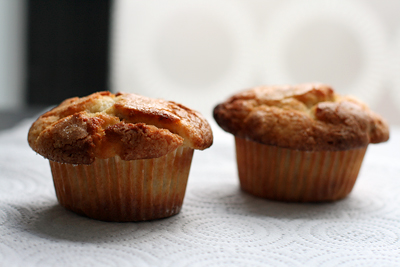
Pear Walnut Muffins

Pear Walnut Muffins

This recipe for pear and walnut muffins was a hit at work, but i'm not sure i'll make it again. It was more complicated than most quickbread recipes. While whipping cream, separating eggs, and toasting walnuts, I couldn't help thinking that I like muffins to be a quick and not-too-messy project.

The muffins were rather rich for breakfast, but they'd be nice for tea. The tender white cakes are studded with crunchy walnuts and big chunks of canned pear. Whipped cream, orange zest, and ginger give them a delicate flavor.

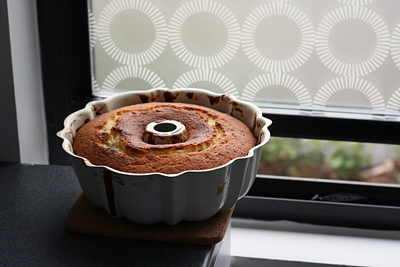
Coffee Cake

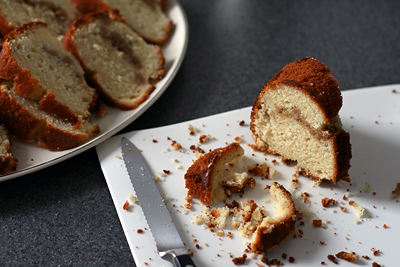
Coffee Cake

I also tried the cinnamon swirl buttermilk pound cake from Tish Boyle's The Cake Book, which ripped horribly during unmolding (though I greased and floured the pan). It's not the first time i've had trouble unmolding filled coffee cakes. I'm not sure if I need to allow more cooling time or invest in a non-stick pan. It was also well received, but I found the texture tough and the flavor plain.

This week i'm trying a Rhode Island chunky pear pie and some cookies. I have high hopes for them! I'm hoping I have time to go through some of my Paris photos too. That project has been on the back burner for too long.

Monday, October 6, 2008

Butternut Squash Pie

Butternut Squash Pie

Butternut Squash Pie Filling

This weekend, I decided to try David Lebovitz's recipe for Butternut Squash Pie. I bought a large butternut squash in the Strip District and defrosted a big chunk of leftover tart dough.

I really love the Rich Shortcrust Pastry Dough from this post. Even when rolled very thin, it stays flaky, delicate, and crisp. The base recipe is intended for savory tarts, but you can add 2 tbsp confectioners' sugar for sweet ones.

My tart shells were quite shallow; I ended up with enough filling for one 9-inch tart, three 4-inch tarts, and six 4oz ramekins (the original recipe is for one 10-inch pie). I baked the ramekins in a water bath until they were mostly set but slightly wobbly in the middle. They turned out well, though they'd be better with some whipped cream, ice cream, streusel, or sugared nuts sprinkled on top.

I'm not sure I prefer butternut squash pie to pumpkin pie, but it's certainly delicious and fall-appropriate. Like Lebovitz, I prefer this pie chilled (but i've always had an affinity for cold pumpkin pie).

Fall is my favorite season, and i've definitely caught the fall baking bug. You'll be seeing an assortment of apple and pumpkin desserts very soon...

Butternut Squash Pie
adapted from David Lebovitz's Room for Dessert
makes one 10-inch pie

2 pounds butternut squash (for about 2 cups pulp)
1 cup heavy cream
1/2 cup milk
4 eggs
3/4 cup light brown sugar, firmly packed
1 tsp ground ginger
1 tsp ground cinnamon
1/4 tsp ground cloves
1/4 tsp ground black pepper
1/4 tsp grated nutmeg
pinch of salt
1/2 tsp vanilla extrct
1 tbsp brandy
one 10-inch prebaked pie crust

1. Position the oven rack in the center of the oven and preheat to 400F. Line a baking sheet with parchment and rub generously with butter.

2. Slice the squash in half lengthwise. With a spoon, remove the seeds and fibers from the cavity. Place the halves cut side down on the baking sheet and bake for 45 minutes, until tender and fully cooked.

3. While the squash is baking, mix together the cream, milk, eggs, sugar, spices, salt, vanilla, and brandy.

4. When the squash is cooked, remove it from the oven and turn the oven down to 375F. Scoop out the squash pulp and add to the other ingredients. Mix until smooth in a food processor or blender.

5. Pour the warm filling into the pre-baked pie shell and bake for 30-35 minutes, until just barely set in the center. (I poured the filling through a strainer).

Sunday, August 24, 2008

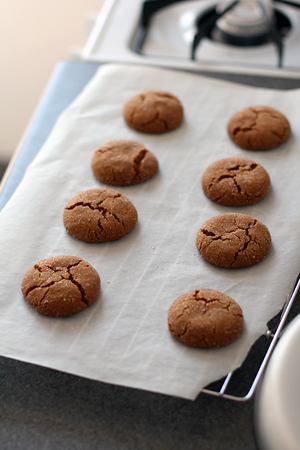
Molasses Spice Cookies

Molasses Spice Cookies

Molasses Spice Cookies

I strongly believe that gingersnaps and molasses cookies should be enjoyed year-round. While some people save cinnamon, ginger, allspice, and cloves for fall and Christmas recipes, I use them for any occasion. Especially breakfast.

I've tried many kinds of spiced cookies and I definitely have favorites. So, when I tried this Cook's Illustrated recipe, I wasn't expecting much. I just wanted to use up the molasses.

As soon as the cookies came out of the oven, I knew they'd be perfect. They were beautiful: big, sugary, crinkled, and perfectly round. I've tried similar recipes that weren't nearly as consistent- the cookies spread too much, or they looked nothing like they were supposed to. Conversely, these cookies turned out perfectly every time.

I highly recommend this recipe if you like chewy molasses cookies. Don't over bake them, or they will lose their wonderfully chewy texture!

Molasses Spice Cookies
from Cook's Illustrated

Measure the molasses in a liquid measuring cup. If you find that the dough sticks to your palms as you shape the balls, moisten your hands occasionally in a bowl filled with cold water and shake off the excess. Bake the cookies one sheet at a time. If baked two sheets at a time, the cookies started on the bottom rack won’t develop the attractive cracks. The cookies should look slightly raw and underbaked when removed from the oven.

1/3 cup granulated sugar (about 2 1/2 ounces), plus 1/2 cup for dipping
2 1/4 cups unbleached all-purpose flour (11 1/4 ounces)
1 teaspoon baking soda
1 1/2 teaspoons ground cinnamon
1 1/2 teaspoons ground ginger
1/2 teaspoon ground cloves
1/4 teaspoon ground allspice
1/4 teaspoon ground black pepper
1/4 teaspoon table salt
12 tablespoons unsalted butter (1 1/2 sticks), softened but still cool
1/3 cup dark brown sugar (about 2 1/2 ounces)
1 large egg yolk
1 teaspoon vanilla extract
1/2 cup molasses (about 6 ounces), light or dark

1. Adjust oven rack to middle position and heat oven to 375 degrees. Line 2 baking sheets with parchment paper. Place 1/2 cup sugar for dipping in 8- or 9-inch cake pan.

2. Whisk flour, baking soda, spices, and salt in medium bowl until thoroughly combined; set aside.

3. In standing mixer fitted with paddle attachment, beat butter with brown and granulated sugars at medium-high speed until light and fluffy, about 3 minutes. Reduce speed to medium-low and add yolk and vanilla; increase speed to medium and beat until incorporated, about 20 seconds. Reduce speed to medium-low and add molasses; beat until fully incorporated, about 20 seconds, scraping bottom and sides of bowl once with rubber spatula. Reduce speed to lowest setting; add flour mixture and beat until just incorporated, about 30 seconds, scraping bowl down once. Give dough final stir with rubber spatula to ensure that no pockets of flour remain at bottom. Dough will be soft.

4. Using tablespoon measure, scoop heaping tablespoon of dough and roll between palms into 11/2-inch ball; drop ball into cake pan with sugar and repeat to form about 4 balls. Toss balls in sugar to coat and set on prepared baking sheet, spacing them about 2 inches apart. Repeat with remaining dough. Bake 1 sheet at a time until cookies are browned, still puffy, and edges have begun to set but centers are still soft (cookies will look raw between cracks and seem underdone), about 11 minutes, rotating baking sheet halfway through baking. Do not overbake.

5. Cool cookies on baking sheet 5 minutes, then use wide metal spatula to transfer cookies to wire rack; cool cookies to room temperature.

Monday, May 5, 2008

Los Angeles Eating.

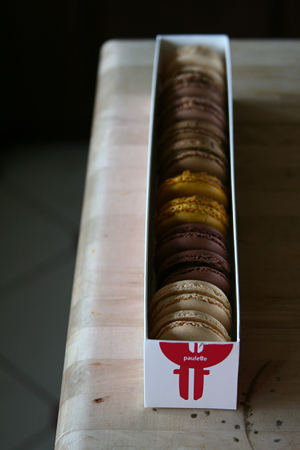
Paulette Macaron

Paulette Macaron

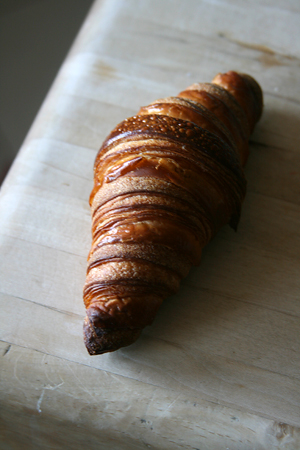
Croissant from Boule

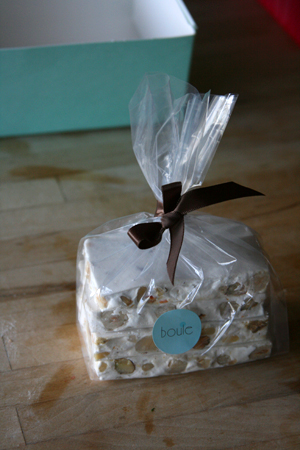
Nougat from Boule

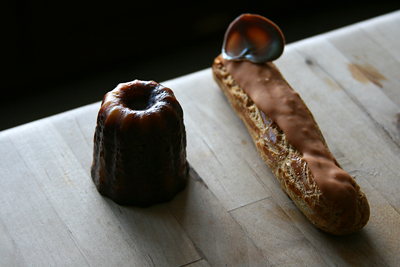
Canele, Fleur de Sel Caramel Eclair

I had a full day of driving today and by the time I got home it was a little dark for photography. I settled for dark photos because I wanted to sample all of these pastries with my mom as soon as possible.

I wanted to try some new bakeries and restaurants during this trip, so I took some cues from Potatomato. It's a great blog with photos from many Los Angeles area restaurants. Here are some of the places I went:

Clementine is an upscale deli where you order at the counter, take a number, and find a table. It was insanely crowded (the lunch rush is usually from 12-2pm) but the food was great. Some of the flavor combinations were really interesting: red onions pickled with ginger and citrus, roasted tomato mayo, caper and anchovy vinaigrette...I was too full to try any pastries. I hear they are good.

I had lunch at Joe's again. It was a little disappointing. Maybe it was an off day, or maybe they're still recovering from a recent chef change. Joe's is near Jin Patisserie which i'm also hoping to visit again this trip.

I finally went to Patisserie Chantilly in Lomita. It was fantastic! I tried a few pastries, and my favorite was a tart cheesecake with candied citrus and a shortbread crust. It's two doors down from a great place for udon noodles. I can't remember the name but it was fabulous. I had wakame udon.

Today, after a visit to UCLA I stopped at Paulette Macarons. I preferred the macarons that had caramel filling rather than buttercream (salted caramel and New Orleans praline were amazing!) The macarons were soft and slightly cakelike- spongy rather than crispy.

I also stopped at Boule. I've read some mixed reviews of this place, but I liked it. The canele, fleur de sel caramel eclair, and croissant were fantastic. The nougat was so-so.

I also had dinners at Darya (great Persian food) and Pine Tree Korean BBQ (a family favorite. I love the little side dishes).

I think that's everywhere I went!

Friday, April 25, 2008

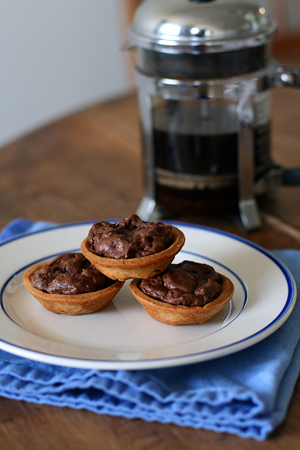
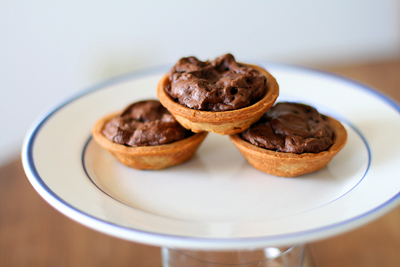
Melting Chocolate Cookie Tartlets

Melting Chocolate Cookie Tartlets

Melting Chocolate Cookie Tartlets

I've been working through some untried recipes in Bittersweet. I had some tartlet crusts in the freezer and I filled them with this chocolate/nut meringue mixture.

I like this filling; it's easy to assemble, intensely chocolate flavored, and studded with chopped pecans. It doesn't have that crunchy, chalky meringue texture. I had extra filling left over, so I scooped piles onto a cookie sheet and baked them. This worked fine, and I enjoyed eating the cookies.

Next time I think i'll pipe the filling into the tart shells. I might put more filling in too; it has structure, so there's no danger of spilling.

Melting Chocolate Cookie Tartlets
adapted from Alice Medrich's Bittersweet

For the crust:
8 tbsp unsalted butter, melted
3 tbsp sugar
3/4 tsp vanilla extract
1/8 tsp salt
1 cup all purpose flour

For the filling:
6oz bittersweet or semisweet chocolate, coarsely chopped (50-62%. For 64-66%, use 5 oz)
2 large egg whites, at room temperature
1/8 tsp cream of tartar
1/2 tsp pure vanilla extract
1/4 cup sugar
3/4 cup chopped pecans or walnutes

Eight 4in tartlet pans, or 10 3.5in tartlet pans. (I used 12 very small tartlet tins and still had filling left over)

Position a rack in the lower third of the oven and preheat the oven to 350F.

To make the crust: Mix the butter, sugar, vanilla, and salt in a medium bowl. Add the flour and mix just until well blended. Don't worry if the dough seems too soft. Divide the dough into 8-10 equal pieces. Press one piece of dough very thinly and evenly across the bottom and up the sides of each tartlet pan. Place the pans on a cookie sheet. Bake for 15-20 minutes, until a deep golden brown.

While the crusts are baking, make the filling: Melt the chocolate in a medium heatproof bowl set in a wide skillet of barely simmering water, or in the microwave. Remove from the heat and stir until completely melted.

In a large bowl, beat the egg whites with the cream of tartar and vanilla until soft peaks form when you lift the beaters. Gradually add the sugar and continue to beat until the egg whites are stiff but not dry. Pour the nuts and all of the warm chocolate over the egg whites and fold with a rubber spatula until the color of the batter is uniform.

As soon as the tartlet crusts are ready, divide the filling equally among them. Make sure the batter touches the crust around all the edges. Return to the oven and bake the filling until it is dry or slightly cracked on top, about 10 minutes. Cool on a rack.

To unmold, use the point of a paring knife to loosen one edge of the crust from the pan, then tip the tarts into your hand. Serve warm or at room temperature.

Variations: Fold in 2 oz of crystallized ginger, finely chopped; 4 oz moist prunes, chopped into 1/4in pieces; 4 oz candied chestnuts, chopped. You can also substitute other nuts, like pine nuts.

Thursday, March 27, 2008

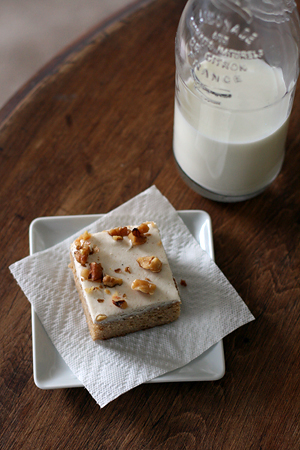
Spice Cake with Cream Cheese Frosting

Spice Cake

Spice Cake

I can be skeptical about mise en place. I'll measure dry ingredients hours ahead of time, but i'll avoid prepping one thing or another. I tell myself that if I wait, the ingredient will be fresher, the preparation less cumbersome.

There is a reason you're supposed to prepare your ingredients: urgency while baking is dangerous. While carefully pouring eggs into your rapidly whipping stand-mixer, you'll realize that you're supposed to throw in a tablespoon of ginger that you haven't grated. In your rush to peel and grate the ginger, you'll make a bad decision.

In this case, I balanced the microplane over the top of a cereal bowl, figuring the grated ginger could fall into it. This took much more leverage than I anticipated, and the bowl slipped and flew into the air. I fumbled it for several seconds before launching it across the room where it hit the floor and shattered into a million pieces.

I cleaned up the mess, took a few deep breaths, and continued. The rest of the process was pleasant. My whole apartment smelled like brown butter and spices. I served the finished cake later in the evening for my friends who come over to watch Top Chef. They graciously brought montegrappa, apples, pears, crackers, chips, wine, and daffodils.

I'd definitely make this recipe again. It's best served at room temperature the day it's made. Don't be put off by the ginger and molasses; the flavors are subtle and complementary.

Spice Cake
from Cook's Illustrated

Cake
2 1/4 cups unbleached all-purpose flour (11 1/4 ounces), plus extra for dusting pans
1 tablespoon ground cinnamon
3/4 teaspoon ground cardamom
1/2 teaspoon ground allspice
1/2 teaspoon ground cloves
1/4 teaspoon ground nutmeg
16 tablespoons unsalted butter (2 sticks), softened
1/2 teaspoon baking powder
1/2 teaspoon baking soda
1/2 teaspoon table salt
2 large eggs at room temperature
3 large egg yolks at room temperature
1 teaspoon vanilla extract
1 3/4 cups granulated sugar (12 1/4 ounces)
2 tablespoons light molasses or mild molasses
1 tablespoon grated fresh ginger
1 cup buttermilk , at room temperature

Frosting
5 tablespoons unsalted butter , cut into 5 pieces, softened
1 1/4 cups confectioners' sugar (4 1/2 ounces)
8 ounces cream cheese , cut into 4 pieces , softened
1/2 teaspoon vanilla extract
3/4 cup coarsely chopped walnuts, toasted (optional)

1. For the cake: Adjust oven rack to middle position and heat oven to 350 degrees. Grease and flour 13- by 9-inch baking pan. Combine spices in small bowl; reserve 1/2 teaspoon for frosting.

2. Heat 4 tablespoons butter in 8-inch skillet over medium heat until melted, 1 to 2 minutes. Continue to cook, swirling pan constantly, until butter is light brown and has faint nutty aroma, 2 to 4 minutes. Add spices and continue to cook, stirring constantly, 15 seconds. Remove from heat and cool to room temperature, about 30 minutes.

3. Whisk flour, baking powder, baking soda, and salt in medium bowl. In small bowl, gently whisk eggs, yolks, and vanilla to combine. In standing mixer fitted with paddle attachment, cream remaining 12 tablespoons butter with sugar and molasses at medium-high speed until pale and fluffy, about 3 minutes, scraping down sides and bottom of bowl twice with rubber spatula. Reduce to medium speed and add cooled butter and spice mixture, ginger, and half of egg mixture; mix until incorporated, about 15 seconds. Repeat with remaining egg mixture; scrape down bowl again. Reduce to low speed; add about one-third flour mixture, followed by half of buttermilk, mixing until just incorporated after each addition, about 5 seconds. Repeat using half of remaining flour mixture and all of remaining buttermilk. Scrape bowl and add remaining flour mixture; mix at medium speed until batter is thoroughly combined, about 15 seconds. Remove bowl from mixer and fold batter once or twice with rubber spatula to incorporate any remaining flour.

4. Transfer batter to prepared pan. Zigzag the tip of a metal spatula through batter, pulling it to pan edges. Lightly tap pan against counter 3 or 4 times to dislodge any large air bubbles; smooth surface with spatula.

5. Bake until toothpick inserted in center of cake comes out clean, 32 to 37 minutes. Cool cake to room temperature in pan on wire rack, about 2 hours.

6. For the frosting: In bowl of standing mixer fitted with paddle attachment, beat butter, sugar, and reserved 1/2 teaspoon spice mixture at medium-high speed until light and fluffy, 1 to 2 minutes. Add cream cheese one piece at a time, beating thoroughly after each addition. Add vanilla and beat until no lumps remain, about 30 seconds.

7. Run paring knife around edge of cake to loosen from pan. Using spatula, spread frosting evenly over surface of cake. Sprinkle cake with walnuts, if using. Cut into squares and serve.

Sunday, March 9, 2008

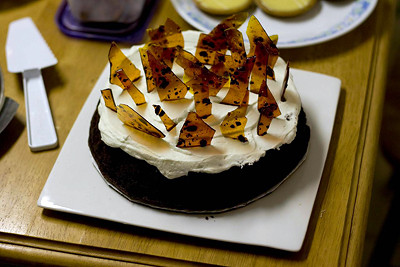
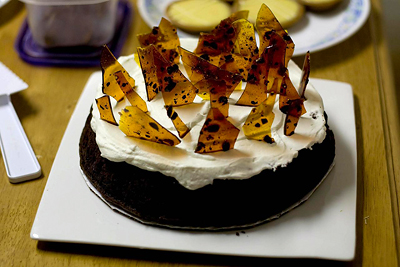
One-Pan Mocha Cake with Coffee Bean Brittle.

Mocha Cake w/ Coffee Bean Brittle

Mocha Cake w/ Coffee Bean Brittle

I am fortunate to have friends who enjoy good food and, perhaps more importantly, good hospitality. They RSVP. They invite people out for brunch or veggie dogs and a screening of North by Northwest. They say thank you. They take pictures and share them. Sometimes they pick up the tab. They bring not one bottle of wine, but two (or three!)

Kim asked, "do all library students like to cook? They seem like a type." I'm not sure if we're a type, or if I just gravitate towards foodies. This is the first year i've had so many friends who cook well, and adventurously.

I've hosted and attended several incarnations of dinner parties. There's the small dinner party: four or five people, a pre-planned menu, and cohesive conversation. Maybe a movie. There's the 8-12 person potluck or formal dinner party with wine and sometimes clear course progressions. That sort of party is usually dependent on whose apartment has the most space.

And then there's the party.

20-30 people scattered throughout a living room, dining room, and eat-in kitchen. Piles of food that comes in waves. Some of it gets eaten and some of it gets ignored. Someone makes cocktails. People dance. Believe me, it is something to see when every person brings food to a party that size.

Last night there was a party. We had onion tarts, curry with squash and brussels sprouts, two kinds of challah, bread from Wood Street Bakery, wheatberry salad with ginger and scallions, 5-6 kinds of cheese, olive tapenade, baba ghanoush, pita, mashed potatoes, some sort of cream cheese dip/salsa, peanutty noodles, rice noodles with chickpeas and spinach, red beans and rice, rice salad with pine nuts and raisins, endive salad with pecans, roasted potatoes and green beans, lasagna, chips, espresso, key lime tartlets, vegan chocolate and peanut butter cupcakes, sachertorte, and this one-pan mocha cake with coffee bean brittle.

I am probably forgetting a few things. I took home a huge tupperware of lasagna. Every dinner party has its place. While I prefer smaller gatherings, an occasional party can be fun.

This mocha cake was a big hit. It's very easy to prepare and looks very dramatic (though I think it would taste better and be easier to slice if you crushed the brittle instead). People started calling it "the broken bottle cake," to my amusement.

One-Pan Mocha Cake w/ Coffee Bean Brittle
adapted from Belinda Jeffery's Mix and Bake

1/3 cup (35g) dutch process cocoa powder
75g unsalted butter (about 6 tbsp)
1/3 cup (80ml) light olive oil
2/3 cup strong black coffee, cooled (or 3 tsp instant espresso powder dissolved in 2/3 cup boiling water)
90g (about 3 ounces) good quality dark chocolate, finely chopped
250g castor sugar (about 1 cup + 2 tbsp)
1 large egg
1 1/2 tsp vanilla extract
1 1/4 cups (185g) all purpose flour
2 tsp baking powder
1/3 cup (80ml) buttermilk (or sour cream or yogurt, in a pinch)

topping:
350ml heavy cream, lightly whipped
coffee bean brittle, coarsely crushed, or shards of dark chocolate, for garnish

1. Preheat your oven to 150C/300F. Butter a 23cm/9in round cake pan (preferably 3 inches high). Line the base with buttered parchment paper, then dust the pan with flour. Shake out the excess flour and set aside.

2. Put the cocoa, butter, oil, and coffee into a largish saucepan. Bring them to the boil over medium heat, stirring frequently until the mixture is silky, then take it off the heat. Add the chocolate and sugar and whisk them in until the chocolate has melted and the mixture is smooth.

3. Once the mixture has cooled, add the egg and vanilla extract, whisking them in thoroughly. Sift the flour and baking powder into the mixture and stir them in until they're just combined. Whisk in the buttermilk.

4. Pour the batter into the prepared tin and give it a gentle shake to level it out. Bake for about 50 minutes, or until a fine skewer inserted in the middle of the cake comes out clean. Cool the cake in the pan on a wire rack for 5 minutes. Invert the cake onto a rack, remove the paper and leave it to cool completely.

5. When you're ready to serve, transfer the cake to a serving plate. Just before serving, spread the cream on top, then use the back of a spoon to swirl it a bit. To finish off, sprinkle some of the coffee bean brittle (see below) or chocolate shavings over the cream. This cake keeps well in the fridge for a few days (ungarnished) and freezes well without the topping for about 3 weeks.

Coffee Bean Brittle
1 cup (220g) sugar
1/2 (125ml) water
1 tbsp roasted coffee beans, coarsely chopped

1. Line a large, shallow baking tray with parchment, foil, or a silpat and sit it on a chopping board or thick tea towel.

2. Put the sugar and water into a small saucepan over high heat. Stir it constantly until the sugar dissolves, then stop stirring and bring the mixture to a boil. As it boils, wash down the sides occasionally with a pastry brush dipped in water to dissolve any sugar crystals. The mixture will slowly change from being quite liquid to a thicker syrup, with lazy bubbles on the surface.

3. As soon as it turns a light amber color, add the chopped coffee beans and swirl the pan to mix them in. Continue to cook until the syrup is a deep golden brown, then immediately take it off the heat and carefully pour the mixture into the prepared baking tray. Hold the tray with a thick cloth or potholders and tilt it gently to spread the syrup evenly. Leave the brittle to cool and set, then carefully peel away the paper and break it into large shards.

4. To store the brittle, layer the shards in an airtight container between sheets of parchment to stop them sticking together, then freeze. When you need it, take out as much as you want, crush it coarsely (or leave it in bigger pieces) and return the rest to the freezer. It will keep in the freezer for 12 months.

Monday, February 25, 2008

Bran Muffins

Bran Muffin

These muffins were, if anything, confusing. They almost tasted like a lot of things: chocolate, ginger, molasses, brown sugar, cinnamon, nutmeg, etc. Somehow, the flavors didn't quite mesh. They had a fluffy, bran-ish texture straight from the oven, but by day two they were sticky and dense.

When it's a dreary grey afternoon, a plain bran muffin doesn't exactly put a smile on my face. I've always equated wheat bran with health food. If you put a bran muffin and any other kind of muffin in front of me, i'd probably choose the latter. You'd probably like these if you like bran muffins and dark gingerbread cakes. They aren't too sweet and they're good with a strong cup of coffee.

I used Carole Walter's "Too Good to be True Bran Muffins" recipe. It says it yields 12 muffins, but I got 12 muffins and 12 mini muffins out of it. I'm not going to post it- i've posted quite a bit out of this book already.

Tuesday, February 5, 2008

Spice Cake with Maple Icing and Toasted Pecans

Spice Cake w/ Maple Frosting

Spice Cake w/ Maple Frosting

How can you not enjoy a recipe when it tells you to throw nuts at the sides of your cake? I didn't bother trying to be precise or tidy. I literally took handfuls of pecans and whirled them at the cake. Most of them stuck, but many of them ended up on the countertops and the floor.

I substituted the maple syrup cake from the original recipe for Flo Braker's spice cake. It was a good choice; the cake has a crumbly, rustic texture that reminds me of coffee cake. Combined with the maple syrup in the frosting, you could almost pass this cake off as a breakfast item.

I was quite proud of how pretty the cake looked. I carried it, umbrella covered, through the rain to my friends at Apple. Everyone seemed to enjoy it, though Peter didn't care for the texture of the icing. He described it as "stretchy" or "stringy." Meringue tends to be hit or miss with most people. I like it when it's well-made. It's lighter than buttercream and reminds me of marshmallow fluff.

This cake was fun to make, and I found myself smiling through the whole process. I find the flavors and textures playful and happy. It's an easy, elegant cake that would be good for birthdays or other occasions.

Spice Cake with Maple Icing
adapted from Nigella Lawson and Flo Braker

For the cake:
2 1/2 cups sifted cake flour
1 teaspoon baking powder
1/2 teaspoon baking soda
1/2 teaspoon cinnamon
1/2 teaspoon ground ginger
1/4 teaspoon freshly grated nutmeg
1/4 teaspoon salt
1/8 teaspoon ground cloves
1 cup buttermilk, at room temperature
1 teaspoon pure vanilla extract
1 1/2 sticks (6 ounces) unsalted butter, softened
1 cup (packed) light brown sugar
1/2 cup granulated sugar
3 large eggs, at room temperature

For the icing:
2 large egg whites
1/2 cup maple syrup
7 tbsp sugar
1/4 tsp cream of tartar
1/4 tsp salt
1 tsp vanilla extract
1/2 cup or 4 oz pecans, lightly toasted

1. Preheat the oven to 350° and position a rack in the lower third. Butter and flour two 8-by-2-inch round cake pans. Sift the flour with the baking powder, baking soda, cinnamon, ginger, nutmeg, salt and cloves onto a sheet of wax paper. Combine the buttermilk and vanilla in a small pitcher.

2. In a standing electric mixer fitted with a paddle attachment, beat the butter at medium speed until creamy. Add the light brown and granulated sugars and beat until light and fluffy, about 4 minutes, stopping once to scrape down the bowl. Add the eggs, 1 at a time, beating well after each addition. Beat in the flour mixture at low speed in 3 batches, alternating with the buttermilk mixture, just until the batter is smooth; stop the mixer occasionally to scrape down the bowl.

3. Divide the batter evenly between the pans. Transfer the pans to the oven and bake for 30 to 35 minutes, or until the cakes begin to shrink from the sides. Let the cakes cool for 10 minutes, then turn each out onto a rack, invert onto another rack and let cool completely. Wrap each cake in plastic and store at room temperature overnight.

4. To make the frosting: Put everything except the extract and pecans into a glass or metal bowl that fits over a saucepan to form a double boiler. Fill the saucepan with enough water to come just below, but not touching, the bowl when it sits on top. Bring the water to the boil, set the boil on top, and using an electric mixer, beat the mixture vigorously for 5-7 minutes. It should stand up in peaks like a meringue mixture. Take the bowl off the saucepan, away from the heat, and add the extract, beating for another minute.

5. Using the icing, frost the middle, sides, and top of the cake. Chop most of the pecans finely, leaving some pieces larger. Sprinkle over the top of the cake, and throw at the sides. This cake is best eaten the day it's made.
.

Saturday, January 19, 2008

Ginger Oatmeal Raisin Cookies

Ginger Oatmeal Raisin Cookies

Ginger Oatmeal Raisin Cookies

When a batch of cookies goes awry, sometimes it's the recipe's fault. Other times, it's your fault. Well- at least your equipment's fault.

Once, I took a batch of these gingersnaps to my friend's office the same day one of his coworkers did. Even though we used the same recipe, our cookies looked and tasted nothing alike. It was clear we approached things very differently; he mentioned spending time in Whole Foods searching for "packed brown sugar."

There are so many variables involved in cookie baking: technique, baking time, temperature, equipment, ingredients, cooling methods...to understand them, you must bake lots of cookies.

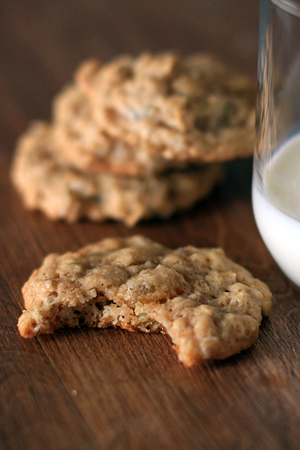
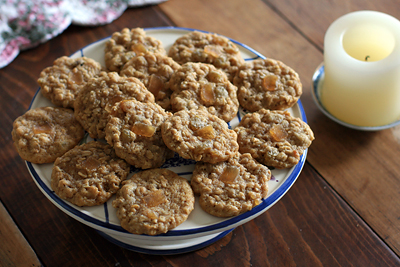
I made a big bowl of Ginger Oatmeal Raisin Cookie dough and experimented with each dozen I baked. I baked some batches for 10 minutes, and others for 12-16. I used different types of cookie sheets. I left some cookies on the sheet to cool and moved others to racks individually. I flattened the cookies to different thicknesses. I put little squares of candied ginger on some and left others plain. I fiddled with the oven temperature and oven rack position.

Eventually, I found my favorite combination: one inch balls of dough, flattened and garnished with ginger, baked on a parchment-lined half-sheet pan in the upper middle rack of my oven for 10 minutes at 325 F and an extra 2-3 minutes at 330 F, and cooled completely on the cookie sheet.

There's no guarantee this method will work for you. You probably have a different oven, different cookie sheets, different weather, and a different taste in cookies. I like mine crunchy at the edges, chewy in the middle, nicely golden, and well spiced.

I like this recipe. The cayenne pepper and ginger add a nice bite to an otherwise traditional, satisfying oatmeal raisin cookie.

Ginger Oatmeal Raisin Cookies
adapted from Pichet Ong's The Sweet Spot
1 1/2 cups (223g) all purpose flour
1 1/2 tsp baking powder
1 1/2 tsp baking soda
1 cup (226g) unsalted butter, cut into 1 inch cubes and chilled
2/3 cup (114g) packed light brown sugar
1/2 cup (114g) sugar
2 tbsp candied ginger, finely chopped, plus more for garnish if desired
1 1/2 tsp ground cinnamon
1/4 tsp salt
1/4 tsp cayenne pepper (optional)
2 large eggs
1 tbsp whole milk
2 tsp vanilla extract
2 cups (170g) old fashioned rolled oats
1 1/4 cups (170g) raisins, preferably golden

1. Sift together the flour, baking powder, and baking soda and set aside.

2. Put the butter, both sugars, the ginger, cinnamon, salt, and cayenne, into the bowl of an electric mixer fitted with the paddle attachment. Beat on medium speed until light and fluffy, about 4 minutes. With the machine running, add the eggs one at a time, then add the milk and vanilla. As soon as the liquids are incorporated, stop the mixer and scrape down the sides and bottom of the bowl.

3. Turn the mixer speed to low and add half the flour mixture. When it is incorporated, add the remaining flour and mix until no traces of flour remain. Stir in the oats and raisins. If you have time, cover the dough and let chill for at least 2 hours, or up to 3 days, before baking.

4. When ready to bake, preheat the oven to 325 F. Line two baking sheets with parchment paper.

5. Scoop the cookie dough into 1 inch balls and put 2 inches apart on the baking sheets. Use your palm to slightly flatten each ball, then sprinkle the tops with chopped candied ginger, if desired.

6. Bake the cookies until lightly golden brown, about 10 minutes*. Transfer to a cooling rack to cool completely. The cookies can be stored in an airtight container for up to 3 days.

*I pulled one batch of cookies at exactly 10 minutes and they were way under-baked. My baking time also varied depending on the type of cookie sheet I used. Wait until the cookies are no longer wet/shiny on top. They should be just golden at the edges. Bake them longer for a crispier cookie.
Friday, December 7, 2007

Fresh Ginger and Chocolate Gingerbread

Fresh Ginger and Chocolate Gingerbread

Fresh Ginger and Chocolate Gingerbread

This is the gingerbread i've been waiting for. The fresh ginger adds great flavor and heat, and the chunks of chopped chocolate melt in your mouth. I love the subtle blend of spices and the smooth consistency of the frosting.

Do sift the confectioners' sugar, or your icing will be rather lumpy.

I didn't mind that the edges were slightly over-baked. I trimmed them off and ate them immediately. This gingerbread is a keeper. I almost don't want to take it to the holiday party I made it for...

Fresh Ginger and Chocolate Gingerbread
adapted from Baking from my Home to Yours by Dorie Greenspan

For the cake:
2 tbsp finely chopped peeled fresh ginger
1 tbsp sugar
2 cups all purpose flour
1 tsp baking soda
2 tsp ground ginger
3/4 tsp ground cinnamon
1/4 tsp ground cloves
1 stick + 3 tbsp unsalted butter, at room temperature
3/4 cup packed light brown sugar
3 large eggs
1/2 cup molasses
6 oz bittersweet chocolate, 2 oz melted and cooled, 4 oz finely chopped
1 cup buttermilk
1 tbsp finely chopped stem ginger in syrup (optional)

For the icing:
3 oz bittersweet chocolate, coarsely chopped
1 tbsp strong coffee
3 tbsp unsalted butter, at room temperature
3 tbsp confectioners sugar

Center a rack in the oven and preheat the oven to 350 degrees. Butter a 9in square baking pan and put it on a baking sheet.

Put the fresh ginger and sugar in a small bowl, stir and set aside.

Whisk the flour, baking soda, and spices together.

Working with a stand mixer fitted with the paddle attachment, or a hand mixer in a large bowl, beat the butter and brown sugar together at medium speed until light and fluffy, about 3 minutes. Add the eggs one at a time, beating for 1 minute after each egg goes in. Don't worry if the mixture looks curdled at this stage. Pour in the molasses and beat until smooth. Reduce the mixer speed to low and add the melted chocolate, along with the sugared ginger. Still on low speed, add the dry ingredients in 3 additions and the buttermilk in two (begin and end with dry ingredients,) mixing the batter only as much as needed to blend the ingredients. Fold in the chopped chocolate and the ginger in syrup (if using.) Pour the batter into the pan.

Bake for about 40 minutes, or until the cake starts to pull away from the sides of the pan and a thin knife inserted into the center comes out clean. Don't be concerned if the cake has domed and cracked- it will settle down as it cools. Transfer the cake to a rack and cool for 10 minutes, then unmold the cake. Turn right side up to cool to room temperature before icing the cake. The edges might be quite brown, but don't fret- you can trim them after you ice the cake.

To make the icing: Set a heatproof bowl over a pan of simmering water, put the chocolate and coffee in the bowl, and stir occasionally until the chocolate is melted. Remove the bowl and, using a small whisk, stir in the butter 1 tbsp at a time. Sift the confectioners sugar over the chocolate and stir in. Transfer the bowl to a counter and let the icing sit for about 10 minutes.

Put the gingerbread, still on the rack, on a pice of wax paper or foil. Pour the icing onto the center of the cake and use a long metal spatula to spread the icing evenly over the top. Allow the icing to set for 30 minutes. If the edges of the cake are overbaked, now's the time to trim them. Then cut the gingerbread into 9 even pieces.

Saturday, November 24, 2007

Easy Gingerbread Cakes.

Gingerbread Cakes

I love gingerbread. Generally I love all things involving any combination of molasses, cinnamon, cloves, nutmeg, allspice, pepper, ginger, and cardamom.

Every year I look foward to the arrival of Bahlsen christmas cookies. Prestogeorge Coffee in the Strip District usually has the best selection. Mon Aimee Chocolat also has a small selection this year. I'm extremely partial to the Contessas. My family has a history of going through Contessas like hotcakes. Sometimes we hide them from eachother.

I like this recipe because it's easy. I usually omit the blueberries or substitute chocolate chips. I also add about 1/4 tsp of cloves. Also, I never use an 11x7 pan; I use muffin tins or small cake pans and reduce the baking time.

The cake is soft and delivers Christmas flavors without bashing you over the head with them. It's a good solution for people who complain about too much molasses, too much ginger, etc.


Blueberry Gingerbread
from recipezaar.com

1/2 cup oil
1 cup sugar
1/2 teaspoon salt
3 tablespoons molasses
1 egg
2 cups flour
1/2 teaspoon ginger
1 teaspoon cinnamon
1/2 teaspoon nutmeg
1 teaspoon baking soda
1 cup fresh blueberries or frozen blueberries
1 cup buttermilk
2 tablespoons sugar

Preheat oven to 350 degrees.
With mixer, beat together oil, 1 C sugar, salt and molasses.
Beat in egg.
Combine flour, spices and baking soda, dredge blueberries with 2 Tbsp of mixture.
Add remaining flour mixture to first mixture alternately with buttermilk, beating after each addition.
Stir in blueberries.
Pour into a greased and floured 12 x 7 baking dish.
Sprinkle top with remaining 2 Tbsp sugar.
Bake for 35- 40 minutes.
Cut into squares and serve warm with butter.

Thursday, November 15, 2007

Apple Cheesecake

Apple Cheesecake

Apple Cheesecake

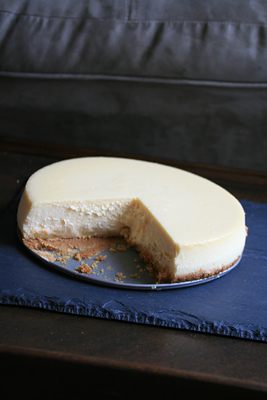
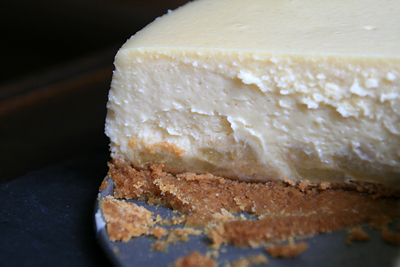
This apple cheesecake seemed appropriate for fall. It has a touch of ground cinnamon and ginger and a layer of caramelized apples sitting on top of the graham cracker crust.

I wasn't sure which photos to pick. I thought the above two had a nice character to the color/texture, but I also took this one which was also interesting- less washed out, but busier.

I'm going to drop this off with the guys at Apple again. There's no way 3/4ths of a cheesecake is going to get eaten in my apartment. I'm also pretty picky about cheesecake texture. This cake is pretty light and similar to cheesecakes i've tried at Juniors.

I'm more partial to cheesecakes that are very dense and crumbly with a crust that is crunchy instead of soggy and dense. The crust recipe I used on Pichet Ong's Kabocha Squash Cheesecake is one of my favorites and next time i'll probably substitute it in.

Sometimes my baking really reflects my mood. I'm still stuck in an empty, stressful, unmotivated funk. Lots of friends have moved away and my new apartment building gives me less opportunities to cook for people. I'm not sure if I need to take a break or simply find a new outlet for my work.

Apple Cheesecake Brulee
adapted from Tish Boyle's The Cake Book
Apple Layer:
2 medium granny smith apples
1 tbsp fresh squeezed lemon juice
2 tbsp unsalted butter
2 tbsp granulated sugar
3 tbsp heavy cream

Cinnamon Graham Cracker Crust:
1 1/4 cups (150g) cinnamon graham cracker crumbs
3 tbsp granulated sugar
4 tbsp unsalted butter, melted

Cream Cheese Filling:
1 1/2 pounds cream cheese, softened
1 1/2 cups granulated sugar
2 tsp vanilla extract
1/4 tsp ground cinnamon
1/4 tsp ground ginger
1/2 cup sour cream at room temp
1 tbsp corn starch
4 large eggs, at room temp

Brulee Topping:
1 1/2 tbsp granulated sugar

1. Position a rack in the center of the oven and preheat oven to 350. Grease the bottom and sides of a 9x3 springform pan. Cut an 18in square of heavy duty aluminum foil and wrap the foil around the outside of the pan.

2. Make the apple layer. Peel and core the apples and slice them in half. Cut them into 1/4 inch slices (don't cut too thin!) and place them in a bowl with the lemon juice, tossing the slices so they are evenly coated.

3. Melt the butter in a large skillet over medium high heat. When the butter is bubbling, add the apples and saute for 2 minutes. Sprinkle the sugar over the apple and continue to cook, stirring frequently until the apples are nicely browned, about 5 minutes. Add the cream and continue to cook until the apples are tender, about 10 mins. Remove skillet from heat and set the apples aside to cool.

4. Make the crust: in a medium bowl combine the crumbs, sugar, and butter. Pat the mixture evenly into the bottom of the prepared pan. Bake the crust for 8 minutes.

5. Set the pan on a wire rack and cool the crust completely. Reduce the oven temperature to 325.

6. When the apples are cool, arrange a tight circle of slices, without overlapping them, around the edge of the pan, on top of the crust. Arrange another circle of slices in the center, covering the crust completely.

7. Make the filling: In the bowl of an electric mixer, using the paddle attachment, beat the cream cheese at medium-low speed until creamy and smooth, about 2 minutes. Gradually add the sugar and beat until blended. Add the vanilla extract, salt, cinnamon, ginger, sour cream, and corn starch and mix until well blended. At low speed, add the eggs one at a time, mixing well after each addition and scraping down the sides of the bowl with a rubber spatula as needed.

8. Scrape the batter over the apple layer. Place the pan in a roasting pan or large baking pan. Pour enough hot water into the roasting pan to come about 1 inch up the side of the springform pan. Bake the cake in the water bath for 70 to 80 minutes, until the center is set but still slightly wobbly (the cake will continue to set up as it cools.) Remove the pan from the water bath and set it on a wire rack to cool completely.

9. Refrigerate the cheesecake for at least 4 hours before caramelizing the top.

10. Run a thin bladed knife between the edge of the pan and the cake to loosen it. Remove the side of the pan. Sprinkle the sugar over the top of the cake, covering it with a very thin, even layer. Caramelize the sugar with a butane or propane torch, holding it about 2 inches from the surface of the cake and slowly moving it over the top until the sugar melts and turns golden brown.

Monday, October 22, 2007

Sweet and Spicy Nuts.

I had a library student potluck last night. The blackout cake went over well; the outer frosting got way too hard in the fridge, but the inside was very moist. I'd happily eat a bowl of the pudding filling by itself.

I also made this recipe for Sweet and Spicy Nuts from The Macrina Bakery and Cafe Cookbook. I have no photo because everyone ate them! The cayenne pepper gives these spiced nuts a pleasant kick. They'd make a good holiday gift or holiday party contribution. Feel free to substitute other nuts; I used 2c walnuts, 1c almonds/pecans, and 1c hazelnuts.

Sweet and Spicy Nuts
1 cup whole almonds
1 cup whole peanuts
1 cup whole pecans
1 cup walnut halves
1 tsp cinnamon
1/2 tsp ground allspice
1/4 tsp ground cardamom
1/2 tsp ground ginger
1/4 tsp ground black pepper
1/2 tsp cayenne pepper
1/2 tsp kosher salt
1/2 cup honey
1/2 cup light corn syrup

Preheat the oven to 350. Line a rimmed baking sheet with parchment paper, then brush the top of the paper with canola oil.

Combine almonds, peanuts, pecans, and walnuts in a medium bowl.

Combine cinnamon, allspice, cardamom, ginger, pepper, cayenne and salt in a small bowl. Mix well, then pour the spice mixture over the nuts and toss together thoroughly.

Combine honey and corn syrup in a medium saucepan and place over low heat, stirring frequently, until the mixture is just warm. Pour the mixture over the nuts and toss together until the nuts are evenly coated.

Pour the nuts onto the prepared baking sheet and spread them in a single layer. Bake on a center rack of oven for 15-20 minutes, or until the nuts take on a rich mahogany color. Let the nuts cool completely. At this point they will have formed a single, crispy layer in the baking sheet. Break the nuts apart with your hands and store in an airtight container. Store in a cool place, as heat will melt the syrup on the nuts and make them sticky.

Tuesday, October 2, 2007

Gingersnaps.

Gingersnaps

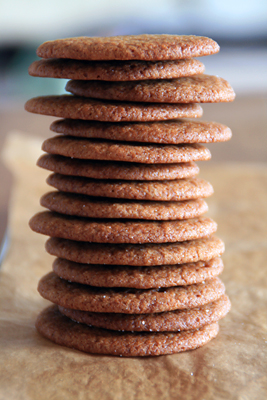
I finally ordered a copy of The Sweet Life: Desserts from Chanterelle. These gingersnaps won me over; I could eat the whole pile in one go.

These aren't snappy, toothbreaking gingersnaps: They're crisp right around the edges, but soft in the middle. I baked one batch for 10 minutes and the other for 15. The second batch had much crispier edges, but still stayed chewy.

The flavors are really well balanced. I like my gingersnaps with more cloves than usual, so the 1.5 tsps in this recipe was perfect.

Gingersnaps
adapted from The Sweet Life: Desserts from Chanterelle

18 tbsp butter, at room temperature
1 1/4 cups packed light brown sugar
2 eggs, at room temperature
1/2 tsp salt
2 tsp baking soda
2 1/4 cups flour
2 tsp powdered ginger
1.5 tsp ground cloves
1.5 tsp ground cinnamon
1/4 cup molasses
1 cup raw sugar, or granulated sugar.

Place the butter in the bowl of a stand mixer fitted with the paddle attachment and beat on medium speed for 1 minute. Add the light brown sugar and beat on medium-high speed until the mixture becomes fluffy and lighter in color, 6 to 8 minutes, stopping the mixer occasionally to scrape down the sides of the bowl. Add the eggs, one at a time, and continue to beat until they are fully incorporated and the batter looks smooth and glossy, 1 to 2 minutes.

In a dry bowl, whisk together the dry ingredients. Add the dry mixture, all at once, to the butter mixture. Using a rubber spatula, fold together for a few turns. With the mixter on slow speed, mix the dough until thoroughly combined, 1 minute.

Add the molasses and mix until incorporated. Cover the dough with plastic wrap and refrigerate for at least 2 hours.

Preheat the oven to 350. Line baking sheets with parchment or silicone. Place the raw sugar in a small bowl. Pinch off 1.5 inch pieces of batter and roll into balls. Roll each ball in the sugar to coat. Arrange the cookies on the prepared sheet 2 inches apart and press your thumb in the center of each cookie to flatten it a bit. Bake until the cookies spread, crack a bit, and take on a dark golden brown color, 10-15 minutes.

Monday, September 10, 2007

Kabocha Squash Cheesecake

Kabocha Squash Cheesecake

Kabocha Squash Cheesecake

I need to have more faith in cookbooks. Lately i've been so wary even though the recipes have been great!

Fall is just around the corner. I'd been in the mood for comforting, spiced baked goods, so I picked up a 3 lb red kabocha squash from the Food Co-op and decided to try Pichet Ong's recipe for Kabocha Squash Cheesecake.

This isn't your average cheesecake. It's a little more like a pumpkin pie in that the filling has a very high ratio of squash flesh to cream cheese. Consequently, it's not nearly as dense and retains that silky but not mushy texture of good pumpkin pie.
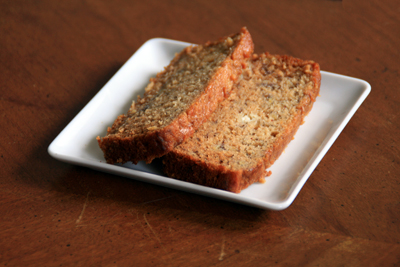
The crust is amazing too. I worried the Mi-Del graham crackers would be too dense, but they worked perfectly. The crust is a little thicker than usual, and it stayed nice and crunchy. I loved the balance of spices too!

A nice dollop of whipped cream would suit if the cake isn't quite rich enough for you. The cookbook suggests a little condensed milk chantilly cream. I will probably make this for Thanksgiving.


Kabocha Squash Cheesecake with Walnut Crust
adapted from Pichet Ong's The Sweet Spot
Kabocha Squash Filling
one 3 lb kabocha squash
8 oz cream cheese, at room temp
1 cup sugar
1.5 tsp ground cinnamon
1 tsp ground ginger
1/3 tsp nutmeg
1/2 tsp salt
1.5 tsp brandy (I used rum.)
2 large eggs, room temp

Walnut Crust
1/4 cup unsalted butter, melted
1/2 cup walnuts
1/2 cup packed light brown sugar
11 graham crackers (174 g), crushed into fine crumbs, about 1.5 cups
(I used mi-del honey grahams.)
2 tsp grated lime zest
1/2 tsp cinnamon
1/8 tsp ginger
1/4 tsp salt

1. To make the filling: Prepare a steamer by filling a large round casserole with water to a depth of 3 inches; the casserole should be able to hold the squash comfortably and have a tight fitting lid. Put a steamer rack or enough crumpled heavy-duty foil to support the squash on the bottom; the rack or foil should be just above the waterline. Set over medium heat and bring to a steady simmer. Put the whole squash on the rack, cover the pot, and steam until a knife pierces the flesh easily (about 1hr.)

2. Remove from the heat, uncover the pot, and cool the squash in the steamer until cool enough to handle.

3. Meanwhile, make the crust: Preheat the oven to 325. Lightly butter a 9-inch springform pan, line with paper and butter the paper. Set aside.

4. Spread the walnuts on a rimmed baking sheet and toast, shaking the pan occasionally, until fragrant, about 15 minutes. Cool completely. Turn the oven down to 300.

5. Put the walnuts and 1/4 cup of the brown sugar in the bowl of a food processor and pulse until the walnuts are coarsley ground. Transfer the walnuts to a mixing bowl and add the graham cracker crumbs, zest, cinnamon, ginger, and salt, and the remaining 1/4 cup brown sugar. Mix well, then add the melted butter and mix with your hands until everything is moistened. Transfer the mixture to the prepared pan and press into an even layer on the bottom.

6. Bake the crust until golden brown, about 12 minutes. Cool completely. Leave the oven on.

7. When the squash is cool enough to handle, remove it from the steamer, cut it in half, and scoop out and discard the seeds and strings. Scoop out 2.5 cups of the squash flesh into a small bowl. Reserve any remaining squash for another use.

8. Put the cream cheese, sugar, cinnamon, ginger, nutmeg, and salt into the bowl of a food processor and process, scraping down the sides and bottom of the bowl occasionally, until the mixture is light and smooth. Add the squash and process again, scraping down the sides of the bowl of the bowl occasionally, until smooth. Add the brandy and eggs and process until just incorporated. Transfer to a bowl and finish mixing with a rubber spatula.

9. Transfer the filling to the cooled crust. Bake until the center is set but still slightly jiggly, about 1 hour. Cool completely and unmold.

NOTES: I think steaming your squash upside down would be good. The top of my squash was much thicker than the bottom, and didn't quite cook all the way through.

Keeping the walnuts pretty coarse adds a nice crunch.

Sunday, August 26, 2007

Pichet Ong's Banana Cake.

Pichet Ong's Banana Cake

This is the first recipe in Pichet Ong's The Sweet Spot and it's a great starting point. Many of the recipes are familiar with interesting twists: ginger pastry cream in a banana cream pie, perhaps a touch of matcha, yuzu, or condensed milk...

I really enjoyed this cake because it's different from your typical banana bread. I used a wildflower honey, but I think something a little darker would have been fantastic. Really try to avoid over mixing. Even if there are a few pockets of yogurt/sour cream, the cake will be incredibly tender.

Banana Cake
adapted from Pichet Ong's "The Sweet Spot"

1/3 cup unsalted butter, at room temperature, plus more for greasing the pan
1 cup all purpose flour
1 tsp baking powder
1 tsp baking soda
1/4 cup honey
1/2 cup light brown sugar
1/2 tsp ground cinnamon
1/2 tsp salt
1 cup (228g) roughly mashed baby bananas
1/2 tsp vanilla
1 large egg
1/2 cup plain whole milk yogurt or sour cream
1 cup semisweet chocolate chips (optional)

1. Preheat the oven to 350. Lightly butter an 8.5x4.5in loaf pan and set aside.
2. Sift together the flour, baking soda, and baking powder and set aside
3. Put the butter, honey, sugar, cinnamon, and salt in the bowl of an electric mixer fitted with the paddle attachment. Beat the mixture on medium high speed until light and fluffy- about 5 minutes. Scrape down the sides and bottom of the bowl and add the bananas and vanilla, beating on medium speed until the mixture looks "broken" or lumpy, about 1 minutes. The bananas should be smashed, with a few small chunks remaining.
4. Turn the speed to medium low and beat in the egg until incorporated. Turn the speed to low and gradually add the sifted flour mixture, mixing just until no traces of flour remain- about 10 seconds. Add the yogurt and mix until the batter has only a few remaining white streaks- about 5 seconds. Be sure to avoid over mixing. Gently fold in the chocolate, if desired.
5. Transfer the batter to the pan. Bake in the center of the oven until a tester comes out clean, about 45 minutes. Cool the cae in the pan on a rack for 5 minutes, then unmold and cool completely on the rack.