Wednesday, February 25, 2009

Thrift Store Finds: Enamelware

On Saturday, I decided to visit the South Hills and Avalon locations of Red White and Blue. It's a thrift store i've used for years to find vintage bakeware, melamine dishes, enamelware, polaroid cameras, roller skates, cheap vases, tablecloths, curtains, clothes arranged by color, and other funky bric-a-brac.

The last time I went there, I found an awesome dish set and a square tube pan. This time, I found some nice pieces of enamelware:

Thrift Store Finds

Thrift Store Finds

I have a thing for brightly colored enamelware. This pot's yellow lid caught my eye, and several women in the store mentioned they'd looked at it when I headed towards the checkout. The exterior needed some cleaning, but otherwise it looked new. I'll probably use it to make some baked oatmeal this Sunday.

The teapot is brand new and from Japan. It had the original care and cleaning instructions inside! For removing rust and stains/mineral deposits, it suggests boiling water with 2 tbsp baking soda and the juice of half a lemon for 45 minutes. I tried this technique on a badly tea-stained saucepot and it worked fairly well. Martha Stewart has additional guidelines on caring for vintage enamelware here here.

I highly recommend checking out Red White and Blue if you haven't been to one. They are massive!

Monday, February 23, 2009

Nibby Buckwheat Butter Cookies

Nibby Buckwheat Butter Cookies

Nibby Buckwheat Butter Cookies

Some cookies are best small. To be honest, i've never liked the big-as-your-head cookies found in so many bakeries and coffee shops. They often sacrifice good flavor and texture for size. I'm much happier with a good cup of coffee that has some dainty cookies perched on the saucer.

I liked these Sea Salt and Cocoa Shortbreads so much that i've been exploring other recipes for butter cookies. I love the crisp, crumbly texture that comes from proper mixing and the occasional addition of corn starch or gluten-free flours (they contribute to the "shortness" of the cookie).

These Nibby Buckwheat Butter Cookies were highly recommended by several bloggers, so I decided to try them. The original recipe is for slice-and-bake cookies, but I used a star shaped cutter instead. I used to think cut-out cookie required too much labor, but i've been more willing to make them since I started rolling out the soft dough inside of ziplock bags (a tip you can see demonstrated in this post).

I made a half-batch of dough, which still yielded plenty of small cookies. Since I was out of vanilla extract, I used the seeds from half a vanilla bean and saved the pod to make vanilla sugar. I also lightly toasted the cocoa nibs to improve their flavor, and sprinkled a little sea salt over the top of the dough.

The finished cookies are perfect for tea or snacking. They're not too sweet, and they're small enough that most people will happily indulge in a few. You can find Alice Medrich's original recipe here, courtesy of 101 Cookbooks.

Wednesday, February 18, 2009

Chocolate Chip Cookie Bars

Chocolate Chip Cookie Bars

I borrowed Flo Braker's latest cookbook, Baking for all Occasions, a few weeks ago. I didn't get a chance to try many recipes before I had to return it, but I photocopied a few for future testing. The recipes are interesting- many of them have creative names and mix new flavors with old techniques (a streusel topped cake with fresh pineapple and hazelnuts, anyone?)

This recipe for a Chocolate Chip Cookie Cake caught my eye because it's simple, versatile, and yields a large quantity. It's basically a chocolate chip cookie dough that's pressed into a 9x13 pan and sliced into squares. Braker's book includes instructions for turning the same dough into individual cookies or chocolate chip biscotti.

For this recipe, it's important to use well softened butter. The goal is to incorporate as little air into the dough as possible to make the texture more like a cookie than a cake. The texture will also vary greatly with baking time- the cake becomes crunchier the longer you bake it. Nuts and chocolate chips play a big role in flavor, and you'll have very different results depending on what you use.

The finished bars aren't as rich tasting as some blondies or cookies. I'm interested in trying a variation using more brown sugar, or peanut butter. Both could lead to a chewier texture. I like using big pieces of chocolate for a nice visual and textural contrast. I used Nestle chocolate chunks for this batch, but any large chocolate pieces would work well.

These were a huge hit at work, and several people asked for the recipe. Over a few days, the texture improved and the cinnamon flavor became more pronounced. I only used 1/2 tsp cinnamon and the flavor was still quite strong. The bars are great snacks to have on hand and they keep for a relatively long time. I usually line the pan with foil so I can just lift the bars out when they're done.

Chocolate Chip Cookie Cake
adapted from Flo Braker's Baking for all Occasions

2 1/3 cups (300 grams) all-purpose flour
2/3 cup (130 grams) granulated sugar
2/3 cup (130 grams) light brown sugar
1 tsp salt
1/2 tsp baking soda
1 tsp ground cinnamon or 1/2 tsp ground cardamom (optional)
2 sticks (225 grams) unsalted butter, softened
1 large egg
1 tsp pure vanilla extract
2 cups (340 grams) semisweet chocolate chips
1 cup (115 grams) chopped walnuts, pecans, hazelnuts, or a combination
*You can omit the nuts and mix in an additional 1 cup (170g) chocolate chips

1. Center a rack in the oven and preheat to 350F. Have ready a 9x13 inch pan.

2. In a stand mixer fitted with the paddle attachment, combine the flour, sugars, salt, cinnamon (if using), and baking soda and mix on the lowest speed just until blended. Add the butter and continue to mix until small, moist crumbs form that look similar to streusel, about 1 minute. Add the egg and vanilla and beat on low speed until the mixture begins to form a cohesive dough. Increase the speed to medium and add the chocolate chips and nuts. Beat just until they are incorporated- 20 to 30 seconds.

3. Spoon dollows of the thick dough evenly over the bottom of the baking pan with a rubber spatula. To distribute the dough evenly, lay a sheet of plastic wrap or parchment paper over the dough and pat it evenly with your fingertips.

4. Bake the cake until it is golden brown and feels more solid than soft when pressed in the center- 37-40 minutes. Be careful not to overbake- it will firm as it cools. Transfer to a wire rack and let cool in the pan for 30-35 minutes.

5. Slip a thin metal spatula between the cake and the pan and run the spatula along the entire perimeter of the pan. Lift the pan, tilt it slightly, and tap it on a counter to help release the cake. Invert the cake onto a wire rack and lift it out of the pan. Invert so it is right side up and let cool completely.

If serving within 2 days, wrap the cake in foil and store at room temperature. For longer storage, freeze for up to 1 month. Thaw at room temperature for about 3 hours.To serve, cut the cake into squares, rectanges, or sticks with a sharp knife.

Friday, February 6, 2009

Sea Salt and Cocoa Shortbread

Sea Salt and Cocoa Shortbread

Sea Salt and Cocoa Shortbread

I think culinary encouragement goes a long way, especially for avid bakers and food bloggers.

You reach a point where the learning curve plateaus and the people you’re feeding assume everything you create will be delicious and beautifully photographed. And believe me, it’s pretty disappointing when you spend hours preparing something, only to have a good friend pick at their plate and say polite things like “it’s okay” or “it’s pretty good” or “I’m just not that hungry.”

Furthermore, there’s a sort of social detachment that comes with increased culinary ability. Suddenly, people don’t want to share their cooking with you, or they preface edible gifts with statements like “I made you these cookies, but you probably won’t like them” or “here is this pastry, but it’s store-bought so you don’t have to eat it.”

So, it can be pretty tough when everything starts to go wrong. I found it very comforting that a bad week in the kitchen had Molly of Orangette on the verge of tears. Her description of failed dough as “oat-and-brown-sugar hummus” is priceless, and probably familiar to more than one baker.

One of the things I love most about food blogs is that sense of shared baking failure that follows a post like Molly’s. Suddenly everyone has a kind word and a story about flipping pancakes onto the floor, cleaning spilled batter out of the oven, or substituting/omitting ingredients with disastrous results. And, in many cases, people will share a fantastic recipe to compensate for the troublesome one.

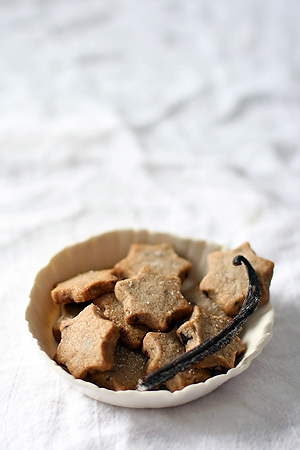
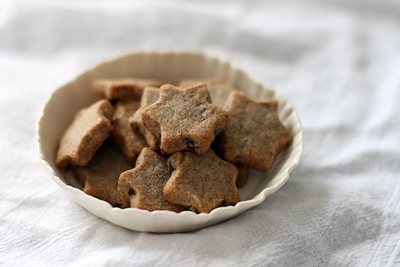
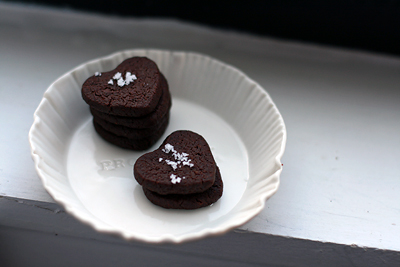
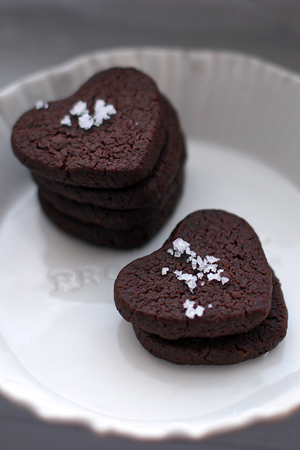
I, too, have weeks where all recipes fail, and the possibility of baking something great is utterly squashed. I’ve been testing chocolate recipes for an upcoming presentation, and some of them were just terrible! Luckily, these sea salt and shortbread cookies turned out very well. They’re quite rich, and I think they’re best small, maybe served on a saucer alongside some coffee. The crisp, crumbly texture is addictive.

I roll out the soft dough inside of a gallon-sized plastic bag, chill it, and then cut it into shapes. It’s best to leave the bag open while you do this, so air can escape. Dorie Greenspan gives a good description of this technique in Baking From my Home to Yours, which you can view here.

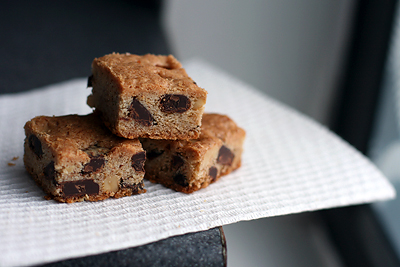
Chocolate Shortbread with Cacao Nibs and Sea Salt
Adapted from Elizabeth Falkner’s recipe in The Essence of Chocolate

1 cup all purpose flour
¾ cup unsweetened cocoa powder
¼ cup + 2 tbsp cocoa nibs, crushed with a rolling pin
1 tsp fine or coarse sea salt (I used fleur de sel)
12 tbsp unsalted butter, at room temperature (don’t use cold butter!)
½ cup granulated sugar
1 tsp vanilla extract

Preheat the oven to 325F. Line two baking sheets with parchment paper or silicone mats.

Sift the flour and cocoa into a small bowl and whisk to combine. In another bowl, combine the nibs and sea salt.

In the bowl of a stand mixer fitted with the paddle attachment, cream the butter and sugar on medium speed for about 5 minutes, until light and fluffy, stopping occasionally to scrape the sides and bottom of the bowl. Mix in the vanilla. Add half of the flour mixture and mix on low speed. Add the remaining flour mixture, stopping as necessary to scrape down the bowl. Once incorporated, mix on medium speed for 1-2 minutes, or until well combined. Mix in the nibs and salt. (The dough can be refrigerated, well wrapped, for up to 1 week, or frozen for up to 2 months).

On a lightly floured board or between two pieces of parchment paper, roll the dough into a square ¼ inch thick. Cut into 1 by 2.5 inch rectangles or other desired shape, and place on the prepared pans about 1 inch apart (they will spread a little).

Bake for 15 minutes. It is sometimes difficult to tell when these are done- one of the best indications is the smell of baked cookies in the air. When the cookies are nudged, they shouldn’t feel soft, but the bottoms should seem crisp. Avoid over-baking to avoid a bitter flavor.

Remove from the oven and transfer shortbread to a cooling rack to cool completely. The cookies can be stored in an airtight container for up to 1 week.

Tuesday, February 3, 2009

Black and Gold Baking

Marble Cake

Rice Krispie Treats

Rice Krispie Treats

Over the weekend, Pittsburgh bakeries, grocery stores, and Eat'n Parks cranked out seemingly enough black and gold sweets to fill a football stadium. Bakery workers in Johnstown worked overtime. By Friday my grocery store was sold out of individually packaged yellow food coloring, and a friend told me she couldn't find yellow sprinkles anywhere.

Despite our local enthusiasm, I don't really associate the super bowl with baking. While many newspapers run a super bowl themed food section, they tend to focus on savory items. All of the Post Gazette's reader recipes were savory, and I noticed that most of my friends/coworkers preferred purchasing Steelers baked goods to making them.

In some cases, it makes sense that savory super bowl fare outshines the sweet; i'd much rather eat wings, pierogies, and sauerkraut than oversized sugar cookies and artificially colored cupcakes. Still, I think some people avoid baking for a crowd because they assume it is difficult and expensive and yields a mediocre product. And sometimes it's hard to resist the novelty of a storebought cake shaped like a football field.

Two days before the super bowl, I felt a rush of Steelers fever and decided to find some simple recipes that would be appetizing, even if I had to spend extra money for the multi-pack of food coloring. I have an aversion to black food coloring, so I picked recipes that used cocoa for color contrast.

I added yellow food coloring to a plain batch of rice krispie treats and to the plain batter in this tried and true recipe for marble cake. The chocolate rice krispie treats are from Lora Brody's Chocolate American Style. The recipe is a simple but potent variation on the traditional one. Be sure to use a good-flavored cocoa as it really impacts the taste. I used dutch-process cocoa from Penzey's.

If you're hungry for more black and gold baking, check out these black and gold pastries from Jean-Marc Chatellier, or the "Steelers Cupcake" flickr results.

Chocolate Cereal Treats
adapted from Lora Brody's Chocolate American Style
4 tbsp unsalted butter
1 10oz bag of mini marshmallows
2/3 cup dutch-process cocoa powder
6 cups rice krispies (or 4 cups + 2 cups cheerios)
1/2 cup dried sweet or tart cherries (optional)

Butter a 9x13in pan. In a large saucepan or pot, combine the butter and marshmallows. Cook and stir over low heat, until the marshmallows are almost completely melted. Add the cocoa powder and stir until the mixture is smooth and even-colored. Turn off the heat and stir in the cereal. Scrape the mixture into the prepared pan and use a piece of wax paper or plastic wrap to smooth the mixture in the pan. Sprinkle the cherries over the cereal and use the paper or plastic to press them in gently.

When fully cooled, turn the contents out of the pan onto a cutting board and cut into squares. Store in an airtight container at room temperature for up to 1 week.