Sunday, March 30, 2008

Sbrisolona- Italian Crumbly Cake

Sbrisolona

Sbrisolona

Sometimes, I choose recipes because I know exactly where to find the ingredients. When I read some grumpy comments regarding Gina DePalma's use of "specialty ingredients" like almond flour, chestnut flour and "00" flour, I thought haha! "00" flour and chestnut flour are on a shelf near the pasta at Penn Mac.

Pittsburgh is a great city for bakers. In California, I drive three or four places before I have everything I need. Here, I can walk two blocks to the Indian mini-mart and choose from several types of shredded coconut. I can take a quick bus to the Strip District and pick up chestnut cream, salt cod, lavender, dulce de leche, or twenty kinds of fish sauce.

I try to restrain myself and avoid buying things I don't need, but I do keep an eye out for ingredients. I ogle the baking aisles at Whole Foods and the East End Food Co-op. I wander into random Asian or Eastern European grocery stores and make a mental note of what they have. It's relaxing, in a way.

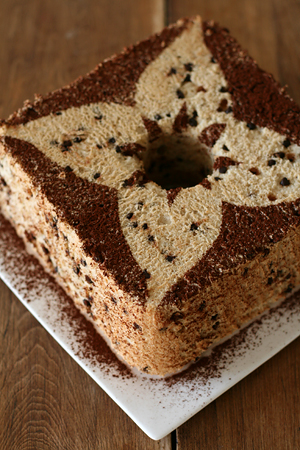
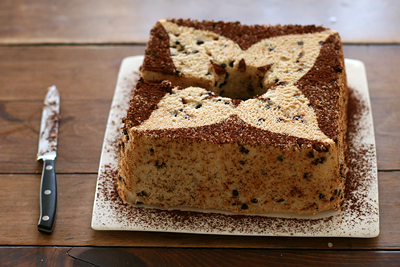
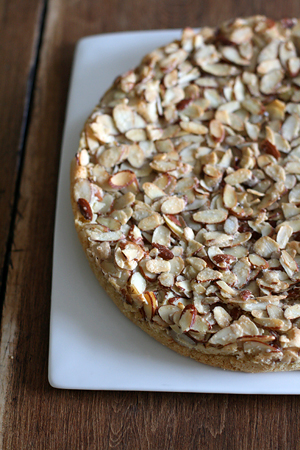
I picked this recipe because I was curious about the flour. "00" flour is very finely milled flour with as much of the germ and bran removed as possible. It was interesting; the batter was extremely thick and the finished cake was dense and chewy with a fine crumb.

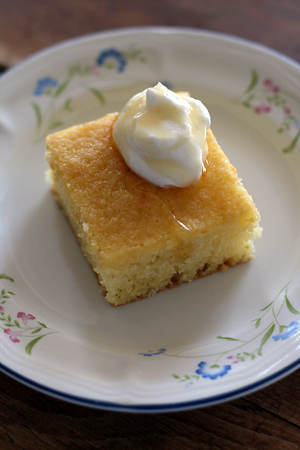
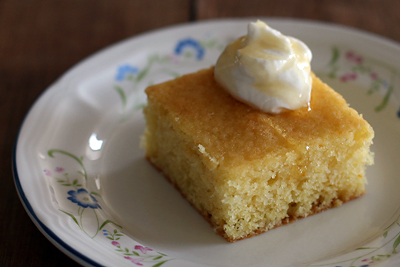
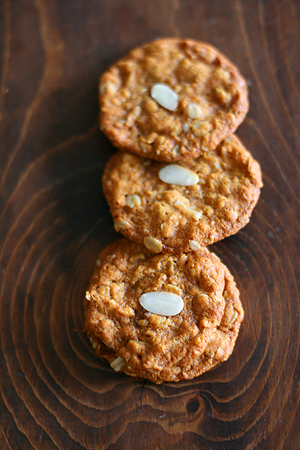
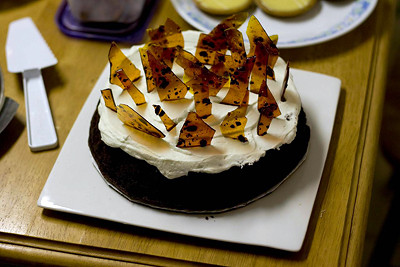
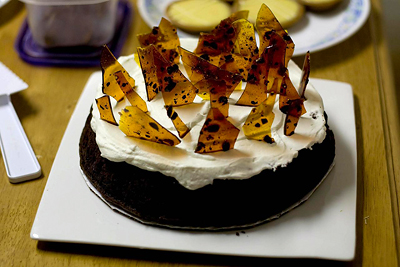
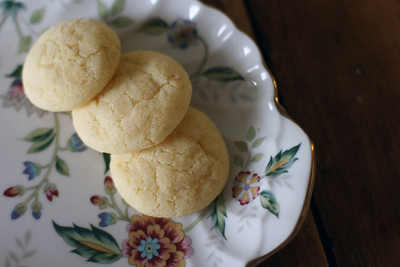
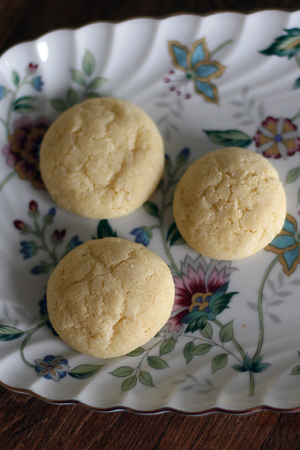
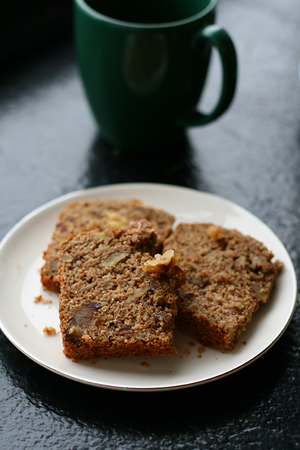
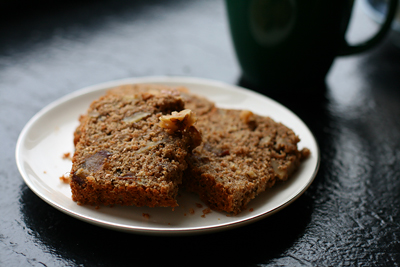
I'd say this cake was worth buying the extra ingredients. After it cooled, I sat down and had a large piece with a cup of coffee. The flavors were clean and simple: vanilla and almond with a hint of cinnamon. The crunchy, toasted almond topping was nice too. I broiled it a little for color. I thought it tasted very Italian, if that means anything. It also reminded me a little of sugar cookie dough, which seems like a weird association.

Italian Crumbly Cake
from Gina DePalma's Dolce Italiano
makes one 10-inch cake, approximately 10 servings

For the cake
1 1/4 cups "00" flour
1/4 cup almond flour
1/2 tsp kosher salt
1/2 tsp baking powder
1/2 tsp ground cinnamon
1 large egg
4 large egg yolks
1 cup granulated sugar
1 tsp pure vanilla extract
1/2 cup (1 stick/4oz) unsalted butter, melted and cooled

For the topping
1 1/2 cups sliced blanched almonds
1 large egg white
3 tbsp granulated sugar

Preheat the oven to 325F and position a rack in the center. Lightly grease a 10-inch springform pan* with nonstick cooking spray or butter, dust it with flour, and tap to knock out the excess.

To make the cake: In a medium bowl, whisk together the "00" flour, almond flour, salt, baking powder and cinnamon and set aside.

In an electric mixer fitted with the paddle attachment, beat the egg, egg yolks, and sugar on medium speed until they are thick and pale yellow, about three minutes. On low speed, add the dry ingredients and beat well, scraping down the sides of the bowl. Beat in the vanilla extract, followed by the melted butter. Switch to medium speed and beat for 30 seconds.

Spread the batter evenly in the prepared pan and smooth the top with a spatula.

To make the topping: Put the sliced almonds in a medium bowl. Lightly beat the egg white in a small bowl with a fork until it is foamy and light, then pour half of it over the almonds, stirring to coat them evenly (discard the rest of the egg white). Sprinkle the almonds with the sugar and toss to coat them. Spread the almond topping evenly over the surface of the batter.

Bake the cake for 25-30 minutes, or until it is springy to the touch and golden brown on top and a cake tester inserted in the center comes out clean. Allow the cake to cool for 10 minutes in the pan, then remove the sides and allow the cake to cool completely on a wire rack.

To serve, carefully remove the bottom of the springform pan with an offset spatula and transfer the cake to a serving plate. Any leftover cake can be wrapped in plastic and served the next day.

*I used a plain 10 inch cake pan lined with foil. I inverted it onto a rack, then placed another rack on top of the cake and turned it right-side up.

Perfect Party Cake.

Perfect Party Cake

Perfect Party Cake

I recently joined The Daring Bakers, a group of bloggers who agree to bake a chosen recipe each month. This month, the challenge was Dorie Greenspan's Perfect Party Cake from Baking From my Home to Yours. Since i'd made the cake before, I decided to challenge myself with a flavor variation.

This cake lends itself to experimentation; the buttercream recipe is extremely forgiving and the cake layers are sturdy enough to slice and move easily. I flavored my cake layers with almond extract and orange zest and substituted the lemon juice in the buttercream for orange juice. I toasted some sliced almonds for the topping to keep with the orange/almond theme.

The complicated part of this cake was the filling. Instead of the listed buttercream/jam filling, I decided to substitute Sherry Yard's Creme Chiboust recipe from The Secrets of Baking. Creme Chiboust is a pastry cream that's usually lightened with whipped cream or beaten egg whites and gelatin.

I flavored my pastry cream with vanilla beans and orange zest. After incorporating the egg whites I built the cake in a setting ring lined with cake ribbon/transfer sheets. The unchilled filling is too loose to use without a ring. The filling made my cake unbelievably tall- it took the entire buttercream recipe just to frost the top and sides.

When I unmolded the cake to frost it, I was convinced it would fall apart or have big chunks of gelatin in it. I shouldn't have worried so much- it set perfectly and made frosting the outside easy. I think I this was the fastest, neatest frosting job i've ever done! I the cake for a small party and people enjoyed it. It tasted like a light, fluffy burnt almond torte.

Perfect Party Cake
adapted from Dorie Greenspan's Baking from my Home to Yours.

For the Cake
2 1/4 cups cake flour
1 tablespoon baking powder
½ teaspoon salt
1 ¼ cups whole milk or buttermilk (I prefer buttermilk with the lemon)
4 large egg whites
1 ½ cups sugar
2 teaspoons grated lemon zest
1 stick (8 tablespoons or 4 ounces) unsalted butter, at room temperature
½ teaspoon pure lemon extract

For the Buttercream
1 cup sugar
4 large egg whites
3 sticks (12 ounces) unsalted butter, at room temperature
¼ cup fresh lemon juice (from 2 large lemons)
1 teaspoon pure vanilla extract

For Finishing
2/3 cup seedless raspberry preserves stirred vigorously or warmed gently until spreadable
About 1 ½ cups sweetened shredded coconut

Getting Ready
Centre a rack in the oven and preheat the oven to 350 degrees F. Butter two 9 x 2 inch round cake pans and line the bottom of each pan with a round of buttered parchment or wax paper. Put the pans on a baking sheet.

To Make the Cake
Sift together the flour, baking powder and salt.
Whisk together the milk and egg whites in a medium bowl.
Put the sugar and lemon zest in a mixer bowl or another large bowl and rub them together with your fingers until the sugar is moist and fragrant.
Add the butter and working with the paddle or whisk attachment, or with a hand mixer, beat at medium speed for a full 3 minutes, until the butter and sugar are very light.
Beat in the extract, then add one third of the flour mixture, still beating on medium speed.
Beat in half of the milk-egg mixture, then beat in half of the remaining dry ingredients until incorporated.
Add the rest of the milk and eggs beating until the batter is homogeneous, then add the last of the dry ingredients.
Finally, give the batter a good 2- minute beating to ensure that it is thoroughly mixed and well aerated.
Divide the batter between the two pans and smooth the tops with a rubber spatula.
Bake for 30-35 minutes, or until the cakes are well risen and springy to the touch – a thin knife inserted into the centers should come out clean
Transfer the cakes to cooling racks and cool for about 5 minutes, then run a knife around the sides of the cakes, unfold them and peel off the paper liners.
Invert and cool to room temperature, right side up (the cooled cake layers can be wrapped airtight and stored at room temperature overnight or frozen for up to two months).

To Make the Buttercream
Put the sugar and egg whites in a mixer bowl or another large heatproof bowl, fit the bowl over a plan of simmering water and whisk constantly, keeping the mixture over the heat, until it feels hot to the touch, about 3 minutes.
The sugar should be dissolved, and the mixture will look like shiny marshmallow cream.
Remove the bowl from the heat.
Working with the whisk attachment or with a hand mixer, beat the meringue on medium speed until it is cool, about 5 minutes.
Switch to the paddle attachment if you have one, and add the butter a stick at a time, beating until smooth.
Once all the butter is in, beat in the buttercream on medium-high speed until it is thick and very smooth, 6-10 minutes.
During this time the buttercream may curdle or separate – just keep beating and it will come together again.
On medium speed, gradually beat in the lemon juice, waiting until each addition is absorbed before adding more, and then the vanilla.
You should have a shiny smooth, velvety, pristine white buttercream. Press a piece of plastic against the surface of the buttercream and set aside briefly.

To Assemble the Cake
Using a sharp serrated knife and a gentle sawing motion, slice each layer horizontally in half.
Put one layer cut side up on a cardboard cake round or a cake plate protected by strips of wax or parchment paper.
Spread it with one third of the preserves.
Cover the jam evenly with about one quarter of the buttercream.
Top with another layer, spread with preserves and buttercream and then do the same with a third layer (you’ll have used all the jam and have buttercream leftover).
Place the last layer cut side down on top of the cake and use the remaining buttercream to frost the sides and top.
Press the coconut into the frosting, patting it gently all over the sides and top.

Serving
The cake is ready to serve as soon as it is assembled, but I think it’s best to let it sit and set for a couple of hours in a cool room – not the refrigerator. Whether you wait or slice and enjoy it immediately, the cake should be served at room temperature; it loses all its subtlety when it’s cold. Depending on your audience you can serve the cake with just about anything from milk to sweet or bubbly wine.

Storing
The cake is best the day it is made, but you can refrigerate it, well covered, for up to two days. Bring it to room temperature before serving. If you want to freeze the cake, slide it into the freezer to set, then wrap it really well – it will keep for up to 2 months in the freezer; defrost it, still wrapped overnight in the refrigerator.

Playing Around
Since lemon is such a friendly flavour, feel free to make changes in the preserves: other red preserves – cherry or strawberry – look especially nice, but you can even use plum or blueberry jam.

Saturday, March 29, 2008

A Package from New Zealand!

Package from NZ

Package from NZ

I recently participated in Baking by Mail, a great blogging event hosted by Stephanie of "The Happy Sorceress." It's a food blogger package exchange.

I love getting packages in the mail, especially if they contain food products. I love sending mail too, though I've been negligent with pen-pal correspondence.

I sent a package filled with treats from the Strip District to Smita. I tried to give her things I love eating on a regular basis.

In return, I got a package from Morven all the way from New Zealand! It contained Tim Tams, tea, Marmite, tomato sauce, a calendar, a touring map, a note pad, a plastic kiwi prepping tool, some napkins, and a Cadbury chocolate bar.

I particularly loved the Tim Tams. Morven also sent me some magazines that were probably my favorite part of the package. I love foreign food publications. They're always filled with interesting language, ingredients, and photography. Thank you Morven for the thoughtful treats!

Thursday, March 27, 2008

Spice Cake with Cream Cheese Frosting

Spice Cake

Spice Cake

I can be skeptical about mise en place. I'll measure dry ingredients hours ahead of time, but i'll avoid prepping one thing or another. I tell myself that if I wait, the ingredient will be fresher, the preparation less cumbersome.

There is a reason you're supposed to prepare your ingredients: urgency while baking is dangerous. While carefully pouring eggs into your rapidly whipping stand-mixer, you'll realize that you're supposed to throw in a tablespoon of ginger that you haven't grated. In your rush to peel and grate the ginger, you'll make a bad decision.

In this case, I balanced the microplane over the top of a cereal bowl, figuring the grated ginger could fall into it. This took much more leverage than I anticipated, and the bowl slipped and flew into the air. I fumbled it for several seconds before launching it across the room where it hit the floor and shattered into a million pieces.

I cleaned up the mess, took a few deep breaths, and continued. The rest of the process was pleasant. My whole apartment smelled like brown butter and spices. I served the finished cake later in the evening for my friends who come over to watch Top Chef. They graciously brought montegrappa, apples, pears, crackers, chips, wine, and daffodils.

I'd definitely make this recipe again. It's best served at room temperature the day it's made. Don't be put off by the ginger and molasses; the flavors are subtle and complementary.

Spice Cake
from Cook's Illustrated

Cake
2 1/4 cups unbleached all-purpose flour (11 1/4 ounces), plus extra for dusting pans
1 tablespoon ground cinnamon
3/4 teaspoon ground cardamom
1/2 teaspoon ground allspice
1/2 teaspoon ground cloves
1/4 teaspoon ground nutmeg
16 tablespoons unsalted butter (2 sticks), softened
1/2 teaspoon baking powder
1/2 teaspoon baking soda
1/2 teaspoon table salt
2 large eggs at room temperature
3 large egg yolks at room temperature
1 teaspoon vanilla extract
1 3/4 cups granulated sugar (12 1/4 ounces)
2 tablespoons light molasses or mild molasses
1 tablespoon grated fresh ginger
1 cup buttermilk , at room temperature

Frosting
5 tablespoons unsalted butter , cut into 5 pieces, softened
1 1/4 cups confectioners' sugar (4 1/2 ounces)
8 ounces cream cheese , cut into 4 pieces , softened
1/2 teaspoon vanilla extract
3/4 cup coarsely chopped walnuts, toasted (optional)

1. For the cake: Adjust oven rack to middle position and heat oven to 350 degrees. Grease and flour 13- by 9-inch baking pan. Combine spices in small bowl; reserve 1/2 teaspoon for frosting.

2. Heat 4 tablespoons butter in 8-inch skillet over medium heat until melted, 1 to 2 minutes. Continue to cook, swirling pan constantly, until butter is light brown and has faint nutty aroma, 2 to 4 minutes. Add spices and continue to cook, stirring constantly, 15 seconds. Remove from heat and cool to room temperature, about 30 minutes.

3. Whisk flour, baking powder, baking soda, and salt in medium bowl. In small bowl, gently whisk eggs, yolks, and vanilla to combine. In standing mixer fitted with paddle attachment, cream remaining 12 tablespoons butter with sugar and molasses at medium-high speed until pale and fluffy, about 3 minutes, scraping down sides and bottom of bowl twice with rubber spatula. Reduce to medium speed and add cooled butter and spice mixture, ginger, and half of egg mixture; mix until incorporated, about 15 seconds. Repeat with remaining egg mixture; scrape down bowl again. Reduce to low speed; add about one-third flour mixture, followed by half of buttermilk, mixing until just incorporated after each addition, about 5 seconds. Repeat using half of remaining flour mixture and all of remaining buttermilk. Scrape bowl and add remaining flour mixture; mix at medium speed until batter is thoroughly combined, about 15 seconds. Remove bowl from mixer and fold batter once or twice with rubber spatula to incorporate any remaining flour.

4. Transfer batter to prepared pan. Zigzag the tip of a metal spatula through batter, pulling it to pan edges. Lightly tap pan against counter 3 or 4 times to dislodge any large air bubbles; smooth surface with spatula.

5. Bake until toothpick inserted in center of cake comes out clean, 32 to 37 minutes. Cool cake to room temperature in pan on wire rack, about 2 hours.

6. For the frosting: In bowl of standing mixer fitted with paddle attachment, beat butter, sugar, and reserved 1/2 teaspoon spice mixture at medium-high speed until light and fluffy, 1 to 2 minutes. Add cream cheese one piece at a time, beating thoroughly after each addition. Add vanilla and beat until no lumps remain, about 30 seconds.

7. Run paring knife around edge of cake to loosen from pan. Using spatula, spread frosting evenly over surface of cake. Sprinkle cake with walnuts, if using. Cut into squares and serve.

Sunday, March 23, 2008

Greek Semolina Coffee Cake w/ Orange Syrup

Greek Semolina Cake w/ Orange Syrup

Greek Semolina Cake w/ Orange Syrup

After seeing so many bloggers tackle hot crossed buns, greek easter breads, and marshmallow peeps, I thought I should make something seasonal. I'm not sure this cake counts, but I thought citrus, almonds, and honey were appropriate for spring. I needed a break from the paper i'm writing.

This cake would be nice for breakfast, brunch or tea. Ground almonds give it a dense crumb, and the citrus/rum syrup keeps it moist. It also keeps for an extremely long time, as far as breakfast cakes go. It's good plain, but you can dress it up with some greek yogurt and a drizzle of honey.

Greek Semolina Coffee Cake w/ Orange Syrup
adapted from Carole Walter's Great Coffee Cakes, Sticky Buns, Muffins, and More

Orange Syrup
1 cup sugar
1 cup water
1/4 tsp cream of tartar
3 (3 inch) pieces lemon zest
3 (3 inch) pieces orange zest
2 tbsp light rum

Cake
1 cup sifted all purpose flour, spooned in and leveled
1/2 cup slivered alminds
1 tbsp baking powder
1/4 tsp salt
3/4 cup semolina, preferably greek (or italian).
6 large eggs
1 cup (2 sticks) unsalted butter, slightly firm
1 tsp freshly grated navel orange zest
3/4 cup sugar
1 tsp pure vanilla extract

1. Make the syrup: combine the sugar, water, cream of tartar, and zests in a heavy 2-quart saucepan. Bring to a boil and simmer for 10 minutes. Remove from the heat and stir in the rum. Set aside to cool.

2. Position a rack in the middle of the oven. Heat the oven to 350F. Generously butter a 9x13x2 inch pan and set aside.

3. Combine the flour, almonds, baking powder, and salt in the work bowl of a food processor fitted with the steel blade. Process until the almonds are finely chopped, about 1.5 minutes. Add the semolina and pulse 3-4 times to blend. Set aside.

4. Place the eggs in a medium bowl and whisk until well blended. Set aside.

5. Cut the butter into 1 inch pieces and combine with the orange zest in the bowl of an electric mixer fitted with the paddle attachment. Mix on medium speed until smooth and lightened in color, about 2 minutes. Add the sugar, about 1 tbsp at a time, taking 3-4 minutes, scraping down the side of the bowl as needed. Beat in 1/2 cup of the eggs, taking about 1 minute, and blend in the vanilla.

6. Reduce the mixer speed to low and add the dry ingredients alternately with the remaining eggs, dividing the flour into four parts and the eggs into three parts, beginning and ending with the flour. Scrape down the side of the bowl as needed.

7. Empty the batter into the prepared pan and smooth the top with the bottom of a large soupspoon. Bake for 28-32 minutes. The cake is done when the top is golden brown and firm to the touch, and a toothpick inserted in the center comes out clean.

8. Remove the cake from the oven and place on a cooling rack for 5 minutes. Spoon the cooled syrup over the hot cake. Do this slowly so the syrup thoroughly absorbs into the crumb of the cake. Let stand for at least 3 hours before cutting into 2 inch squares. Store in the pan, tightly covered with foil, for up to 1 week. This cake may be frozen.

Friday, March 21, 2008

Orange Berry Muffins

Orange Berry Muffins

Orange Berry Muffins

I felt very productive yesterday morning. At 6:45 I rolled out of bed, took a shower, and set to making muffins. I figured they could be done before I caught the bus and before my roommates woke up. What roommate wouldn't like waking up to warm muffins?

I must have been sleepy, because I read "1 cup blueberries" as "1 pint blueberries." I threw in one scant cup each of frozen raspberries and blueberries. This didn't hurt the recipe- if anything, it made it more to my taste.

The raspberries added a nice tartness and made the muffins a happy, harlequin color. The fruit really complements the buttermilk taste. These are great for freezing and reheating, as the orange flavor improves after a day or two.

I thought i'd be taking a blogging hiatus. It looks like stress from final projects is making me bake more, not less...I like to call it "productive procrastination." On a random note, don't put parchment paper in the toaster. It burns. A lot.

Orange Berry Muffins
From Dorie Greenspan's Baking From my Home to Yours

Grated zest and juice of 1 orange
About 3/4 cup buttermilk
2 large eggs
3 tablespoons honey
1 stick (8 tablespoons) unsalted butter, melted and cooled
1/3 cup sugar
2 cups all-purpose flour
2 1/2 teaspoons baking powder
1/4 teaspoon baking soda
1/4 teaspoon salt
1 cup blueberries - fresh, preferably, or frozen (not thawed)

Decorating sugar, for topping (optional)

Center a rack in the oven and preheat the oven to 400 degrees F. Butter or spray the 12 molds in a regular-size muffin pan or fit the molds with paper muffin cups. Alternatively, use a silicone muffin pan, which needs neither greasing nor paper cups. Place the muffin pan on a baking sheet.

Pour the orange juice into a large glass measuring cup or a bowl and pour in enough buttermilk to make 1 cup. Whisk in the eggs, honey and melted butter.

In a large bowl, rub the sugar and orange zest together with your fingertips until the sugar is moist and the fragrance of orange strong. Whisk in the flour, baking powder, baking soda and salt. Pour the liquid ingredients over the dry ingredients and, with the whisk or a rubber spatula, gently but quickly stir to blend. Don’t worry about being thorough - the batter will be lumpy and bubbly, and that’s just the way it should be. Stir in the blueberries. Divide the batter evenly among the muffin cups.

Bake for 22 to 25 minutes. If you want to top the muffins with decorating sugar, sprinkle on the sugar after the muffins have baked for 10 minutes. When fully baked, the tops of the muffins will be golden and springy to the touch and a thin knife inserted into the center of the muffins will come out clean. Transfer the pan to a rack and cool for 5 minutes before carefully removing each muffin from its mold.

Wednesday, March 19, 2008

Ranger Cookies

Ranger Cookies

Ranger Cookies

Emily Luchetti never lets me down. When I crack open A Passion for Ice Cream it's usually to make cookies. I'm particularly fond of the pistacio and cocoa nib florentines, as well as the walnut cookies, oat crisps, and brandy snaps. The recipes are simple, straightforward, and consistent. I always get perfect results.

I love eating these. They have all the best qualities of chocolate chip and oatmeal cookies, with a few twists. They're crispy and full of brown sugar flavor without that toothsome over-sugared texture. I used chopped premium organic flaked coconut that I bought from the East End Food Co-op. I liked the bigger pieces, and i'd suggest trying to find the big flakes of unsweetened coconut rather than the fine stuff.

In the book, these ranger cookies are sandwiched with peanut butter ice cream. I prefer them plain with milk or coffee. I'm really looking forward to trying the recipe again with cashews!

Ranger Cookies
adapted from Emily Luchetti's A Passion for Ice Cream

4oz/8tbsp unsalted butter, softened
1/2 cup granulated sugar
1/2 cup dark brown sugar, firmly packed
1 tsp vanilla extract
1 large egg
1 cup all-purpose flour
1/2 tsp baking soda
1/8 tsp baking powder
1/4 tsp kosher salt
1/4 cup unsweetened coconut
1/2 cup (2 oz) unsalted roasted peanuts, coarsely chopped (I used walnuts, and I think cashews would be amazing)
1/2 cup old fashioned rolled oats
1/3 cup chocolate chips

To make the cookies: Preheat the oven to 350F. Line 3 baking sheets with parchment paper.

In a large bowl, beat together the butter and the granulated and brown sugars until smooth and creamy. Stir in the vanilla extract and the egg. Sift together the flour, baking soda, and baking powder. Add the salt. Stir the dry ingredients into the butter mixture. Stir in the coconut, peanuts, oats, and chocolate chips.

Using about 1 1/2 tablespoonfuls for each cookie, place mounds of the cookie dough 3 inches apart on the prepared sheets. Bake until golden brown, about 12 minutes. Let the cookies cool to room temperature before removing them from the pans with a spatula.

Yields 2-3 dozen cookies, depending on size.

Tuesday, March 18, 2008

Lavender Shortbread

Lavender Shortbread

Lavender Shortbread

Shortbread often comes with a warning: don't overwork the dough, otherwise the gluten becomes over developed and your cookies will be tough. Similar precautionary statements precede many recipes for scones, biscuits, quick breads, rolled cookies, and pie crusts.

I have been so thoroughly imbued with the fear of over-mixing and over-kneading that I usually avoid scones and shortbread altogether. I know that high amounts of fat and additions like cornstarch or rice flour can make a flakier, "shorter" dough. I have tried multiple mixing, cutting, slicing, and scoring techniques and still don't quite understand how to get the product I want.

I tend to execute these recipes with a certain amount of paranoia. I tried the green tea cookies from Amai. I stared at the flour and butter mixture as it whirled around in the mixer, and by the time I stopped wondering if the dough was supposed to fully come together or look damp, I had over mixed it beyond all believing.

The best shortbread I ever had was from Tartine in San Francisco. It was extremely light and crumbly and practically melted in my mouth. I think I ate 3-4 pieces in one sitting. When the cookbook came out, I tried making the recipe and ended up with underbaked, falling-apart shortbread that ended up in the trash.

This lavender shortbread recipe from the LA Times made me want to try again. Sadly, I still couldn't get my dough to come together. I flattened it out inside of a ziplock bag, chilled it, and sliced it into squares. I had to put the tray back in the oven several times because I kept pulling the cookies out too early.

In the end they tasted good, even if they didn't look as delicate as the ones in the newspaper. They didn't have the texture I wanted, but the flavor was good and I think most lavender lovers will enjoy them. Give them a dusting of powdered sugar, if you like.

Akasha's lavender shortbread
from The Los Angeles Times

Adapted from Akasha Richmond of Akasha Restaurant, Bar & Bakery in Culver City.

1/2 pound (2 sticks) butter
1/4 teaspoon fine sea salt
1 1/4 cup (loosely-packed, or 4 ounces) powdered sugar, plus additional for dusting
1 tablespoon dried lavender blossoms
2 egg yolks
1 teaspoon vanilla extract
3 cups flour

1. In the bowl of a stand mixer with the paddle attachment, or in a large bowl using a hand mixer, cream the butter with the sea salt, powdered sugar and lavender until light and fluffy.

2. Add the egg yolks, one at a time, beating well after each addition. Add the vanilla and beat until combined, about 10 seconds. Fold in the flour by hand, mixing lightly just until incorporated and being careful not to over-mix.

3. Remove the dough from the bowl and form it into a log 9 inches long and 2 inches thick. Wrap tightly in plastic wrap, and refrigerate for 2 hours, or until firm enough to slice.

4. Heat the oven to 350 degrees. Unwrap the log, and cut into one-fourth-inch slices. Place them on parchment-lined baking sheets, and bake for 8 to 10 minutes, until set (the cookies should not color).

5. Cool the cookies (still on the pans) on a rack. Then dust lightly with powdered sugar. They will keep for a few days in a container.

Saturday, March 15, 2008

Anzac Biscuits

Anzac Biscuits

These Anzac biscuits are also from Belinda Jeffery's Mix and Bake. I find the book interesting, but slightly unreliable. Some of the recipes are good, and others are either difficult to convert or not to my taste. I tried a scone recipe that called for whole wheat self-rising flour and regular self-rising flour. I erred in my salt conversion and ended up with inedibly salty scones.

I'm pretty sure i'll keep the book in my collection though. It has an everyday simplicity to it. I think i'm pickier about cookbooks than the average person. My favorite baking books yield consistenly fantastic desserts, so I end up pruning anything mediocre from my collection.

I've had several requests for this recipe, so i've edited this post to include it. Try not to overbake these- they're much better when when they're a little chewy.

Anzac Biscuits
adapted from Belinda Jeffery's Mix and Bake

1 cup (90g) rolled oats
2/3 cup (50g) shredded coconut
1 cup (150g) plain flour
3/4 cup sugar
125g (about 9tbsp) unsalted butter
2 tbsp golden syrup
2 tbsp boiling water
1 1/2 tsp baking soda
1 tsp vanilla extract
whole blanched almonds (optional) for topping

1. Preheat your oven to 160C/320F. Line baking sheets with parchment paper and set aside. In a large bowl, thoroughly mix together the oats, coconut, flour, and sugar.

2. Put the butter and golden syrup in a small saucepan set over low heat and warm them, stirring occasionally, until the butter has melted. Remove the pan from the heat. Add the boiling water and baking soda and stir them in briefly- just be careful as the mixture froths up. Pour this buttery liquid into the oat mixture along with the vanilla extract. Quickly stir the two together until their thoroughly combined.

3. Roll the sticky dough into walnut sized balls (keep them small, they spread a lot) then flatten them slightly and sit them at least 2 inches apart on the baking sheets. Press an almond, if using, on the top of each biscuit.

4. Bake for 16-20 minutes or until the biscuits are a deep golden brown but still soft, then remove them from the oven. Leave them to cool on the trays for a few minutes, then transfer them to racks to cool completely. They will keep well in an airtight container for up to one week.

Thursday, March 13, 2008

Espresso-Chocolate Chip Angel Food Cake.

Espresso Chocolate Chip Angel Food Cake

Espresso Chocolate Chip Angel Food Cake

My baking disasters are often egg-white related. Every now and then i'll end up with deflated batter, despite my best efforts to fold gently and quickly. Egg foam cakes aren't easy, especially if you have to incorporate a lot of fat and dry ingredients.

This is the first time i've made an angel food cake. Given my egg-white whipping anxiety, I thought it'd be a great confidence booster. It's much harder to mess up than genoise, and it gave me an occasion to use my square tube pan.

Homemade angel food cake is very different than what you get from a box mix. This is a good recipe; it's more moist and substantial, and the espresso flavor is really subtle.

I used mini-chocolate chips, but next time i'd use finely chopped 65-70% bittersweet chocolate. It would have been a nice contrast to the sweetness of the cake. A light dusting of Valrhona cocoa powder (as pictured), coffee ice cream, or chocolate sauce would be nice accompaniments.

Espresso-Chocolate Chip Angel Food Cake
adapted from Emily Luchetti’s Classic Stars Desserts

2 tsp instant espresso powder
1 1/3 cups cake flour, sifted
1/8 tsp kosher salt
1 ¾ cups (about 12) large egg whites
1 tsp cream of tartar
1 ¾ cups granulated sugar
1 ½ tsp vanilla extract
1 ¼ tsp freshly squeezed lemon juice
¾ cup bittersweet chocolate chips, coarsely chopped

Preheat the oven to 350F. Have ready an ungreased 10-inch angel food cake pan.

Sift together the espresso powder and flour onto a piece of parchment paper or into a bowl. Add the salt and set aside.

Put the egg whites in the large bowl of a stand mixer fitted with the whisk attachment and whisk on medium speed until frothy. Add the cream of tartar, increase the speed to high, and continue whipping while slowly pouring in the sugar until the whites are firm and satiny, about 3 minutes.

Reduce the speed to low, add the vanilla and lemon juice and then add the dry ingredients. When the flour mixture is almost completely incorporated, remove the bowl from the mixer stand and fold in the chocolate chips with a spatula. Make sure that the chips are spread evenly throughout the batter and that the flour is evenly incorporated. But be careful not to overmix or you will deflate the batter and the cake will not rise fully in the oven.

Pour the batter into the cake pan. Cut through the batter a few times with a table knife to break up any air pockets. Bake until a skewer inserted into the center comes out clean, 40-45 minutes. Invert the cake and let cool completely upside down in the pan. If your pan does not have feet, balance the inverted pan on the neck of a bottle, or rest the edge of the pan rim on 3-4 ramekins.

To unmold the cake, run a long knife around the inside edge of the pan. Then, holding the center tube, free the cake from the pan sides. Slip a knife between the cake and the bottom of the pan to loosen the cake and gently flip the cake over, letting it fall onto a platter. To serve, cut into slices with a serrated knife, using a gentle sawing motion.

The cake may be made a day in advance. Wrap in plastic wrap and store at room temperature.

To transform it into a dinner party dessert, serve it with warm chocolate caramel sauce or any kind of ice cream you fancy. This espresso and chocolate chips contribute enough flavor for it to be eaten plain too, or with coffee.

Tuesday, March 11, 2008

Key Lime Tartlets

Key Lime Tartlet

Key Lime Tartlets

These were the first dessert to go at the potluck. I caught people eating them before dinner. I filled Claudia Fleming's graham crust recipe with Abigail Johnson Dodge's key lime tart filling. The combination, with a touch of white chocolate on top, was fantastic.

I also made Tish Boyle's Sachertorte. It didn't come out as good as the last time I made it. I'm not sure why. I think i've been having egg white folding issues. Honestly, i'd love to have a very talented genoise-maker spend some time in the kitchen with me.

Key Lime Tartlets
adapted from Abigail Johnson Dodge's The Weekend Baker and Claudia Fleming's The Last Course

Graham Cracker Tart Shells
1 cup (2 sticks) unsalted butter, softened
1/4 cup firmly packed dark brown sugar
1/4 cup granulated sugar
1/4 cup honey
2 cups all purpose flour
1/2 cup whole wheat pastry flour
1 tsp salt
1/2 tsp ground cinnamon

Key Lime Filling
1 can sweetened condensed milk
2/3 cup bottled or fresh key lime juice
1 tsp vanilla extract
2 eggs

1. To prepare the graham cracker shells, in the bowl of an electric mixer fitted with a paddle attachment, cream the buter and sugars until smooth, about 1 minute. Add the honey and beat until well combined.

2. In a medium bowl, whisk together the flours, salt, and cinnamon. Add the flour mixture to the butter mixture in two batches, scraping down the sides of the bowl between additions. Mix until the dough is well combined. Scrape the dough onto a piece of plastic wrap and form it into a disc. Chill until firm, at least 1 hour and up to 2 days.

3. Preheat the oven to 325. On a lightly floured surface, roll out the dough to 1/8 inch thick, about a 13x16 rectangle. Using a 3 inch cookie cutter, cut out 16 circles of dough and press them into greased mini muffin pans of 2 inch tart pans, triming away excess dough. Alternatively, fit the dough into mini rectangular tart tins. Prick the dough all over with a fork and chill for 20 minutes. (You can also make one large 9inch tart. I believe this dough recipe yields enough for 2 crusts).

4. Bake until golden brown, 18-20 mins. Transfer to a wire rack to cool.

5. To prepare the filling: raise the oven temperature to 350F. Whisk together the milk, juice, eggs, and vanilla. Pour the mixture into the fully baked tart shells and bake for 15 minutes, or until barely set. Cool at least 45 minutes before serving. Optionally, garnish them with white chocolate, or whipped cream and toasted coconut.

Sunday, March 9, 2008

One-Pan Mocha Cake with Coffee Bean Brittle.

Mocha Cake w/ Coffee Bean Brittle

Mocha Cake w/ Coffee Bean Brittle

I am fortunate to have friends who enjoy good food and, perhaps more importantly, good hospitality. They RSVP. They invite people out for brunch or veggie dogs and a screening of North by Northwest. They say thank you. They take pictures and share them. Sometimes they pick up the tab. They bring not one bottle of wine, but two (or three!)

Kim asked, "do all library students like to cook? They seem like a type." I'm not sure if we're a type, or if I just gravitate towards foodies. This is the first year i've had so many friends who cook well, and adventurously.

I've hosted and attended several incarnations of dinner parties. There's the small dinner party: four or five people, a pre-planned menu, and cohesive conversation. Maybe a movie. There's the 8-12 person potluck or formal dinner party with wine and sometimes clear course progressions. That sort of party is usually dependent on whose apartment has the most space.

And then there's the party.

20-30 people scattered throughout a living room, dining room, and eat-in kitchen. Piles of food that comes in waves. Some of it gets eaten and some of it gets ignored. Someone makes cocktails. People dance. Believe me, it is something to see when every person brings food to a party that size.

Last night there was a party. We had onion tarts, curry with squash and brussels sprouts, two kinds of challah, bread from Wood Street Bakery, wheatberry salad with ginger and scallions, 5-6 kinds of cheese, olive tapenade, baba ghanoush, pita, mashed potatoes, some sort of cream cheese dip/salsa, peanutty noodles, rice noodles with chickpeas and spinach, red beans and rice, rice salad with pine nuts and raisins, endive salad with pecans, roasted potatoes and green beans, lasagna, chips, espresso, key lime tartlets, vegan chocolate and peanut butter cupcakes, sachertorte, and this one-pan mocha cake with coffee bean brittle.

I am probably forgetting a few things. I took home a huge tupperware of lasagna. Every dinner party has its place. While I prefer smaller gatherings, an occasional party can be fun.

This mocha cake was a big hit. It's very easy to prepare and looks very dramatic (though I think it would taste better and be easier to slice if you crushed the brittle instead). People started calling it "the broken bottle cake," to my amusement.

One-Pan Mocha Cake w/ Coffee Bean Brittle
adapted from Belinda Jeffery's Mix and Bake

1/3 cup (35g) dutch process cocoa powder
75g unsalted butter (about 6 tbsp)
1/3 cup (80ml) light olive oil
2/3 cup strong black coffee, cooled (or 3 tsp instant espresso powder dissolved in 2/3 cup boiling water)
90g (about 3 ounces) good quality dark chocolate, finely chopped
250g castor sugar (about 1 cup + 2 tbsp)
1 large egg
1 1/2 tsp vanilla extract
1 1/4 cups (185g) all purpose flour
2 tsp baking powder
1/3 cup (80ml) buttermilk (or sour cream or yogurt, in a pinch)

topping:
350ml heavy cream, lightly whipped
coffee bean brittle, coarsely crushed, or shards of dark chocolate, for garnish

1. Preheat your oven to 150C/300F. Butter a 23cm/9in round cake pan (preferably 3 inches high). Line the base with buttered parchment paper, then dust the pan with flour. Shake out the excess flour and set aside.

2. Put the cocoa, butter, oil, and coffee into a largish saucepan. Bring them to the boil over medium heat, stirring frequently until the mixture is silky, then take it off the heat. Add the chocolate and sugar and whisk them in until the chocolate has melted and the mixture is smooth.

3. Once the mixture has cooled, add the egg and vanilla extract, whisking them in thoroughly. Sift the flour and baking powder into the mixture and stir them in until they're just combined. Whisk in the buttermilk.

4. Pour the batter into the prepared tin and give it a gentle shake to level it out. Bake for about 50 minutes, or until a fine skewer inserted in the middle of the cake comes out clean. Cool the cake in the pan on a wire rack for 5 minutes. Invert the cake onto a rack, remove the paper and leave it to cool completely.

5. When you're ready to serve, transfer the cake to a serving plate. Just before serving, spread the cream on top, then use the back of a spoon to swirl it a bit. To finish off, sprinkle some of the coffee bean brittle (see below) or chocolate shavings over the cream. This cake keeps well in the fridge for a few days (ungarnished) and freezes well without the topping for about 3 weeks.

Coffee Bean Brittle
1 cup (220g) sugar
1/2 (125ml) water
1 tbsp roasted coffee beans, coarsely chopped

1. Line a large, shallow baking tray with parchment, foil, or a silpat and sit it on a chopping board or thick tea towel.

2. Put the sugar and water into a small saucepan over high heat. Stir it constantly until the sugar dissolves, then stop stirring and bring the mixture to a boil. As it boils, wash down the sides occasionally with a pastry brush dipped in water to dissolve any sugar crystals. The mixture will slowly change from being quite liquid to a thicker syrup, with lazy bubbles on the surface.

3. As soon as it turns a light amber color, add the chopped coffee beans and swirl the pan to mix them in. Continue to cook until the syrup is a deep golden brown, then immediately take it off the heat and carefully pour the mixture into the prepared baking tray. Hold the tray with a thick cloth or potholders and tilt it gently to spread the syrup evenly. Leave the brittle to cool and set, then carefully peel away the paper and break it into large shards.

4. To store the brittle, layer the shards in an airtight container between sheets of parchment to stop them sticking together, then freeze. When you need it, take out as much as you want, crush it coarsely (or leave it in bigger pieces) and return the rest to the freezer. It will keep in the freezer for 12 months.

Friday, March 7, 2008

Pumpkin Date Scones

Pumpkin Date Scones

Pumpkin Date Scones

"Remember, there's a wonderful saying (i'm not sure who said it first) that good scone-makers are good in bed too- if you ever needed encouragement to master the art then there you go!" --Belinda Jeffery

"Gently pry any recalcitrant madeleines from their molds using your fingers" --Dorie Greenspan

"a fruit tart...comprises a squidgy filling of creme patissiere with fresh berries on top" --Nigella Lawson


Some cookbooks contain only the bare-bones of directions, listing ingredient values, basic preparation methods, and little else. Others are fully imbued with the personality of their authors. They're packed with anecdotes, descriptive adjectives, and little touches that bring humor and individuality to the writing.

I like it when a cookbook makes me laugh out loud. It's like having a friend in the kitchen.

I don't make scones much, but I liked the idea of pumpkin and dates. The flavor combination seemed right to me, even though I'd never encountered it before. I like these scones; they're substantial and not too sweet. They're also less crumbly than scones with more butter in them- ideal for slicing and spreading with butter or clotted cream.

Pumpkin and Date Scones
adapted from Belinda Jeffery's Mix and Bake

3 cups (450g) all purpose flour
1/4 cup (55g) sugar
1 tbsp baking powder
3/4 tsp baking soda
3/4 tsp salt
120g (a little over 8tbsp) cold unsalted butter, cut into chunks
150g chopped pitted dates or dried cherries or cranberries
1 cup cold cooked mashed butternut squash or pumpkin
3/4 cup (180ml) buttermilk

1. Preheat your oven to 200C/395F. Lightly dust a sturdy baking sheet with flour and set it aside. (If you don't have a heavy baking sheet, line a lightweight one with parchment.)

2. Put the flour, sugar, baking powder, baking soda, and salt into a food processor and whiz them for about 20 seconds so they're thoroughly mixed. Add the butter chunks and whizz everything again until the mixture resembles coarse breadcrumbs. Tip it into a large bowl. (You can also do this by hand. Sift the dry ingredients into a large bowl, then whisk them for about 1 minute. Use your fingers to rub in the butter chunks, lifting your hands as you do to aerate the mixture.)

3. Add the dates to the bowl and toss them about to coat them in the floury mixture. Make a well in the middle of the ingredients. Whisk together the pumpkin and buttermilk and pour them into the well. Stir everything together very gently and quickly. Tip the mixture out onto a floured chopping board and knead it lightly a few times so it comes together- it's pretty sticky. (This mixing and kneading stage is where you need to maintain the proverbial "light hand" to end up with fluffy scones.)

4. Pat the dough out into a round about 1.5 inches (4cm) thick. Dip a scone cutter or a small tumbler into some flour, then stamp out the scones, dipping the cutter into the flour between each one (this helps stop the dough sticking to it). You can also cut the scones into triangles.

5. Sit the scones closely together on the prepared baking sheet. You'll have some scraps left, so gently knead them together and cut out more scones. To finish them you can dust the tops lightly with flour or brush them sparingly with milk or egg wash (1 yolk to 2 tsp water).

6. Bake the scones for 20 minutes. When they're ready, remove them from the oven and wrap them immediately in a clean tea towel (this helps keep them moist**). Let them sit for 5 minutes, then serve the scones with butter.

**This step really works, and I advise following it if you want to freeze and reheat some later. I left a few in the open air and they were much drier.

Lemony Semolina Cookies

Lemony Semolina Cookies

Lemony Semolina Cookies

I called my mother to tell her about these cookies. "They have lemon juice and zest and limoncello in them," I said. "They're kindof like tea cakes-soft, good with coffee."

"They sound like the kind of cookies you pack in a box and ship to your mother,"
she said.

My roommates loved them. I took them to a Lost watching party and everyone there loved them. Liz leaned over to her fiance Brian and whispered a comment about how good they were, which he relayed to everyone else. They're definitely some of the best cookies i've had in a while.

I wasn't sure if i'd like the semolina; I made some semolina waffles once and they tasted like pasta. In this context, the semolina is like cornmeal, but less crunchy. It gives the cookies a lovely color and crumbly texture.

I've seen some photos where the cookies spread very flat, so I tried to keep the liquid and sugar measurements very precise. I used a small lemon too. Chill the dough thoroughly and keep the cookies small.

These cookies keep well and would ship quite nicely. They're dainty and sophisticated. Put them in a box and send them to your mother.

Lemony Semolina Cookies
adapted from Dolce Italiano by Gina De Palma
Makes 5 dozen cookies

2 cups all purpose flour
2/3 cup semolina
1 teaspoon baking powder
1/2 teaspoon baking soda
1/2 teaspoon kosher salt
1/2 cup (1 stick) unsalted butter
2 tablespoons extra-virgin olive oil
1 cup granulated sugar, plus extra for rolling
1 large egg
1 large egg yolk
freshly grated zest and juice of one lemon
2 tablespoons limonccello
1/2 teaspoon vanilla extract

Whisk flour, semolina, baking powder, baking soda and salt together in a bowl.

Using an electric mixer fitted with the paddle attachment, cream together the butter, oil and sugar on medium speed until light and fluffy. Beat in the egg and egg yolk, scraping down the sides of the bowl. Continue to add the lemon zest, juice, limoncello and vanilla, making sure to srape the sides of the bowl down.

Using low speed beat in the dry ingredients until a very soft dough is formed. Scrape out onto a sheet of plastic wrap, flatten into a disc, wrap and chill for an hour.

Preheat the oven to 325F. Lightly grease two baking sheets, line with baking parchment or a silpat.

Break off teaspoon-sized bits of dough and roll them into balls about an inch in diameter. Roll each in a small bowl of sugar and place on the tray. Make sure to space them an inch apart as they'll spread.

Bake for 14-15 minutes until they've flattened out and are crinkly on top. Cool on the sheet for 2 minute and then use a spatula to transfer to a wire rack.

Thursday, March 6, 2008

Green Tea Pudding Cakes

Green Tea Pudding Cake

Green Tea Pudding Cake

I'm always on the lookout for good green tea recipes. This one is probably more palatable to your average person than these green tea puddings. If you know a spectacular green tea recipe, please let me know.

Please follow the chilling instructions. Unchilled, these puddings have a strange texture and eggy flavor. They were a little plain; next time, i'd top them with whipped cream mixed with muddled raspberries or diced mango, kiwi, or strawberries.

Green Tea Pudding Cakes
from teality.com

2 ounces (1/4 cup) unsalted butter, melted and cooled slightly
1 cup granulated sugar
3 large eggs, room temperature
1 1/8 ounce (1/4 cup) unbleached all purpose flour
3 teaspoons Matcha
1/4 plus 1/8 teaspoon salt
1 1/8 cup whole milk, room temperature
1/4 cup fresh Meyer lemon juice, room temperature
1/2 tablespoon finely grated lemon zest
whipped cream (optional)

Position rack in the center of the oven and preheat at 350 degrees. Butter eight 6 oz ovenproof ramekins and arrange them in a baking dish or a roasting pan.

In a large bowl, whisk the melted butter with 2/3 cup of sugar and the egg yolks until smooth and turns a light yellow color, about 1 minute. Add the flour and salt and pour in just enough milk to whisk the flour smoothly into the egg yolk mixture. Next, whisk in the remaining milk and the lemon juice until smooth. The mixture will be very fluid. Slowly sift the matcha into the mixture and mix making sure that the matcha doesn't clump up.

Put the egg whites in a large bowl. Beat with an electric mixer with a whisk attachment on medium speed until the whites begin to foam, 30 to 60 seconds. Increase the speed to high and beat until the whites hold a soft peak, another 1 to 2 minutes. Reduce the speed to medium and with the mixer running slowly sprinkle in the remaining 1/3 cup of sugar. Stop the mixer and scrap down the sides of the bowl. Beat on high speed until the whites hold a medium firm peak, about 30 seconds. Scrape 1/3 of the egg whites into the egg yolk mixture, sprinkle the lemon zest on top and whisk until combined. Gently incorporate the remaining egg whites into the batter using the whisk in a folding/stirring motion. The batter will still be a little thin.

Portion the mixture evenly into the ramekins. The cakes do not rise much so you can fill the ramekins to within 1/8 inch of the top. Pull out the oven rack and put the baking dish full of ramekins on the rack. Pour warm water into the dish until it reaches half way up the side of the ramekins. Bake until the tops of the cake are light golden brown and slightly puffed, and when touched with a finger, they should feel spongy and spring right back a bit but hold a shallow indentation. 30 to 35 minutes.

Using tongs, carefully transfer the ramekins to a rack to cool to room temperature and then refrigerate for at least 4 hours and up to 24 hours before serving. Add whipped cream and enjoy!

Wednesday, March 5, 2008

London Cheesecake, again.

lonchs

lonchs1

Eating Cheesecake

...just to prove these pretty things I make get eaten.

It was a small, five person dinner party. We made burritos and watched 30 Rock. Small dinner parties are under-rated, and i'd like to host some of my own eventually. Thanks to Brian (bottom left) for bringing the camera!

This recipe is here.

Tuesday, March 4, 2008

Healthy Banana and Date Loaf

Banana Date Walnut Loaf

Banana Date Walnut Loaf

I recently purchased Mix and Bake by Belinda Jeffery. Apparently, she's big in Australia. This book is a compilation of her "100 all-time favorite recipes for cakes, scones, muffins, biscuits, slices, quick breads, pies and tarts."

I need to try a few recipes, but I'll tell you what I like so far: it has entire chapters dedicated to scones and slices (bar cookies). There are some savory recipes too, like Egg, Leek, and Bacon Pie. I'm intrigued by the recipes that use grated pumpkin/butternut squash, olive oil, or whole-grain flours. Some of the recipes are decadent, and syrup-drenched while others are...healthy.

When I saw this recipe, I cringed a little. It had the word healthy in it. Still, I find that "healthy" recipes reveal much about the quality of a cookbook. I hate it when an author insists that a dense, cardboard-ish dessert tastes good.

Belinda Jeffery doesn't falsely advertise this cake. It is more of a breakfast cake than a dessert. It isn't too sweet; I think the slight saltiness is very addictive and plays up the fruit and nut flavors. I'd suggest making it in muffin form- it's very, very difficult to slice unless it's completely cool, and even then it crumbles a little. If you like wheat bran and grains, you'd like this recipe.

This is another recipe for grain and bran lovers. Please: make it for breakfast or coffee. Don't substitute it for dessert. Put something on it if you like: Tony ate it with a pile of nutella, and the author says her customers frequently ask for ricotta, cottage cheese, or "lashings of butter" to go with it.

Healthy Banana and Date Loaf
Adapted from Belinda Jeffery's Mix and Bake

1 1/2 cups (240g) wholemeal self-raising flour*
1/2 tsp baking soda
1 cup (60g) wheat bran
1/3 cup (75g) raw sugar
1/4 tsp salt
1/2 cup (75g) chopped dates or dried apricots
1/2 cup (70g) coarsely chopped toasted walnuts or pecans
1/4 cup (60ml) milk
125g unsalted butter, cut into chunks
1/2 cup buttermilk
1 1/2 tsp vanilla extract
2 eggs
3 medium sized ripe bananas, mashed (about 3/4 cup mashed)
extra nuts for topping (optional)
ricotta, cottage cheese, or butter to serve (optional)

1. Preheat your oven to 350F/180C. Butter a 9x5in (23x13x6cm) loaf tin and line with parchment. Butter the parchment and dust the tin with flour, then set aside. (Alternately, you can just line the pan with foil.)

2. Put the flour, baking soda, bran, sugar, and salt into a large bowl and whisk them together until well combined. Add the apricots and pecans and toss them about so they're well coated in the flour mixture. Make a well in the middle of the mixture, then set aside.

3. Heat the milk in a small saucepan until it's just about to start boiling- you'll see little bubbles forming around the edges. Take it off the heat and stir in the butter until it's completely melted, then whisk in the buttermilk and vanilla extract.

4. In a separate bowl, lightly whisk the eggs, then pour in the buttermilk mixture, whisking as you pour. Scrape in the mashed bananas and whisk them in too. Tip this into the well in the dry ingredients and stir the two together until just combined. The batter will be very thick.

5. Scrape the batter into the prepared tin and smooth it out. At this point, you can top the loaf with extra nuts, raw sugar, streusel, or whatever you fancy.

6. Bake for about 45 minutes or until the loaf is golden and a fine skewer inserted in the center comes out clean. Leave it to cool in the tin for 5 minutes or so, then carefully ease the loaf out of the tin onto a wire rack. Gently pull away the parchment, put the loaf right side up, then leave it to cool completely on the wire rack. This cake keeps well in an airtight container in a cool place for 5 days. It also freezes well for up to three weeks.

*I can never find whole wheat self raising flour. I measured 240g whole wheat flour into my food scale, added 2 1/4 tsp baking powder and 3/4 tsp salt, then removed enough flour to make the weight 240g again. I did this using a conversion of 1 cup self raising flour= 1 cup flour+1 1/2 tsp baking powder+ 1/2 tsp salt. I wonder if the crumbliness of the loaf came from a conversion problem, so if anyone has better tips, let me know.