Showing posts sorted by relevance for query raspberry. Sort by date Show all posts

Saturday, February 16, 2008

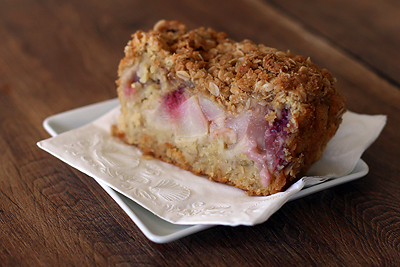
Oat, Pear and Raspberry Loaf

Oat, pear and raspberry loaf

Oat, pear, and raspberry loaf

"I have to stop reading your blog," Siobhan said. "I look at it and think, I have eggs. I have butter. I should bake."

I also experience this sentiment. I'll browse the contents of my fridge and calculate how many different recipes I can make without hitting a grocery store. It's not about making something specific; sometimes I just can't stand to see ingredients go bad. When you devote a good chunk of your budget to food, you feel guilty wasting it. Before you know it, you have three cakes or five plates of cookies on the counter (i'm only exaggerating a little) and you're struggling to give them away.

So why bake at all? Why not throw those overripe fruits and nearly empty jars/bags of ingredients in the garbage? I usually cite one of the following reasons: it's educational, it's productive, it's a creative outlet, it's an easy way to avoid homework, i love it.

None of those explanations entirely justifies the sheer amount of baking I do. The top questions I get are doesn't it get expensive? how do you not weigh 500 pounds? how do you make time for it?

I try not to think too hard about those questions. Maybe one day i'll be sick of baking. Until then, i'm going to just keep doing what i'm doing and let people keep pondering. Today I had two pears on their last legs, so I made Bill Granger's oat, pear and raspberry loaf. The batter tastes like a bowl of oatmeal loaded with brown sugar and butter.

When I cut into the cake it was still raw in the middle. Determined not to be dissapointed, I shoved the whole thing (cut piece and all) back into the loaf pan and baked it for another fourteen minutes. It was a dense, moist, falling apart mess. It's a very hearty cake that would be great for breakfast or brunch, and you'll love it if you're a fan of the 61c Cafe's oatmeal raspberry muffins.

Oat, Pear and Raspberry Loaf
adapted from Bill's Open Kitchen

topping:
25 g (1/4 cup) rolled oats
55 g (1/4 cup) brown sugar
2 tbsp plain all purpose flour
25 g (1 oz) chilled butter, cut into small pieces

cake:
100 g (1 cup) rolled oats
375 ml (1.5 cups) boiling water
150g (5.5oz) unsalted butter, diced
115g (1/2 cup) brown sugar
55g (1/4 cup) caster sugar (fine granulated sugar)
2 eggs
1 tsp natural vanilla extract
185g (1.5 cups) all purpose flour
a pinch of sea salt
1 tsp baking powder
2 ripe pears, peeled cored and diced
60g (1/2 cup) raspberries, fresh or frozen

Preheat the oven to 180C/350F. To make the topping, place all the ingredients into a bowl and rub the butter into the mixture with your fingertips until well incorporated and small clumps form.

To make the cake, place the oats into a bowl and pour over the boiling water. Stir and leave to cool until lukewarm. Cream the butter and sugars in a bowl until pale and creamy. Add the eggs, 1 at a time, beating well after each addition. Mix in the vanilla. Sift the flour, salt, and baking powder into the bowl. Drain any excess water off the oats. Add the oats to the mixture and fold to combine. Spread 2/3 of the mixture into a greased or nonstick 19x11cm (7.5x4.5in) loaf pan. Sprinkle with the pears and raspberries, top with the remaining cake batter then sprinkle the topping over evenly.

Bake for 1 hour 10 minutes, or until a skewer inserted into the centre of the cake comes out clean (*it should be well browned and feel springy to the touch. If the cake sinks significantly while cooling, it is probably under-baked). Turn out onto a plate before quickly transferring to a wire rack with the topping facing upwards. Leave to cool slightly before cutting. Serve in slices with butter. Makes 8-10 slices.

Saturday, July 5, 2008

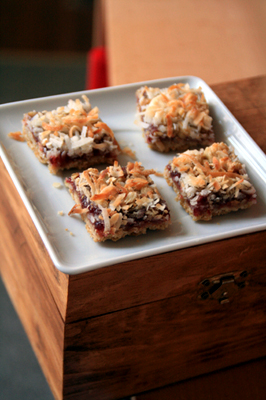
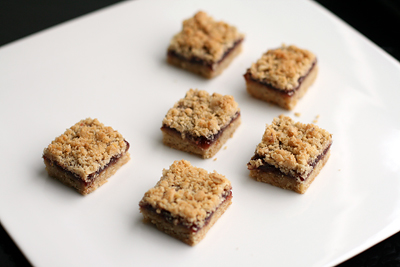
Raspberry Squares

Raspberry Squares

I think I prefer these Raspberry Squares to my usual Oatmeal Coconut Raspberry Bars. They're easy to make (the recipe is essentially a large batch of streusel), they slice neatly, and their crispy-yet-chewy texture is fantastic.

I was impatient to eat them. Consequently, all of the photos turned out slightly unfocused. Don't let that deter you from trying the recipe. These cookies would nicely complement some assorted petit fours or tea time sweets. I like to cut them into small 1-1.5 inch squares.

Raspberry Squares
from Cook's Illustrated

1 1/2 cups unbleached all-purpose flour (7.5 ounces)
1 1/4 cups quick-cooking oats
1/3 cup granulated sugar (2.3 ounces)
1/3 cup packed light brown sugar
1/4 teaspoon baking soda
1/4 teaspoon table salt
1/2 cup finely chopped pecans or almonds, or a combination (I used walnuts)
12 tablespoons unsalted butter (1 1/2 sticks), cut into 12 pieces and softened by still cool
1 cup rasberry preserves

1. Adjust oven rack to lower-middle position and heat oven to 350 degrees. Spray 9-inch-square baking pan with nonstick cooking spray. Fold two 16-inch pieces of foil lengthwise to measure 8 inches wide. Fit one sheet in bottom of greased pan, pushing it into corners and up sides of pan (overhang will help in removal of baked squares). Fit second sheet in pan in same manner, perpendicular to first sheet. Spray foil with nonstick cooking spray.

2. In bowl of standing mixer, mix flour, oats, sugars, baking soda, salt, and nuts at low speed until combined, about 30 seconds. With mixer running at low speed, add butter pieces; continue to beat until mixture is well-blended and resembles wet sand, about 2 minutes.

3. Transfer 2/3 of mixture to prepared pan and use hands to press crumbs evenly into bottom. Bake until starting to brown, about 20 minutes. Using rubber spatula, spread preserves evenly over hot bottom crust; sprinkle remaining oat/nut mixture evenly over preserves. Bake until preserves bubble around edges and top is golden brown, about 30 minutes, rotating pan from front to back halfway through baking time. Cool on wire rack to room temperature, about 1½ hours, then remove from pan using foil handles. Cut into 1¼- to 1½-inch squares and serve.

Tuesday, July 17, 2007

Peach-Raspberry Crostata


This recipe came from Sarah Foster's Casual Cooking. I own all three of the Foster's Market cookbooks and they're all fantastic. The recipes are always fresh and easy to execute.

This crostata dough was particularly good. Adding egg yolk and milk made the dough a little more tender than a pure short crust, but it still was really really crispy. The filling had a hint of ginger and cinnamon, and enough cornstarch to keep the crostata from becoming too liquidy.

Peach Raspberry Crostatas
For the crust:
2 cups all purpose flour
3 T sugar
1/4 tsp kosher or sea salt
2 sticks cold unsalted butter, cut into cubes
1 large egg yolk
3-4 T ice water or milk (i used milk.)

For the filling:
2 pounds peaches, peeled, pitted, and thinly sliced
1 cup fresh raspberries
1/3 cup sugar plus extra for sprinkling
3 T cornstarch
1/2 tsp ground cinnamon
1/4 tsp ground ginger
1/4 tsp kosher or sea salt
4 T unsalted butter, cut into 8 pieces (I omitted this.)
1 large egg
1-2 T milk

To make the crust, stir the flour, sugar, and salt together in a large bowl. Add the butter and blend it in with the flour using a pastry blender or two knives in a crisscrossing motion until the mixture resembles coarse meal. Whisk the egg yolk and 3 T of milk together in a small bowl and add it to the flour mixture. Stir until the dough just comes together and starts to form a ball, adding the remaining milk if necessary. Dust your hands lightly with flour and press the dough together to form a fat, round disk. Cover the dough with plastic wrap and place it in the refrigerator to chill for at least 1 hour or overnight.

Lightly grease 2 baking sheets or cover with parchment and set aside.

To make the filling, combine the peaches, raspberries, sugar, cornstarch, cinnamon, ginger, and salt in a large bowl and stir gently to mix.

Remove the dough from the refrigerator and cut it into 8 equal size pieces. Lightly flour the work surface and roll each piece into a 6 inch round. Place the rounds onto prepared baking sheets.

Scoop the filling and juices into the center of each round, dividing it evenly and leaving a 1 inch border around the edges. Place a piece of butter on top of the fruit, if you like. Folkd the dough over the fruit all the way around to form an edge.

Whisk the egg and milk together to make an egg wash. (I usually strain this to avoid ugly lumpy bits of egg.) Brush the edges of each tart and sprinkle with sugar. Put the tarts in the fridge and chill for about 30 mins.

Preheat the oven to 375. Bake the tarts for 40-45 minutes, rotating the sheets halfway through, until the crusts are golden brown and the fruit is bubbling. Cool the tarts slightly and serve warm. (I like a little dollop of vanilla ice cream on top :))

Saturday, April 7, 2007

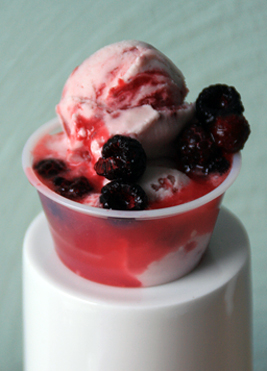
Ice Cream Soda!

Ice Cream Soda

Homemade raspberry soda, homemade strawberry ice cream, and black raspberries my roommate brought back from Ithaca, NY.

I'd never tasted a black raspberry before. These tasted just a little bit like licorice, actually.

I used a tiny cup because my trigger scoop is small (so really, it was just to get the photo.) I made myself one about three times as large :)

Monday, July 6, 2009

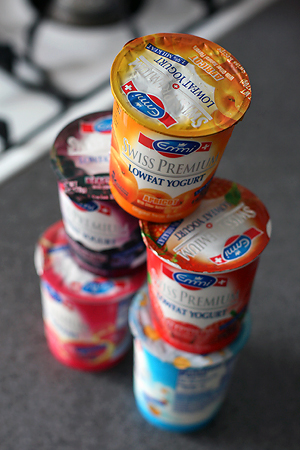
On Yogurt

Emmi Yogurt

An 2004 industry report on the US yogurt market estimated that market value in 2008 would be $5,023 million. Apparently, our country eats a lot of yogurt.

The market is dominated by General Mills and Groupe Danone (Dannon is their US subsidiary), whose yogurts I tend to avoid. The grocery stores I visit have a wide selection, and i've become particular about my choices.

I don't like very sweet yogurt, or yogurt that masquerades as dessert. I don't want to see the words pie or mousse anywhere on the container. It shouldn't have extra digestive aids, vitamin supplements, cooked grains, or anything that needs to be mixed in. Even the president of Fage said mixing ruins the yogurt.

Packaging and branding can be particularly misleading. There are differences between "all-natural" and "organic" yogurts (the latter cannot contain bovine growth hormones). Many premium brands are subsidiaries of larger companies. Rachel's and Horizon Organics are both owned by Dean Foods. Stonyfield Farms and Oikos are both owned by Danone. Chobani is owned by Agro-Farma Inc, who used to manufacture Oikos for Stonyfield.

That said, I choose my yogurt for taste and texture. I tend to stick to low-fat yogurt, as full-fat is a little rich for everyday eating, and non-fat just doesn't taste right. Here are some of my favorites, in no particular order:

  • Plain Yogurts: Seven Stars Farm low-fat, Fage 2% and 0%, Trader Joe's organic low-fat and low-fat kefir, Whole Foods organic low-fat, Wallaby low-fat, Emmi

  • Flavored Yogurts: Wallaby peach, strawberry, blueberry, raspberry, banana-vanilla, Emmi apricot, blueberry, raspberry, strawberry, Trader Joe's green tea, vanana, Chobani vanilla bean, honey

    I haven't tried making my own yogurt yet, but one of my neighbors recommends Harold Mcgee's recipe. No yogurt maker required- all you need is a heated bowl or thermos.

    Further reading:

    Anstine, Jeffrey. "Organic and All Natural: Do Consumers Know the Difference?." Journal of Applied Economics & Policy 26, no. 1 (May 2007): 15-28.

    "Yogurt in the United States." Yogurt Industry Profile: United States (February 2004): 1.

    Berry, Donna. "It's a Jungle Out There." Dairy Foods 110, no. 4 (April 2009): 30-38.
  • Friday, February 23, 2007

    Oatmeal Coconut Raspberry Bars

    Coconut Raspberry Oatmeal Bars

    Here's the recipe.

    Today has been happy, and these seemed like a happy bar cookie to me when I noticed the link at the traveler's lunchbox.

    Also, I've been offered an internship with Miette!

    Saturday, October 27, 2007

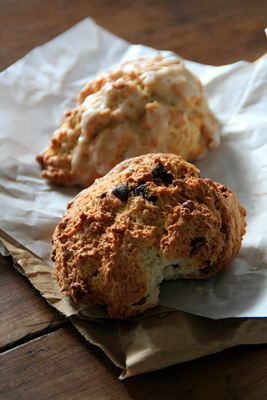
    Scones from Enrico Biscotti Co.

    Scones from Enricos

    During undergrad I took a 7:56am bus to the Strip District almost every Saturday. Now I avoid Saturday because it gets so crowded! Still, I love the Strip and I go there for different things depending on my mood and the time of year.

    Right now i'm in a scone phase. While I like traditional, soft cream scones with jam or clotted cream, I'm rather partial to drop scones. These ones have particularly crusty exteriors (and i'm a sucker for anything crusty.)

    I think my current favorite flavor is raspberry with lemon icing. Today I decided on lemon and chocolate chip/pecan. They were perfect with coffee. In general I love the combination of chocolate/lemon and coffee/lemon.

    Scones from Enricos

    The Enrico Biscotti Company is one of my favorite places. You can always find good, comforting food there, and Larry Lagatutta has great stories about old italian ladies, handed-down recipes, and knife injuries. Their cafe is now open six days a week, so you can get your wood-fired-pizza fix.

    Now if only the yearly supply of Bahlsen christmas cookies would arrive. Then it would really feel like fall.

    Wednesday, July 18, 2007

    Espresso-Chocolate Semifreddo


    Usually I don't care for semifreddo; it's not quite ice cream and not quite a substantial torte, cake, or pudding. I picked this recipe out of food and wine magazine because the picture was really pretty, and i'm happy to say it turned out quite well.

    I'm a fan of Sherry Yard's recipes. They're usually very sophisticated, though sometimes a little hard to execute at home. This recipe didn't give an indication of just how much batter it produced. Make sure you use a very large mixing bowl.

    This recipe was also a good excuse to play with my dad's huge La Cimbali espresso machine. I brewed shot after shot and tasted them all before measuring them out for the recipe O.o

    If you like Tiramisu, I think you'll like this. It's got great coffee taste and a really nice texture. It'd be great with some raspberry coulis, or at least some muddled fruit.

    Espresso Chocolate Semifreddo
    (adapted from Food and Wine Magazine)
    1.5 cup sugar
    3/4 cup water+ 2tbsp
    1.25 cup strongly brewed espresso
    1/2 cup whole milk
    1 vanilla bean, split and seeds scraped
    1 tsp gelatin dissolved in 2 tsp water
    2 oz bittersweet chocolate, chopped
    4 large eggs
    1/4 cup light corn syrup
    1.25 cups heavy cream
    18 dry ladyfingers
    1 tbsp cocoa for sprinkling
    Raspberries, for serving

    1. In a small saucepan, combine 1 cup of the sugar with the 3/4 cup water and 1/4 cup of the espresso. Bring to a simmer over moderate heat and stir to dissolve the sugar. Let the espresso syrup cool.

    2. In a small saucepan, boil the remaining 1 cup of espresso over high heat until reduced to 1/4 cup (about 8 minutes) Pour into a medium heatproof bowl.

    3. Warm the milk with the vanilla bean and seeds over moderate heat until bubbles form around the edge. Remove from heat and stir in the gelatin until melted. Discard the vanilla bean. Add the hot milk to the reduced espresso and whisk in the chocolate until melted.

    4. In the bowl of a standing mixer, beat the eggs at high speed until light yellow and foamy. In a small saucepan bring the corn syrup, the remaining 1/2 cup of sugar, and 2 T of water to a simmer. Cook over moderately high heat until the syrup registers to 235 on a candy thermometer*, about 5 minutes. With the mixer on medium speed, gradually beat the hot syrup into the eggs. Continue beating until the mixture is very pale and has tripled in volume, about 4 mins. Fold in the espresso mixture**

    5. In a bowl, whip the heavy cream until stiff peaks form. Fold into the mousse mixture until no streaks remain**

    6. Spoon about 1/4 of the mousse into a 9 inch springform pan. Dip 6 lady fingers into the espresso syrup until just soaked through. Arrange the ladyfingers over the mousse in rows. Repeat the process 2 more times, then top with the remaining mousse. Cover with plastic wrap and freeze at least 6 hours.

    7. Before serving, warm a thin sharp knife under hot water. Run the knife around the edge of the semifreddo and remove the ring (you can refreeze after this if the sides are a little melty) Sift cocoa over the top of the semifreddo. Cut into wedges and serve with raspberries. The semifreddo will keep frozen for up to three days (so says the magazine.)

    *If you don't have a candy thermometer, you can cook the syrup and periodically drop a little of it into a bowl of cold water. You want to cook it until a little before the soft ball phase. You should be able to shape the cold syrup with your fingers, but it shouldn't form a really dense ball. It takes a little practice sometimes.

    ** I was running out of room in my bowl, so I just gently whisked in these ingredients. It didn't deflate the mix or anything.


    Sunday, March 30, 2008

    Perfect Party Cake.

    Perfect Party Cake

    Perfect Party Cake

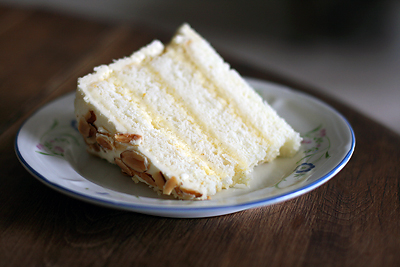
    I recently joined The Daring Bakers, a group of bloggers who agree to bake a chosen recipe each month. This month, the challenge was Dorie Greenspan's Perfect Party Cake from Baking From my Home to Yours. Since i'd made the cake before, I decided to challenge myself with a flavor variation.

    This cake lends itself to experimentation; the buttercream recipe is extremely forgiving and the cake layers are sturdy enough to slice and move easily. I flavored my cake layers with almond extract and orange zest and substituted the lemon juice in the buttercream for orange juice. I toasted some sliced almonds for the topping to keep with the orange/almond theme.

    The complicated part of this cake was the filling. Instead of the listed buttercream/jam filling, I decided to substitute Sherry Yard's Creme Chiboust recipe from The Secrets of Baking. Creme Chiboust is a pastry cream that's usually lightened with whipped cream or beaten egg whites and gelatin.

    I flavored my pastry cream with vanilla beans and orange zest. After incorporating the egg whites I built the cake in a setting ring lined with cake ribbon/transfer sheets. The unchilled filling is too loose to use without a ring. The filling made my cake unbelievably tall- it took the entire buttercream recipe just to frost the top and sides.

    When I unmolded the cake to frost it, I was convinced it would fall apart or have big chunks of gelatin in it. I shouldn't have worried so much- it set perfectly and made frosting the outside easy. I think I this was the fastest, neatest frosting job i've ever done! I the cake for a small party and people enjoyed it. It tasted like a light, fluffy burnt almond torte.

    Perfect Party Cake
    adapted from Dorie Greenspan's Baking from my Home to Yours.

    For the Cake
    2 1/4 cups cake flour
    1 tablespoon baking powder
    ½ teaspoon salt
    1 ¼ cups whole milk or buttermilk (I prefer buttermilk with the lemon)
    4 large egg whites
    1 ½ cups sugar
    2 teaspoons grated lemon zest
    1 stick (8 tablespoons or 4 ounces) unsalted butter, at room temperature
    ½ teaspoon pure lemon extract

    For the Buttercream
    1 cup sugar
    4 large egg whites
    3 sticks (12 ounces) unsalted butter, at room temperature
    ¼ cup fresh lemon juice (from 2 large lemons)
    1 teaspoon pure vanilla extract

    For Finishing
    2/3 cup seedless raspberry preserves stirred vigorously or warmed gently until spreadable
    About 1 ½ cups sweetened shredded coconut

    Getting Ready
    Centre a rack in the oven and preheat the oven to 350 degrees F. Butter two 9 x 2 inch round cake pans and line the bottom of each pan with a round of buttered parchment or wax paper. Put the pans on a baking sheet.

    To Make the Cake
    Sift together the flour, baking powder and salt.
    Whisk together the milk and egg whites in a medium bowl.
    Put the sugar and lemon zest in a mixer bowl or another large bowl and rub them together with your fingers until the sugar is moist and fragrant.
    Add the butter and working with the paddle or whisk attachment, or with a hand mixer, beat at medium speed for a full 3 minutes, until the butter and sugar are very light.
    Beat in the extract, then add one third of the flour mixture, still beating on medium speed.
    Beat in half of the milk-egg mixture, then beat in half of the remaining dry ingredients until incorporated.
    Add the rest of the milk and eggs beating until the batter is homogeneous, then add the last of the dry ingredients.
    Finally, give the batter a good 2- minute beating to ensure that it is thoroughly mixed and well aerated.
    Divide the batter between the two pans and smooth the tops with a rubber spatula.
    Bake for 30-35 minutes, or until the cakes are well risen and springy to the touch – a thin knife inserted into the centers should come out clean
    Transfer the cakes to cooling racks and cool for about 5 minutes, then run a knife around the sides of the cakes, unfold them and peel off the paper liners.
    Invert and cool to room temperature, right side up (the cooled cake layers can be wrapped airtight and stored at room temperature overnight or frozen for up to two months).

    To Make the Buttercream
    Put the sugar and egg whites in a mixer bowl or another large heatproof bowl, fit the bowl over a plan of simmering water and whisk constantly, keeping the mixture over the heat, until it feels hot to the touch, about 3 minutes.
    The sugar should be dissolved, and the mixture will look like shiny marshmallow cream.
    Remove the bowl from the heat.
    Working with the whisk attachment or with a hand mixer, beat the meringue on medium speed until it is cool, about 5 minutes.
    Switch to the paddle attachment if you have one, and add the butter a stick at a time, beating until smooth.
    Once all the butter is in, beat in the buttercream on medium-high speed until it is thick and very smooth, 6-10 minutes.
    During this time the buttercream may curdle or separate – just keep beating and it will come together again.
    On medium speed, gradually beat in the lemon juice, waiting until each addition is absorbed before adding more, and then the vanilla.
    You should have a shiny smooth, velvety, pristine white buttercream. Press a piece of plastic against the surface of the buttercream and set aside briefly.

    To Assemble the Cake
    Using a sharp serrated knife and a gentle sawing motion, slice each layer horizontally in half.
    Put one layer cut side up on a cardboard cake round or a cake plate protected by strips of wax or parchment paper.
    Spread it with one third of the preserves.
    Cover the jam evenly with about one quarter of the buttercream.
    Top with another layer, spread with preserves and buttercream and then do the same with a third layer (you’ll have used all the jam and have buttercream leftover).
    Place the last layer cut side down on top of the cake and use the remaining buttercream to frost the sides and top.
    Press the coconut into the frosting, patting it gently all over the sides and top.

    Serving
    The cake is ready to serve as soon as it is assembled, but I think it’s best to let it sit and set for a couple of hours in a cool room – not the refrigerator. Whether you wait or slice and enjoy it immediately, the cake should be served at room temperature; it loses all its subtlety when it’s cold. Depending on your audience you can serve the cake with just about anything from milk to sweet or bubbly wine.

    Storing
    The cake is best the day it is made, but you can refrigerate it, well covered, for up to two days. Bring it to room temperature before serving. If you want to freeze the cake, slide it into the freezer to set, then wrap it really well – it will keep for up to 2 months in the freezer; defrost it, still wrapped overnight in the refrigerator.

    Playing Around
    Since lemon is such a friendly flavour, feel free to make changes in the preserves: other red preserves – cherry or strawberry – look especially nice, but you can even use plum or blueberry jam.

    Thursday, May 8, 2008

    Cardamom Pound Cake

    Cardamom Pound Cake

    Cardamom Pound Cake

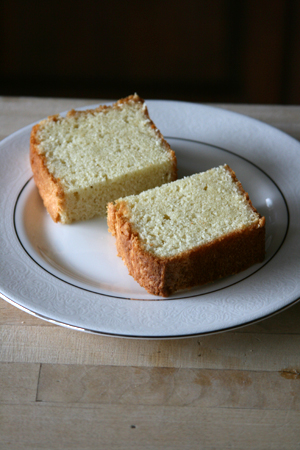
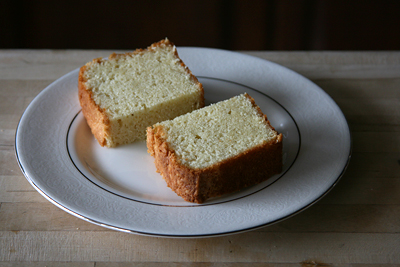
    "You might have to make another one of these before you go."

    That was my mom's verdict on this rich, warmly spiced pound cake. It's a simple recipe that I highly recommend to anyone who likes cardamom. I like it lightly toasted with black coffee, but it'd be great with fruit compote or ice cream as well.

    I love how much my family and neighbors enjoy my baking. I made another Cardamom Crumb Cake and caught different people (myself included) picking at the streusel all day. I made granola, a flan, a breakfast bread pudding, two kinds of cookies, and an apple-raspberry crisp. Today i'm going to try and whip out a cheesecake before I start packing for my return to Pittsburgh.

    On a side note, I much prefer David Leite's Baked French Toast to the Breakfast Bread Pudding in Fresh Every Day. The texture was pretty unfortunate.

    Sour Cream Cardamom Pound Cake
    adapted from Sara Foster's Fresh Every Day
    makes 1 10-inch tube or bundt, or 2 9x5 inch loaf pans

    3/4 pound (3 sticks) unsalted butter, softened, plus more for buttering the pan
    3 cups all purpose flour, plus more for dusting
    1 1/2 tsp ground cardamom
    1 tsp baking powder
    1/2 tsp baking soda
    1/4 tsp salt
    3 cups sugar
    6 large eggs
    2 tsp pure vanilla extract
    1 cup sour cream

    1. Preheat the oven to 325F. Butter a 10 inch tube pan or bundt pan (or 2 9 inch loaf pans) and dust lightly with flour. You can also line the pans with foil or parchment paper.

    2. Stir the flour, baking powder, baking soda, and salt together in a large bowl.

    3. In a separate large bowl, cream the butter, sugar, and cardamom together with an electric mixer on high speed until fluffy. Add the eggs one at a time, mixing well after each addition, and stopping to scrape down the sides of the bowl from time to time.

    4. Add a third of the flour mixture to the butter mixture. Mix in half of the sour cream. Repeat, alternating between the flour mixture and sour cream and ending with the flour until all the ingredients are combined. Scrape down the sides of the bowl with a rubber spatula after each addition and mix only until all the ingredients are incorporated and no flour is visible.

    5. Scrape the batter into the prepared pan(s) with a rubber spatula and smooth to even out the top. Bake the cake on the center rack of the oven for 1 hour and 15 minutes to 1 hour 25 minutes, until a wooden skewer inserted into the center comes out clean. Let the cake cool in the pan for 20 minutes, then turn the cake out of the pan onto a baking rack to cool completely. Serve warm or at room temperature. This cake will keep, tightly wrapped in plastic, for several days or in the freezer for up to 3 months.

    Saturday, December 29, 2007

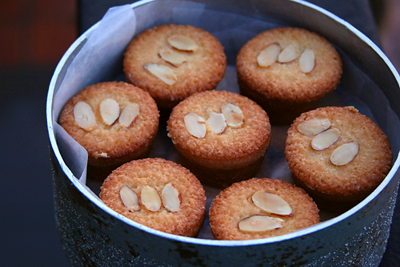
    Almond Brown-Butter Cakes

    Almond Brown-Butter Cakes

    Almond Brown-Butter Cakes

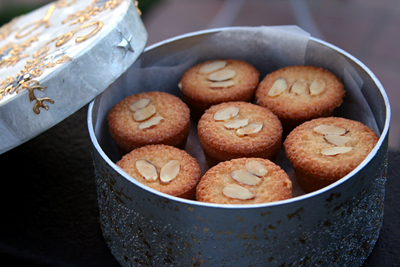
    My best friend from high school mentioned that she and her husband have never tried anything i've baked. They're driving back to San Francisco today so I made them a care package of oatmeal coconut raspberry bars, banana bread pudding, and these almond financiers from Claudia Fleming's The Last Course.

    I didn't have almond flour; I just ground sliced blanched almonds in a food processor. I think the cakes would be better made with very fine almond flour though. It's a good recipe. The batter is easy to make and keeps in the fridge for three days.

    Almond Brown-Butter Cakes
    adapted from Claudia Fleming's The Last Course
    yield: 15 small cakes

    1/2 cup (1 stick) unsalted butter
    1 1/3 cups confectioners' sugar
    1/2 cup almond flour
    1/3 cup cake flour
    4 large egg whites (about 1/2 cup)
    2-3 tbsp blanched sliced almonds

    1. Preheat the oven to 400 degrees F. In a large skillet over medium heat, melt the butter. Continue to let the butter cook until some of the white milk solids fall to the bottom of the skillet and turn a rich hazelnut brown. Strain the browned butter through a fine sieve into a clean bowl.

    2. Sift together the confectioners' sugar, almond flour, and cake flour. Place the sifted ingredients in the bowl of an electric mixer witted with the whisk attachment. On the lowest speed, add the egg whites and mix until all the dry ingredients are moistened. Increase the speed to low and mix in the browned butter. Increase the speed to medium and beat until smooth. (The batter can be made up to 3 days in advance and refrigerated until needed.)

    3. Butter and flour 15 mini muffin tins. Spoon the batter into the tins and place 2-3 almond slices on top of each. Bake the cakes for about 15 minutes, until they are golden brown around the edges. Transfer to a wire rack to cool completely.

    Thursday, January 17, 2008

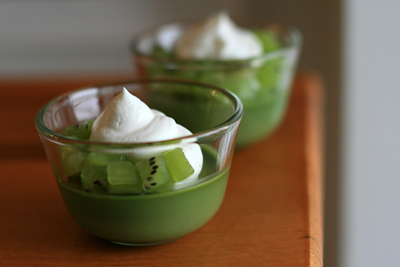
    Green Tea Pudding

    Green Tea Pudding

    Green Tea Pudding

    Sometimes I try recipes for pleasure, and sometimes I try recipes for research. When I look at a recipe I usually think one of three things:

    1. This looks delicious and I want to eat it.
    2. I've never made this before.
    3. This is a pretty photo and I want to make a pretty dessert.


    I chose the green tea puddings from The Sweet Spot because I like green tea, I rarely make pudding, and I have a pile of gelatin sheets in the cupboard.

    The puddings came out much greener than the ones pictured in the book. Food photography can be decieving; sometimes the dessert is executed differently in the photo than in the recipe. I often see visible change-ups in baking pans, cutting techniques, or ingredients.

    This pudding recipe doesn't overdo the gelatin; the texture was very nice. The green tea flavor is very strong, so I don't recommend it if you aren't passionate about matcha. Do try and serve the puddings with a large dollop of whipped cream and fresh fruit. They are lighter than most panna cottas and extra richness, texture, and flavor makes them much more interesting.

    I'd consider making the chocolate or raspberry pudding variations. While this dessert isn't my favorite (generally I hate anything with noticeable gelatin use), it's very elegant and easy to make. It'd be a good, light party dessert.

    Green Tea Pudding
    adapted from The Sweet Spot by Pichet Ong and Genevieve Ko

    1 1/2 cups whole milk
    1/4 cup + 2 tbsp sugar
    1/8 tsp salt
    2 gelatin sheets, soaked in cold water until softened and drained, or 1.5 tsp powdered gelatin, softened in 2 tbsp cold water
    2 tbsp matcha powder
    1 tbsp fresh squeezed lemon juice
    1/4 cup diced mango for garnish
    whipped cream, optional

    Put the milk, sugar, and salt in a small saucepan and warm over medium heat just until bubbles begin to form around the edges. Add the gelatin and stir until dissolved. Remove from the heat and let the mixture sit until it cools to room temperature.

    Whisk the green tea powder and lemon juice into the gelatin mixture and continue whisking until the green tea powder dissolves completely (a hand blender makes this easier.) Strain the mixture through a fine mesh sieve. Divide among eight small serving bowls or cups and refrigerate, uncovered, until set, about 3 hours.

    Garnish with fresh fruit and whipped cream.