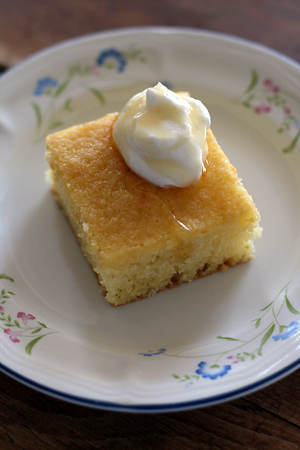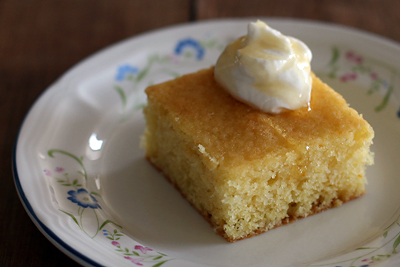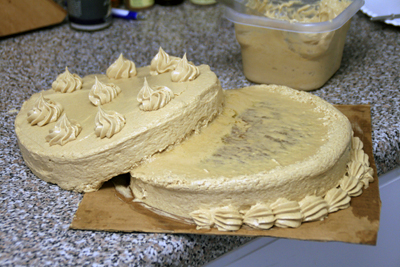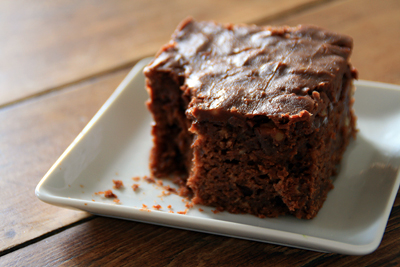
Showing posts sorted by relevance for query cake. Sort by date Show all posts

Tuesday, October 21, 2008

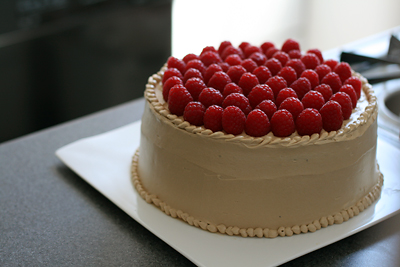
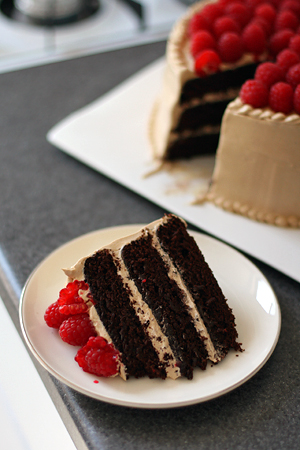
Sour Cream Fudge Cake w/ Peanut Butter Frosting

Chocolate Cake w/ Peanut Butter Frosting

Chocolate Cake w/ Peanut Butter Frosting

What makes a good birthday cake?

When I was a kid, I didn’t want a fancy, elaborate layer cake. I wanted a cake with Gumby on it. I wanted my mother to make the same lemon and german chocolate cake recipes over and over again. I ogled grocery store cakes adorned with neon-colored sugar roses and ballerinas, and I obsessed over a Cinderella cake complete with tired looking buttercream pumpkins and delicate figurines.

The mid-twenties birthday lacks the magic of a childhood birthday. In fact, if you live alone and far from home, birthdays can seem quite selfish. Casual mention your own birthday at work or in public can be misinterpreted as a scheme for free food, swag, and personal validation. Consequently, you get in the habit of either hiding your birth date, or telling anyone who will listen that you want NO gifts, NO parties, and certainly NO cake.

I rarely get cake these days. I’ve had my share of practically non-existent birthdays- the sort of birthday where you’re too busy reheating leftovers and rushing out the door for a five hour rehearsal to think about cakes and singing.

A good birthday cake doesn’t have to look or taste good (though it’s certainly a bonus if it does). In my opinion, birthday cake success is dependent on how, where, when, and with whom the cake is eaten. I asked a number of my friends to recall their favorite birthday cakes, and most of them said the majority of their cakes had been "average." So what makes an average cake spectacular?

My friend Anusha said: I like when it's something that is special for me...I love oreos, so an oreo anything cake is AWESOME. I also like when there's some deep tradition in it-like we got the same cake for YEARS for my sister's birthday."

My friend Peter said while he was on the Atkins Diet, his wife made him a cake out of frozen blueberries and cream. It wasn't exactly a cake, but it was "so completely insane" that he loved it.

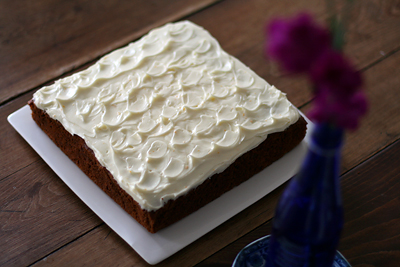
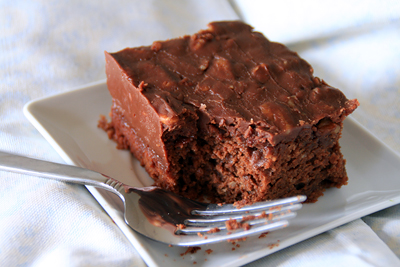
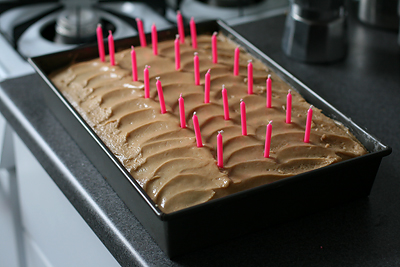
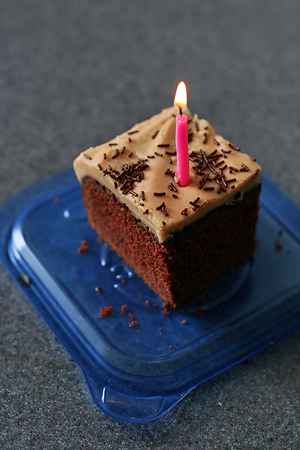
One of my best friends turned 25 last week, and since he is worth celebrating I made him a cake. I picked out this Sour Cream Fudge Cake with Peanut Butter frosting from The Cake Book because it looked simple and good. We lit candles, sang, and ate huge, sprinkle-topped slices from the pan. The frosting consistency was a little strange, but nobody noticed.

For me, a good cake should rekindle memories of candles, singing, tradition, family, friends, and childhood wishes. It should reflect its recipient, and be given with the best intentions. I’ll turn a blind eye to stray eggshells, neon-colored frosting, or lopsided layers if a friend takes the time to make me a cake.

Sour Cream Fudge Cake
adapted from Tish Boyle's The Cake Book
2 1/4 cups cake flour
1 1/2 tsp baking soda
1/2 tsp salt
3 oz unsweetened chocolate, chopped
1 1/2 sticks unsalted butter, softened
2 1/4 cups granulated sugar
3 large eggs
2 tsp vanilla extract
3/4 cup sour cream
3/4 cup hot water

1. Position a rack in the center of the oven and preheat to 325F. Grease the bottom and sides of a 9x13 pan and dust with flour, tapping out the excess.

2. Sift together the cake flour, baking soda, and salt into a medium bowl. Whisk to combine.

3. Put the chocolate in a medium stainless steel bowl and place over a pot of barely simmering water. Heat, stirring frequently, until the chocolate is completely melted. Remove the bowl from the pot and set aside to cool until tepid.

4. In the bowl of an electric mixer fitted with the paddle attachment, beat the butter and sugar at medium high speed until well blended and light. At medium speed, add the eggs one at a time, beating well after each addition and scraping down the sides of the bowl as necessary. Beat in the vanilla extract until blended. Add the chocolate in two additions, mixing until blended. At low speed, add the flour mixture in three additions, alternating it with the sour cream in 2 additions and mixing until blended. Add the hot water 1/3 at a time, mixing until blended. Remove the bowl from the mixer and, using a rubber spatula, stir the batter a few times to ensure it is blended. Scrape the batter into the prepared pan.

5. Bake the cake for 45-55 minutes, until a toothpick inserted in the center comes out clean. Cool the cake completely in the pan on a wire rack.

6. Frost the top of the cake with peanut butter frosting. Serve the cake from the pan, cutting it into squares and sprinkling with sugared peanuts (or chocolate sprinkles). Store covered in the refrigerator for up to 5 days.

Creamy Peanut Butter Frosting
3/4 cup creamy peanut butter (not natural or low sugar.)
4 tbsp unsalted butter, softened
1 1/2 tsp vanilla extract
3 cups confectioners' sugar
1/3 cup whole milk

1. In an electric mixer fitted with the paddle attachment, beat the peanut butter and butter at medium speed until well blended and smooth, scraping down the bowl as necessary. Add the vanilla and mix until blended. At low speed, gradually add the confectioners' sugar in 3 additions, alternating it with the milk in 2 additions. Beat at low speed until creamy, about 1 minute.

2. Use immediately, or cover and refrigerate.

Friday, April 11, 2008

Strawberry Cream Cake.

Strawberry Cream Cake

Strawberry Cream Cake

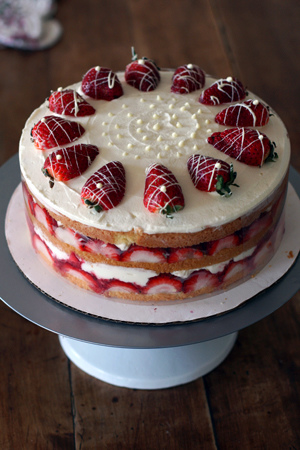
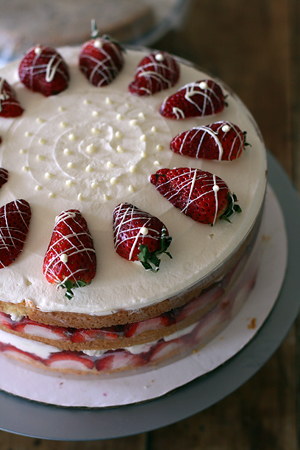
Yesterday, we had a small reception at work for a recently married staff member. At the request of some co-workers, I baked two cakes: a strawberry cream cake and a chocolate cake with espresso caramel frosting.

I had a little trouble choosing recipes. I wanted the finished cakes to be fancier than average, but I didn't want them to be technically difficult or extremely time consuming. I knew I wanted to use strawberries; they've been on sale for weeks, and they're always popular and visually appealing.

Usually i'm against trying new recipes for parties, but I make exceptions for things in Cook's Illustrated. I've had this recipe mentally bookmarked since 2006. It's a simple cake filled with strawberries and a whipped cream/cream cheese mixture. The cake was good: light and spongy with enough structure to slice and move easily.

I built my cake inside of a setting ring to keep everything neat. I slightly over-whipped my filling, which made it difficult to spread over the chopped strawberries. It was much easier to pipe the filling and smooth it with a spatula. I garnished the cake with some melted white chocolate. I've posted a few more notes at the end of the recipe.
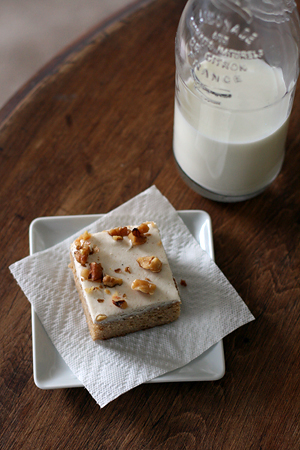
This cake was long gone before the chocolate one. It reminds me of my favorite trifle recipe, and I'll probably find an excuse to make it again soon.

Strawberry Cream Cake
from Cook's Illustrated

Cake
1 1/4 cups cake flour (5 ounces)
1 1/2 teaspoons baking powder
1/4 teaspoon table salt
1 cup sugar (7 ounces)
5 large eggs (2 whole and 3 separated), room temperature
6 tablespoons unsalted butter , melted and cooled slightly
2 tablespoons water
2 teaspoons vanilla extract

Strawberry Filling
2 pounds fresh strawberries (medium or large, about 2 quarts), washed, dried, and stemmed
4–6 tablespoons sugar
2 tablespoons Kirsch
Pinch table salt

Whipped Cream
8 ounces cream cheese , room temperature
1/2 cup sugar (3 1/2 ounces)
1 teaspoon vanilla extract
1/8 teaspoon table salt
2 cups heavy cream

1. FOR THE CAKE: Adjust oven rack to lower-middle position and heat oven to 325 degrees. Grease and flour round 9 by 2-inch cake pan or 9-inch springform pan and line with parchment paper. Whisk flour, baking powder, salt, and all but 3 tablespoons sugar in mixing bowl. Whisk in 2 whole eggs and 3 yolks (reserving whites), butter, water, and vanilla; whisk until smooth.

2. In clean bowl of standing mixer fitted with whisk attachment, beat remaining 3 egg whites at medium-low speed until frothy, 1 to 2 minutes. With machine running, gradually add remaining 3 tablespoons sugar, increase speed to medium-high, and beat until soft peaks form, 60 to 90 seconds. Stir one-third of whites into batter to lighten; add remaining whites and gently fold into batter until no white streaks remain. Pour batter into prepared pan and bake until toothpick or wooden skewer inserted into center of cake comes out clean, 30 to 40 minutes. Cool in pan 10 minutes, then invert cake onto greased wire rack; peel off and discard parchment. Invert cake again; cool completely, about 2 hours.

3. FOR THE STRAWBERRY FILLING: Halve 24 of best-looking berries and reserve. Quarter remaining berries; toss with 4 to 6 tablespoons sugar (depending on sweetness of berries) in medium bowl and let sit 1 hour, stirring occasionally. Strain juices from berries and reserve (you should have about 1/2 cup). In workbowl of food processor fitted with metal blade, give macerated berries five 1-second pulses (you should have about 1 1/2 cups). In small saucepan over medium-high heat, simmer reserved juices and Kirsch until syrupy and reduced to about 3 tablespoons, 3 to 5 minutes. Pour reduced syrup over macerated berries, add pinch of salt, and toss to combine. Set aside until cake is cooled.

4. FOR THE WHIPPED CREAM: When cake has cooled, place cream cheese, sugar, vanilla, and salt in bowl of standing mixer fitted with whisk attachment. Whisk at medium-high speed until light and fluffy, 1 to 2 minutes, scraping down bowl with rubber spatula as needed. Reduce speed to low and add heavy cream in slow, steady stream; when almost fully combined, increase speed to medium-high and beat until mixture holds stiff peaks, 2 to 2 1/2 minutes more, scraping bowl as needed (you should have about 4 1/2 cups).

5. TO ASSEMBLE THE CAKE: Using large serrated knife, slice cake into three even layers. Place bottom layer on cardboard round or cake plate and arrange ring of 20 strawberry halves, cut sides down and stem ends facing out, around perimeter of cake layer. Pour one half of pureed berry mixture (about 3/4 cup) in center, then spread to cover any exposed cake. Gently spread about one-third of whipped cream (about 1 1/2 cups) over berry layer, leaving 1/2-inch border from edge. Place middle cake layer on top and press down gently (whipped cream layer should become flush with cake edge). Repeat with 20 additional strawberry halves, remaining berry mixture, and half of remaining whipped cream; gently press last cake layer on top. Spread remaining whipped cream over top; decorate with remaining cut strawberries. Serve, or chill for up to 4 hours.

(Notes: don't underwhip or overfold the egg whites, or your cake may end up flat and dense. The cake is easiest to slice when it's well chilled, and thicker slices will hold together better. Next time I might add a little gelatin to the whipped cream mix. I substituted rum for kirsh, and next time I might throw in a little almond extract. The sponge cake can be wrapped and frozen-just let it defrost on a counter for 2 hours, unwrapped, before using.)

Thursday, May 29, 2008

Chocolate Coconut Caramel Cake

Chocolate Coconut Caramel Cake

Chocolate Coconut Caramel Cake

This cake was meant to be a swan song of sorts. Between a full schedule of work and summer classes, there's no time for complex baking projects. I'll be moving soon, so I used up most of my baking ingredients on a multi-component cake. Now I can slowly start packing up the kitchen.

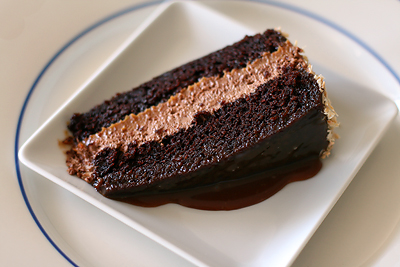
I picked this recipe from Payard's Chocolate Epiphany because the chocolate cake looked extremely simple. It's made with simple ingredients and simple techniques. I'd use it for other layer cakes because it's moist and it has good structure.

I didn't think the directions for this cake were particularly well explained; I wasn't sure what the cooked egg mixture for the mousse was supposed to look like, and I had a lot of trouble with temperatures. The recipe says the caramel glaze should be applied close to body temperature, but even at 80 degrees it was very runny.

I know that restaurants often use cream with a higher fat content. This might have been the problem, but it could have been a problem with my kitchen scale. If you have more success with the glaze, let me know. Mine tasted great, but it was more like a caramel sauce.

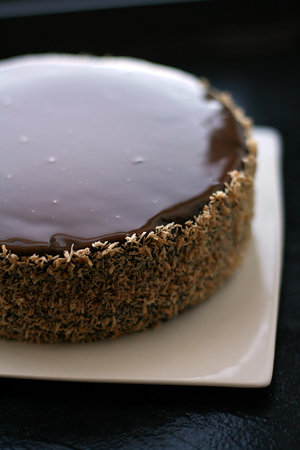
The best part was the filling. I loved the combination of rich chocolate mousse and dense, dark caramel. The toasted coconut garnish was also a nice touch.

Chocolate Coconut Caramel Cake
adapted from Payard's Chocolate Epiphany

Caramel Filling
1/4 cup (70g) light corn syrup
2/3 cup (125g) sugar
1/2 cup + 2 tbsp (150g) heavy cream, at room temperature (*you can warm it briefly on the stove or in the microwave)
3 tbsp (50g) unsalted butter, at room temperatre, cut into small pieces

Cake
Vegetable cooking spray, for the pan
2 1/3 cups (235g) all-purpose flour
2 tsp (10g) baking soda
1 2/3 cup (335g) sugar
2 tsp (7g) salt
1 cup (225g) buttermilk
3/4 cup (170g) vegetable oil
2 large eggs
1/2 cup (45g) dutch processed cocoa powder

Chocolate Mousse
1/2 cup (125g) heavy cream
3 oz (82g) 72% chocolate, chopped
1/4 cup (62g) whole milk
1/3 cup (62g) sugar
2 large egg yolks

Caramel Glaze
1 cup (200g) sugar
1 1/3 cups (330g) heavy cream, at room temperature
4 oz (120g) milk chocolate, chopped
2 tbsp (30g) unsalted butter
1/2 cup (135g) light corn syrup

Garnish
2 cups (150g) unsweetened shredded coconut, lightly toasted

Make the caramel filling: Place the corn syrup in a medium saucepan over medium high heat. Pour the sugar over the corn syrup and let the sugar begin to melt. When the mixture begins to turn slightly golden, stir it gently with a wooden spoon to make sure that the sugar dissolves and the caramelization is even. If sugar sticks to the sides of the pan, dip a pastry brush in water and brush the sides. Once the sugar reaches a dark amber color, after 5-10 minutes, add the cream and keep stirring over the heat, to ensure the sugar is completely melted. The sugar mixture will splatter, so be sure to not stand directly in front of the pan when you do this.

Transfer the caramel to a bowl and let it cool to room temperature, then stir in the butter until it is fully incorporated. Place the caramel in the refrigerator for about 1 hour, until it is thick but still spreadable. You can also make this a day ahead. In this case, soften the caramel in the microwave before using in 10 second increments, until it reaches a spreadable consistency.

Make the cake: Place a rack in the center of the oven and preheat to 350F. Spray a 9inch round cake pan with cooking spray. Cut a 9inch round of parchment paper, place it at the bottom of the pan, and spray it as well. (Use a 9x3 or taller cake pan- 2 inches will be too short).

Sift together the flour, baking soda, sugar, and salt over a large bowl. In a separate bowl, whisk together the buttermilk, oil, and eggs, and add them to the dry ingredients. Whisk until the ingredients are just combined.

Place 1/2 cup (125g) water in a small saucepan over medium high heat, and bring to a boil. Whisk in the cocoa powder, and let the mixture return to a boil, constantly whisking. Pour it over the batter, and stir it in with a spatula or wooden spoon. Pour the batter into the prepared pan, and bake for about 30 minutes, until a wooden skewer inserted in the center of the cake comes out clean and the sides slightly pull back from the edges of the pan. Let cool in the pan. (My baking time was 40-45 minutes).

Make the chocolate mousse: Pour the cream in a large bowl and whisk until it holds soft peaks. Set aside. Place the chocolate in the bowl of an electric mixer fitted with the whisk attachment.

Bring the milk to a boil in a medium saucepan. Meanwhile, in a medium bowl, whisk the sugar with the yolks until the mixture turns a pale yellow. Pour a third of the milk into the yolk mixture and whisk until the mixture is well combined. Lower the heat to low. Pour the mixture back into the saucepan, and return to the heat. Stirring constantly with a wooden spoon, cook the mixture until it thickens and coats the back of the spoon, about 3 minutes.

Pour the mixture over the chocolate, and whip on medium high speed until the mixture is cool, becomes very fluffy, and nearly doubles in volume, 10-15 minutes. With a spatula, gently fold the whipped cream into the chocolate mixture, and refrigerate until ready to use, at least 15 minutes and up to 2 days.

Make the caramel glaze: Place the sugar in a medium saucepan over medium high heat. When the sugar begins to turn slightly golden, gently stir it with a wooden spoon to make sure that the sugar dissolves and the caramelization is even. If sugar sticks to the side of the pan, dip a pastry brush in water and brush the sides. When the caramel turns a light caramel color, add the cream and keep stirring over the heat, to ensure that the sugar is completely melted. The mixture will splatter, so do not stand directly in front of the pan. Remove from the heat, and stir in the chocolate, butter, and corn syrup. The glaze should be warm, close to body temperature, when you pour it over the cake. If it cools down too much, transfer it to a microwave safe bowl and reheat it in the microwave in 10 second increments until it's pourable.

Assemble the cake: Line a baking sheet with wax paper, and place a wire cooling rack on top of the paper. Unmold the cake. If necessary, trip the top of the cake w/ a serrated knife to make it flat. Cut it horizontally into two even layers. Place the top layer of the cake in front of you on a 9 inch cardboard cake round. Spread all of the caramel filling over the cake, then spread the chocolate mousse over the caramel. Place the bottom layer of the cake, bottom side up, over the mousse. This will ensure that the surface of the cake is smooth, which will make its coating easier.

Without removing the cake board, transfer the cake to the cooling rack and pour the caramel glaze over the cake. Use an offset spatula that is larger than the diameter of the cake to help the glaze flow down over the sides. The whole cake should be coated. Without removing it from the rack, refrigerate it for 30-60 minutes, until the glaze has set up. It will feel sticky, but will be thicker and firmer.

Place the coconut on a piece of wax paper. With a large serving spatula, carefully remove the cake, still on the board, from the rack and place it in the center of your left hand (or right if you are left handed) over the paper. With the over hand, scoop up the coconut and press it on the sides of the cake. When the cake is coated all the way around, place it on a serving platter. Refrigerate the cake until you are ready to serve it, up to 1 day. Remove the cake from the fridge 30 minutes before serving.

Sunday, March 30, 2008

Perfect Party Cake.

Perfect Party Cake

Perfect Party Cake

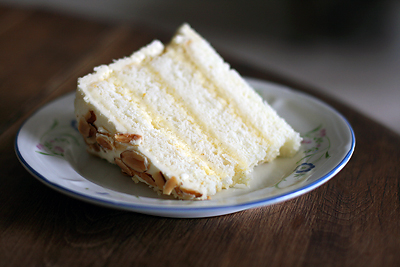
I recently joined The Daring Bakers, a group of bloggers who agree to bake a chosen recipe each month. This month, the challenge was Dorie Greenspan's Perfect Party Cake from Baking From my Home to Yours. Since i'd made the cake before, I decided to challenge myself with a flavor variation.

This cake lends itself to experimentation; the buttercream recipe is extremely forgiving and the cake layers are sturdy enough to slice and move easily. I flavored my cake layers with almond extract and orange zest and substituted the lemon juice in the buttercream for orange juice. I toasted some sliced almonds for the topping to keep with the orange/almond theme.

The complicated part of this cake was the filling. Instead of the listed buttercream/jam filling, I decided to substitute Sherry Yard's Creme Chiboust recipe from The Secrets of Baking. Creme Chiboust is a pastry cream that's usually lightened with whipped cream or beaten egg whites and gelatin.

I flavored my pastry cream with vanilla beans and orange zest. After incorporating the egg whites I built the cake in a setting ring lined with cake ribbon/transfer sheets. The unchilled filling is too loose to use without a ring. The filling made my cake unbelievably tall- it took the entire buttercream recipe just to frost the top and sides.

When I unmolded the cake to frost it, I was convinced it would fall apart or have big chunks of gelatin in it. I shouldn't have worried so much- it set perfectly and made frosting the outside easy. I think I this was the fastest, neatest frosting job i've ever done! I the cake for a small party and people enjoyed it. It tasted like a light, fluffy burnt almond torte.

Perfect Party Cake
adapted from Dorie Greenspan's Baking from my Home to Yours.

For the Cake
2 1/4 cups cake flour
1 tablespoon baking powder
½ teaspoon salt
1 ¼ cups whole milk or buttermilk (I prefer buttermilk with the lemon)
4 large egg whites
1 ½ cups sugar
2 teaspoons grated lemon zest
1 stick (8 tablespoons or 4 ounces) unsalted butter, at room temperature
½ teaspoon pure lemon extract

For the Buttercream
1 cup sugar
4 large egg whites
3 sticks (12 ounces) unsalted butter, at room temperature
¼ cup fresh lemon juice (from 2 large lemons)
1 teaspoon pure vanilla extract

For Finishing
2/3 cup seedless raspberry preserves stirred vigorously or warmed gently until spreadable
About 1 ½ cups sweetened shredded coconut

Getting Ready
Centre a rack in the oven and preheat the oven to 350 degrees F. Butter two 9 x 2 inch round cake pans and line the bottom of each pan with a round of buttered parchment or wax paper. Put the pans on a baking sheet.

To Make the Cake
Sift together the flour, baking powder and salt.
Whisk together the milk and egg whites in a medium bowl.
Put the sugar and lemon zest in a mixer bowl or another large bowl and rub them together with your fingers until the sugar is moist and fragrant.
Add the butter and working with the paddle or whisk attachment, or with a hand mixer, beat at medium speed for a full 3 minutes, until the butter and sugar are very light.
Beat in the extract, then add one third of the flour mixture, still beating on medium speed.
Beat in half of the milk-egg mixture, then beat in half of the remaining dry ingredients until incorporated.
Add the rest of the milk and eggs beating until the batter is homogeneous, then add the last of the dry ingredients.
Finally, give the batter a good 2- minute beating to ensure that it is thoroughly mixed and well aerated.
Divide the batter between the two pans and smooth the tops with a rubber spatula.
Bake for 30-35 minutes, or until the cakes are well risen and springy to the touch – a thin knife inserted into the centers should come out clean
Transfer the cakes to cooling racks and cool for about 5 minutes, then run a knife around the sides of the cakes, unfold them and peel off the paper liners.
Invert and cool to room temperature, right side up (the cooled cake layers can be wrapped airtight and stored at room temperature overnight or frozen for up to two months).

To Make the Buttercream
Put the sugar and egg whites in a mixer bowl or another large heatproof bowl, fit the bowl over a plan of simmering water and whisk constantly, keeping the mixture over the heat, until it feels hot to the touch, about 3 minutes.
The sugar should be dissolved, and the mixture will look like shiny marshmallow cream.
Remove the bowl from the heat.
Working with the whisk attachment or with a hand mixer, beat the meringue on medium speed until it is cool, about 5 minutes.
Switch to the paddle attachment if you have one, and add the butter a stick at a time, beating until smooth.
Once all the butter is in, beat in the buttercream on medium-high speed until it is thick and very smooth, 6-10 minutes.
During this time the buttercream may curdle or separate – just keep beating and it will come together again.
On medium speed, gradually beat in the lemon juice, waiting until each addition is absorbed before adding more, and then the vanilla.
You should have a shiny smooth, velvety, pristine white buttercream. Press a piece of plastic against the surface of the buttercream and set aside briefly.

To Assemble the Cake
Using a sharp serrated knife and a gentle sawing motion, slice each layer horizontally in half.
Put one layer cut side up on a cardboard cake round or a cake plate protected by strips of wax or parchment paper.
Spread it with one third of the preserves.
Cover the jam evenly with about one quarter of the buttercream.
Top with another layer, spread with preserves and buttercream and then do the same with a third layer (you’ll have used all the jam and have buttercream leftover).
Place the last layer cut side down on top of the cake and use the remaining buttercream to frost the sides and top.
Press the coconut into the frosting, patting it gently all over the sides and top.

Serving
The cake is ready to serve as soon as it is assembled, but I think it’s best to let it sit and set for a couple of hours in a cool room – not the refrigerator. Whether you wait or slice and enjoy it immediately, the cake should be served at room temperature; it loses all its subtlety when it’s cold. Depending on your audience you can serve the cake with just about anything from milk to sweet or bubbly wine.
Storing
The cake is best the day it is made, but you can refrigerate it, well covered, for up to two days. Bring it to room temperature before serving. If you want to freeze the cake, slide it into the freezer to set, then wrap it really well – it will keep for up to 2 months in the freezer; defrost it, still wrapped overnight in the refrigerator.
Playing Around
Since lemon is such a friendly flavour, feel free to make changes in the preserves: other red preserves – cherry or strawberry – look especially nice, but you can even use plum or blueberry jam.

Tuesday, February 5, 2008

Spice Cake with Maple Icing and Toasted Pecans

Spice Cake w/ Maple Frosting

Spice Cake w/ Maple Frosting

How can you not enjoy a recipe when it tells you to throw nuts at the sides of your cake? I didn't bother trying to be precise or tidy. I literally took handfuls of pecans and whirled them at the cake. Most of them stuck, but many of them ended up on the countertops and the floor.

I substituted the maple syrup cake from the original recipe for Flo Braker's spice cake. It was a good choice; the cake has a crumbly, rustic texture that reminds me of coffee cake. Combined with the maple syrup in the frosting, you could almost pass this cake off as a breakfast item.

I was quite proud of how pretty the cake looked. I carried it, umbrella covered, through the rain to my friends at Apple. Everyone seemed to enjoy it, though Peter didn't care for the texture of the icing. He described it as "stretchy" or "stringy." Meringue tends to be hit or miss with most people. I like it when it's well-made. It's lighter than buttercream and reminds me of marshmallow fluff.

This cake was fun to make, and I found myself smiling through the whole process. I find the flavors and textures playful and happy. It's an easy, elegant cake that would be good for birthdays or other occasions.

Spice Cake with Maple Icing
adapted from Nigella Lawson and Flo Braker

For the cake:
2 1/2 cups sifted cake flour
1 teaspoon baking powder
1/2 teaspoon baking soda
1/2 teaspoon cinnamon
1/2 teaspoon ground ginger
1/4 teaspoon freshly grated nutmeg
1/4 teaspoon salt
1/8 teaspoon ground cloves
1 cup buttermilk, at room temperature
1 teaspoon pure vanilla extract
1 1/2 sticks (6 ounces) unsalted butter, softened
1 cup (packed) light brown sugar
1/2 cup granulated sugar
3 large eggs, at room temperature

For the icing:
2 large egg whites
1/2 cup maple syrup
7 tbsp sugar
1/4 tsp cream of tartar
1/4 tsp salt
1 tsp vanilla extract
1/2 cup or 4 oz pecans, lightly toasted

1. Preheat the oven to 350° and position a rack in the lower third. Butter and flour two 8-by-2-inch round cake pans. Sift the flour with the baking powder, baking soda, cinnamon, ginger, nutmeg, salt and cloves onto a sheet of wax paper. Combine the buttermilk and vanilla in a small pitcher.

2. In a standing electric mixer fitted with a paddle attachment, beat the butter at medium speed until creamy. Add the light brown and granulated sugars and beat until light and fluffy, about 4 minutes, stopping once to scrape down the bowl. Add the eggs, 1 at a time, beating well after each addition. Beat in the flour mixture at low speed in 3 batches, alternating with the buttermilk mixture, just until the batter is smooth; stop the mixer occasionally to scrape down the bowl.

3. Divide the batter evenly between the pans. Transfer the pans to the oven and bake for 30 to 35 minutes, or until the cakes begin to shrink from the sides. Let the cakes cool for 10 minutes, then turn each out onto a rack, invert onto another rack and let cool completely. Wrap each cake in plastic and store at room temperature overnight.

4. To make the frosting: Put everything except the extract and pecans into a glass or metal bowl that fits over a saucepan to form a double boiler. Fill the saucepan with enough water to come just below, but not touching, the bowl when it sits on top. Bring the water to the boil, set the boil on top, and using an electric mixer, beat the mixture vigorously for 5-7 minutes. It should stand up in peaks like a meringue mixture. Take the bowl off the saucepan, away from the heat, and add the extract, beating for another minute.

5. Using the icing, frost the middle, sides, and top of the cake. Chop most of the pecans finely, leaving some pieces larger. Sprinkle over the top of the cake, and throw at the sides. This cake is best eaten the day it's made.
.

Sunday, January 27, 2008

Banana Cake with Fudgy Frosting

Banana Cake w/ Fudgy Frosting

Banana Cake w/ Fudgy Frosting

[UPDATE: If you are making this, I suggest adding 1/2 to 3/4 cup of the evaporated milk, then adding more if the frosting is too thin. I've made a few bad batches- all because I added too much liquid.]

I had a fantastic potluck last night. I contributed a mushroom tart and this banana layer cake. We also had miso soup, mac and cheese, vegetarian chili, tofu scramble with gorgonzola, sweet and spicy nuts, and three bottles of wine.

The last time I hosted a potluck I baked a recipe i'd never tried. It made me stressed, so this time I was determined to cook something familiar. I've made this cake seven or eight times and I knew it'd be fantastic. It has a frosting that I actually enjoy eating- it's rich, smooth, and has good texture even when it's cold. I have no problem piling it on.

The Weekend Baker is one of my favorite cookbooks. It gives weight conversions for all the ingredients and suggestions for preparing components in advance. I baked the cake layers two days early and left them on the counter in gallon-sized ziplock bags. I cut the bags away the night before and frosted the cake, then pulled it out of the fridge two hours before the potluck.

Everyone loved it. Liz said something like: "Lisa, how do you not make this cake all the time and get really fat?" I made an effort to post the recipe quickly because multiple people requested it.

The consitency of the frosting can vary depending on the chocolate and butter you use. I suggest under-measuring the milk, and if the frosting seems too thin try adding a little more butter. Sometimes my frosting is firm enough to pipe, but sometimes it isn't. I used unsweetened baking chocolate from Trader Joes and I really preferred it to normal Bakers squares.

Banana Layer Cake with Fudgy Frosting
adapted from Abigal Johnson Dodge's The Weekend Baker

For the cake:
2 2/3 cups (340g) all purpose flour
1 tbsp baking powder
1/2 tsp table salt
1/2 tsp baking soda
16 tbsp (2 sticks) unsalted butter, at room temperature
1 3/4 cups (397g) granulated sugar
3 medium, very ripe bananas (397g total including peel), peeled
2 tsp vanilla extract
4 large eggs
1/2 cup buttermilk
3/4 cup (85g) chopped walnuts, optional

For the fudgy frosting:
6 oz unsweetened chocolate, chopped
1 1/3 cups (298g) granulated sugar
1 cup evaporated milk (not sweetened condensed)
6 tbsp (85g) unsalted butter, cut in 2 pieces
1 tbsp pure vanilla extract
1/2 tsp table salt

toppings: chopped toasted walnuts, other nuts, or toasted shredded unsweetened dried coconut.

1. To make the cake: position an oven rack on the middle rung. Heat the oven to 350F (180C). Grease and flour the bottom and sides of two 9x2 inch (22.75x5cm) round cake pans, tapping out the excess flour. You can also line the bottoms of the pans with parchment to ensure easy and clean removal.

2. In a medium bowl, combine the flour, baking powder, salt, and baking soda. Whisk until well blended. In a large bowl, beat the butter with an electric mixer (or a stand mixer with the paddle attachment) on medium high speed until smooth. Add the sugar and beat until well combined. Add the bananas and vanilla and beat until well blended and only small bits of banana remain. Add the eggs two at a time, beating well after each addition. The mixture will look curdled and a bit lumpy. Don't worry, it will all come together. Add half of the flour mixture and mix on low speed just until blended. Add the buttermilk and mix just until blended. Add the remaining flour and mix until blended. Stir in the walnuts, if using. Scrape the batter into the prepared pans, dividing it evenly.

3. Bake until the tops are light brown and a toothpick or cake tester inserted into the center of one layer comes out clean, about 30 minutes. Transfer the pans to racks and let cool for about 15 minutes. Run a thin knife around the sides of each pan to loosen the cake. Invert the layers onto the racks, lift off the pans, and let cool completely.

4. To make the frosting: While the cake is baking, make the frosting. Melt the unsweetened chocolate in a double boiler or microwave. Meanwhile, combine the sugar, evaporated milk, butter, vanilla, and salt in a blender; there's no need to blend at this point. If you think your blender might be too small, divide the recipe in half and make in 2 batches. When the chocolate is melted, remove it from the heat and give it a stir. Scrape the hot melted chocolate into the blender. Cover with the lid and blend on high speed until the mixture darkens and is very thick, about 2 minutes. You'll also hear the engine working harder when the frosting is sufficiently thick, and it will appear to be barely moving in the blender. It will not be pourable. Scrape the frosting into a clean bowl and set aside at room temperature. When the frosting is cool, cover the bowl with plastic wrap until the cake is completely cool and ready to frost.

5. To frost the cake: Brush away any loose crumbs from the cake layers. Center 1 layer, top side down, on a flat serving plate. To protect the plate from smears during frosting, slide small strips of foil or parchment under the bottom of the cake to cover the plate. Using a metal spatula or the dull edge of a table knife, spread 1 cup of the frosting evenly over the layer. Place the second layer, top side down, on top of the frosting. Be sure the sides are lined up and then press gently on the layer. Apply a very thin layer of frosting over the entire cake to seal in any crumbs. Spread the remaining frosting over the top and sides of the cake. Garnish the top with coconut or walnuts, if using. The cake is best served at room temperature.

The cake layers can be made in advance and stored at room temperature for up to 2 days, or frozen for up to 3 months. Thaw before using. The entire cake can be prepared, covered, and stored in the fridge for up to 3 days.

Thursday, February 14, 2008

Banana Chocolate Chip Cake

Banana Chocolate Chip Cake

Banana Chocolate Chip Cake

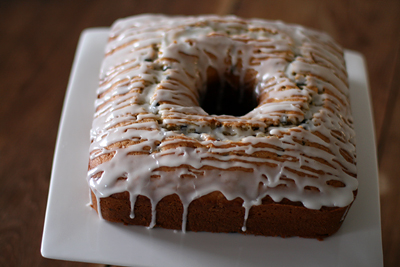
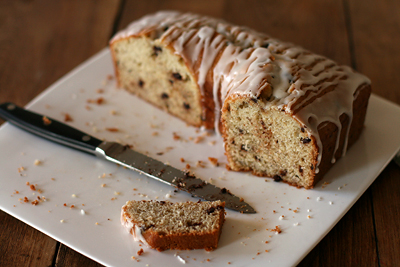
I'm surprised that i'm not sick of banana desserts by now. This is the sixth banana recipe i've made since January. I have a habit of comparing banana bread/cake/muffin recipes. The little variations spark my curiosity.

This recipe has a higher proportion of fat than the others. A good dose of butter and sour cream makes the crumb very delicate and soft. It's more like a decadent pound cake than a traditional banana bread. Try to get the banana extract if you can; I thought my cake could have used more banana flavor. The mace is a nice peppery, nutmeg-like touch.

The directions might seem a little complicated or over the top. The details are related to texture. Pureeing and straining the bananas removes the seeds and improves their texture. Cake flour, sour cream, and superfine sugar improve the cake's tenderness and crumb. Creaming the butter and sugar and gently folding in the ingredients ensures a light, fluffy cake rather than a dense, tough one.

I cut up most of this cake and took it to work. It was definitely interesting and well enjoyed, but i'm not sure i'll make it again soon.

Banana Chocolate Chip Cake
adapted from Carole Walter's Great Coffee Cakes, Sticky Buns, Muffins & More

2 1/2 cups sifted cake flour, spooned in and leveled
1 tsp baking soda
1/2 tsp salt
1/2 tsp mace
2 large, very ripe bananas
1 tsp lemon juice
3/4 cup sour cream
1 tsp pure vanilla extract
3/4 tsp banana extract
3/4 cup unsalted butter (1.5 sticks) slightly firm
1 1/4 cups superfine sugar
3 large eggs
1/2 cup mini chocolate chips
1 large recipe vanilla glaze

1. Position the rack in the lower third of the oven. Heat the oven to 350F. Generously butter a 10 inch bundt pan, dust with flour, then invert it over the kitchen sink and tap firmly to remove the excess flour. Set aside.

2. In a large bowl, thoroughly whisk the flour, baking soda, salt, and mase. Set aside.

3. Cut the bananas into 1 inch pieces and place with the lemon juice in the bowl of a food processor fitted with the steel blade. Process for 30 seconds, then stop the machine and scrape down the sides of the bowl. Process for another 10 seconds, or until the bananas are pureed. Strain the puree through a medium-gauge strainer. You should have a generous cupful. Stir the sour cream and extracts into the bananas and set aside.

4. Cut the butter into 1 inch pieces and place in the bowl of an electric mixer fitted with the paddle attachment. Mix on medium speed until smooth and lightened in color, about 2 minutes. Add the sugar, 1 to 2 tablespoons at a time, taking 6 to 8 minutes. Blend in the eggs, one at a time, beating thoroughly after each addition, scraping down the side of the bowl as needed.

5. Reduce the mixer speed to low and add the dry ingredients alternately with the banana/sour cream mixture, dividing the flour mixture into four parts and the liquid into three parts, beginning and ending with the flour. Scrape down the side of the bowl, then mix for 10-15 seconds longer. Remove the bowl from the machine and, using a large rubber spatula, fold in the mini chocolate chips.

6. Spoon the batter into the prepared pan. Smooth the surface with the back of a large soupspoon and bake for 55-60 minutes. The cake is done when the top is golden brown and firm to the touch, and a wooden skewer inserted deeply in the center comes out clean.

7. Remove the cake from the oven and let stand on a cooling rack for 10 minutes. Invert the pan onto the rack and carefully lift it off. As the cake is cooling, prepare the vanilla glaze. While the cake is still warm, place a piece of parchment or wax paper under the rack and spoon the glaze onto the cake. The glaze will harden as the cake cools. Store under a cake dome or tightly covered with aluminum foil for up to 7 days. This cake may be frozen before glazing. You can also omit the chocolate chips and fold in 1/2 to 3/4 cup medium-chopped walnuts or pecans.

Vanilla Glaze
1 cup strained powdered sugar
3 to 4 tbsp hot water, milk, or cream
2 tsp light corn syrup
1/4 tsp pure vanilla extract
1/8 tsp lemon juice
2 pinches salt

Place the powdered sugar in a medium bowl. Add 3 tsp of the hot water or milk, the corn syrup, vanilla, lemon juice, and salt. Stir until smooth. Add additional liquid as needed to make a thin glaze. Use immediately if possible, or rewarm by setting the bowl in a bowl of hot water.

Sunday, April 6, 2008

Pecan Roulade w/ Praline Mousse

Pecan Roulade w/ Praline Mousse

Pecan Roulade w/ Praline Mousse

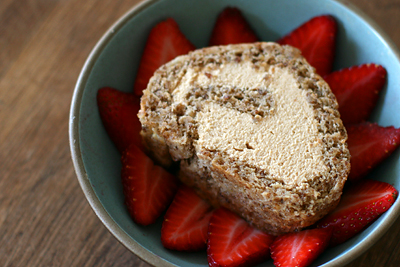
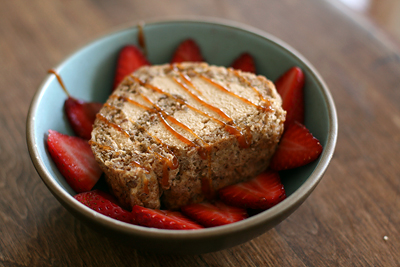
I looked through Susan Spicer's Crescent City Cooking in the library a few weeks ago but didn't check it out. Last week, it was featured on Leite's Culinaria, one of my favorite sites for recipes. This pecan roulade caught my eye; it looked sophisticated, delicious, and relatively easy to make. It's also gluten-free!

I was stressed about a school project, so naturally I felt like baking. I could make the caramel syrup a day before, make the cake right before my big presentation, and assemble the cake when I got home. By then the cake would be cool and all the mousse ingredients would be at room temperature.

The baking process was relatively easy; however, the original recipe said to cover the cake with a damp dish towel and my cooled cake was sticky, wet, and difficult to roll. Most roulade recipes suggest inverting the briefly cooled cake onto a clean dish towel and rolling it up to cool before filling. Next time i'd try this method.

This cake tastes strongly of pecans, caramel, and rum (I think it's fantastic). Most of the components can stand alone. I'd use the caramel mousse for filling layer cakes or cream puffs, and the caramel syrup would be great on ice cream or chilled and spread on toast. It's especially good with the cream cheese before you add the whipped cream and gelatin.

Pecan Roulade w/ Praline Mousse
adapted from Susan Spicer's Crescent City Cooking

For the cake:
7 oz pecans (about 1 cup), lightly toasted
1/2 tsp baking powder
7 eggs, separated (don't get any yolks in the whites!)
1/2 cup + 2 tbsp granulated sugar

For the praline syrup:
1 cup sugar
1/2 cup water
1 cup heavy cream
1 tsp pure vanilla extract
bourbon or rum to taste

For the praline mousse:
4 oz cream cheese, softened
1 cup reserved praline syrup
1 tsp pure vanilla extract
3/4 tsp unflavored gelatin
1 1/2 tbsp dark rum
1 cup heavy cream, whipped to firm peaks
confectioners' sugar for dusting (optional)

Make the cake:
1. Line an 18 x 12-inch baking pan with parchment paper and lightly grease the parchment or spray it with nonstick spray. Preheat the oven to 375°F (190°C).

2. Pulse the pecans in a food processor until you have a coarse meal. Transfer to a medium bowl and toss with the baking powder.

3. Whip the yolks with 1/4 cup of the granulated sugar in an electric mixer at high speed until thick and pale. Stir into the nut mixture. Using a clean beater and a clean mixing bowl, whip the egg whites at medium speed until foamy. Whip at high until soft peaks begin to form. Gradually add the remaining 1/4 cup plus 2 tablespoons granulated sugar. Stop the mixer and pull the beater out slowly: if the whites leave stiff peaks in the bowl, the mixture is ready (it should be stiff but not dry).

4. Fold the whites into the yolk mixture one half at a time. Avoid the urge to overmix. Spread the batter evenly into the prepared pan.

5. Bake until light golden brown, 10-12 minutes. Remove the cake from the oven and immediately cover with a clean dish towel; cool completely.

Make the praline syrup:
1. Put the sugar and water in a small, heavy-bottomed saucepan and place over high heat. Stir to combine. Put the cream in another small saucepan and bring it just short of a boil. Remove from heat and set aside.

2. Bring the sugar mixture to a boil and then down to a steady simmer. When the liquid turns amber, swirl the pan. This will help it caramelize evenly. When it reaches a deep amber color, remove it from the heat and very carefully whisk in the cream. It will bubble up and steam, so watch those fingers! Return the pan to the heat and whisk to dissolve all the caramel. Refrigerate 1 cup of the praline syrup for the mousse filling. Add the vanilla and bourbon to the rest for your sauce.

Make the mousse:
1. Cream the cream cheese by hand or in an electric mixer fitted with the whisk attachment. Slowly add the praline syrup, scraping the bowl frequently. Add the vanilla. Place the gelatin in a small bowl with about 1 tablespoon warm water. Add the rum to the gelatin and stir to dissolve. Fold a bit of the praline syrup into the gelatin, then fold the gelatin mixture back into the praline syrup. Fold in the whipped cream, one half at a time.

Assemble:
1. Run a paring knife around the outside of the cake to release it from the sides of the pan. Lift the edges carefully, feeling under the cake to loosen it. Sift a thin layer of confectioners' sugar onto the top of the cake. Lay a piece of parchment the size of the cake across the top, then turn the pan over to release the cake onto the parchment. With the cake lying on the counter, carefully peel the parchment that is now on the top off the cake.

2. Spread the mousse on the cake, stopping 1/2 inch from the long edge. Starting with the long edge closest to you, begin rolling the cake up jelly roll style, using the parchment for support. Tuck the rolling edge of the cake in as you go to make it a little tighter and neater. Place the cake back on the baking pan and refrigerate to firm it up.

3. To serve, sprinkle with confectioners' sugar, cut the slices about 1 inch thick, and serve with a generous drizzle of the reserved praline syrup. Garnish with fresh strawberries or peaches, if desired.

Thursday, March 13, 2008

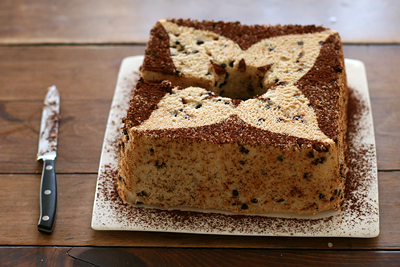
Espresso-Chocolate Chip Angel Food Cake.

Espresso Chocolate Chip Angel Food Cake

Espresso Chocolate Chip Angel Food Cake

My baking disasters are often egg-white related. Every now and then i'll end up with deflated batter, despite my best efforts to fold gently and quickly. Egg foam cakes aren't easy, especially if you have to incorporate a lot of fat and dry ingredients.

This is the first time i've made an angel food cake. Given my egg-white whipping anxiety, I thought it'd be a great confidence booster. It's much harder to mess up than genoise, and it gave me an occasion to use my square tube pan.

Homemade angel food cake is very different than what you get from a box mix. This is a good recipe; it's more moist and substantial, and the espresso flavor is really subtle.

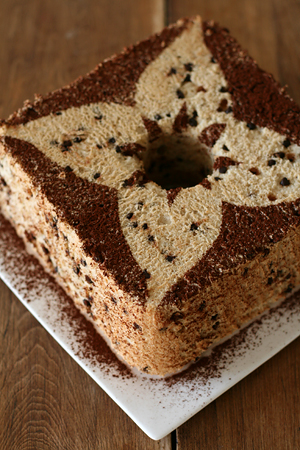
I used mini-chocolate chips, but next time i'd use finely chopped 65-70% bittersweet chocolate. It would have been a nice contrast to the sweetness of the cake. A light dusting of Valrhona cocoa powder (as pictured), coffee ice cream, or chocolate sauce would be nice accompaniments.

Espresso-Chocolate Chip Angel Food Cake
adapted from Emily Luchetti’s Classic Stars Desserts

2 tsp instant espresso powder
1 1/3 cups cake flour, sifted
1/8 tsp kosher salt
1 ¾ cups (about 12) large egg whites
1 tsp cream of tartar
1 ¾ cups granulated sugar
1 ½ tsp vanilla extract
1 ¼ tsp freshly squeezed lemon juice
¾ cup bittersweet chocolate chips, coarsely chopped

Preheat the oven to 350F. Have ready an ungreased 10-inch angel food cake pan.

Sift together the espresso powder and flour onto a piece of parchment paper or into a bowl. Add the salt and set aside.

Put the egg whites in the large bowl of a stand mixer fitted with the whisk attachment and whisk on medium speed until frothy. Add the cream of tartar, increase the speed to high, and continue whipping while slowly pouring in the sugar until the whites are firm and satiny, about 3 minutes.

Reduce the speed to low, add the vanilla and lemon juice and then add the dry ingredients. When the flour mixture is almost completely incorporated, remove the bowl from the mixer stand and fold in the chocolate chips with a spatula. Make sure that the chips are spread evenly throughout the batter and that the flour is evenly incorporated. But be careful not to overmix or you will deflate the batter and the cake will not rise fully in the oven.

Pour the batter into the cake pan. Cut through the batter a few times with a table knife to break up any air pockets. Bake until a skewer inserted into the center comes out clean, 40-45 minutes. Invert the cake and let cool completely upside down in the pan. If your pan does not have feet, balance the inverted pan on the neck of a bottle, or rest the edge of the pan rim on 3-4 ramekins.

To unmold the cake, run a long knife around the inside edge of the pan. Then, holding the center tube, free the cake from the pan sides. Slip a knife between the cake and the bottom of the pan to loosen the cake and gently flip the cake over, letting it fall onto a platter. To serve, cut into slices with a serrated knife, using a gentle sawing motion.

The cake may be made a day in advance. Wrap in plastic wrap and store at room temperature.

To transform it into a dinner party dessert, serve it with warm chocolate caramel sauce or any kind of ice cream you fancy. This espresso and chocolate chips contribute enough flavor for it to be eaten plain too, or with coffee.

Tuesday, April 22, 2008

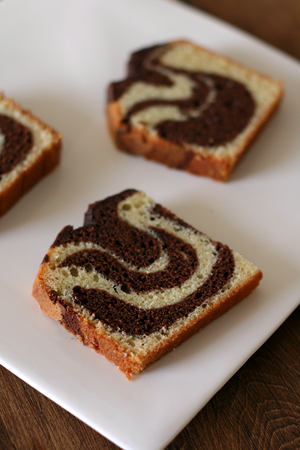
Tiger Cake

Tiger Cake

Tiger Cake

Tiger Cake

How cool is this cake?!

I rarely notice this recipe when I leaf through Bittersweet. I think the page sticks. Or maybe, subconsciously, I think that marble cake tastes boring.

This is a recipe worth looking at. It's moist, easy to prepare, and more complex than typical recipes. Given the simplicity of the cake, I suggest using good cocoa, spices, and oil. I enjoy it lightly toasted, with coffee. I've been toasting everything these days...banana bread, muffins cut in half, you name it.

I felt childishly enthusiastic while making this. I loved the way the outside and inside looked. The individual slices had character; I think the one in the bottom photo looks like a bird! Other pieces reminded me of ships, tulips, and smiling faces.

The quantity is awesome too. I think I have enough cake to take to every class this week! I am confident it will be a hit.

Tiger Cake
adapted from Alice Medrich's Bittersweet

1/2 cup natural process cocoa powder
1/2 cup sugar
1/3 cup water

3 cups all purpose flour
2 tsp baking powder
1/4 tsp salt
2 cups sugar
1 cup flavorful extra-virgin olive oil
1 tsp pure vanilla extract
1/2 tsp finely ground white pepper
5 cold large eggs
1 cup cold milk

A 10-12 cup tube or bundt pan, or two 6 cup loaf pans.

Position a rack in the lower third of the oven and preheat the oven to 350F. Grease and flour the cake pan or line the loaf pans with parchment.

In a small bowl, whisk together the cocoa, sugar, and water until well blended.

Mix the flour, baking powder, and salt thoroughly and sift together onto a piece of paper. Set aside.

In a large mixer bowl (preferably fitted with the whisk attachment) beat the sugar, oil, vanilla, and pepper until well blended. Add the eggs one at a time, beating well after each addition. Continue to beat until the mixture is thick and pale, 3-5 minutes. Stop the mixer and add 1/3 of the flour mixture*. Beat on low speed until just blended. Stop the mixer and add half the milk. Beat just until it is blended. Repeat with another third of the flour, the remaining milk, and then the remaining flour.

Pour 3 cups of batter into another bowl and stir in the cocoa mixture. Pour 1/3 of the plain batter into the prepared tube pan (or divide it between the loaf pans) and top with 1/3 of the chocolate batter. Repeat with the remaining batters. Don't worry about marbling the batters- that happens during the baking**

Bake until a cake tester comes out clean, about 1 hour and 10 minutes for either the tube or loaf pans. Cool the cake in the pan(s) on a rack for about 15 minutes. Slide a thin knife around the sides of the pan(s) to release the cake. Invert the pan(s) and invert again, setting the cake right side up on a rack to cool completely.***

*I find it helps to fold the dry ingredients a few times with a spatula between additions.
**Don't try too hard when layering the batters. I just plopped big piles of batter in the pan and they came out beautifully.
***If you are using a tube pan, it can be hard to invert the cake. I used an offset spatula to release the cake from the sides and bottom of the pan, then I used two large, flat, icing spatulas to lift the cake from the removable portion of the pan and set it on a rack.

Thursday, November 8, 2007

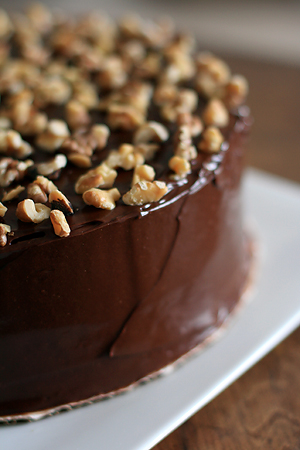
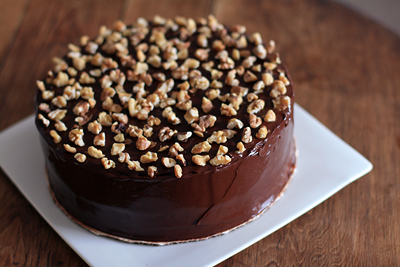
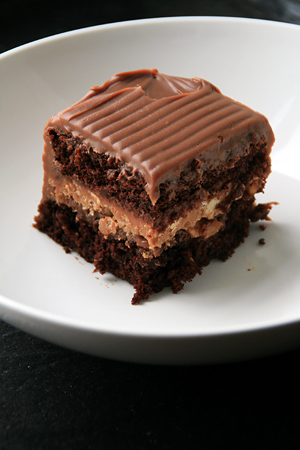
Crunchy Milk Chocolate-Peanut Butter Cake

Chocolate Peanut Butter Cake

I immediately noticed this Nancy Olson recipe in the latest issue of Food and Wine. According to the article it's "the brilliant marriage of her mother's chocolate, peanut butter, and Rice Krispie-topped brownie...and Pierre Herme's 'sweet pleasure'."

Sometimes I think Pierre Herme's Plaisir Sucre is the ultimate baking challenge as so many bloggers have attempted it.

I don't really feel like trying; it seems like the kind of pastry that can be amazing and memorable in a patisserie but stressful and not worth the expense/effort at home. Still, I love all things crunchy and i've often fantasized about making a dessert involving some sort of feuilletine or rice crispie layer.

This cake recipe takes a little time, but you can definitely finish it in one sitting. It was a very satisfying evening project and i'm extremely happy with the results. It's very rich and texturally interesting. I'd definitely make it again.

Anyway, i'm going on a short tour with my band this weekend. We're hitting South Haven, Grand Rapids, Chicago, and somewhere in Indiana. Hopefully i'll take some fun photos on the road.


Crunch Milk-Chocolate-Peanut Butter Cake
Cake:
2 cups + 2 tbsp sugar
1 3/4 cups all purpose flour
3/4 cup + 2 tbsp unsweetened cocoa powder
1.5 tsp baking powder
1.5 tsp baking soda
1.5 tsp salt
2 large eggs
1 cup milk
1/2 cup vegetable oil
1 tbsp vanilla extract
3/4 cup + 2 tbsp boiling water

Filling:
1/3 cup sliced almonds
1/2 cup confectioners sugar
2 large egg whites
1 tbsp granulated sugar
1/2 cup salted roasted peanuts, coarsely chopped
1 cup creamy peanut butter
2 tbsp unsalted butter, softened
3 oz milk chocolate, chopped
1 cup rice krispies

Ganache:
1 1/4 pounds milk chocolate
1 3/4 cups + 2 tbsp heavy cream, warmed

1. Make the cake: Preheat the oven to 350. Butter and flour a 9x13 cake pan. In a large bowl, whisk the sugar, flour, cocoa, baking powder, baking soda, and salt. In a medium bowl, whisk the eggs, milk, oil, and vanilla. Whisk the wet ingredients into the dry ingredients. Whisk in the boiling water. Pour the batter (it will be thin) into the prepared pan and bake for about 50 minutes, or until a toothpick inserted in the center comes out clean. Let cool.

2. Invert the cake onto a work surface. Working carefully, slice the cake horizontally. Reduce the oven temperature to 325.

3. Make the filling: Trace a 9x13 rectangle on a sheet of parchment paper and lay it on a large baking sheet. In a food processor, pulse the almonds with the confectioners sugar until they're finely ground. In a bowl, using an electric mixer, beat the egg whites at medium speed until soft peaks form. Add the granulated sugar and beat until the whites are stiff and glossy- about 2 minutes. Using a rubber spatula, fold in the almond mixture. Spread the meringue on the parchment to fill the rectangle. Sprinkle the chopped peanuts on top. Bake for about 20 minutes, until lightly browned and firm. Let cool.

4. In a medium bowl, set in a saucepan of simmering water, heat the peanut butter with the butter and milk chocolate, stirring constantly, until smooth and melted. Remove from the heat and fold in the Rice Krispies. Spread the mixture all over the meringue rectangle. Transfer to the freezer and let cool completely.

5. Make the ganache: In a medium bowl set in a saucepan of simmering water, melt the chocolate. Whisk in the warm cream until smooth. Remove from the heat and refrigerate for one hour, whisking occasionally until thick enough to spread.

6. Assemble the cake: Place the bottom cake layer cut side up on a large board. Spread 1/3 of the ganache over the cake. Invert the filling onto the cake and peel off the paper. Spread half the remaining ganache over the filling, then top with the second cake layer. Refrigerate until firm, at least one hour. Using a serrated knife, trim the edges. Spread the remaining ganache over the top and sides of the cake and refrigerate to set. Cut and serve.

Sunday, March 30, 2008

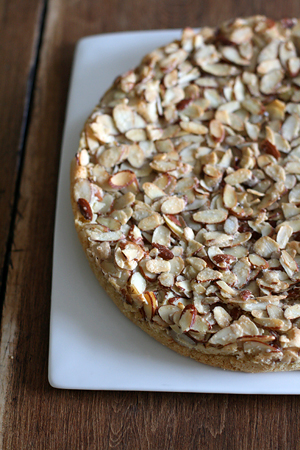
Sbrisolona- Italian Crumbly Cake

Sbrisolona

Sbrisolona

Sometimes, I choose recipes because I know exactly where to find the ingredients. When I read some grumpy comments regarding Gina DePalma's use of "specialty ingredients" like almond flour, chestnut flour and "00" flour, I thought haha! "00" flour and chestnut flour are on a shelf near the pasta at Penn Mac.

Pittsburgh is a great city for bakers. In California, I drive three or four places before I have everything I need. Here, I can walk two blocks to the Indian mini-mart and choose from several types of shredded coconut. I can take a quick bus to the Strip District and pick up chestnut cream, salt cod, lavender, dulce de leche, or twenty kinds of fish sauce.

I try to restrain myself and avoid buying things I don't need, but I do keep an eye out for ingredients. I ogle the baking aisles at Whole Foods and the East End Food Co-op. I wander into random Asian or Eastern European grocery stores and make a mental note of what they have. It's relaxing, in a way.

I picked this recipe because I was curious about the flour. "00" flour is very finely milled flour with as much of the germ and bran removed as possible. It was interesting; the batter was extremely thick and the finished cake was dense and chewy with a fine crumb.

I'd say this cake was worth buying the extra ingredients. After it cooled, I sat down and had a large piece with a cup of coffee. The flavors were clean and simple: vanilla and almond with a hint of cinnamon. The crunchy, toasted almond topping was nice too. I broiled it a little for color. I thought it tasted very Italian, if that means anything. It also reminded me a little of sugar cookie dough, which seems like a weird association.

Italian Crumbly Cake
from Gina DePalma's Dolce Italiano
makes one 10-inch cake, approximately 10 servings

For the cake
1 1/4 cups "00" flour
1/4 cup almond flour
1/2 tsp kosher salt
1/2 tsp baking powder
1/2 tsp ground cinnamon
1 large egg
4 large egg yolks
1 cup granulated sugar
1 tsp pure vanilla extract
1/2 cup (1 stick/4oz) unsalted butter, melted and cooled

For the topping
1 1/2 cups sliced blanched almonds
1 large egg white
3 tbsp granulated sugar

Preheat the oven to 325F and position a rack in the center. Lightly grease a 10-inch springform pan* with nonstick cooking spray or butter, dust it with flour, and tap to knock out the excess.

To make the cake: In a medium bowl, whisk together the "00" flour, almond flour, salt, baking powder and cinnamon and set aside.

In an electric mixer fitted with the paddle attachment, beat the egg, egg yolks, and sugar on medium speed until they are thick and pale yellow, about three minutes. On low speed, add the dry ingredients and beat well, scraping down the sides of the bowl. Beat in the vanilla extract, followed by the melted butter. Switch to medium speed and beat for 30 seconds.

Spread the batter evenly in the prepared pan and smooth the top with a spatula.

To make the topping: Put the sliced almonds in a medium bowl. Lightly beat the egg white in a small bowl with a fork until it is foamy and light, then pour half of it over the almonds, stirring to coat them evenly (discard the rest of the egg white). Sprinkle the almonds with the sugar and toss to coat them. Spread the almond topping evenly over the surface of the batter.

Bake the cake for 25-30 minutes, or until it is springy to the touch and golden brown on top and a cake tester inserted in the center comes out clean. Allow the cake to cool for 10 minutes in the pan, then remove the sides and allow the cake to cool completely on a wire rack.

To serve, carefully remove the bottom of the springform pan with an offset spatula and transfer the cake to a serving plate. Any leftover cake can be wrapped in plastic and served the next day.

*I used a plain 10 inch cake pan lined with foil. I inverted it onto a rack, then placed another rack on top of the cake and turned it right-side up.

Monday, July 6, 2009

Devil's Food Cake with Espresso Frosting

Devil's Food Cake

Devil's Food Cake

It takes a certain level of commitment to make a layer cake. You need time, space, equipment, and ridiculous amounts of butter. You also need patience and a steady hand, if you want a smooth finish and even piping. Most importantly, you need practice.

It is expensive to practice making layer cakes, so I don't make them very often. Still, I like to have a few in my repertoire for birthdays and celebratory occasions. A homemade cake can be much cheaper (and in my opinion, better) than a store-bought cake, and making one can be a fun way to spend an afternoon.

If you're worried about how the cake will look, you can always make a batch of frosting (or mashed potatoes) and practice piping on a cake pan. For this cake, you'll need about 5 cups of frosting. I used an easy recipe for espresso frosting- if you prefer vanilla, you can omit the espresso powder. You can also substitute your favorite buttercream.

The layer cake recipes in The America's Test Kitchen Family Baking Book are very forgiving, and I recommend them if you like step-by-step photographs and tips. I've also had success with cakes from Tish Boyle's The Cake Book and Flo Braker's The Simple Art of Perfect Baking.

Devil's Food Cake with Espresso Frosting
adapted from The America's Test Kitchen Family Baking Book
For the cake:
1/2 cup dutch-processed cocoa powder
1 1/2 cups all-purpose flour
1 tsp baking soda
1/2 tsp baking powder
1/4 tsp salt
1 1/4 cups boiling water
4oz unsweetened chocolate, chopped
1 tsp instant espresso powder
10 tbsp unsalted butter, softened
1 1/2 cups packed light brown sugar
3 large eggs, at room temperature
1/2 cup sour cream, at room temperature
1 tsp vanilla extract

1. Adjust the oven racks to the upper-middle and lower-middle positions and preheat to 350F. Grease 3 8-inch round cake pans, then dust with cocoa powder and line the bottoms with parchment paper. Whisk the flour, baking soda, baking powder, and salt together in a large bowl. In a medium bowl, whisk the boiling water, chocolate, 1/2 cup cocoa, and instant espresso together until smooth.

2. In a large bowl, beat the butter and sugar with an electric mixer on medium speed until light and fluffy, 3-6 minutes. Beat in the eggs, one at a time, until combined, about 30 seconds. Add the sour cream and vanilla and beat until incorporated.

3. With the mixer on low, beat in 1/3 of the dry ingredients followed by 1/2 of the chocolate mixture. Repeat with half of the remaining flour and the remaining chocolate. Beat in the remaining flour until just incorporated.

4. Give the batter a final stir with a rubber spatula to make sure it is thoroughly combined. Scrape the batter into the prepared pans, smooth the tops, and gently tap the pans on the counter to settle the batter. Bake until a toothpick inserted in the center comes out with a few crumbs attached, 15-20 minutes, rotating the pans halfway through baking.

5. Let the cakes cool in the pans for 10 minutes. Run a knife around the edge of the cakes, then flip them out onto wire racks. Peel off the parchment and flip cakes right side up. Let cool completely before frosting, about 2 hours.

For the frosting:
4 sticks unsalted butter, cut into chunks and softened
1/4 cup heavy cream
1 tbsp vanilla extract
1/4 tsp table salt
3 tsbp instant espresso powder
4 cups confectioners' sugar


1. Beat the butter, cream, vanilla, salt, and espresso powder together in a large bowl with an electric mixer on medium-high speed until smooth, 1-2 minutes.

2. Reduce the speed to medium-low, slowly add the confectioners' sugar, and beat until smooth, 4-6 minutes. Increase the mixer speed to medium high and beat until the frosting is light and fluffy, 5-10 minutes.

Wednesday, February 20, 2008

Carrot Honey Cake

Carrot Honey Cake

Carrot Honey Cake

My friend Liz needed a carrot cake recipe and gave me several guidelines: It had to be relatively simple (nothing fancy like pineapple or coconut), it couldn't require a food processor, and it needed to be appropriately sized for 4-5 people.

After I e-mailed her a few different recipes, I kept thinking why do I hate so many carrot cakes? All the store bought carrot cakes i've tried are oily, painfully sweet, and topped with those creepy, radioactive-orange carrots.

I like my carrot cakes simple, spicy, and lightly frosted. I prefer nut and raisin combinations to coconut and pineapple. I've only made this carrot cake though, so I figured it was time to start sampling a few other recipes.

I thought of Liz again when I read this Carole Walter recipe. It's the least labor intensive carrot cake recipe i've seen. I picked it for the orange zest, cardamom, and honey; these ingredients make the cake more interesting than usual. The zest gives the frosting a really fresh taste, and the cake itself is hearty without being greasy.

I took it to work around 9 and it was gone before noon. One of my co-workers laughed when I took a bite and exclaimed, "I really like this!" I was surprised. It was good.

Carrot Honey Cake
adapted from Carole Walter's Great Coffee Cakes, Sticky Buns, Muffins & More

3 large carrots (about 8 oz), peeled and trimmed
1 1/2 cups all purpose flour
2 tsp ground cinnamon
1 tsp baking soda
3/4 tsp ground cardamom
1/2 tsp salt
3 large eggs
1/2 cup granulated sugar
1/2 cup (lightly packed) very fresh light brown sugar
1 tsp freshly grated navel orange zest
3/4 cup canola oil
1/4 cup honey
1 tsp vanilla extract
1/2 cup medium chopped toasted pecans
1 recipe cream cheese frosting

1. Position the rack in the middle of the oven and preheat to 350F. Generously butter a 9x9x2 inch square pan and set aside (*you can also just line it with foil).

2. Shred the carrots. To shred in a food processor, fit the machine with the medium shredding disc. Cut the carrots into 1 inch chunks and place in the feeder tube. Shred using very light pressure. Remove the shredding disc and insert the steel blade. Pulse 4-5 times, then process for 5-6 seconds. You should have 1 1/2 to 1 2/3 cups. Set aside.

2. To shred by hand: finely shred the carrots using the smallest half-moon side of a box grater (scant 1/8 inch). You should have 1 1/2 to 1 2/3 cups. Set aside.

3. In a medium bowl, thoroughly whisk together the flour, cinnamon, baking soda, cardamom, and salt. Set aside.

4. Place the eggs in the bowl of an electric mixer fitted with the whip attachment. Beat for 2 minutes on medium speed, then add the granulated sugar, 1 tbsp at a time, taking 2-3 minutes. Add the brown sugar, 1 tbsp at a time, taking another 2 to 3 minutes, then beat in the orange zest.

5. Using a small whisk, mix together the oil, honey, and vanilla in a 1 quart mixing bowl, beating until the honey is thoroughly incorporated with the oil. Immediately pour into the egg/sugar mixture in a steady stream and beat well. Reduce the speed to medium-low and mix in the carrots. Add the dry ingredients in two additions, mixing only to blend after each addition. Scrape down the side of the bowl as needed. Then, quickly mix in the pecans. Note: This batter cannot stand before baking because the oil and honey will settle to the bottom of the bowl.

6. Immediately pour the batter into the prepared pan and baked for 40-45 minutes. The cake is done when it is firm to the touch, the sides begin to release, and a toothpick inserted in the center comes out clean.

7. While the cake is baking, prepare the frosting.

8. Remove the cake from the oven and place on a cooling rack. When the cake is cool, spread with the frosting, swirling it with the bottom of a soupspoon. Cut into 16 squares. Refrigerate for up to 7 days. The frosted cake may be frozen.

Cream Cheese Frosting

6 oz cream cheese, cold
6 oz butter, soft
1 1/2 cups powdered sugar, sifted
1 tsp pure vanilla extract
1/2 tsp freshly grated navel orange zest

Combine all the ingredients in the work bowl of a food processor fitted with the steel blade. Pulse 3-4 times, then process for 3-4 seconds. Stop the processor, scrape down the side of the bowl, and empty into a small bowl. Cover with plastic wrap and refrigerate until ready to use. (You can also make this in a bowl with a hand mixer).

Sunday, September 16, 2007

Wedding Cake (Part 3.)

Wedding Cake

Wedding Cake

Wedding Cake

Wedding Cake

Wedding Cake

Wedding Cake

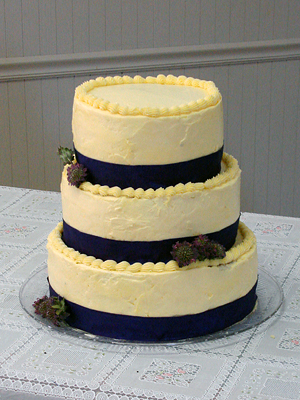
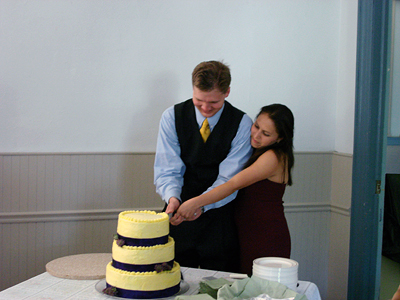
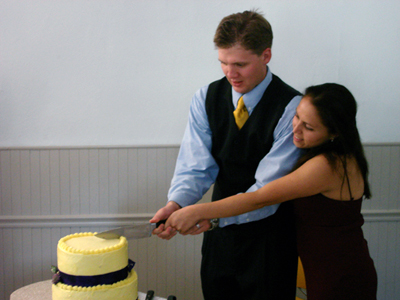
The reception was wonderful. The decorations were great, the food was simple and delicious, the alcohol was plentiful, the people were genial, and the cake was very well recieved.

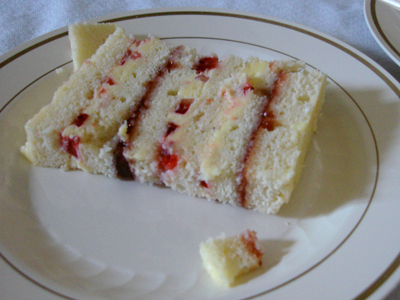
It was really delicious. The caterer took care of the cutting after Aaron and Claudia made the first slice. Many people told me they usually didn't eat cake, but they loved this and ate two or three slices. I recieved so many nice compliments. It felt really nice to see everyone eating and enjoying the cake.

I found quarts of strawberries for a dollar each in the Strip District on Saturday. I bought five for the filling and they really added a lot to the finished product. The ribbon on the cake was actually a very bright royal purple, but I made the mistake of bringing the small camera rather than the nice one and it didn't register.

If I ever decide to make another wedding cake it won't be nearly as stressful. All the worrying about how everything would turn out was horrid, and now that i've gone through the entire process I think I can do a lot better!

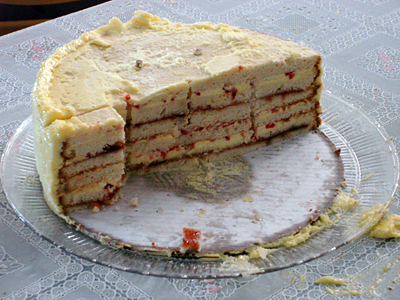
I had an awesome time. And there's a good chunk of leftovers :)

Sunday, March 23, 2008

Greek Semolina Coffee Cake w/ Orange Syrup

Greek Semolina Cake w/ Orange Syrup

Greek Semolina Cake w/ Orange Syrup

After seeing so many bloggers tackle hot crossed buns, greek easter breads, and marshmallow peeps, I thought I should make something seasonal. I'm not sure this cake counts, but I thought citrus, almonds, and honey were appropriate for spring. I needed a break from the paper i'm writing.

This cake would be nice for breakfast, brunch or tea. Ground almonds give it a dense crumb, and the citrus/rum syrup keeps it moist. It also keeps for an extremely long time, as far as breakfast cakes go. It's good plain, but you can dress it up with some greek yogurt and a drizzle of honey.

Greek Semolina Coffee Cake w/ Orange Syrup
adapted from Carole Walter's Great Coffee Cakes, Sticky Buns, Muffins, and More

Orange Syrup
1 cup sugar
1 cup water
1/4 tsp cream of tartar
3 (3 inch) pieces lemon zest
3 (3 inch) pieces orange zest
2 tbsp light rum

Cake
1 cup sifted all purpose flour, spooned in and leveled
1/2 cup slivered alminds
1 tbsp baking powder
1/4 tsp salt
3/4 cup semolina, preferably greek (or italian).
6 large eggs
1 cup (2 sticks) unsalted butter, slightly firm
1 tsp freshly grated navel orange zest
3/4 cup sugar
1 tsp pure vanilla extract

1. Make the syrup: combine the sugar, water, cream of tartar, and zests in a heavy 2-quart saucepan. Bring to a boil and simmer for 10 minutes. Remove from the heat and stir in the rum. Set aside to cool.

2. Position a rack in the middle of the oven. Heat the oven to 350F. Generously butter a 9x13x2 inch pan and set aside.

3. Combine the flour, almonds, baking powder, and salt in the work bowl of a food processor fitted with the steel blade. Process until the almonds are finely chopped, about 1.5 minutes. Add the semolina and pulse 3-4 times to blend. Set aside.

4. Place the eggs in a medium bowl and whisk until well blended. Set aside.

5. Cut the butter into 1 inch pieces and combine with the orange zest in the bowl of an electric mixer fitted with the paddle attachment. Mix on medium speed until smooth and lightened in color, about 2 minutes. Add the sugar, about 1 tbsp at a time, taking 3-4 minutes, scraping down the side of the bowl as needed. Beat in 1/2 cup of the eggs, taking about 1 minute, and blend in the vanilla.

6. Reduce the mixer speed to low and add the dry ingredients alternately with the remaining eggs, dividing the flour into four parts and the eggs into three parts, beginning and ending with the flour. Scrape down the side of the bowl as needed.

7. Empty the batter into the prepared pan and smooth the top with the bottom of a large soupspoon. Bake for 28-32 minutes. The cake is done when the top is golden brown and firm to the touch, and a toothpick inserted in the center comes out clean.

8. Remove the cake from the oven and place on a cooling rack for 5 minutes. Spoon the cooled syrup over the hot cake. Do this slowly so the syrup thoroughly absorbs into the crumb of the cake. Let stand for at least 3 hours before cutting into 2 inch squares. Store in the pan, tightly covered with foil, for up to 1 week. This cake may be frozen.

Thursday, March 27, 2008

Spice Cake with Cream Cheese Frosting

Spice Cake

Spice Cake

I can be skeptical about mise en place. I'll measure dry ingredients hours ahead of time, but i'll avoid prepping one thing or another. I tell myself that if I wait, the ingredient will be fresher, the preparation less cumbersome.

There is a reason you're supposed to prepare your ingredients: urgency while baking is dangerous. While carefully pouring eggs into your rapidly whipping stand-mixer, you'll realize that you're supposed to throw in a tablespoon of ginger that you haven't grated. In your rush to peel and grate the ginger, you'll make a bad decision.

In this case, I balanced the microplane over the top of a cereal bowl, figuring the grated ginger could fall into it. This took much more leverage than I anticipated, and the bowl slipped and flew into the air. I fumbled it for several seconds before launching it across the room where it hit the floor and shattered into a million pieces.

I cleaned up the mess, took a few deep breaths, and continued. The rest of the process was pleasant. My whole apartment smelled like brown butter and spices. I served the finished cake later in the evening for my friends who come over to watch Top Chef. They graciously brought montegrappa, apples, pears, crackers, chips, wine, and daffodils.

I'd definitely make this recipe again. It's best served at room temperature the day it's made. Don't be put off by the ginger and molasses; the flavors are subtle and complementary.

Spice Cake
from Cook's Illustrated

Cake
2 1/4 cups unbleached all-purpose flour (11 1/4 ounces), plus extra for dusting pans
1 tablespoon ground cinnamon
3/4 teaspoon ground cardamom
1/2 teaspoon ground allspice
1/2 teaspoon ground cloves
1/4 teaspoon ground nutmeg
16 tablespoons unsalted butter (2 sticks), softened
1/2 teaspoon baking powder
1/2 teaspoon baking soda
1/2 teaspoon table salt
2 large eggs at room temperature
3 large egg yolks at room temperature
1 teaspoon vanilla extract
1 3/4 cups granulated sugar (12 1/4 ounces)
2 tablespoons light molasses or mild molasses
1 tablespoon grated fresh ginger
1 cup buttermilk , at room temperature

Frosting
5 tablespoons unsalted butter , cut into 5 pieces, softened
1 1/4 cups confectioners' sugar (4 1/2 ounces)
8 ounces cream cheese , cut into 4 pieces , softened
1/2 teaspoon vanilla extract
3/4 cup coarsely chopped walnuts, toasted (optional)

1. For the cake: Adjust oven rack to middle position and heat oven to 350 degrees. Grease and flour 13- by 9-inch baking pan. Combine spices in small bowl; reserve 1/2 teaspoon for frosting.

2. Heat 4 tablespoons butter in 8-inch skillet over medium heat until melted, 1 to 2 minutes. Continue to cook, swirling pan constantly, until butter is light brown and has faint nutty aroma, 2 to 4 minutes. Add spices and continue to cook, stirring constantly, 15 seconds. Remove from heat and cool to room temperature, about 30 minutes.

3. Whisk flour, baking powder, baking soda, and salt in medium bowl. In small bowl, gently whisk eggs, yolks, and vanilla to combine. In standing mixer fitted with paddle attachment, cream remaining 12 tablespoons butter with sugar and molasses at medium-high speed until pale and fluffy, about 3 minutes, scraping down sides and bottom of bowl twice with rubber spatula. Reduce to medium speed and add cooled butter and spice mixture, ginger, and half of egg mixture; mix until incorporated, about 15 seconds. Repeat with remaining egg mixture; scrape down bowl again. Reduce to low speed; add about one-third flour mixture, followed by half of buttermilk, mixing until just incorporated after each addition, about 5 seconds. Repeat using half of remaining flour mixture and all of remaining buttermilk. Scrape bowl and add remaining flour mixture; mix at medium speed until batter is thoroughly combined, about 15 seconds. Remove bowl from mixer and fold batter once or twice with rubber spatula to incorporate any remaining flour.

4. Transfer batter to prepared pan. Zigzag the tip of a metal spatula through batter, pulling it to pan edges. Lightly tap pan against counter 3 or 4 times to dislodge any large air bubbles; smooth surface with spatula.

5. Bake until toothpick inserted in center of cake comes out clean, 32 to 37 minutes. Cool cake to room temperature in pan on wire rack, about 2 hours.

6. For the frosting: In bowl of standing mixer fitted with paddle attachment, beat butter, sugar, and reserved 1/2 teaspoon spice mixture at medium-high speed until light and fluffy, 1 to 2 minutes. Add cream cheese one piece at a time, beating thoroughly after each addition. Add vanilla and beat until no lumps remain, about 30 seconds.

7. Run paring knife around edge of cake to loosen from pan. Using spatula, spread frosting evenly over surface of cake. Sprinkle cake with walnuts, if using. Cut into squares and serve.

Saturday, February 23, 2008

Nutella Cake

Tony w/ Nutella Cake

Nutella Cake

Kim and Tony made this Nutella cake last weekend. They were quite proud of it. The photo in How to be a Domestic Goddess is really striking; i've thought of making the cake multiple times, but I never seem to get around to it.

It's good to have a recipe like this in your repertoire: elegant and easier to make than it looks. It's the sort of dessert you could throw together for a dinner party with very little planning. It wasn't my favorite cake, but who can say no to something that looks so pretty?

Nutella Cake
Serves 8
Nigella Lawson: How to be a Domestic Goddess

for the cake
6 large eggs -- separated
1 pinch salt
115 g soft butter
1 jar of Nutella (400 g) (Yes, an entire jar.)
1 tablespoon Frangelico or water
100 g finely ground hazelnuts
120 g dark chocolate, melted

for the icing
100 hazelnuts
125 ml double cream
1 tablespoon Frangelico or water
125 g dark chocolate

Preheat oven to 175 degrees C. (350 F).

Prepare a 9-inch springform pan: grease and line with parchment or wax paper.

In a large bowl, whisk the eggs whites and salt until stiff but not dry. In a separate bowl, beat the butter and Nutella together, then add Frangelico (or what you're using), egg yolks, and ground hazelnuts. Fold in the cooled, melted chocolate, then lighten the mixture with a dollop of egg white, which you can beat in as roughly as you want, before gently folding the rest of them in a third at a time. Pour into the prepared pan and cook for 40 minutes or until the cake's beginning to come away at the sides, then let cool on rack.

Toast the hazelnuts in a dry frying pan until the aroma wafts upward and the nuts are golden brown in parts: keep shaking the pan so they don't burn on one side and stay too pallid on others. If you use unpeeled nuts, transfer them to a kitchen towel, and rub, rub, rub. Most of the skins should come off. Transfer to a plate and let cool. Leave them whole or chop them up, depending on how much skin you actually managed to get off.

In a heavy-bottomed sauce pan, add the cream, liquer or water, and chopped chocolate and heat gently. Once the chocolate's melted, take the pan off the heat and whisk until it reaches the right consistency to ice just the top of the cake. Unmold the cooled cake carefully. Ice the top with the chocolate icing, and decorate with the hazelnuts. Serve with a lightly sweetened whipped cream.

Monday, October 15, 2007

Recipe for Failure.

Failure.

Failure (serves one.)
1 cake recipe
2 garbage bags
1 sponge
1 glass of water
15 spatulas

1. Decide that, despite being really sick, you'd like to bake a cake.

2. Select a cake recipe and corresponding frosting. In this instance we've used Tish Boyle's Banana Cake with Espresso-Caramel Frosting.

3. Prepare the cake according to the directions. You should end up with the most perfect nine inch cakes you've ever produced.

4. Begin the frosting and decide halfway through that you're going to try a new technique for incorporating the sugar.

5. Undercook your sugar syrup, curdle your eggs, then increase the mixer speed to high whilst thinking this will rectify all problems.

6. Attempt to spread the curdled frosting on the cake. Attempt to pipe a lovely border.

7. Refrigerate the cake for ten minutes.

8. Remove cake from fridge and watch the top layer slide off the bottom.

9. Use the sponge to clean large gobs of weeping buttercream from your drawers, countertops, and mixer. Drop the cake into one garbage bag, and once you see the corners of the cake board poking through place it in a second bag. Throw cake into the garbage chute. Pray the bag doesn't burst within the chute.

10. Get a glass of water and go back to bed. Do more grad school homework like you should have done in the first place.


Water

Monday, November 19, 2007

Mountain Meadow Chocolate Fudge Cake

Mountain Meadow Fudge Cake

Supposedly, Sticky, Chewy, Messy, Gooey by Jill O'Connor is the next feature for Joseph Beth's Cookbook Potluck Club.

The book says "desserts for the serious sweet tooth" on the front cover. Even though I love dessert, some of these recipes seem a little too intense for me (ie cheesecake milkshake.) Still, the book is beautifully designed and all the recipes have a happy, whimsical quality.

I decided to try this relatively simple chocolate cake recipe. It was well recieved at a potluck on Sunday. It's not the fanciest cake in the world, but it uses fairly simple ingredients and takes less than an hour to make.

The frosting might seem a little strange at first; while warm, it has a weird, oily consistency. Even if it seems a little thin, I recommend omitting the optional 1 cup of powdered sugar. Once the cake cools completely, the frosting will have hardened in to a decadent fudge layer that's best at room temperature. The toasted pecans are a great textural addition.

Mountain Meadow Chocolate Fudge Cake
adapted from Sticky Chewy Messy Gooey by Jill O'Connor
2 cups all purpose flour
1 tsp baking powder
1/4 tsp baking soda
1/4 tsp salt
1 cup (2 sticks) unsalted butter
1 cup boiling water
4 oz unsweetened chocolate, chopped
2 cups sugar
1/2 cup buttermilk
2 large eggs
1 tbsp pure vanilla extract

For the icing:
3 oz unsweetened chocolate, chopped
1/2 cup (1 stick) unsalted butter
1/3 cup buttermilk
1 tsp pure vanilla extract
pinch of salt
3 to 4 cups confectioners sugar, sifted
1 1/2 cups chopped pecans, toasted

Position a rack in the middle of the oven and preheat to 400 degrees. Brush a 9x13 inch baking pan with melted butter or spray with a nonstick spray.

Sift the flour, baking powder, baking soda, and salt together in a large bowl and set aside.

Combine the butter, boiling water, and chocolate in a saucepan. Place the saucepan over medium-low heat and whisk gently until the butter and chocolate are melted and the mixture is smooth. Remove the pan from the heat and whisk in the sugar. Quickly whisk in the buttermilk and then the eggs and vanilla. Using an electric mixer set on medium speed, beat the chocolate mixture into the dry ingredients just until combined and a smooth batter forms, about 1 minute.

Pour the batter into the prepared pan. Bake until the cake starts to pull away from the sides of the pan and a wooden skewer inserted into the middle of the cake comes out clean, 20-25 minutes.

Meanwhile, make the icing. Combine the chocolate, butter, and buttermilk in a saucepan and cook, stirring over medium heat, until the chocolate is melted. Remove from the heat and whisk in the vanilla, salt, and 3 cups of the confectioners sugar. If you would like the icing sweeter and thicker, whisk in the remaining sugar to taste. Stir in the pecans.

Transfer the cake to a wire rack and pour the warm icing over the cake while it too is still warm in the pan. Let cool completely, then cut into squares and serve.


Mountain Meadow Fudge Cake