Showing posts sorted by relevance for query raspberries. Sort by date Show all posts

Thursday, May 14, 2009

Experimental Meringue Roulade

Meringue Roulade

Meringue is a tricky thing. It gets sticky in humid weather. It weeps when over or under beaten, or when the sugar doesn't dissolve completely. It can be cooked or uncooked, and range in textures from light and fluffy to dense and stiff. And, when prepared badly with poor eggs, it can taste horrible.

Harold Mcgee's entry on egg foams in On Food and Cooking will tell you everything you need to know about when and how to add sugar to egg whites. A basic knowledge of meringue-science can help you know what to expect from a recipe (and know when it's written badly).

I prefer the smooth, marshmallowy texture of cooked meringues. I love the meringue cookies from Tartine- they're crisp on the outside, but chewy in the middle. I love the mountain of meringue on the Lemon Meringue Pie from the LA Times. I can live without the wet, spongy, eggy meringue that tops so many pies.

I also like meringues with texture and flavor contrasts, like vacherins or pavlovas, or meringue based cakes filled with cream and fruit. Jin Patisserie makes a great one filled with mango and strawberries.

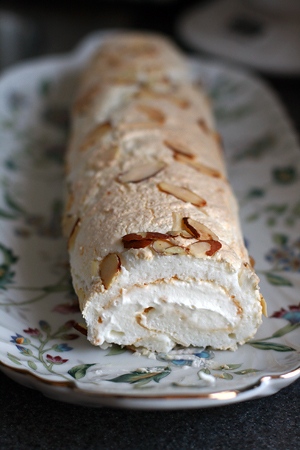
I'd hoped this Meringue Roulade from Sarah Raven's In Season would be similar. The original recipe is baked in a half sheet pan and filled and topped with raspberries. I decided to test a half batch in a 9x13 pan, and i'm glad I did because it was enough for 6-8 servings.

The unsweetened whipped cream filling is a nice contrast to the sugary meringue. Without the fruit, however, the finished cake is rather plain. This would be a great recipe to showcase ripe summer fruits.

As much as I liked the concept of this dessert, I'm not I preferred the meringue to a light sponge cake. I also added half a sheet of gelatin to the whipped cream filling to make it slice better and maintain its texture. It worked well, and I recommend adding 1 sheet to the full recipe.

Meringue Roulade with Raspberries
Adapted from Sarah Raven’s In Season

Sunflower oil, for the pan
6 egg whites
1 ½ cups superfine sugar
3 tbsp sliced almonds
1 ½ cups heavy cream
2 cups fresh raspberries (or other berries)

Preheat the oven to 400F. Line a swiss roll baking pan (I used a 13x18 sheet), with parchment paper and brush with oil.

Whisk the egg whites in a clean, dry bowl, until very stiff. Gradually add the sugar, 1 tbsp at a time, whisking between each spoonful. Once the sugar has been added, continue whisking until the mixture is thick and glossy.

Spread the meringue mixture into the prepared pan and scatter with the sliced almonds. Place the pan near the top of the preheated oven and bake for 8 minutes. Lower the oven temperature to 325F and continue baking until golden brown. Don’t cook too long, or the meringue will be difficult to roll.

Remove from the oven and turn the cake, almond side down, onto a sheet of wax paper. Peel off the paper and allow to cool for 10-15 minutes.

Whisk the cream until it stands in stiff peaks (if you’re adding gelatin, add it towards the end of whipping) and gently fold in half of the raspberries. Spread the cream and berries over the meringue. Letting the wax paper help you, roll the long side fairly tightly until it is all rolled up. Wrap in parchment paper and chill before serving. Scatter the rest of the berries on top to serve.

Tuesday, July 17, 2007

Peach-Raspberry Crostata


This recipe came from Sarah Foster's Casual Cooking. I own all three of the Foster's Market cookbooks and they're all fantastic. The recipes are always fresh and easy to execute.

This crostata dough was particularly good. Adding egg yolk and milk made the dough a little more tender than a pure short crust, but it still was really really crispy. The filling had a hint of ginger and cinnamon, and enough cornstarch to keep the crostata from becoming too liquidy.

Peach Raspberry Crostatas
For the crust:
2 cups all purpose flour
3 T sugar
1/4 tsp kosher or sea salt
2 sticks cold unsalted butter, cut into cubes
1 large egg yolk
3-4 T ice water or milk (i used milk.)

For the filling:
2 pounds peaches, peeled, pitted, and thinly sliced
1 cup fresh raspberries
1/3 cup sugar plus extra for sprinkling
3 T cornstarch
1/2 tsp ground cinnamon
1/4 tsp ground ginger
1/4 tsp kosher or sea salt
4 T unsalted butter, cut into 8 pieces (I omitted this.)
1 large egg
1-2 T milk

To make the crust, stir the flour, sugar, and salt together in a large bowl. Add the butter and blend it in with the flour using a pastry blender or two knives in a crisscrossing motion until the mixture resembles coarse meal. Whisk the egg yolk and 3 T of milk together in a small bowl and add it to the flour mixture. Stir until the dough just comes together and starts to form a ball, adding the remaining milk if necessary. Dust your hands lightly with flour and press the dough together to form a fat, round disk. Cover the dough with plastic wrap and place it in the refrigerator to chill for at least 1 hour or overnight.

Lightly grease 2 baking sheets or cover with parchment and set aside.

To make the filling, combine the peaches, raspberries, sugar, cornstarch, cinnamon, ginger, and salt in a large bowl and stir gently to mix.

Remove the dough from the refrigerator and cut it into 8 equal size pieces. Lightly flour the work surface and roll each piece into a 6 inch round. Place the rounds onto prepared baking sheets.

Scoop the filling and juices into the center of each round, dividing it evenly and leaving a 1 inch border around the edges. Place a piece of butter on top of the fruit, if you like. Folkd the dough over the fruit all the way around to form an edge.

Whisk the egg and milk together to make an egg wash. (I usually strain this to avoid ugly lumpy bits of egg.) Brush the edges of each tart and sprinkle with sugar. Put the tarts in the fridge and chill for about 30 mins.

Preheat the oven to 375. Bake the tarts for 40-45 minutes, rotating the sheets halfway through, until the crusts are golden brown and the fruit is bubbling. Cool the tarts slightly and serve warm. (I like a little dollop of vanilla ice cream on top :))

Saturday, February 16, 2008

Oat, Pear and Raspberry Loaf

Oat, pear and raspberry loaf

Oat, pear, and raspberry loaf

"I have to stop reading your blog," Siobhan said. "I look at it and think, I have eggs. I have butter. I should bake."

I also experience this sentiment. I'll browse the contents of my fridge and calculate how many different recipes I can make without hitting a grocery store. It's not about making something specific; sometimes I just can't stand to see ingredients go bad. When you devote a good chunk of your budget to food, you feel guilty wasting it. Before you know it, you have three cakes or five plates of cookies on the counter (i'm only exaggerating a little) and you're struggling to give them away.

So why bake at all? Why not throw those overripe fruits and nearly empty jars/bags of ingredients in the garbage? I usually cite one of the following reasons: it's educational, it's productive, it's a creative outlet, it's an easy way to avoid homework, i love it.

None of those explanations entirely justifies the sheer amount of baking I do. The top questions I get are doesn't it get expensive? how do you not weigh 500 pounds? how do you make time for it?

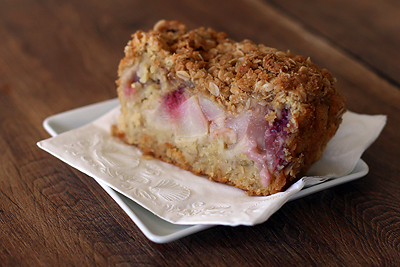
I try not to think too hard about those questions. Maybe one day i'll be sick of baking. Until then, i'm going to just keep doing what i'm doing and let people keep pondering. Today I had two pears on their last legs, so I made Bill Granger's oat, pear and raspberry loaf. The batter tastes like a bowl of oatmeal loaded with brown sugar and butter.

When I cut into the cake it was still raw in the middle. Determined not to be dissapointed, I shoved the whole thing (cut piece and all) back into the loaf pan and baked it for another fourteen minutes. It was a dense, moist, falling apart mess. It's a very hearty cake that would be great for breakfast or brunch, and you'll love it if you're a fan of the 61c Cafe's oatmeal raspberry muffins.

Oat, Pear and Raspberry Loaf
adapted from Bill's Open Kitchen

topping:
25 g (1/4 cup) rolled oats
55 g (1/4 cup) brown sugar
2 tbsp plain all purpose flour
25 g (1 oz) chilled butter, cut into small pieces

cake:
100 g (1 cup) rolled oats
375 ml (1.5 cups) boiling water
150g (5.5oz) unsalted butter, diced
115g (1/2 cup) brown sugar
55g (1/4 cup) caster sugar (fine granulated sugar)
2 eggs
1 tsp natural vanilla extract
185g (1.5 cups) all purpose flour
a pinch of sea salt
1 tsp baking powder
2 ripe pears, peeled cored and diced
60g (1/2 cup) raspberries, fresh or frozen

Preheat the oven to 180C/350F. To make the topping, place all the ingredients into a bowl and rub the butter into the mixture with your fingertips until well incorporated and small clumps form.

To make the cake, place the oats into a bowl and pour over the boiling water. Stir and leave to cool until lukewarm. Cream the butter and sugars in a bowl until pale and creamy. Add the eggs, 1 at a time, beating well after each addition. Mix in the vanilla. Sift the flour, salt, and baking powder into the bowl. Drain any excess water off the oats. Add the oats to the mixture and fold to combine. Spread 2/3 of the mixture into a greased or nonstick 19x11cm (7.5x4.5in) loaf pan. Sprinkle with the pears and raspberries, top with the remaining cake batter then sprinkle the topping over evenly.

Bake for 1 hour 10 minutes, or until a skewer inserted into the centre of the cake comes out clean (*it should be well browned and feel springy to the touch. If the cake sinks significantly while cooling, it is probably under-baked). Turn out onto a plate before quickly transferring to a wire rack with the topping facing upwards. Leave to cool slightly before cutting. Serve in slices with butter. Makes 8-10 slices.

Wednesday, July 18, 2007

Espresso-Chocolate Semifreddo


Usually I don't care for semifreddo; it's not quite ice cream and not quite a substantial torte, cake, or pudding. I picked this recipe out of food and wine magazine because the picture was really pretty, and i'm happy to say it turned out quite well.

I'm a fan of Sherry Yard's recipes. They're usually very sophisticated, though sometimes a little hard to execute at home. This recipe didn't give an indication of just how much batter it produced. Make sure you use a very large mixing bowl.

This recipe was also a good excuse to play with my dad's huge La Cimbali espresso machine. I brewed shot after shot and tasted them all before measuring them out for the recipe O.o

If you like Tiramisu, I think you'll like this. It's got great coffee taste and a really nice texture. It'd be great with some raspberry coulis, or at least some muddled fruit.

Espresso Chocolate Semifreddo
(adapted from Food and Wine Magazine)
1.5 cup sugar
3/4 cup water+ 2tbsp
1.25 cup strongly brewed espresso
1/2 cup whole milk
1 vanilla bean, split and seeds scraped
1 tsp gelatin dissolved in 2 tsp water
2 oz bittersweet chocolate, chopped
4 large eggs
1/4 cup light corn syrup
1.25 cups heavy cream
18 dry ladyfingers
1 tbsp cocoa for sprinkling
Raspberries, for serving

1. In a small saucepan, combine 1 cup of the sugar with the 3/4 cup water and 1/4 cup of the espresso. Bring to a simmer over moderate heat and stir to dissolve the sugar. Let the espresso syrup cool.

2. In a small saucepan, boil the remaining 1 cup of espresso over high heat until reduced to 1/4 cup (about 8 minutes) Pour into a medium heatproof bowl.

3. Warm the milk with the vanilla bean and seeds over moderate heat until bubbles form around the edge. Remove from heat and stir in the gelatin until melted. Discard the vanilla bean. Add the hot milk to the reduced espresso and whisk in the chocolate until melted.

4. In the bowl of a standing mixer, beat the eggs at high speed until light yellow and foamy. In a small saucepan bring the corn syrup, the remaining 1/2 cup of sugar, and 2 T of water to a simmer. Cook over moderately high heat until the syrup registers to 235 on a candy thermometer*, about 5 minutes. With the mixer on medium speed, gradually beat the hot syrup into the eggs. Continue beating until the mixture is very pale and has tripled in volume, about 4 mins. Fold in the espresso mixture**

5. In a bowl, whip the heavy cream until stiff peaks form. Fold into the mousse mixture until no streaks remain**

6. Spoon about 1/4 of the mousse into a 9 inch springform pan. Dip 6 lady fingers into the espresso syrup until just soaked through. Arrange the ladyfingers over the mousse in rows. Repeat the process 2 more times, then top with the remaining mousse. Cover with plastic wrap and freeze at least 6 hours.

7. Before serving, warm a thin sharp knife under hot water. Run the knife around the edge of the semifreddo and remove the ring (you can refreeze after this if the sides are a little melty) Sift cocoa over the top of the semifreddo. Cut into wedges and serve with raspberries. The semifreddo will keep frozen for up to three days (so says the magazine.)

*If you don't have a candy thermometer, you can cook the syrup and periodically drop a little of it into a bowl of cold water. You want to cook it until a little before the soft ball phase. You should be able to shape the cold syrup with your fingers, but it shouldn't form a really dense ball. It takes a little practice sometimes.

** I was running out of room in my bowl, so I just gently whisked in these ingredients. It didn't deflate the mix or anything.


Friday, March 21, 2008

Orange Berry Muffins

Orange Berry Muffins

Orange Berry Muffins

I felt very productive yesterday morning. At 6:45 I rolled out of bed, took a shower, and set to making muffins. I figured they could be done before I caught the bus and before my roommates woke up. What roommate wouldn't like waking up to warm muffins?

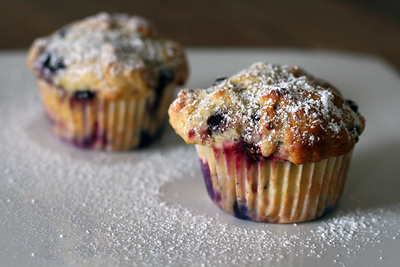
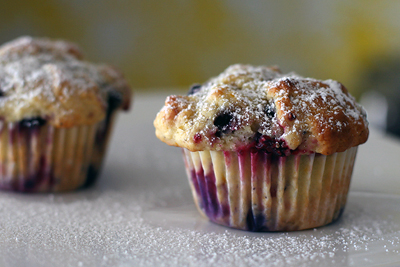
I must have been sleepy, because I read "1 cup blueberries" as "1 pint blueberries." I threw in one scant cup each of frozen raspberries and blueberries. This didn't hurt the recipe- if anything, it made it more to my taste.

The raspberries added a nice tartness and made the muffins a happy, harlequin color. The fruit really complements the buttermilk taste. These are great for freezing and reheating, as the orange flavor improves after a day or two.

I thought i'd be taking a blogging hiatus. It looks like stress from final projects is making me bake more, not less...I like to call it "productive procrastination." On a random note, don't put parchment paper in the toaster. It burns. A lot.

Orange Berry Muffins
From Dorie Greenspan's Baking From my Home to Yours

Grated zest and juice of 1 orange
About 3/4 cup buttermilk
2 large eggs
3 tablespoons honey
1 stick (8 tablespoons) unsalted butter, melted and cooled
1/3 cup sugar
2 cups all-purpose flour
2 1/2 teaspoons baking powder
1/4 teaspoon baking soda
1/4 teaspoon salt
1 cup blueberries - fresh, preferably, or frozen (not thawed)

Decorating sugar, for topping (optional)

Center a rack in the oven and preheat the oven to 400 degrees F. Butter or spray the 12 molds in a regular-size muffin pan or fit the molds with paper muffin cups. Alternatively, use a silicone muffin pan, which needs neither greasing nor paper cups. Place the muffin pan on a baking sheet.

Pour the orange juice into a large glass measuring cup or a bowl and pour in enough buttermilk to make 1 cup. Whisk in the eggs, honey and melted butter.

In a large bowl, rub the sugar and orange zest together with your fingertips until the sugar is moist and the fragrance of orange strong. Whisk in the flour, baking powder, baking soda and salt. Pour the liquid ingredients over the dry ingredients and, with the whisk or a rubber spatula, gently but quickly stir to blend. Don’t worry about being thorough - the batter will be lumpy and bubbly, and that’s just the way it should be. Stir in the blueberries. Divide the batter evenly among the muffin cups.

Bake for 22 to 25 minutes. If you want to top the muffins with decorating sugar, sprinkle on the sugar after the muffins have baked for 10 minutes. When fully baked, the tops of the muffins will be golden and springy to the touch and a thin knife inserted into the center of the muffins will come out clean. Transfer the pan to a rack and cool for 5 minutes before carefully removing each muffin from its mold.

Saturday, April 7, 2007

Ice Cream Soda!

Ice Cream Soda

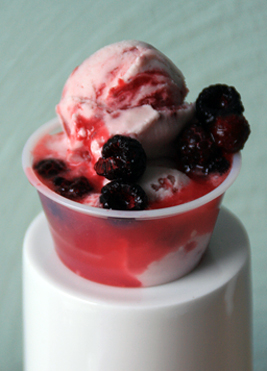
Homemade raspberry soda, homemade strawberry ice cream, and black raspberries my roommate brought back from Ithaca, NY.

I'd never tasted a black raspberry before. These tasted just a little bit like licorice, actually.

I used a tiny cup because my trigger scoop is small (so really, it was just to get the photo.) I made myself one about three times as large :)

Tuesday, June 26, 2007

Back from a week in NYC.

I'll have a real update soon- promise.

I'm also going to try and be more disciplined about posting the recipes of what I make, per your requests.

Anyway, I was in Manhattan last wednesday through this tuesday. Most of my time was spent eating and walking, and i'm happy to say I found some fantastic places worth your time. Here's a summary of the damage I did:

1) Once Upon A Tart was fantastic. I've had their cookbook for years. I recommend the Pear Ginger Raisin muffins, but many people swear by the scones and cookies etc. They usually open around 8 and it's great to enjoy a coffee and pastry at one of the tables in front of the store.

2) Balthazar, despite being very busy all the time, makes a -fabulous- breakfast. Some of the more delicious looking things were pastries, quiches, granola, omlettes...pretty much everything. I highly recommend the smoked salmon and the side order of fried tomatos. I saw plenty of people picking up beverage and pastry from the small boulangerie and eating it on the benches outside.

3) Chikalicious was just great. The service, atmosphere, and food were all fantastic. I hear it can get very busy (long lines) but I went right at opening on sunday and got right in. My dessert tasting menu included kiwi gelee with cantaloupe sorbet, lavender marinated kiwis with yogurt sorbet and crispy kataifi, and a petit four plate with a coconut marshmallow, lemon-poppyseed shortbread, and a chocolate/nib pudding bite. All of the desserts looked fantastic- particularly the ganache filled raspberries. They were the hugest berries i'd ever seen. The iced tea was great too, and some of the other cocktails I saw looked really pretty.

4) I always try and hit Payard when i'm in New York. The pastries are quite good, though the service can be a little snooty. I love their canneles and croissants in particular as well as the orange-carrot tart. Just watch out and make sure the pastry you've ordered hasn't been sitting in the case for days.

5) Ceci Cela was recommended to me by a good friend. Unfortunately, i've been there three times and each time it was -awful.- You could taste that the (rather pricy) pastries had been sitting in the case for far too long. Soggy crusts, blandish pastry, and horrible horrible service. I've been ignored by staff there so many times. It's a pity really because everything always looks so pretty. Honestly, unless they make major changes I won't be going back.

6) Thomas Keller's Bouchon Bakery in the Time Warner Center was nice too. I wish i'd had a chance to try more. I only had time to order a few things to go. Their macarons are fantastic. Though not as crunchy as I might have liked, they were substantial, huge, and packed with flavor. I had caramel and pistachio and they were amazing. It's worth a try, but again, keep an eye out for things that have been in the case too long.

7) Cafe Sabarsky on 5th ave and 86th street is a hidden treasure. I don't think i'd have found it without a friend's recommendation. It is a viennese style cafe that features excellent service, food, and desserts. I went back three times during my trip and managed to sample the apple strudel, streuselkuchen, sachertorte, quark cheesecake, chocolate feuillete, and several cups of espresso. It's fabulous.

8) Tom Colicchio's 'wichcraft wasn't really anything special. It's a good place to get good, fast eats though.

9) 'ino is my favorite place for sandwiches and bruschetta. I've probably had the best sandwich/bruschetta of my life there. I went three times during this trip.

10) I went to an Italian pastry place on Bleeker street called Cafe Bruno, i think. It was pretty good, but I don't really remember it. Many of the cookies tasted similar and were a little stale :(

11) Sfoglia was one of the best dining experiences i've had in a long time. Good lord, GO THERE ALREADY. The bread they serve is out of this world. We had a delightfully spicy and moist roast chicken along with strawberry-basalmic spaghetti, a beet and bean salad, and some antipasto. The restaurant is beautiful and the service is fantastic. It is much easier to get in for lunch than dinner. I wish I could have gone back...

12) Lupa is one of those places I didn't know was popular until after I ate there. It was also UTTERLY FANTASTIC and reasonably priced. We all tried the tasting menu which included a huge assortment of antipasto, good focaccia, two pasta courses, a meat course, a cheese course, and dessert. There were good olives, amazing prosciutto, a baccala salad, a beet salad...curly pasta with AMAZING asparagus ragu, ricotta gnocchi with a fennel sausage sauce, fish with a meyer lemon sauce, spicy chicken diavolo, roast port shoulder, goat cheese, sheep cheese, cow cheese...panna cotta and tartufi that were to die for...I highly recommend it. Zagat calls it "Babbo on a budget."

13) I also made two trips to Kitchen Arts and Letters. It's the best cookbook store i've ever been to, and Matt has given me excellent cookbook and restaurant recommendations. They answer their email, they will ship you anything you like, and generally, if you tell them your favorite cookbooks they'll be able to make you an educated recommendation. They also have rare and out of print things. If you ever need help finding a restaurant to your taste that isn't too touristy, you should give them a call.

Wow...I ate a lot of food last week O.o

I'm probably heading back in July. I have a few places left on my curiosity list including:
Hearth
P*ONG
Good sushi
Good dim-sum
...More bakeries.

Feel free to make recommendations.

Thursday, March 6, 2008

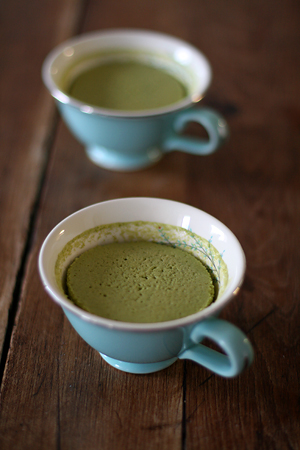
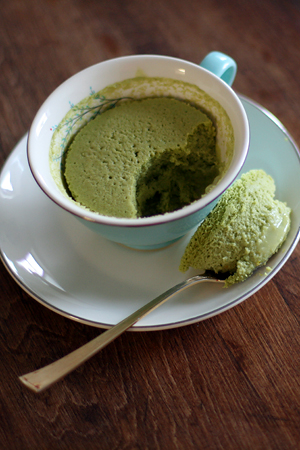
Green Tea Pudding Cakes

Green Tea Pudding Cake

Green Tea Pudding Cake

I'm always on the lookout for good green tea recipes. This one is probably more palatable to your average person than these green tea puddings. If you know a spectacular green tea recipe, please let me know.

Please follow the chilling instructions. Unchilled, these puddings have a strange texture and eggy flavor. They were a little plain; next time, i'd top them with whipped cream mixed with muddled raspberries or diced mango, kiwi, or strawberries.

Green Tea Pudding Cakes
from teality.com

2 ounces (1/4 cup) unsalted butter, melted and cooled slightly
1 cup granulated sugar
3 large eggs, room temperature
1 1/8 ounce (1/4 cup) unbleached all purpose flour
3 teaspoons Matcha
1/4 plus 1/8 teaspoon salt
1 1/8 cup whole milk, room temperature
1/4 cup fresh Meyer lemon juice, room temperature
1/2 tablespoon finely grated lemon zest
whipped cream (optional)

Position rack in the center of the oven and preheat at 350 degrees. Butter eight 6 oz ovenproof ramekins and arrange them in a baking dish or a roasting pan.

In a large bowl, whisk the melted butter with 2/3 cup of sugar and the egg yolks until smooth and turns a light yellow color, about 1 minute. Add the flour and salt and pour in just enough milk to whisk the flour smoothly into the egg yolk mixture. Next, whisk in the remaining milk and the lemon juice until smooth. The mixture will be very fluid. Slowly sift the matcha into the mixture and mix making sure that the matcha doesn't clump up.

Put the egg whites in a large bowl. Beat with an electric mixer with a whisk attachment on medium speed until the whites begin to foam, 30 to 60 seconds. Increase the speed to high and beat until the whites hold a soft peak, another 1 to 2 minutes. Reduce the speed to medium and with the mixer running slowly sprinkle in the remaining 1/3 cup of sugar. Stop the mixer and scrap down the sides of the bowl. Beat on high speed until the whites hold a medium firm peak, about 30 seconds. Scrape 1/3 of the egg whites into the egg yolk mixture, sprinkle the lemon zest on top and whisk until combined. Gently incorporate the remaining egg whites into the batter using the whisk in a folding/stirring motion. The batter will still be a little thin.

Portion the mixture evenly into the ramekins. The cakes do not rise much so you can fill the ramekins to within 1/8 inch of the top. Pull out the oven rack and put the baking dish full of ramekins on the rack. Pour warm water into the dish until it reaches half way up the side of the ramekins. Bake until the tops of the cake are light golden brown and slightly puffed, and when touched with a finger, they should feel spongy and spring right back a bit but hold a shallow indentation. 30 to 35 minutes.

Using tongs, carefully transfer the ramekins to a rack to cool to room temperature and then refrigerate for at least 4 hours and up to 24 hours before serving. Add whipped cream and enjoy!

Tuesday, January 1, 2008

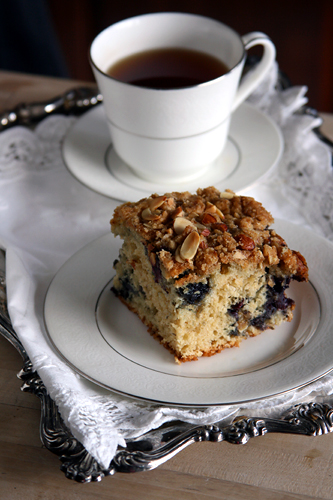
Blueberry Crumb Cake

Blueberry Crumb Cake

I'm pretty sure i've made every recipe with streusel from Dorie Greenspan's Baking From my Home to Yours.

I'm looking forward to returning to Pittsburgh, but i'll miss my family's enthusiasm for good breakfast cakes. This Blueberry Crumb Cake has been out of the oven for less than three hours and it's already more than half gone.

The cake batter was very thick- so much so that I thought the amount of liquid was a misprint. I didn't worry too much though; this cookbook is extremely reliable. I love the streusel- it's golden, crunchy, and rich with brown sugar.

The recipe lends itself well to alteration too. I used toasted almonds instead of walnuts (my brother has nut allergies) and orange zest. I'd love to try some of Dorie's suggestions for other fruits, like raspberries, cubed peaches, or apricots.

Blueberry Crumb Cake
adapted from Baking From my Home to Yours

For the crumbs:
5 tbsp unsalted butter, at room temperature
1/4 cup sugar
1/3 cup (packed) light brown sugar
1/3 cup all purpose flour
1/4 tsp salt
1/2 cup chopped walnuts

For the cake:
1 pint (2 cups) blueberries (preferably fresh, or frozen, not thawed)
2 cups plus 2 tsp all purpose flour
2 tsp baking powder
1/2 tsp baking soda
1/4 tsp salt
1/4 tsp ground cinnamon
1/8 tsp freshly grated nutmeg
2/3 cup sugar
grated zest of 1/2 lemon or 1/4 orange
3/4 stick (6 tbsp) unsalted butter, at room temperature
2 large eggs, at room temperature
1 tsp pure vanilla extract
1/2 cup buttermilk

Center a rack in the oven and preheat the oven to 350 degrees F. Butter an 8 inch square pan and put it on a baking sheet.

To make the crumbs: put all the ingredients except the nuts in a food processor and pulse just until the mixture forms clumps and curds and holds together when pressed. Scrape the topping into a bowl, stir in the nuts, and press a piece of plastic against the surface. Refrigerate until needed. (Covered well, the crumb mix can be refrigerated for up to three days.)

To make the cake: Using your fingertips, toss the blueberries and 2 tsp of the flour together in a small bowl just to coat the berries; set aside. Whisk together the remaining 2 cups flour, the baking powder, baking soda, salt, cinnamon, and nutmeg.

Working in the bowl of a stand mixer fitted with the paddle attachment, or with a hand mixer, beat the sugar with the butter at medium speed until light, about three minutes. Add the eggs, one by one, beating for about 1 minutes after each addition, then beat in the vanilla extract. Don't be concerned if the batter looks curdled- it will soon smooth out. Reduce the mixer speed to low and add the flour mixture and the buttermilk alternately, the flour in three parts and the buttermilk in 2 (begin and end with they dry ingredients.) You will have a thick, creamy batter. With a rubber spatula, gently stir in the berries.

Scrape the batter into the buttered pan and smooth the top gently with the spatula. Pull the crumb mix from the fridge and, with your fingertips, break it into pieces. There's no need to try to get even pieces- these are crumbs, they're supposed to be every shape and size. Scatter the crumbs over the batter, pressing them down ever so slightly.

Bake for 55-65 minutes, or until the crumbs are golden and a thin knife inserted in the center of the cake comes out clean. Transfer the cake to a rack and cool just until it is warm or until it reaches room temperature.

Sunday, July 19, 2009

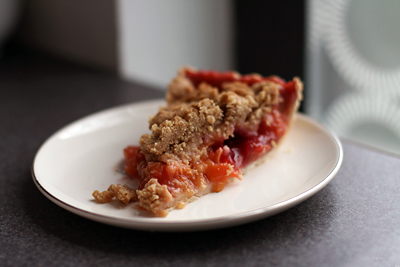
Friday Pie-Day

Peach Cherry Pie

Peach Cherry Pie

Berry Pie

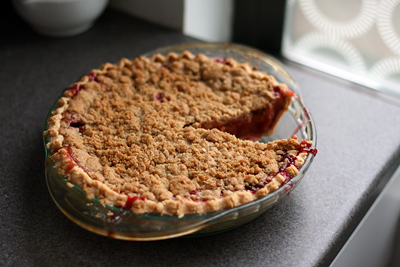
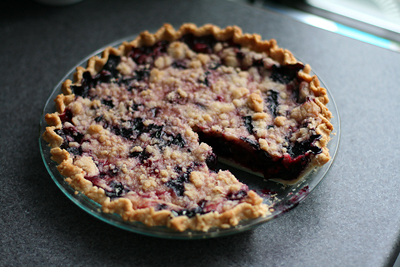
My friend Emily has this thing called "Friday Pie-Day." It involves making pies on Thursday night and delivering them to work the next morning. She wanted to improve her pie technique (which was excellent to begin with), so we met up in Squirrel Hill and made four pies: two Peach and Sour Cherry with Oatmeal Crumb Topping, and two Mixed Berry Crumb.

We baked for a good five hours, stopping to eat dinner and run to the store for extra flour and cornstarch. While the pies were baking, we watched the latest episode of So You Think You Can Dance. It was a nice change of pace; it's been a while since I baked with a friend, in someone else's kitchen.

Pies aren't an exact science. Eventually, you learn to make them intuitively- adjusting quantities of sugar, water, and thickener as needed, and changing the fillings using what you like or what's on sale.

Learning to make pie has been a process of trial and error. I made the dough by hand, with a stand mixer, and with a food processor. I tried adding vodka and vinegar to my crusts to make them more tender. I tried rolling my crusts directly on the counter, between sheets of plastic wrap, and inside of gallon-sized ziplock bags. I've been making pies for years, and I still think there's more to learn.

If you make enough pies, your personal preferences will take over. For a long time, the only recipe I made was printed on cardboard Crisco wrappers. I made all of my crusts with butter-flavored shortening, because that was what my mother used. Now, I have a preferred arsenal of crust recipes, and several pies that I make repeatedly. I rarely follow recipes exactly.

In the case of last Friday's pies, I reduced the amount of sugar in both recipes. I substituted sour cherries for bing cherries and raspberries for a mixture of rasperries, blackberries, blueberries, and cherries. Both recipes came from Ken Haedrich's Pie. It's a great book, though some of the 300+ recipes are better than others. I'll leave you with the recipe for the Peach and Cherry pie.

Flaky Pie Pastry (for a double crust)
adapted from Ken Haedrich's Pie

3 cups all-purpose flour
1 tbsp sugar
1 tsp salt
1/2 cup (1 stick) cold unsalted butter, cut into 1/4 inch pieces
1/2 cup cold vegetable shortening, cut into pieces
1/2 cup cold water

1. Put the flour, sugar, and salt in a food processor. Pulse several times to mix. Scatter the butter over the dry ingredients and pulse the machine 5 or 6 times to cut it in. Fluff the mixture with a fork, lifting it up from the bottom of the bowl. Scatter the shortening over the flour and pulse 5 or 6 times. Fluff the mixture again. Drizzle half of the water over the flour mixture and pulse 5 or 6 times more, until the dough starts to form clumps. Overall, it will look like coarse crumbs. Dump the contents of the processor bowl into a large bowl. Test the pastry by squeezing some of it between your fingers. If it seems a little dry and not quite packable, drizzle a tsp or so of cold water over the pastry and work it in with your fingertips.

2. Using your hands, pack the pastry into 2 balls, making one slightly larger than the other; this larger will be your bottom crust. Knead each ball once or twice, then flatten into 3/4 inch disks on a floured work surface. Wrap the discs in plastic and refrigerate for at least an hour or overnight before rolling.

Peach and Sour Cherry Pie

Pie dough for a single crust

Filling:
4 cups peeled, pitted, and sliced ripe peaches
2 cups sour cherries, stemmed and pitted
2/3 cup granulated sugar
1 tbsp fresh lemon juice
1/4 cup firmly packed light brown sugar
3 tbsp corn starch
Big pinch of ground nutmeg

Oatmeal Crumb Topping:
1 cup all purpose flour
1/2 cup rolled oats (old-fashioned or quick cooking)
2/3 cup firmly packed light brown sugar
1/2 tsp ground cinnamon
1/4 tsp salt
1/2 cup (1 stick) cold unsalted butter, cut into 1/4 inch pieces

1. If you haven't already, prepare the pie dough and refrigerate until firm enough to roll, about 1 hour.

2. On a sheet of lightly floured waxed paper, roll the pastry into a 13-inch circle with a floured rolling pin. Invert the pastry over a 9.5 inch deep dish pie pan, center, and peel off the paper. Gently tuck the pastry into the pan, without stretching it, and sculpt the overhang into an upstanding ridge. Place in the freezer for 15 minutes.

3. Combine the peaches, cherries, granulated sugar, and lemon juice in a large bowl. Mix well, then set aside for 10 minutes to juice. Preheat the oven to 400F.

4. In a small bowl, combine the brown sugar and cornstarch. Stir the mixture into the fruit along with the nutmeg. Turn the filling into the chilled pie shell and smooth the top of the fruit with your hands. Place the pie on the center oven rack and bake for 30 minutes.

5. Meanwhile, make the crumb topping. Put the flour, oats, brown sugar, cinnamon, and salt in a food processor and pulse several times to mix. Scatter the butter over the top and pulse until the mixture resembles fine crumbs. Empty the crumbs into a large bowl and rub them between your fingers until you have large, buttery crumbs. Refrigerate until ready to use.

6. Remove the pie from the oven and reduce the temperature to 375F. Carefully dump the crumbs in the center of the pie, spreading them over the surface with your hands. Tamp them down lightly. Return the pie to the oven, placing it so that the part that faced the back of the oven now faces forward. Just in case, slide a large aluminum foil-lined baking sheet onto the rack below to catch any spills. Continue to bake until the top is dark golden brown and the juices bubble thickly at the edge, 35-40 minutes. If the topping starts to get too dark, loosely cover the pie with tented aluminum foil during the last 15 minutes of baking.

7. Transfer the pie to a wire rack and let cool for at least 2 hours before serving.

Thursday, March 15, 2007

Blueberry Cream Cheese Tartlets

Blueberry Cream Cheese Tartlets

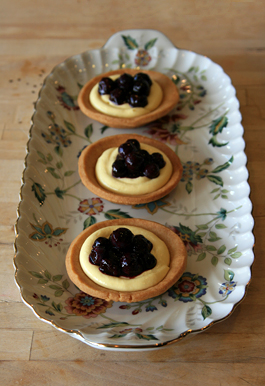
These are from Claudia Fleming's The Last Course.

This seems like a good moment to share some baking advice (which you may or may not have heard before.) Don't take recipes too seriously. This particular recipe involves making a crust, a pastry cream, and a berry topping. As long as you successfully make those components, it doesn't really matter how you go about the process.

It's perfectly acceptable to make the tarts in any shape you would like, or to substitute strawberries or raspberries for blueberries. If you're used to making pastry cream slightly differently, go ahead and do what you're comfortable with. All the details are to ensure you don't curdle the yolks.

That said, this recipe is really great. My mom describes the pastry cream as "killer."

Graham Cracker Tart Shells
1 cup (2 sticks) unsalted butter, softened
1/4 cup firmly packed dark brown sugar
1/4 cup granulated sugar
1/4 cup honey
2 cups all purpose flour
1/2 cup whole wheat pastry flour
1 tsp salt
1/2 tsp ground cinnamon

Cream Cheese Pastry Cream
1 cup milk
5 tbsp sugar
4 large egg yolks
2 1/2 tbsp corn starch
3/4 cup cream cheese, cut into cubes and softened
1 tsp vanilla extract
1/2 cup heavy cream, whipped to soft peaks

Blueberry Topping
2 1/2 cups blueberries
1 tbsp sugar

1. To prepare the graham cracker shells, in the bowl of an electric mixer fitted with a paddle attachment, cream the buter and sugars until smooth, about 1 minute. Add the honey and beat until well combined.

2. In a medium bowl, whisk together the flours, salt, and cinnamon. Add the flour mixture to the butter mixture in two batches, scraping down the sides of the bowl between additions. Mix until the dough is well combined. Scrape the dough onto a piece of plastic wrap and form it into a disc. Chill until firm, at least 1 hour and up to 2 days.

3. Preheat the oven to 325. On a lightly floured surface, roll out the dough to 1/8 inch thick, about a 13x16 rectangle. Using a 3 inch cookie cutter, cut out 16 circles of dough and press them into greased mini muffin pans of 2 inch tart pans, triming away excess dough. Alternatively, fit the dough into mini rectangular tart tins. Prick the dough all over with a fork and chill for 20 minutes.

4. Bake until golden brown, 18-20 mins. Transfer to a wire rack to cool.

5. To prepare the pastry cream, combine 3/4 cups of the milk and 3 tbsp of the sugar in a medium saucepan. Bring to a simmer over medium heat. Meanwhile, in a large bowl, whisk together the egg yolks, cornstarch, and the remaining 2 tbsp sugar. Whisk the remaining 1/4 cup milk into the yolk mixture. Remove the milk mixture from the heat and add a little of the hot milk to the yolk mixture to warm it, whisking constantly to keep the yolks from cooking. Pour the egg yolk mixture into the hot milk mixture, whisking constantly as you pour.

6. Return the custard to the stove and bring it to a boil, whisking constantly. Let the custard cook for 1-2 minutes until it thickens. Add the cream cheese and vanilla and whisk until smooth. Strain the mixture into a clean bowl. Cover the surface with plastic wrap and refrigerate. When it is chilled, whisk the pastry cream until smooth and fold in the whipped cream.

7. To make the blueberry topping, in a medium saucepan , mix 1 cup of the berries with the sugar. Cook over low heat until the berries have all popped and broken down, about 5 minutes. Strain the cooked berries into a bowl and discard the solids. Add the remaining 1.5 cups berries to the cooked syrup and toss to combine.

8. To assemble, spoon the pastry cream into each tart shell and top with 2 tbsp of the berries. Serve soon after assembling.

Tuesday, July 17, 2007

Tiramisu 101.


I've tried a few tiramisu recipes lately. Most recipes have similar ingredients but different techniques, suggestions, and flavors. I hate bad tiramisu, so I try to stick to a few rules.

1) Do not use bad coffee. You're better off using reconstituted instant espresso powder than bitter, mediocre coffee or espresso. When I don't have a giant espresso machine handy, I usually use the powder.

2) Do not use bad alcohol. I'm not a fan of Marsala in my Tiramisu, tradition or no. Cheap alcohol can ruin a good tiramisu.

3) Do not oversoak the ladyfingers. It might take a few tries to get this right. You want the ladyfinger to be almost completely saturated, but not squashy or soggy. If you oversoak, you'll end up with an ugly pool of coffee whenever you cut a slice out of the pan.

The recipe I used above came from Viana LaPlace and Evan Kleiman's Cucica Rustica. It adds raspberries and ground hazelnuts between the layers. I thought it was pretty good, though it still isn't the tiramisu of my dreams.